1. Introduktion
Thank you for choosing the Empisal EES200 Electronic Sewing Machine. This machine is designed to provide a versatile and user-friendly sewing experience, suitable for a wide range of projects. It features 100 built-in stitches, 8 one-step buttonholes, and various convenient functions to assist you in your creative endeavors. Please read this manual thoroughly before operating the machine to ensure safe and efficient use.
2. Vigtige sikkerhedsinstruktioner
Når du bruger et elektrisk apparat, skal grundlæggende sikkerhedsforanstaltninger altid følges, herunder følgende:
- Læs alle instruktioner, før du bruger denne symaskine.
- Opbevar disse instruktioner et praktisk sted i nærheden af maskinen.
- Always unplug the machine from the electrical outlet immediately after using and before cleaning, removing covers, lubricating, or making any other user servicing adjustments mentioned in the instruction manual.
- Må ikke bruges som legetøj. Vær særlig opmærksom, når denne maskine bruges af eller i nærheden af børn.
- Brug kun dette apparat til dets tilsigtede brug som beskrevet i denne vejledning.
- Never operate this sewing machine if it has a damaged cord or plug, if it is not working properly, or if it has been dropped or damaged.
- Tab eller indsæt aldrig nogen genstand i nogen åbning.
- Må ikke bruges udendørs.
- Må ikke anvendes, hvor der anvendes aerosolprodukter (spray), eller hvor der indgives ilt.
- For at afbryde skal du dreje alle knapper til slukket position, og derefter tage stikket ud af stikkontakten.
- Never operate with any air openings blocked. Keep air openings of the sewing machine and foot controller free from the accumulation of lint, dust, and loose cloth.
- Hold fingrene væk fra alle bevægelige dele. Der kræves særlig forsigtighed omkring symaskinens nål.
- Brug altid den rigtige stingplade. Den forkerte plade kan få nålen til at knække.
- Brug ikke bøjede nåle.
- Træk eller skub ikke i stoffet under syning. Dette kan afbøje nålen og få den til at knække.
- Wear safety glasses when operating the sewing machine.
3. Produktet er slutview
The Empisal EES200 is an electronic sewing machine equipped with features designed for ease of use and versatility. Familiarize yourself with the main components of your machine.
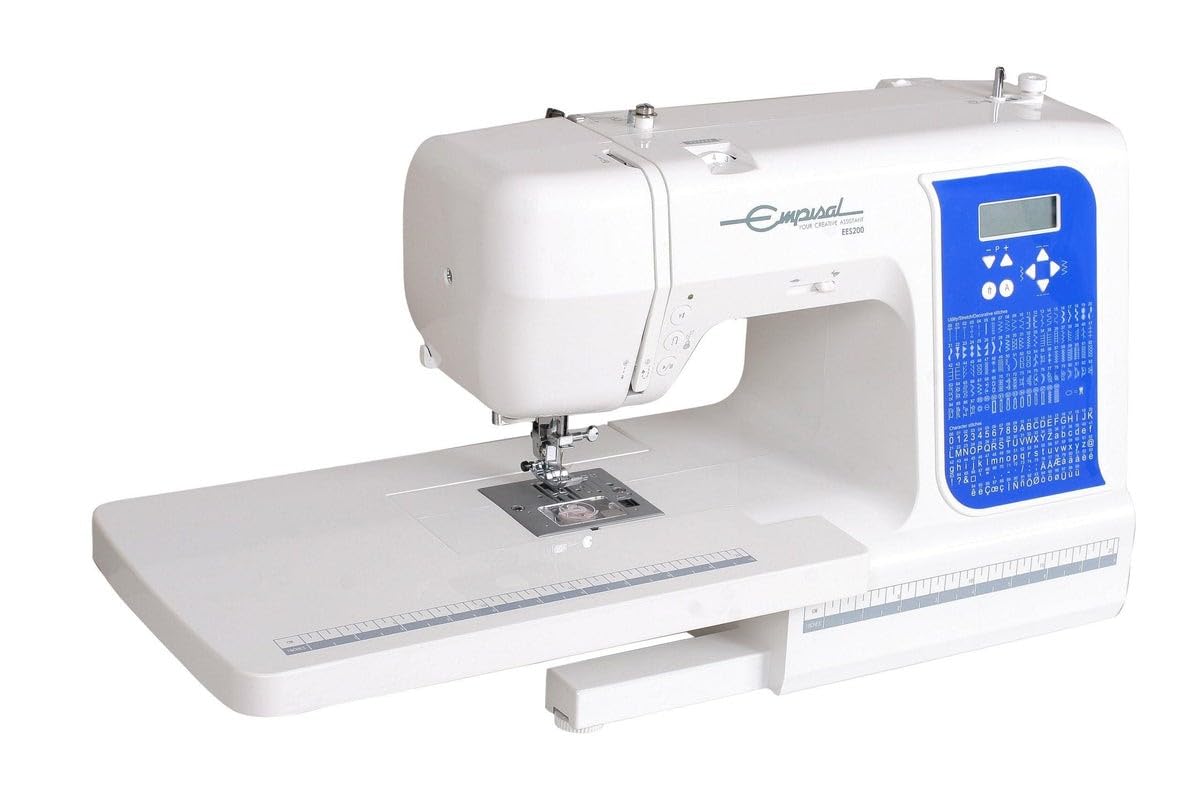
Figur 3.1: Front view of the Empisal EES200 Electronic Sewing Machine. This image displays the main body of the machine, including the needle area, presser foot, stitch selection panel, and the free arm base.
Nøglefunktioner:
- 100 indbyggede sømme: Offers a wide range of decorative, utility, and stretch stitches.
- 8 One-step Buttonholes: For quick and consistent buttonhole creation.
- Rotary Hook and Drop-in Bobbin: Ensures smooth operation and easy bobbin access.
- Fri arm: Facilitates sewing cuffs, sleeves, and other small, circular items.
- Nåletråder: Forenkler gevindskæringsprocessen.
- Trådskærer: Conveniently located for quick thread trimming.
- Number Display Screen: Provides clear stitch information.
- Horizontal and Vertical Spool Pins: Accommodates various thread types and sizes.
- Double Presser Foot Lift: Allows for sewing thicker fabrics.
- Clip-on Feet: For easy changing of presser feet.
- Bredt bord: Provides an extended work surface for larger projects.
- Plastic Dust Cover: Beskytter maskinen, når den ikke er i brug.
4. Opsætning
4.1 Udpakning og placering
- Tag forsigtigt maskinen ud af emballagen.
- Placer maskinen på en stabil, flad overflade.
- Sørg for tilstrækkelig belysning og plads til komfortabel betjening.
4.2 Strømtilslutning
- Tilslut netledningen til maskinens strømindgangsstik.
- Sæt netledningen i en passende stikkontakt.
- Connect the foot controller to its designated jack on the machine.
4.3 Spolning af spolen
- Place a spool of thread on the horizontal or vertical spool pin.
- Før tråden gennem spolespændingsskiven.
- Placer en tom spole på spolevinderens spindel.
- Vikl tråden manuelt et par gange rundt om spolen.
- Skub spolevinderen til højre.
- Press the foot controller or start/stop button to begin winding.
- The machine will stop automatically when the bobbin is full.
- Klip tråden over, og skub spoleapparatets spindel tilbage til venstre.
4.4 Isætning af spolen
- Sørg for, at nålen er i sin højeste position.
- Åbn spoledækslet.
- Sæt den opviklede spole i spolekapslen med tråden udrullet mod uret.
- Før tråden gennem spændingsfjederen og ind i trådførerhullet.
- Pull out approximately 10-15 cm of thread.
- Udskift spolens dækplade.
4.5 Trådning af overtråden
- Løft trykfodshåndtaget.
- Læg en trådrulle på trådrulleholderen.
- Før tråden gennem den øverste trådfører.
- Follow the numbered threading path down to the tension discs and up to the take-up lever.
- Tråd tråg-op-håndtaget fra højre mod venstre.
- Continue guiding the thread down through the lower thread guides.
- Use the needle threader to thread the needle eye, or thread it manually from front to back.
- Træk cirka 15 cm tråd gennem nåleøjet.
4.6 Optagning af undertråden
- Hold let i overtråden med venstre hånd.
- Drej håndhjulet mod dig for at sænke nålen, og løft den derefter igen.
- The needle thread will catch the bobbin thread, forming a loop.
- Pull the loop up with the upper thread, then pull both threads under the presser foot and towards the back of the machine.
5. Betjening
5.1 Valg af sømme
The Empisal EES200 offers 100 built-in stitches. Use the control panel to select your desired stitch.

Figur 5.1: Close-up of the control panel and stitch selection chart. The display screen shows the selected stitch number, and the buttons allow for navigation and adjustment of stitch parameters.
- Tænd for maskinen.
- Refer to the stitch chart on the machine body.
- Use the stitch selection buttons (usually marked with '+' and '-') to navigate through the stitch numbers on the display screen.
- The machine will automatically set the recommended stitch length and width for the selected stitch.
5.2 Justering af stinglængde og -bredde
While the machine suggests optimal settings, you can adjust stitch length and width for specific fabrics or desired effects.
- Use the dedicated length and width adjustment buttons on the control panel.
- Increase the stitch length for basting or thicker fabrics.
- Decrease the stitch length for finer, stronger seams.
- Adjust stitch width for zigzag or decorative stitches.
5.3 Grundlæggende syning
- Placer stoffet under trykfoden, og juster kanten med en sømguide.
- Sænk trykfodshåndtaget.
- Slowly press the foot controller or the start/stop button to begin sewing.
- Før stoffet forsigtigt; træk eller skub det ikke.
- To secure the beginning and end of a seam, use the reverse stitch button.
- When finished, stop the machine, raise the needle to its highest position, and lift the presser foot.
- Pull the fabric away from the machine and cut the threads using the built-in thread cutter.
5.4 Brug af friarmen
The free arm feature allows you to sew cylindrical items such as cuffs, sleeves, and pant hems with ease.

Figur 5.2: Side view of the Empisal EES200 with the accessory box removed, exposing the free arm. This feature is useful for sewing small, tubular items.
- Remove the accessory box from the front of the machine to expose the free arm.
- Slip the cylindrical item over the free arm.
- Proceed with sewing as usual.
5.5 Using the Wide Table (Optional Accessory)
For larger projects, the optional wide table provides an extended work surface.

Figur 5.3: The Empisal EES200 with the wide extension table attached. This accessory provides a larger, flat work area, ideal for quilting or handling larger fabric pieces.
- Slide the wide table onto the free arm base until it clicks into place.
- Ensure it is securely attached before beginning to sew.
5.6 knaphuller i ét trin
The machine features 8 different one-step buttonhole styles for various fabric types and button sizes.
- Monter den passende knaphulsfod.
- Place your button in the buttonhole foot's button holder.
- Select the desired buttonhole stitch from the control panel.
- Placer stoffet, og sænk trykfoden.
- The machine will automatically sew the buttonhole to the correct size.
6. Vedligeholdelse
6.1 Cleaning Your Machine
Regular cleaning ensures optimal performance and extends the life of your sewing machine.
- Tag altid stikket ud af maskinen før rengøring.
- Remove the needle, presser foot, needle plate, and bobbin case.
- Brug en lille børste til at fjerne fnug og støv fra transportøren og spoleområdet.
- Tør maskinens yderside af med en blød, tør klud. Brug ikke flydende rengøringsmidler.
- Saml komponenterne igen.
6.2 Smøring
This machine is designed to operate without user lubrication. Do not oil any part of the machine unless specifically instructed by an authorized service center.
7. Fejlfinding
Dette afsnit omhandler almindelige problemer, du kan støde på. Ved problemer, der ikke er nævnt her, bedes du kontakte kundesupport.
| Problem | Mulig årsag | Løsning |
|---|---|---|
| Springet sting over | Incorrect needle size/type, bent needle, improper threading, low tension. | Change needle, re-thread machine, adjust tension. |
| Trådbrud | Incorrect threading, high tension, damaged needle, poor quality thread, lint in tension discs. | Re-thread, adjust tension, replace needle, use quality thread, clean tension discs. |
| Undertrådsløjfning | Upper thread tension too loose, bobbin incorrectly inserted, lint in bobbin case. | Increase upper thread tension, re-insert bobbin correctly, clean bobbin area. |
| Maskine starter ikke | Power cord not plugged in, foot controller not connected, bobbin winder spindle engaged. | Check power connections, ensure bobbin winder is disengaged. |
| Nål knækker | Bent needle, wrong needle for fabric, pulling fabric, hitting pins, needle not fully inserted. | Replace needle, use correct needle, guide fabric gently, remove pins, ensure needle is fully inserted. |
8. Specifikationer
- Modelnummer: 861139
- Mærke: Empisal
- Type: Elektronisk symaskine
- Indbyggede sømme: 100
- Knaphuller: 8 (One-step)
- Spoletype: Drop-in Rotary Hook
- Armtype: Fri arm
- Nåletråder: Automatisk
- Trådskærer: Ja
- Vise: Number Display Screen
- Spoleholdere: Vandret og lodret
- Trykfodsløft: Dobbelt løft
- Feet Type: Clip-on
- Materiale: Metal, Plast
- Varens vægt: 8.48 kg
- Produktdimensioner: 42D x 22W x 33H centimeter
- Strømkilde: Elektrisk med ledning
9. Garanti og support
9.1 Garantioplysninger
This Empisal EES200 Electronic Sewing Machine comes with a 1-års garanti from the date of purchase. This warranty covers manufacturing defects under normal household use. It does not cover damage resulting from misuse, abuse, accident, alteration, neglect, or failure to follow the instructions for care and cleaning. Please retain your proof of purchase for warranty claims.
Spare part availability information is not available or provided at this time. For any warranty-related inquiries, please contact your retailer or authorized service center.
9.2 Kundesupport
For technical assistance, service, or questions regarding your Empisal EES200 sewing machine, please contact Empisal customer support or your local authorized dealer. Contact information can typically be found on the Empisal official webhjemmeside eller gennem din forhandler.