
1. Introduktion
Thank you for choosing the VIFLYKOO EM3390TF Wireless Weather Station. This device provides comprehensive weather information, including indoor and outdoor temperature and humidity, a 5-day weather forecast, moon phases, and atmospheric pressure. With Wi-Fi connectivity and a dedicated app, you can monitor conditions remotely and access additional features. Please read this manual carefully to ensure proper setup and operation.
2. Produktet er slutview
The VIFLYKOO EM3390TF Weather Station consists of a main display unit and a wireless outdoor sensor. The main unit features a color display and various control buttons, while the outdoor sensor transmits environmental data wirelessly.
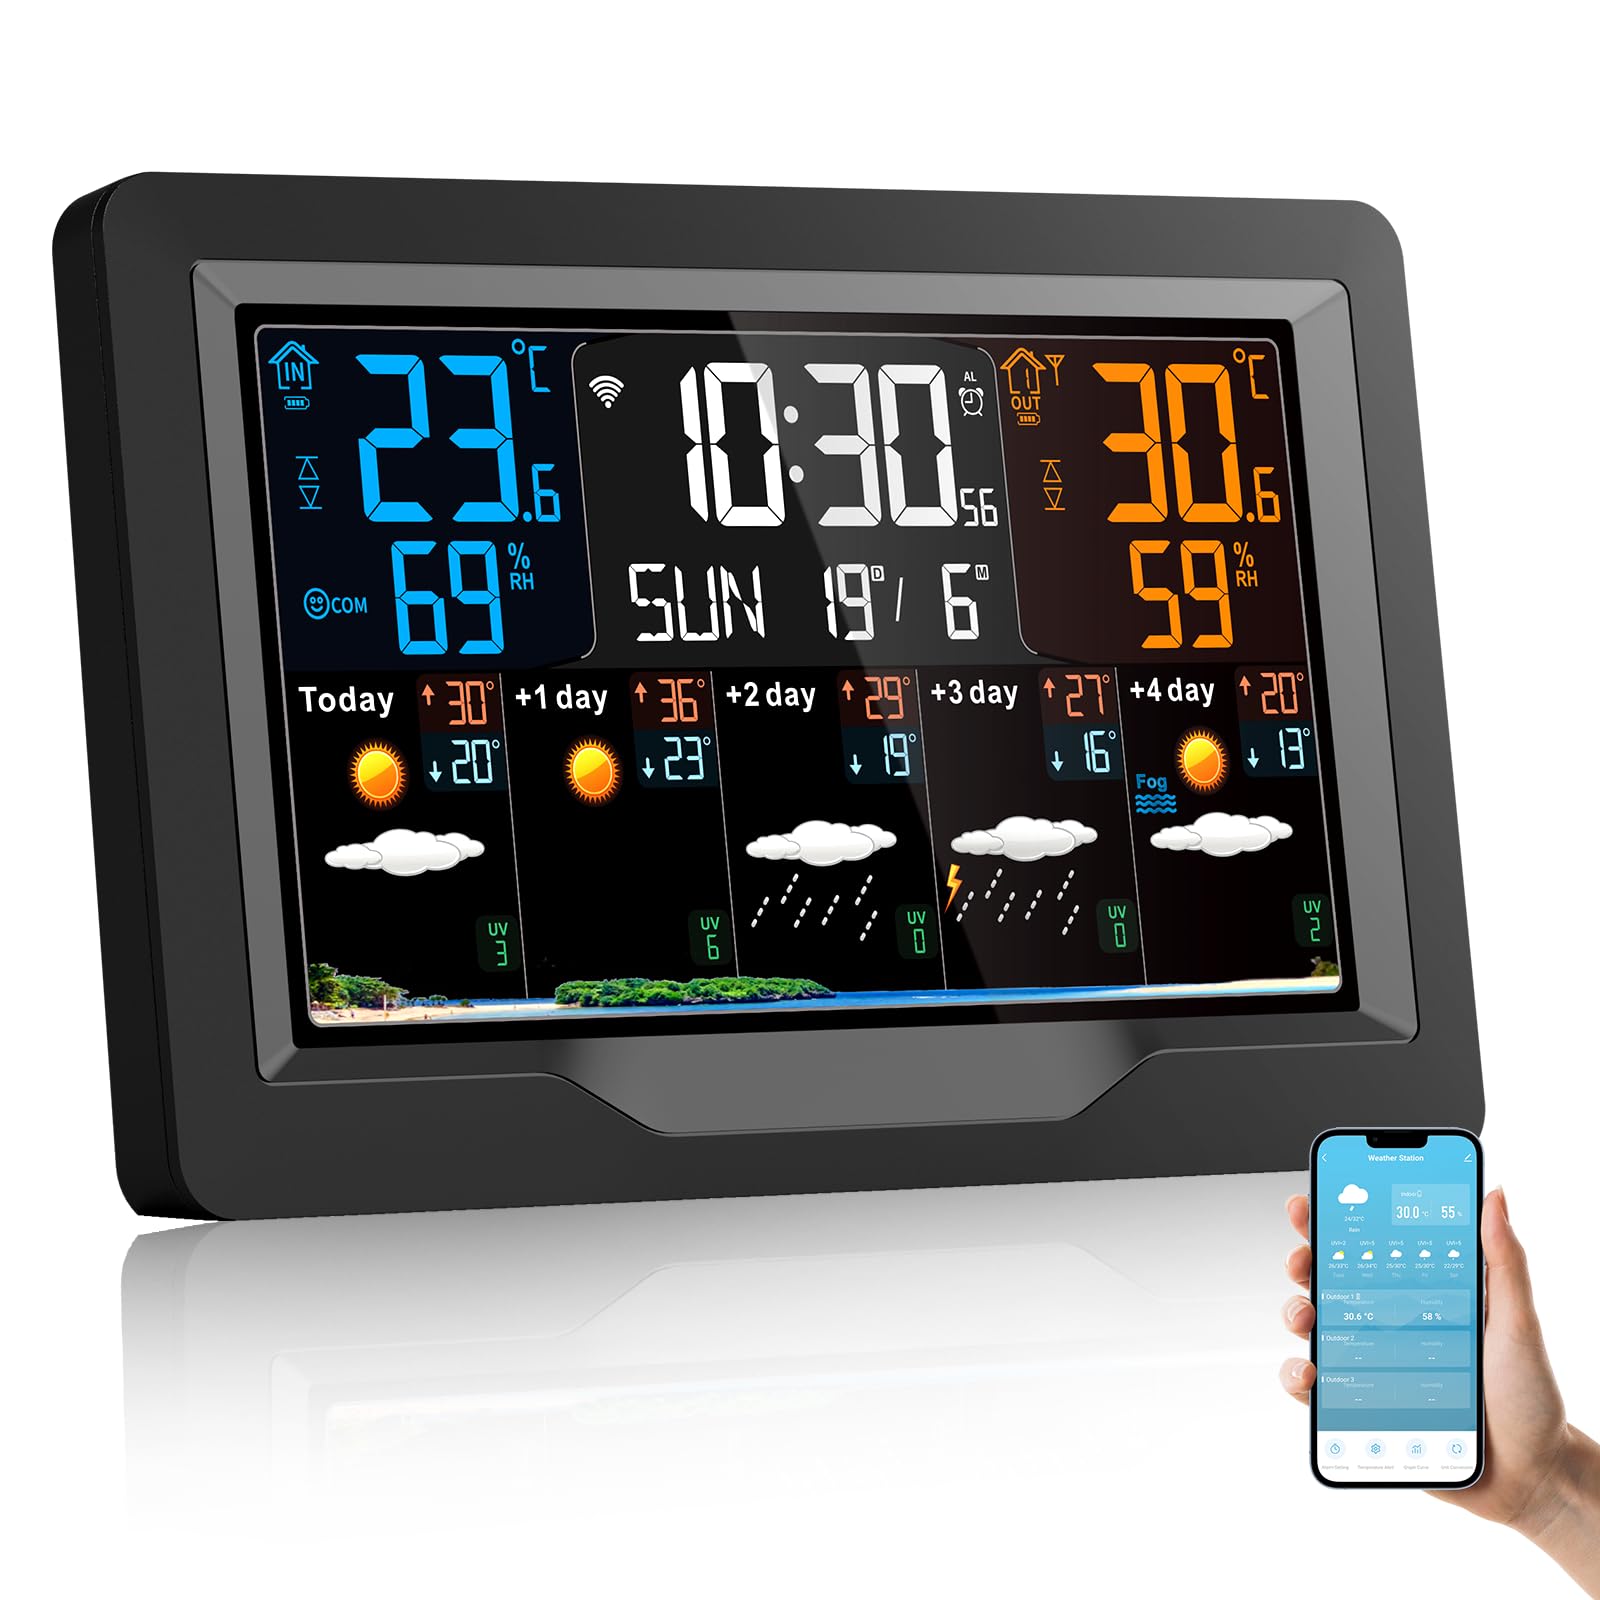
Image: VIFLYKOO EM3390TF Wireless Weather Station main unit and outdoor sensor.

Image: Detailed diagram of the VIFLYKOO EM3390TF Weather Station display and physical components. Labels include: A1: Time, A2: Indoor temperature, A3: Week for today, A4: Indoor humidity, A5: Remote wireless channel, A6: Outdoor temperature, A7: Calendar, A8: Outdoor humidity, A9: Predicted maximum temperature today and in the next 1-4 days, A10: Predicted minimum temperature today and in the next 1-4 days, A11: Weather forecast for today and the next 1-4 days, A12: UV index. B7: Hanging hole, B8: Support frame, B9: Battery compartment, B10: USB charging socket, B11: DC-POWER input jack.
3. Funktioner
- Multiple Data Displays: Shows indoor/outdoor temperature and humidity, time, date, sunrise/sunset times, moon phase, atmospheric pressure, comfort level, and mold risk.
- 5-dages vejrudsigt: Provides a predictive weather forecast for the upcoming days.
- Wi-Fi-forbindelse og app-kontrol: Connects to your 2.4 GHz Wi-Fi network for app control and automatic time synchronization.
- Multi-Channel Support: Capable of receiving data from up to three outdoor sensors (one sensor included).
- Justerbar skærmlysstyrke: Four levels of screen brightness for optimal viewunder forskellige lysforhold.
- Vækkeur med snooze: Features three sets of alarms with a five-minute snooze function.
- Temperaturalarmer: Customizable alerts for temperature changes.
- USB opladningsport: The main unit includes a USB socket for charging external devices.
- Strømindstillinger: Can be powered by DC adapter or 2 AA batteries (for backup).
4. Opsætning
4.1 Udpakning
Carefully remove all components from the packaging. Ensure you have the main weather station unit, one wireless outdoor sensor, a power adapter, and this instruction manual.
4.2 Strømforsyning til hovedenheden
- Connect the provided power adapter to the DC-POWER input jack (B11) on the back of the main unit.
- Plug the adapter into a standard electrical outlet. The display will light up.
- For backup power, open the battery compartment (B9) and insert 2 AA batteries (not included), observing polarity.
4.3 Installing Outdoor Sensor Batteries
- Åbn batterirummet på bagsiden af udesensoren.
- Isæt 2 AA-batterier (medfølger ikke), og sørg for at polerne vender korrekt.
- Luk batterirummet forsvarligt.
4.4 Sensorparring
The outdoor sensor should automatically pair with the main unit upon powering both devices. If the outdoor temperature/humidity is not displayed, press the 'CH' button on the main unit to cycle through channels or the 'RESET' button on the outdoor sensor to re-initiate pairing.
4.5 Wi-Fi-forbindelse og app-opsætning

Image: Weather station display and smartphone app interface.
- Download the companion app (e.g., Smart Life or Tuya Smart) from your smartphone's app store.
- Registrer eller log ind på din konto.
- Follow the in-app instructions to add a new device. This typically involves putting the weather station into pairing mode (refer to the device's specific button combination, often holding a Wi-Fi button for several seconds).
- Ensure your smartphone is connected to a 2.4 GHz Wi-Fi network during the pairing process.
- Once connected, the weather station will synchronize time and date automatically, and you can view data and control settings via the app.
5. Betjeningsvejledning
5.1 Display overview
Refer to the detailed diagram in Section 2 for a complete breakdown of the display elements (A1-A12).
5.2 Justering af skærmens lysstyrke

Image: Weather station display showing different brightness levels.
Press the light/snooze button on the top of the unit to cycle through the four brightness levels: High, Medium, Low, and Off.
5.3 Indstilling af tid og dato
If connected to Wi-Fi, the time and date will synchronize automatically. If manual adjustment is needed, refer to the specific buttons on your device (usually 'MODE' or 'SET' buttons) and follow the on-screen prompts.
5.4 Alarm- og snooze-funktion

Image: Weather station with alarm and snooze function.
To set an alarm, press the 'ALARM' button and use the adjustment buttons to set the desired time. To activate the snooze function when an alarm sounds, touch the top of the weather station. The snooze time is five minutes. Press any other button to turn off the alarm.
5.5 Enhedskonvertering (°C/°F)
Press the '°C/°F' button (if available) or a designated button as per your device's specific controls to switch between Celsius and Fahrenheit temperature units.
5.6 Viewing Multiple Channels

Image: Weather station supporting up to 3 channels for outdoor sensors.
If you have multiple outdoor sensors, press the 'CH' button on the main unit to cycle through the data from each connected sensor (CH1, CH2, CH3).
6. Vedligeholdelse
6.1 Rengøring
Tør hovedenheden og udendørssensoren af med en blød kludamp cloth. Do not use abrasive cleaners or solvents. Ensure no moisture enters the device openings.
6.2 Udskiftning af batteri
Replace batteries in the outdoor sensor when the low battery indicator appears on the main unit's display. For the main unit, replace backup batteries periodically or if the unit loses settings during a power outage.
6.3 Sensorplacering
Place the outdoor sensor in a shaded, dry location, protected from direct sunlight and rain, to ensure accurate readings. Avoid placing it near heat sources or reflective surfaces. The maximum transmission distance is approximately 60m/196ft in open air.
7. Fejlfinding
- Ingen aflæsning af udendørs temperatur/fugtighed:
Ensure batteries are correctly installed in the outdoor sensor. Press the 'RESET' button on the outdoor sensor. Press the 'CH' button on the main unit to re-scan for sensors. Ensure the sensor is within range (max 60m/196ft) and not obstructed by thick walls or metal objects. - Problemer med Wi-Fi-forbindelse:
Verify your Wi-Fi network is 2.4 GHz. Ensure the weather station is in pairing mode. Restart your router and the weather station. Check app instructions for specific troubleshooting steps. - Unøjagtige aflæsninger:
Ensure the outdoor sensor is placed in a suitable location, away from direct sunlight, rain, and heat sources. Compare readings with other reliable thermometers if possible. - Skærmen er svag eller slukket:
Check power adapter connection. Adjust screen brightness using the light/snooze button. Replace backup batteries if using them.
8. Specifikationer
| Mærke | VIFLYKOO |
| Modelnummer | EM3390TF |
| Produktdimensioner | 3 x 20.5 x 13 cm; 540 g |
| Forbindelsesteknologi | Wi-Fi (2.4 GHz) |
| Strømkilde | Corded Electric, Battery Powered (2 AA for main unit backup, 2 AA for sensor) |
| Temperatur nøjagtighed | 1 °C |
| Særlige funktioner | Alarm, Wireless, Large Display, Adjustable Brightness, Pre-calibrated |
| Inkluderede komponenter | Instruction manual, Transmitter (outdoor sensor), Power cord |
| Anbefalede anvendelser | Library, Office, Home, Laboratory, Garden, Restaurant |
9. Garanti og support
For warranty information or technical support, please refer to the contact details provided with your purchase or visit the official VIFLYKOO webwebstedet. Behold din købskvittering som købsbevis.