1. Introduktion
This manual provides detailed instructions for the installation, operation, and maintenance of your HOROW HR-E19D 19-inch extra tall dual flush two-piece toilet. Please read all instructions carefully before beginning installation or use to ensure proper function and safety. Keep this manual for future reference.
Sikkerhedsoplysninger
- Always turn off the water supply to the toilet before performing any maintenance or installation.
- Brug passende sikkerhedsudstyr, såsom handsker og øjenbeskyttelse, under installationen.
- Sørg for, at alle forbindelser er sikre for at forhindre lækager.
- Hvis du er usikker på et trin, skal du kontakte en kvalificeret VVS-installatør.
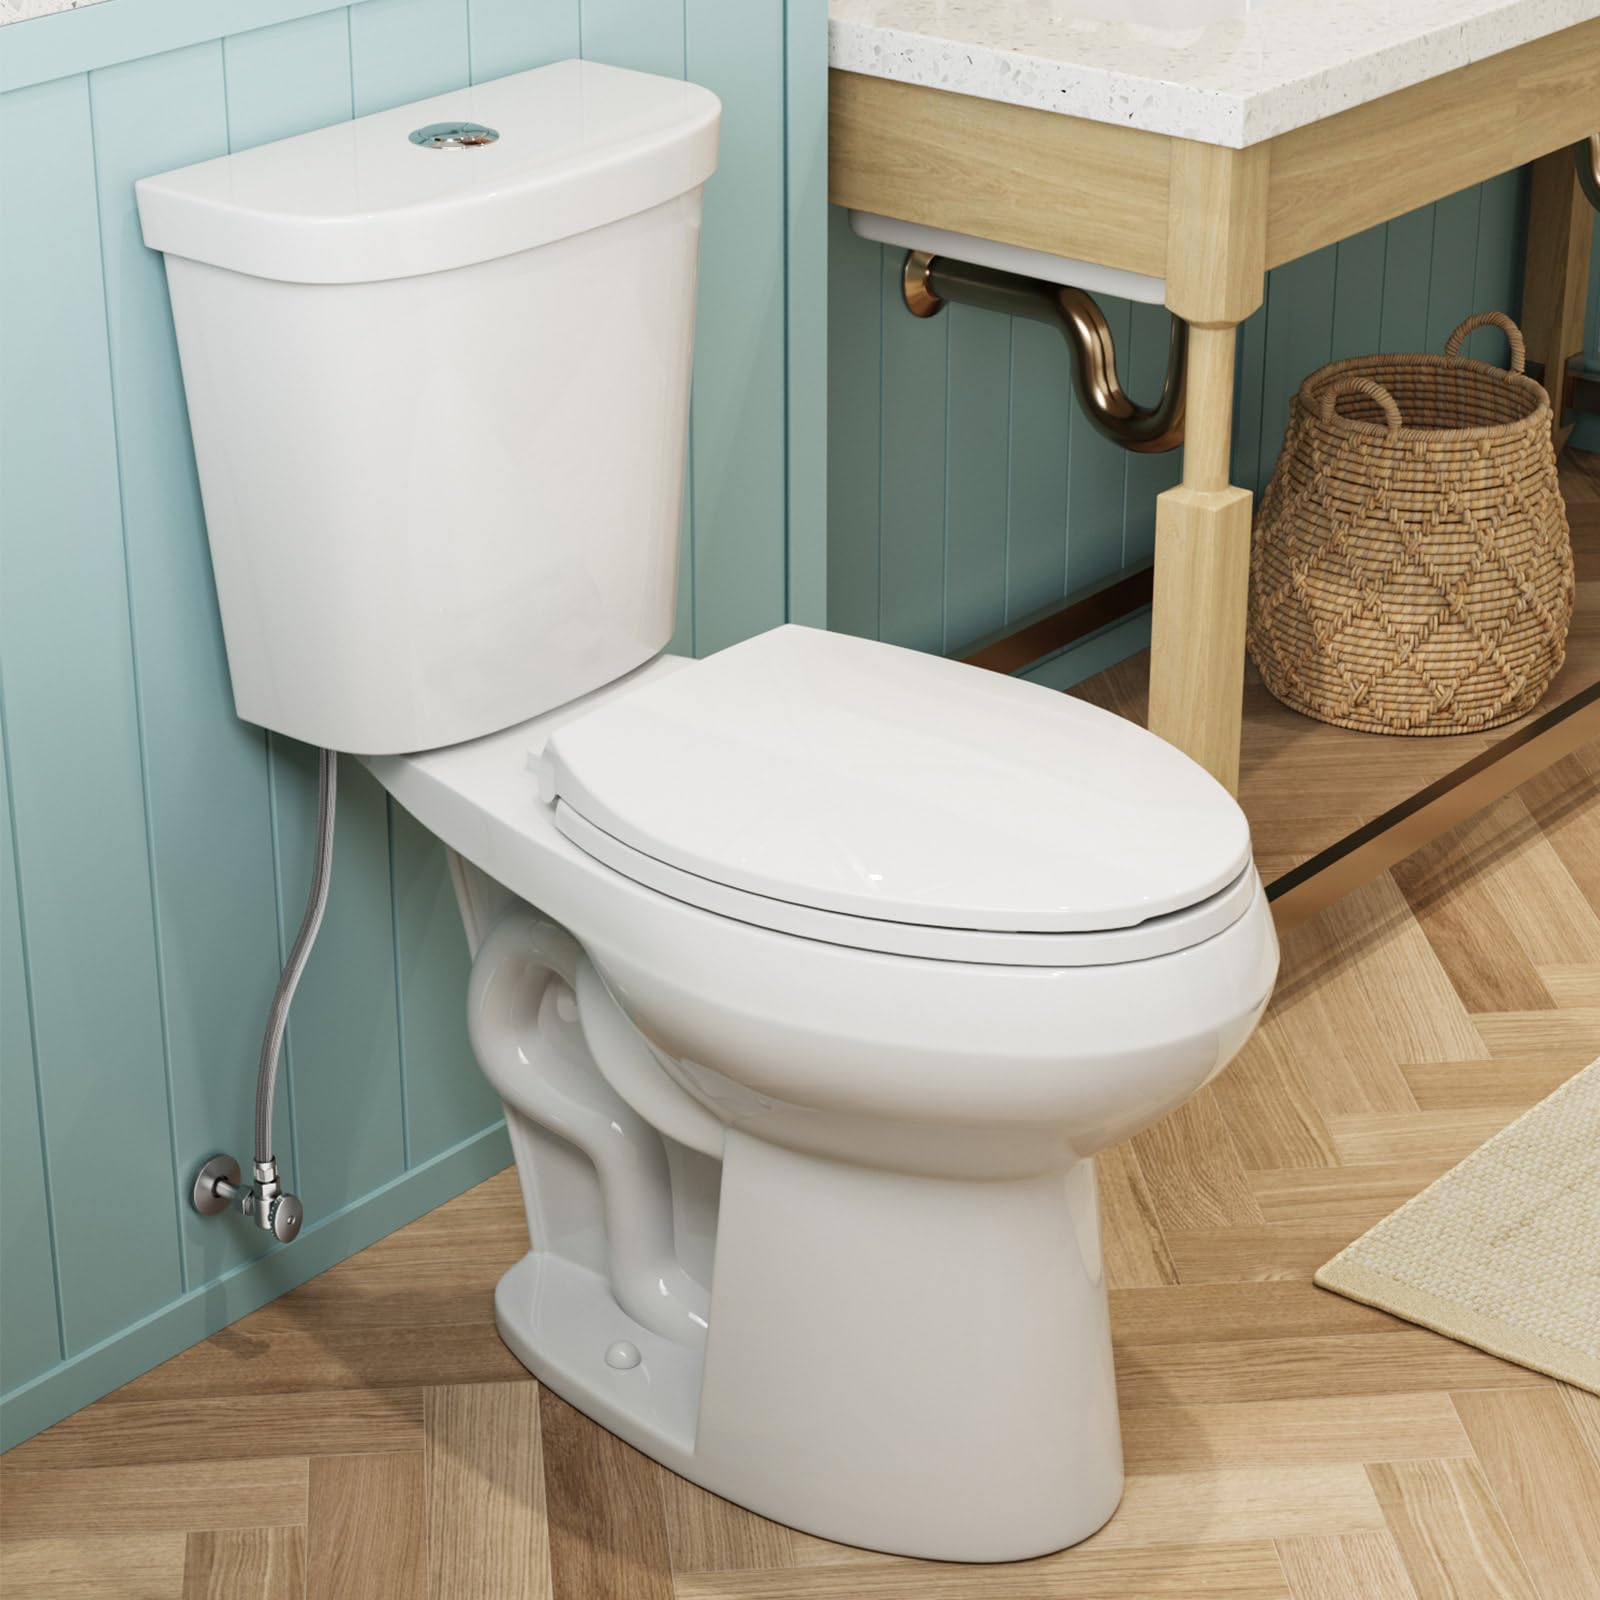
Image 1: HOROW HR-E19D 19-inch extra tall dual flush two-piece toilet.
2. Pakkens indhold
Verify that all components are present and undamaged before beginning installation. The package should include the following:
- Toiletskål
- Toiletbeholder
- Soft-Closing Seat
- Tanklåg
- Monteringshætter
- T-bolte
- Voks ring
- Installationshardware

Image 2: Included components for the HOROW HR-E19D toilet.
3. Dimensioner og specifikationer
The HOROW HR-E19D toilet is designed for comfort and efficiency. Key dimensions and specifications are provided below:
| Specifikation | Detalje |
|---|---|
| Modelnummer | HR-E19D |
| Farve | Hvid |
| Produktmål (D x B x H) | 29.13" D x 16.93" B x 34.65" H |
| Sædehøjde (fra gulvet) | 19 tommer |
| Materiale | Keramisk |
| Sæde materiale | PP (polypropylen) |
| Varens vægt | 86 pund |
| Flushing Performance (MAP) | 1000 g |
| Skylningstype | Dobbelt skyl (1.1 GPF / 1.6 GPF) |
| Installationsmetode | Gulvmonteret |
| Groft ind | 12 tommer |
| Skålform | Forlænget |

Image 3: Technical dimensions of the HOROW HR-E19D toilet.

Image 4: Visual comparison of the 19-inch comfort height.
4. Installationsvejledning
The HOROW HR-E19D toilet is designed for straightforward floor mounting. A 12-inch rough-in is required for compatibility with most standard bathroom plumbing. Follow these general steps for installation:
- Forbered området: Turn off the water supply to the bathroom. Remove the old toilet if applicable and clean the flange area thoroughly.
- Install T-Bolts: Insert the T-bolts into the floor flange slots and secure them in an upright position.
- Place Wax Ring: Firmly press the wax ring onto the toilet bowl's horn or directly onto the floor flange, ensuring a good seal.
- Sæt skålen: Carefully lower the toilet bowl onto the T-bolts, aligning the bolt holes with the bolts. Press down firmly and evenly to compress the wax ring.
- Fastgør skålen: Place washers and nuts onto the T-bolts. Hand-tighten the nuts, then use a wrench to tighten them evenly, alternating sides, until the bowl is secure. Do not overtighten.
- Installer tanken: Attach the tank to the bowl using the provided bolts, washers, and nuts. Ensure the tank gasket is properly seated for a watertight seal.
- Tilslut vandforsyning: Connect the water supply line to the toilet's fill valve. The toilet is compatible with both 7/8'' and 1/2'' water lines. If your supply line is 7/8'', remove the adapter before connecting. If it's 1/2'', connect directly.
- Installer sæde: Attach the soft-closing seat to the bowl using the provided screws.
- Test for lækager: Turn on the water supply slowly and check for any leaks around the base, tank, and water supply connection. Flush the toilet several times to ensure proper operation and check for leaks again.

Image 5: 12-inch rough-in measurement for installation.
Installationsvideo
Video 1: This video demonstrates the installation process of a similar HOROW toilet, highlighting key steps for a successful setup.
5. Betjeningsvejledning
The HOROW HR-E19D toilet features a dual-flush system and a powerful siphon flushing mechanism for efficient waste removal and water conservation.
Dobbelt skylning
The toilet is equipped with two flush buttons located on the top of the tank, allowing you to choose between a partial flush for liquid waste and a full flush for solid waste:
- Delvis skylning (1.1 GPF): Press the smaller button for a reduced water volume flush, ideal for liquid waste. This conserves water effectively.
- Fuld skylning (1.6 GPF): Press the larger button for a full water volume flush, designed for solid waste.
360° Jet Sifon Skylning
The advanced 360° Jet Siphon flush system ensures powerful and thorough waste removal with each flush, preventing clogs and eliminating odors. This system achieves a MAP (Maximum Performance) score of 1000 grams, indicating its strong flushing capability.

Image 6: Illustration of the 360° Jet Siphon Flushing System.
Operation video
Video 2: This video demonstrates the dual flush mechanism and flushing power of the HOROW toilet.
6. Vedligeholdelse
Regular cleaning and proper care will ensure the longevity and optimal performance of your HOROW toilet.
Rengøring af toilettet
- The high-quality ceramic and non-porous surface make cleaning easy. Wipe the surface with water and a soft cloth to maintain cleanliness and shine.
- Avoid abrasive cleaners, harsh chemicals, or scouring pads, as these can damage the ceramic finish.
- The fully skirted drain design simplifies cleaning around the base and trapway, reducing stain accumulation.
Soft-Closing Seat Care
The soft-closing PP seat is designed to close quietly and slowly, preventing slamming and reducing noise. The seat is fixed with screws to prevent loosening.
- To clean the seat, use mild soap and water. Do not use strong chemical cleaners, as they may damage the seat material or hinges.
- Avoid forcing the seat down, as this can damage the soft-closing mechanism.

Image 7: Soft-closing seat mechanism and noise reduction.
7. Fejlfinding
If you encounter any issues with your HOROW toilet, refer to the following common troubleshooting tips:
- Svag flush: Ensure the water supply valve is fully open. Check the water level in the tank; it should be at the marked waterline. Inspect the flush valve for any obstructions.
- Kontinuerligt rindende vand: Check the flapper or flush valve for proper seating. Ensure the fill valve is not overfilling the tank. Adjust the float if necessary.
- Lækager: Inspect all connections (water supply line, tank-to-bowl bolts, wax ring seal) for tightness. If a leak persists at the base, the wax ring may need replacement.
- Slow Tank Refill: Check the water supply line for kinks or obstructions. Ensure the fill valve is functioning correctly.
For issues not covered here, or if problems persist, please contact HOROW customer service.
8. Garanti og support
HOROW is committed to customer satisfaction and product quality. Your HOROW HR-E19D toilet comes with the following:
- 1-års begrænset garanti: Covers manufacturing defects and malfunctions under normal use for one year from the date of purchase.
- Livstids eftersalgsservice: HOROW provides ongoing support for the lifetime of the product.
Our customer service center is available to respond to messages within 12 hours. For warranty claims, technical assistance, or any other inquiries, please refer to the contact information provided with your purchase or visit the official HOROW webwebsted.