
1. Introduktion
The Drexma WiStat is a programmable WiFi touchscreen thermostat designed for radiant floor heating systems. It offers advanced control and monitoring capabilities through its intuitive interface and mobile application for iOS and Android devices. This thermostat is compatible with both 2.4G and 5G Wi-Fi networks and integrates with popular smart home ecosystems such as Amazon Alexa and Google Assistant. It supports dual-voltage (120V and 240V) floor heating cables and includes built-in Class A GFCI protection for enhanced safety. This manual provides detailed instructions for the proper installation, operation, and maintenance of your WiStat thermostat.
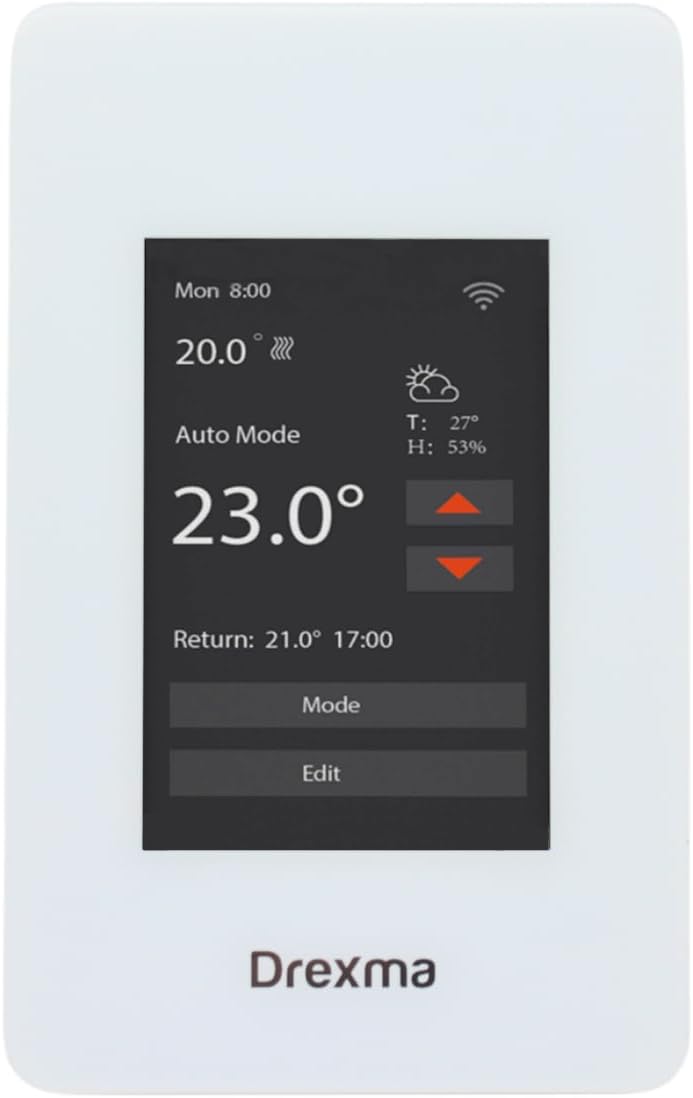
Figure 1: Drexma WiStat Thermostat and Packaging
2. Sikkerhedsoplysninger
ADVARSEL: Risiko for elektrisk stød. Installation must be performed by a qualified electrician in accordance with local electrical codes. Disconnect power at the circuit breaker before installing or servicing the thermostat.
- Ensure the power supply is disconnected before any wiring.
- The thermostat is designed for 120V or 240V radiant floor heating systems. Verify your system's voltage før installation.
- The built-in Class A GFCI (Ground Fault Circuit Interrupter) provides protection against electrical shock. Test the GFCI regularly as per local regulations.
- Udsæt ikke termostaten for vand eller for meget fugt.
- Do not attempt to repair or modify the thermostat. Refer all servicing to qualified personnel.

Figur 2: Bagside view with wiring caution
3. Pakkens indhold
Bekræft at alle varer er til stede i pakken:
- Drexma WiStat Thermostat Unit
- Gulvtemperaturføler
- Mounting Screws (typically included)
- Brugervejledning (dette dokument)
4. Opsætning
4.1. Installation
- Afbryd strømmen: Turn off power to the heating circuit at the main electrical panel.
- Montering: Install the thermostat into a standard electrical box. Ensure proper clearance for wiring.
- Ledningsføring: Connect the thermostat according to the wiring diagram provided in the installation guide (refer to Figure 2 for terminal layout). Ensure correct connections for LINE (power supply), LOAD (heating cables), and the floor sensor. The thermostat supports both 120V and 240V systems.
- Sensor installation: Route the floor temperature sensor cable to the desired location in the floor, ensuring it is properly embedded in the heating area.
- Sikker termostat: Fasten the thermostat to the electrical box using the provided screws.
- Gendan strøm: Turn on power at the circuit breaker. The thermostat display should illuminate.

Figur 3: Side view af termostaten
4.2. Indledende konfiguration
- Upon first power-on, the thermostat will guide you through initial settings such as language (English/French) and temperature units (Celsius/Fahrenheit).
- Følg vejledningen på skærmen for at indstille dato og klokkeslæt.
4.3. Wi-Fi-forbindelse
- Download app: Download the Drexma WiStat mobile application from the iOS App Store or Google Play Store.
- Opret konto: Åbn appen og opret en brugerkonto.
- Tilføj enhed: Follow the in-app instructions to add your WiStat thermostat. This typically involves putting the thermostat into pairing mode and connecting it to your home's 2.4G or 5G Wi-Fi network.
- Smart Home Integration: Once connected to Wi-Fi, you can link your thermostat to smart home platforms like Amazon Alexa or Google Assistant through their respective apps.

Figur 4: Forside view of the thermostat display
5. Betjeningsvejledning
5.1. Berøringsskærmsgrænseflade
The WiStat thermostat features a color touchscreen for easy navigation. Tap icons and menus to access various settings and functions.
5.2. Opvarmningstilstande
Select from available heating modes (e.g., Auto, Manual, Away) to suit your comfort and energy-saving preferences. Refer to the on-screen menu for specific mode descriptions.
5.3. Planlægning
Utilize the 7-day programmability feature to create custom heating schedules. This allows you to set different temperatures for various times of the day and days of the week, optimizing comfort and energy consumption.
5.4. Temperaturjustering
Adjust the desired temperature directly on the touchscreen or through the mobile app. The thermostat can display temperatures in either Fahrenheit or Celsius.
5.5. Child Lock Functionality
Activate the child lock feature through the settings menu to prevent unauthorized changes to the thermostat settings.
5.6. Real-time Weather Reports
The thermostat can display real-time local weather reports, allowing you to anticipate heating needs and adjust settings proactively.

Figur 5: Øverst view af termostaten
6. Vedligeholdelse
- Rensning: Gently wipe the touchscreen and thermostat body with a soft, damp klæde. Brug ikke slibende rengøringsmidler eller opløsningsmidler.
- GFCI test: Regularly test the GFCI function as recommended by local electrical codes, typically monthly. Press the TEST button on the thermostat; the heating should turn off. Press the RESET button to restore normal operation.
- Firmwareopdateringer: Ensure your thermostat's firmware is up to date through the mobile application for optimal performance and new features.
7. Fejlfinding
| Problem | Mulig årsag | Løsning |
|---|---|---|
| Termostatdisplayet er tomt | No power supply; tripped circuit breaker; incorrect wiring. | Check circuit breaker. Verify wiring connections. Consult a qualified electrician if necessary. |
| Ingen varme fra gulvet | Thermostat in OFF mode; GFCI tripped; heating cables faulty; temperature set too low. | Ensure thermostat is in an active heating mode. Reset GFCI. Increase set temperature. Consult a professional for heating cable inspection. |
| Problemer med Wi-Fi-forbindelse | Incorrect Wi-Fi password; router too far; network interference; 2.4G/5G band conflict. | Re-enter Wi-Fi password. Move router closer or use a Wi-Fi extender. Ensure your router supports 2.4G or 5G and the thermostat is connecting to the correct band. Restart router and thermostat. |
| Upræcise temperaturmålinger | Gulvføleren er ikke korrekt installeret eller beskadiget. | Verify floor sensor placement. If damaged, replace the sensor. |
| Thermostat unresponsive | Midlertidig softwarefejl. | Udfør en soft reset ved at slukke for strømmen ved afbryderen i 30 sekunder og derefter genoprette strømmen. |
8. Specifikationer
| Feature | Detalje |
|---|---|
| Mærke | Drexma |
| Modelnavn | DREXMA-WiStat |
| Controller type | WiFi Programmable |
| Speciel funktion | Touchskærm |
| Farve | Hvid |
| Specifikke anvendelser af produktet | Gulvvarme |
| Voltage | 120 volt, 240 volt |
| Form | Rektangulær |
| Kontroltype | Røre |
| Kontrolmetode | App |
| Produktegenskaber | Touchskærm |
| Forbindelsesprotokol | Wi-Fi (2.4G and 5G compatible) |
| Baggrundsbelysning | Ja |
| Produkt stil | Moderne |
| Modelnummer | DREXMA-WiStat |
| UPC | 659460138640 |
| Fabrikant | Drexma |
| Oprindelsesland | USA |
| ASIN | B0D9KPCW36 |
| GTIN | 659460138640 |
9. Garanti
As per the product information, this Drexma WiStat Thermostat is sold without a manufacturer's warranty. Please refer to your retailer's return policy for any issues.
10. Support
For technical assistance or further inquiries regarding your Drexma WiStat Thermostat, please refer to the support section within the Drexma WiStat mobile application or visit the manufacturer's official webwebsted for kontaktoplysninger.