1. Introduktion
This manual provides detailed instructions for the Hilitand ZL-166 Handheld GPS Land Area Meter. This device is designed for accurate land area and length measurement, featuring a durable, waterproof, and dustproof design. It utilizes a U-chip and GPS positioning for precise results, making it suitable for various outdoor measurement tasks.
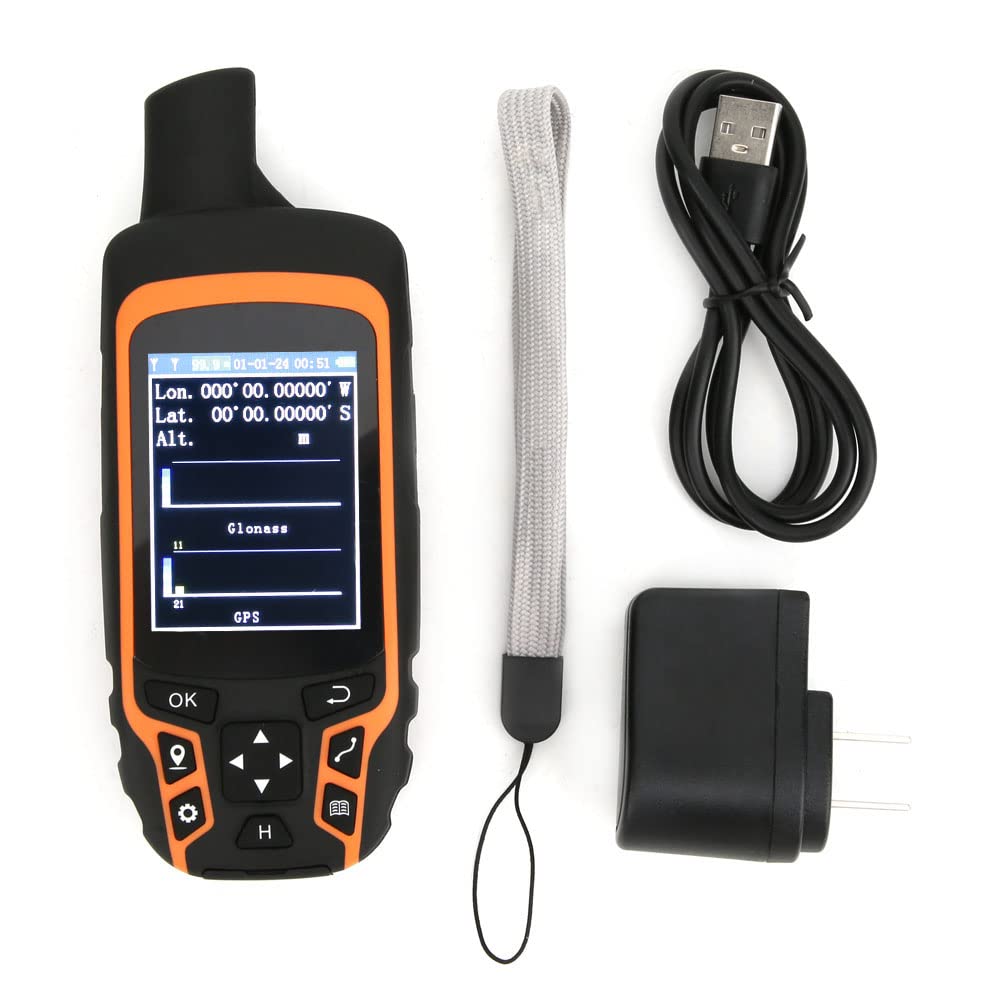
Image 1.1: The Hilitand ZL-166 Handheld GPS Land Area Meter, showing its compact design and display.
2. Pakkens indhold
Bekræft, at alle nedenstående varer er inkluderet i din pakke:
- 1 x Land Area Meter (Model: ZL-166)
- 1 x USB-kabel
- 1 x bærbart reb
- 1 x adapter
- 1 x brugsanvisning

Image 2.1: The USB adapter included with the Hilitand ZL-166 device.
3. Specifikationer
| Feature | Specifikation |
|---|---|
| Model | ZL-166 |
| Materiale | ABS |
| Panel | TFT 2.4in, Resolution 240x320 |
| Positioneringsnøjagtighed | ≤1.5m |
| Arealmålingsområde | 0-99999 Hectares |
| Længdemåleområde | 0-99999999m |
| Relative Accuracy of Area | Track Tolerance: ±2m |
| Antal poster | 100 |
| Batteri | 3.7V 2500mAH litiumbatteri |
| Omgivelsestemperatur | 20-60°C |
| Fugtighed | 5-95 % |
| Vægt | Ca. 375 g / 13.2 oz |
| Produktstørrelse | 15x6x3cm / 5.9x2.4x1.2in |
| Speciel funktion | Vandtæt |
| Forbindelsesteknologi | USB |
| Display Type | LCD |
4. Opsætning
4.1 Opladning af enheden
- Connect the provided USB cable to the charging port on the device.
- Plug the other end of the USB cable into the adapter, then plug the adapter into a standard wall outlet.
- Allow the device to charge fully before first use. The charging indicator on the screen will show the battery status.
4.2 Tænd/sluk
- To power on: Press and hold the power button (usually located on the side or top) until the screen illuminates.
- To power off: Press and hold the power button until a power-off prompt appears, then confirm.
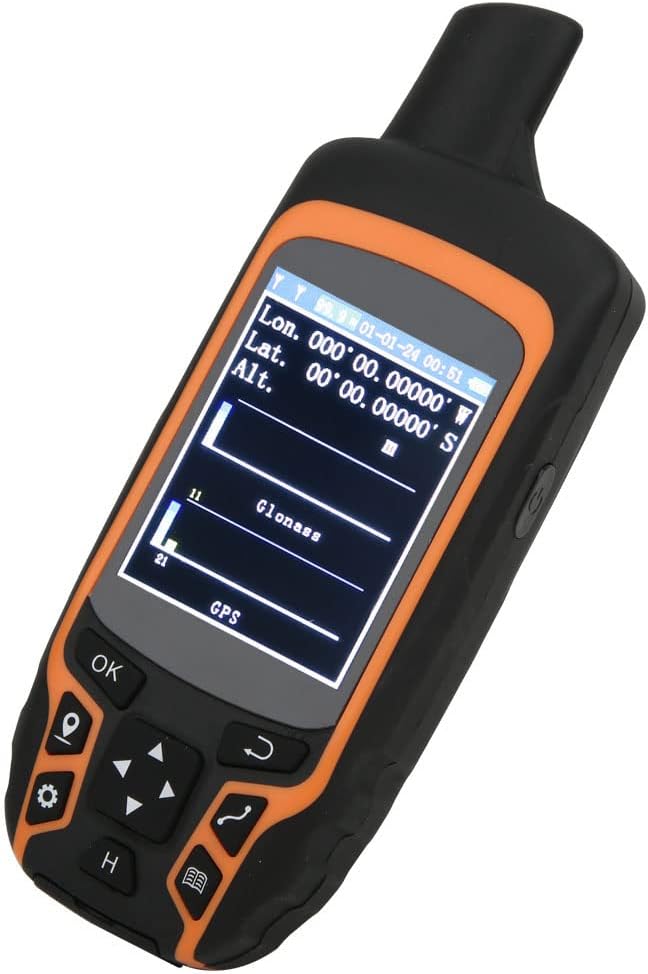
Image 4.1: The device display showing GPS signal strength and coordinates.
5. Betjeningsvejledning
Sørg for, at enheden har en klar view of the sky for optimal GPS signal reception before beginning any measurement.
5.1 Automatic Track Measurement (Area)
This method is used to measure the area of a plot by walking its perimeter.
- Navigate to the 'Area Measurement' mode on the device.
- Once positioned and GPS signal is acquired, press the 'Start' or 'OK' button to begin tracking.
- Walk along the boundary of the area to be measured, ensuring you complete a full circuit back to your starting point.
- Press the 'End' or 'OK' button to finalize the measurement. The device will display the calculated area.

Image 5.1: The device shown in different land measurement scenarios, including fields and natural landscapes.
5.2 Curve Measurement (Length)
This method measures the length of a curved path or boundary.
- Enter the 'Curve Measurement' interface after the device has acquired a stable GPS position.
- Click 'Confirm' or 'OK' to mark the starting point (Point A).
- Walk along the desired curve to the end point (Point B).
- Click 'End' or 'OK' to complete the measurement. The device will display the total length of the path.
5.3 Straight Line Measurement (Length)
This method measures the straight-line distance between two points.
- Enter the 'Straight Line Measurement' interface after the device has acquired a stable GPS position.
- Click 'Confirm' or 'OK' to mark the starting point (Point A).
- Move to the desired end point (Point B).
- Click 'End' or 'OK' to complete the measurement. The device will display the straight-line distance between Point A and Point B.

Image 5.2: The device display illustrating the measurement of a path between point A and point B in a field.
6. Vedligeholdelse
- Rensning: Tør enheden af med en blød, damp klæde. Undgå at bruge skrappe kemikalier eller slibende rengøringsmidler.
- Opbevaring: Opbevar enheden et køligt, tørt sted væk fra direkte sollys og ekstreme temperaturer.
- Batteripleje: For optimal battery life, avoid fully discharging the battery frequently. Charge the device regularly, especially if storing for extended periods.
- Vandtæt/støvtæt: The device has an IP-class waterproof rating. While it is designed for harsh environments, avoid submerging it in water for prolonged periods or exposing it to high-pressure water jets. Ensure all port covers are securely closed.

Billede 6.1: Bagside view of the Hilitand ZL-166 device, displaying the model number ZL166.
7. Fejlfinding
- Enheden tænder ikke: Ensure the battery is charged. Connect the device to the charger and attempt to power on after a few minutes.
- Intet GPS-signal: Gå til et åbent område med en klar view of the sky, away from tall buildings or dense foliage. Allow several minutes for the device to acquire satellites.
- Upræcise målinger: Ensure you are walking at a consistent pace and following the perimeter accurately. Verify that the GPS signal is strong before starting a measurement.
- Skærmen reagerer ikke: Try restarting the device. If the issue persists, ensure the screen is clean and free from moisture.
8. Garanti og support
For warranty information, technical support, or service inquiries, please refer to the contact information provided with your purchase or visit the official Hilitand webwebsted. Gem din købsbevis til garantikrav.