
1. Introduktion
The MUSE M-179 P Alarm Clock Radio is designed to provide reliable timekeeping and audio entertainment. This device features an FM PLL radio with the capacity to store 20 preset stations. It includes a time projection function, allowing you to adjust both the angle and rotation of the projected image for optimal viewing. As an alarm clock, it offers a dual alarm system, enabling you to wake up to either your preferred radio station or a standard buzzer. Additional functions include a snooze feature for extra sleep and a sleep timer for falling asleep to music.
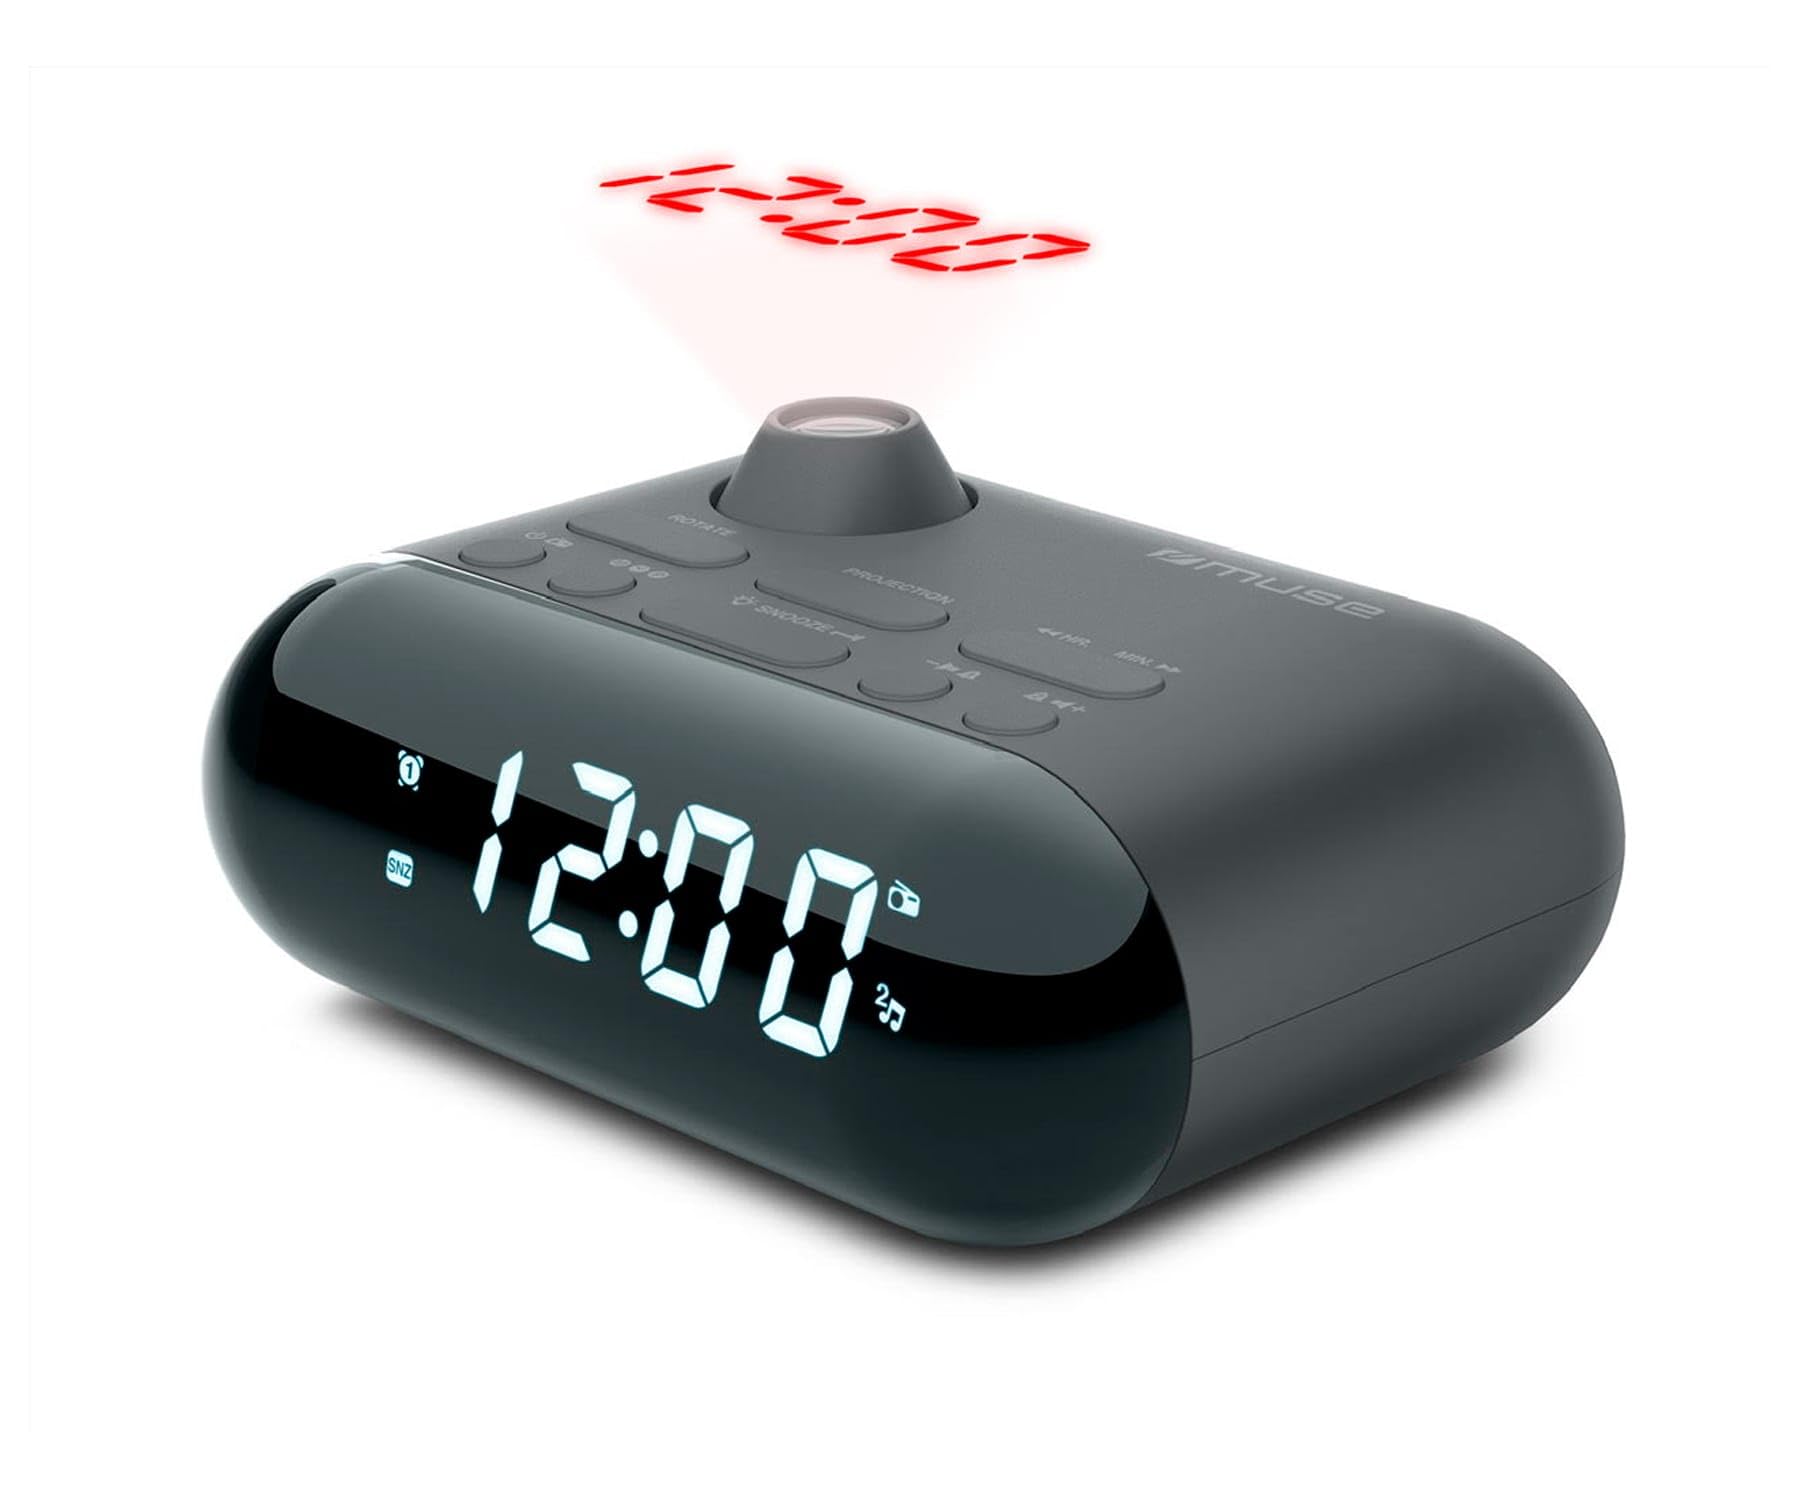
Image showing the front of the MUSE M-179 P Alarm Clock Radio, featuring the LED display and control buttons.
2. Sikkerhedsinstruktioner
- Læs alle instruktioner omhyggeligt, før du betjener enheden.
- Gem denne vejledning til fremtidig reference.
- Udsæt ikke enheden for dryppende eller sprøjtende vand.
- Sørg for ordentlig ventilation; bloker ikke ventilationsåbninger.
- Placer ikke enheden i nærheden af varmekilder såsom radiatorer, varmeapparater, komfurer eller andre apparater (herunder ampløftere), der producerer varme.
- Brug kun tilbehør/tilbehør specificeret af producenten.
- Bortskaf brugte batterier ansvarligt i henhold til lokale regler.
- Forsøg ikke at skille enheden ad eller ændre den. Overlad al service til kvalificeret servicepersonale.
3. Pakkens indhold
Kontroller venligst, at følgende varer er inkluderet i din pakke:
- MUSE M-179 P Alarm Clock Radio Unit
- 1 x AA Battery (for backup or primary power, depending on model)
- Brugervejledning (dette dokument)
4. Produktfunktioner
- Alarm Clock Radio: Integrated alarm and radio functions.
- Tidsprojektion: Projects the current time onto a wall or ceiling.
- Dobbelt alarm: Indstil to uafhængige alarmer.
- Opvågningsmuligheder: Choose to wake up to FM radio or a buzzer sound.
- PLL FM-radio: Digital tuning for stable radio reception.
- 20 FM Presets: Store up to 20 of your favorite FM radio stations.
- Snooze-funktion: Temporarily pause the alarm.
- Sleep timer: Fall asleep to radio with automatic shut-off.
- Indbygget ur: Præcis tidtagning.
- Bærbart design: Compact and easy to move.
5. Betjeningselementer og display
The MUSE M-179 P features an intuitive layout for easy operation. While specific button labels may vary, common controls include:
- LED display: Viser aktuel tid, alarmstatus og radiofrekvens.
- Tidsindstillingsknap: For adjusting hours and minutes.
- Alarm 1/Alarm 2 Buttons: To set and activate individual alarms.
- Snooze/Sleep-knap: Activates snooze or sets the sleep timer.
- Radio/Tuning Buttons: For scanning and selecting radio stations.
- Lydstyrkekontrol: Justerer lydudgangen.
- Projector On/Off & Adjustment: Controls the time projection feature.
6. Opsætning
6.1. Strømtilslutning
- Open the battery compartment, usually located on the bottom or back of the unit.
- Insert 1 AA battery, ensuring correct polarity (+/-). This battery powers the unit.
- Luk batterirummet forsvarligt.
6.2. Indstilling af starttidspunkt
- When the unit is first powered on, the display may flash or show a default time.
- Tryk og hold på TIDSINDSTILLING button (or similar) until the hour digits begin to flash.
- Brug TIME og MINUT buttons (or tuning buttons) to adjust the hour. Pay attention to AM/PM indicators if present.
- Trykke TIDSINDSTILLING igen for at bekræfte timen og gå videre til minutjustering.
- Adjust the minutes using the appropriate buttons.
- Trykke TIDSINDSTILLING one last time to save the current time.
7. Betjeningsvejledning
7.1. Indstilling af alarmer
The M-179 P features two independent alarms (Alarm 1 and Alarm 2).
- Tryk og hold på ALARM 1 knappen, indtil alarmens timecifre blinker.
- Brug TIME og MINUT knapperne for at indstille det ønskede alarmtidspunkt.
- Trykke ALARM 1 again to confirm the time and select the wake-up source (radio or buzzer). Use the tuning buttons to toggle between options.
- Trykke ALARM 1 once more to save the settings. The alarm indicator will light up on the display.
- Gentag processen for ALARM 2 ved hjælp af ALARM 2 knap.
7.2. Brug af FM-radioen
- Tryk på RADIO TIL/FRA knappen for at tænde for radioen.
- Brug TUNE +/- knapperne til manuelt at justere frekvensen.
- For at automatisk scanne efter stationer skal du trykke på og holde TUNE +/- button. The radio will stop at the next strong signal.
- Sådan gemmer du en forudindstillet station: Stil ind på den ønskede station, og tryk derefter på og hold FORUDINDSTILLING knap (eller MEM). The preset number will flash. Use TUNE +/- for at vælge et forudindstillet nummer (1-20), og tryk derefter på FORUDINDSTILLING igen for at gemme.
- Sådan henter du en forudindstillet station: Tryk på FORUDINDSTILLING knappen gentagne gange for at bladre gennem gemte stationer.
- Juster lydstyrken ved hjælp af LYDSTYRKE +/- knapper.
7.3. Tidsprojektion
- Find PROJEKTOR TIL/FRA switch or button. Turn it on to activate the time projection.
- Adjust the projection angle by physically rotating the projector lens housing.
- Hvis tilgængelig, brug BILLEDROTATION button or dial to flip the projected time display 180 degrees for optimal viewing on a ceiling or wall.
- Adjust the focus of the projected image by rotating the focus ring around the projector lens.
7.4. Snooze-funktion
Når en alarm lyder, skal du trykke på SLUM button. The alarm will temporarily stop and sound again after a few minutes (typically 5-9 minutes, depending on the model's default setting).
7.5. Sleep timer
- Mens radioen spiller, skal du trykke på SOVE knap.
- Tryk gentagne gange på SOVE button to cycle through available sleep timer durations (e.g., 90, 60, 30, 15 minutes, or OFF).
- Radioen slukker automatisk efter den valgte varighed.
8. Vedligeholdelse
8.1. Rensning
- Tør enheden af med en blød, tør klud.
- Brug ikke slibende rengøringsmidler, voks eller opløsningsmidler.
8.2. Udskiftning af batteri
- When the display dims or the unit malfunctions, it may be time to replace the battery.
- Open the battery compartment and replace the old AA battery with a new one, observing correct polarity.
- Dispose of the old battery according to local environmental regulations.
9. Fejlfinding
| Problem | Mulig årsag | Løsning |
|---|---|---|
| Enheden tænder ikke. | Batteriet er dødt eller isat forkert. | Udskift batteriet eller kontroller polariteten. |
| Dårlig radiomodtagelse. | Antennen er ikke strakt ud, eller signalet er dårligt i området. | Træk FM-antennen helt ud. Flyt enheden for bedre modtagelse. |
| Alarmen lyder ikke. | Alarmen er ikke aktiveret eller indstillet forkert. | Ensure alarm is set and activated (alarm indicator visible). Check alarm volume. |
| Tidsprojektionen er sløret. | Fokus ikke justeret. | Drej fokusringen på projektorlinsen, indtil billedet er klart. |
| Den forventede tid er på hovedet. | Image rotation needs adjustment. | Press the IMAGE ROTATION button or adjust the dial to flip the display. |
10. Specifikationer
- Mærke: MUSE
- Modelnummer: M-179 P
- Strømkilde: Battery powered (1 AA battery required)
- Skærmtype: LED
- Forbindelse teknologi: Auxiliary (3.5 mm Audio Interface)
- Tuner type: FM
- Understøttede radiobånd: FM
- Særlige funktioner: Built-in clock, Portable
- Produktmål (L x B x H): 15 cm x 12.4 cm x 6.8 cm
- Vandmodstandsniveau: Waterproof (Note: This specification should be interpreted with caution for electronic devices. Avoid direct exposure to water.)
- Internal Material: Plast
- Anbefalede anvendelser: Til indendørs brug
- Compatible Devices (Auxiliary): Headphones, Speaker, MP3 player, Laptop
11. Garanti og support
This product is covered by a standard manufacturer's warranty. For detailed warranty information, please refer to the warranty card included in your product packaging or visit the official MUSE website. For technical support, troubleshooting assistance, or to inquire about spare parts, please contact MUSE customer service through their official channels.
Gem venligst din købsbevis i tilfælde af garantikrav.


