
1. Introduktion
This manual provides detailed instructions for the setup, operation, and maintenance of your AMIR Projection Alarm Clock (Model WA146-AMUS). This digital alarm clock features a 7.9-inch LED display, a 180° rotatable projector, adjustable brightness, multiple alarm modes, and temperature display. Please read this manual thoroughly before use to ensure proper functionality and to maximize your product experience.

Billede 1.1: Forside view of the AMIR Projection Alarm Clock showing its 7.9-inch display and key features like time, alarm, 12/24H, snooze, projection, 4-level brightness, temperature, and night mode.
2. Pakkens indhold
Bekræft at alle varer er til stede i pakken:
- AMIR Projection Alarm Clock (WA146-AMUS)
- USB-opladerkabel (1.5 meter)
- Brugermanual
3. Produktfunktioner
- 7.9-inch LED Display: Large, clear digital display for easy viewing.
- 180° Rotatable Projector: Projects time onto walls or ceilings, adjustable for optimal viewing.
- Justerbar lysstyrke: Four levels of display brightness (Bright, Medium, Low, Off) to suit different environments.
- Flere alarmtilstande: Set alarms for Monday-Friday, Monday-Saturday, or Everyday.
- Snooze-funktion: Customizable snooze interval from 1 to 60 minutes.
- Multifunktionsskærm: Shows time, date, and indoor temperature.
- 12/24 timers format: Easily switch between 12-hour and 24-hour time formats.
- Nattilstand: Automatically dims the display between 18:00 and 6:00 (adjustable time range).
- Dobbelt strømforsyning: Operates via USB cable (for constant display) or 3 AAA batteries (for memory function during power outages).
4. Betjeningselementer og display
Familiarize yourself with the clock's buttons and display elements.

Billede 4.1: Bagside view of the alarm clock, indicating the power port, battery compartment, projection lamp, and control buttons (SWAP, +, -, ALARM, MODE, PROJECT/SNOOZE).
- Skærm: Shows time, date, temperature, and alarm status.
- Projektion Lamp: Located on the side, projects time onto a surface.
- Strømport (DC 5V): Til tilslutning af USB-strømkablet.
- Batterirum: Holds 3 AAA batteries for backup power.
- SWAP Button: Bruges til justering af forskellige indstillinger.
- '+' / '-' knapper: Adjust values during settings, or change display brightness.
- ALARM knap: Bruges til at indstille og aktivere alarmer.
- MODE knap: Skifter gennem visningstilstande og går ind i indstillingstilstande.
- PROJECT/SNOOZE Button: Activates/deactivates projection, or triggers snooze during an alarm.
5. Opsætning
5.1 Tænd/sluk uret
Vækkeuret kan tændes på to måder:
- USB Cable Power (Recommended): Connect the provided USB cable to the DC 5V power port on the back of the clock and plug the other end into a USB power adapter (not included) or a USB port. The LED screen will remain constantly on.
- Batteristrøm: Insert 3 AAA batteries (not included) into the battery compartment. When powered by batteries, the display will turn off after a short period to conserve power. Press any button to activate the display. Batteries also provide a memory feature, retaining time settings during power outages when using USB power.
5.2 Indledende forberedelse
Before first use, ensure you remove the protective film from the display screen.
6. Betjeningsvejledning
6.1 Setting the Time and 12/24 Hour Format
- Tryk og hold på MODE button for 3 seconds. The 12/24H format will flash. Use the '+' or '-' buttons to select your preferred format.
- Trykke MODE again. The hour digits will flash. Use '+' or '-' for at justere timen.
- Trykke MODE again. The minute digits will flash. Use '+' or '-' for at justere minutterne.
- Trykke MODE igen for at bekræfte og afslutte tidsindstillingen.

Image 6.1: Visual guide for setting the time and selecting 12-hour or 24-hour format using the MODE, '+' and '-' buttons.
6.2 Indstilling af alarmen
- Tryk og hold på ALARM button for 3 seconds. The alarm hour digits will flash. Use '+' or '-' for at justere alarmens time.
- Trykke ALARM again. The alarm minute digits will flash. Use '+' or '-' for at justere alarmminutterne.
- Trykke ALARM again. The snooze time (default 5 minutes) will flash. Use '+' or '-' to set the snooze interval from 1 to 60 minutes.
- Trykke ALARM again. The alarm mode (1-5, 1-6, or 1-7) will flash. Use '+' or '-' at vælge:
- 1-5: mandag til fredag
- 1-6: mandag til lørdag
- 1-7: Hver dag
- Trykke ALARM igen for at bekræfte og afslutte alarmindstillingen.

Image 6.2: Visual guide for setting the alarm time, snooze duration, and selecting one of the three alarm modes.
6.3 Aktivering/deaktivering af alarm
After setting the alarm, a small alarm icon will appear on the display, indicating the alarm is active. To deactivate the alarm, short press the ALARM knappen, indtil alarmikonet forsvinder.
6.4 Brug af snooze-funktionen
Når alarmen lyder, skal du trykke på den store PROJECT/SNOOZE button to activate snooze. The alarm will pause for the set snooze interval and then sound again. To turn off the alarm completely, press any other button.

Image 6.3: Illustration of the snooze function, showing a person pressing the large PROJECT/SNOOZE button for extra sleep time.
6.5 Justering af skærmens lysstyrke
Tryk kort på '+' or '-' buttons to cycle through the four display brightness levels: Bright, Medium, Low, and Off.

Image 6.4: Demonstrates the four adjustable brightness levels of the clock's display: Bright, Medium, Dim, and Off.
6.6 Using the Projection Feature
The clock can project the time onto a wall or ceiling. The projection distance ranges from 1.6ft to 16ft.
- Activate/Deactivate Projection: Tryk kort på PROJECT/SNOOZE knappen for at tænde eller slukke for projektionen.
- Juster projektionsvinkel: Manually rotate the projection lamp on the side of the clock to adjust the projection angle.
- 180° Flip Projection: If the projected time appears upside down, press and hold the BYT button to flip the projection 180 degrees.
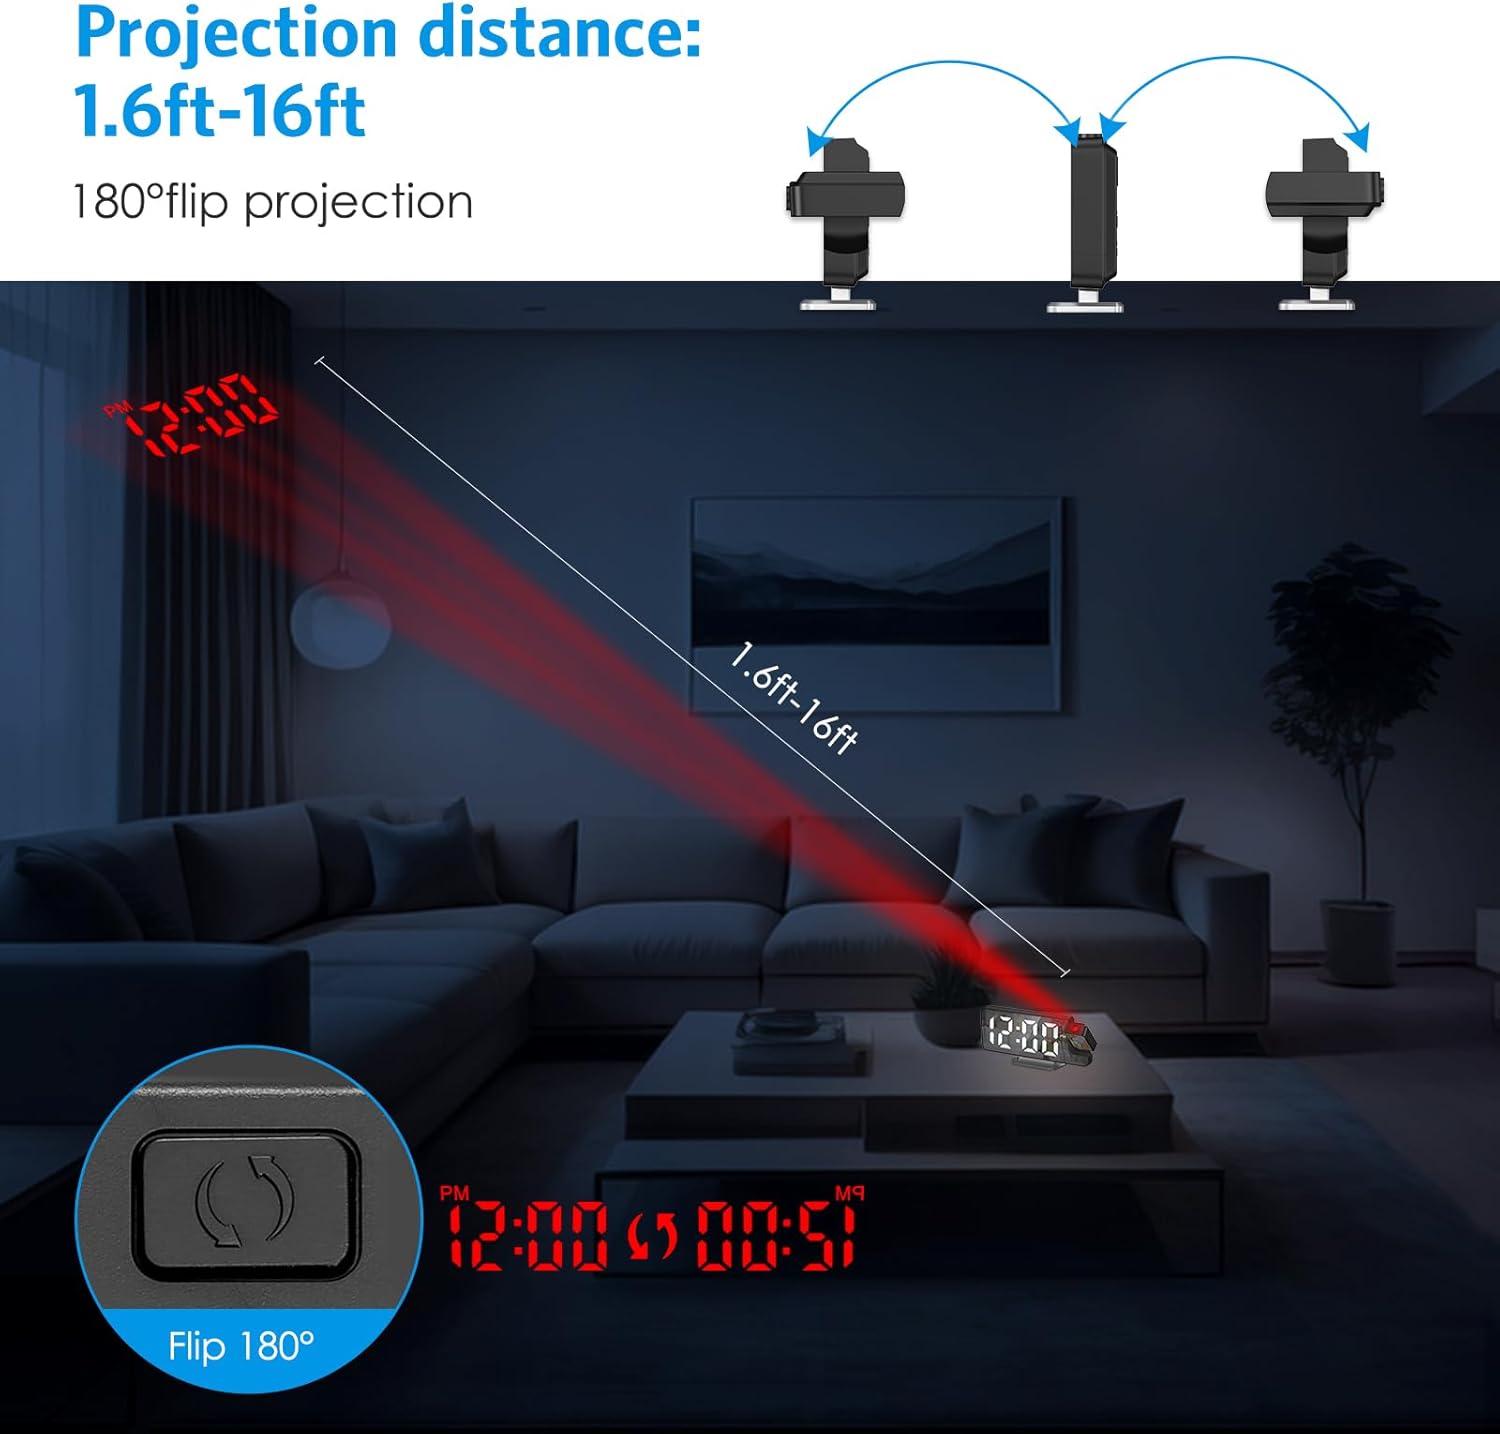
Image 6.5: Illustrates the projection distance range (1.6ft-16ft) and the 180° flip projection capability.
Video 6.1: This video demonstrates the AMIR Projection Alarm Clock's features, including 3 levels of brightness adjustment, time/date/temperature rotation on the main display, manual adjustment of projection angle, one-touch on/off projection, and 180-degree projection rotation.
6.7 Nattilstand
Night mode automatically dims the display during a specified period to reduce light disturbance. The default night mode period is from 18:00 to 6:00.
- Activate/Deactivate Night Mode: Tryk på MODE button repeatedly until 'ON' or 'OFF' appears next to the night mode icon. Use '+' or '-' at skifte.
- Adjust Night Mode Time Range: When night mode is active, press and hold the MODE button until the start hour flashes. Use '+' or '-' for at justere. Tryk MODE to move to the start minute, then end hour, and end minute, adjusting each with '+' or '-'. Trykke MODE at gemme.

Image 6.6: The alarm clock operating in Night Mode, showing the display dimmed and time projected onto the wall.
7. Vedligeholdelse
To ensure the longevity and optimal performance of your AMIR Projection Alarm Clock, follow these maintenance guidelines:
- Rensning: Use a soft, dry cloth to wipe the display and exterior surfaces. Avoid abrasive cleaners or solvents, which can damage the finish.
- Placering: Placer uret på en stabil, flad overflade væk fra direkte sollys, ekstreme temperaturer og høj luftfugtighed.
- Magt: Hvis uret ikke bruges i længere tid, skal du fjerne AAA-batterierne for at forhindre lækage.
8. Fejlfinding
Hvis du støder på problemer med dit vækkeur, kan du se følgende almindelige problemer og løsninger:
| Problem | Mulig årsag | Løsning |
|---|---|---|
| Display is off or intermittent (on battery power) | Battery saving mode activated. | Press any button to activate the display. For continuous display, use USB power. |
| Time changes randomly or is incorrect. | Power interruption or incorrect setting. | Ensure AAA batteries are installed for memory backup. Re-set the time following Section 6.1. Avoid placing near strong electromagnetic fields. |
| Projektionen er sløret eller uklar. | Incorrect focus or distance. | Adjust the projection lamp's focus ring (if available) or move the clock closer/further from the projection surface. Ensure the surface is flat and clear. |
| Alarmen lyder ikke. | Alarmen er ikke aktiveret, eller lydstyrken er for lav. | Verify the alarm icon is visible on the display. Check alarm settings (Section 6.2). Ensure alarm volume is not set to minimum (if adjustable). |
| Projection is upside down. | Projektionsretningen skal justeres. | Tryk og hold på BYT button to flip the projection 180 degrees (Section 6.6). |
9. Specifikationer
| Feature | Detalje |
|---|---|
| Mærke | AMIR |
| Modelnummer | WA146-AMUS |
| Display Type | Digital LED |
| Skærmstørrelse | 7.9 tommer |
| Produktmål (B x H) | 4.13"W x 1.25"H (Note: This seems to be a partial dimension, likely referring to height/depth. The main image shows 7.5in width.) |
| Strømkilde | USB Cable Power (DC 5V) or 3 AAA Batteries |
| Materiale Type | Acrylonitril Butadien Styren (ABS) |
| Særlige funktioner | 2 Alarms + 3 Levels Volume, Adjustable Brightness, Large Display, Snooze, USB/Battery Powered, 180° Rotatable Projector, Temperature Display, Night Mode |
10. Garanti og support
The AMIR Projection Alarm Clock (WA146-AMUS) comes with a Lifetime Warranty, ensuring long-term reliability. For any questions, technical assistance, or support needs, please contact AMIR customer service. Refer to the product packaging or the official AMIR webwebsted for kontaktoplysninger.