1. Introduktion
This manual provides instructions for the installation, operation, and maintenance of your SECRUI M508+D7 Wireless Door Chime. This system is designed to alert you when a door or window is opened, offering enhanced awareness for your home or business. It features a wide operating range, adjustable volume, and a selection of 52 chimes.
2. Pakkens indhold
Kontroller venligst, at alle varer er til stede i din pakke:
- 1 x modtager
- 1 x Door Sensor (main unit)
- 1 x Magnetic Strip (for sensor)
- 1 x AAA Battery (for sensor)
- 1 x brugermanual
- Mounting hardware (double-sided adhesive tape, screws)

Image: The SECRUI M508+D7 package contents, including the receiver and a single door sensor unit.
3. Produktkomponenter
The SECRUI M508+D7 system consists of two main components: the Receiver and the Door Sensor.
3.1 Modtager
The receiver plugs into a standard electrical outlet and emits the selected chime when triggered. It features buttons for volume control and chime selection, along with an LED indicator.
3.2 Dørsensor
The door sensor consists of two parts: a main sensor unit and a smaller magnetic strip. When these two parts are separated (e.g., when a door or window opens), the sensor sends a signal to the receiver, triggering the chime.
Billede: Et nærbillede view of the SECRUI receiver and door sensor, highlighting the music select button, volume control, AC plug, and the magnetic part of the sensor.
4. Opsætning og installation
Follow these steps to set up your SECRUI M508+D7 Wireless Door Chime:
- Insert Battery into Sensor: Open the battery compartment on the main sensor unit and insert the provided AAA battery. Ensure correct polarity. Close the compartment.
- Tilslut modtageren: Plug the receiver unit into any standard electrical outlet in your desired location. The receiver will power on and be ready for use.

Image: The SECRUI receiver unit is shown plugged into a standard wall outlet.
- Monter dørsensoren:
- Identify the door or window you wish to monitor.
- Rengør overfladen, hvor sensoren skal monteres.
- Peel off the protective film from the double-sided adhesive tape on the back of both the main sensor unit and the magnetic strip. Alternatively, use the provided screws for a more permanent installation.
- Attach the main sensor unit to the door/window frame and the magnetic strip to the moving part of the door/window. Ensure the two parts are aligned and the gap between them is no more than 0.6 inches (approximately 1.5 cm) when the door/window is closed.
- Test systemet: Open the monitored door or window. The receiver should emit a chime and its LED indicator should flash. If it does not, check the sensor's battery and alignment.

Image: The door sensor and magnetic strip are correctly installed on a door frame, demonstrating proper alignment.

Image: A visual guide showing the three easy installation steps: plugging in the receiver, placing the magnetic sensor, and the system being ready to protect.
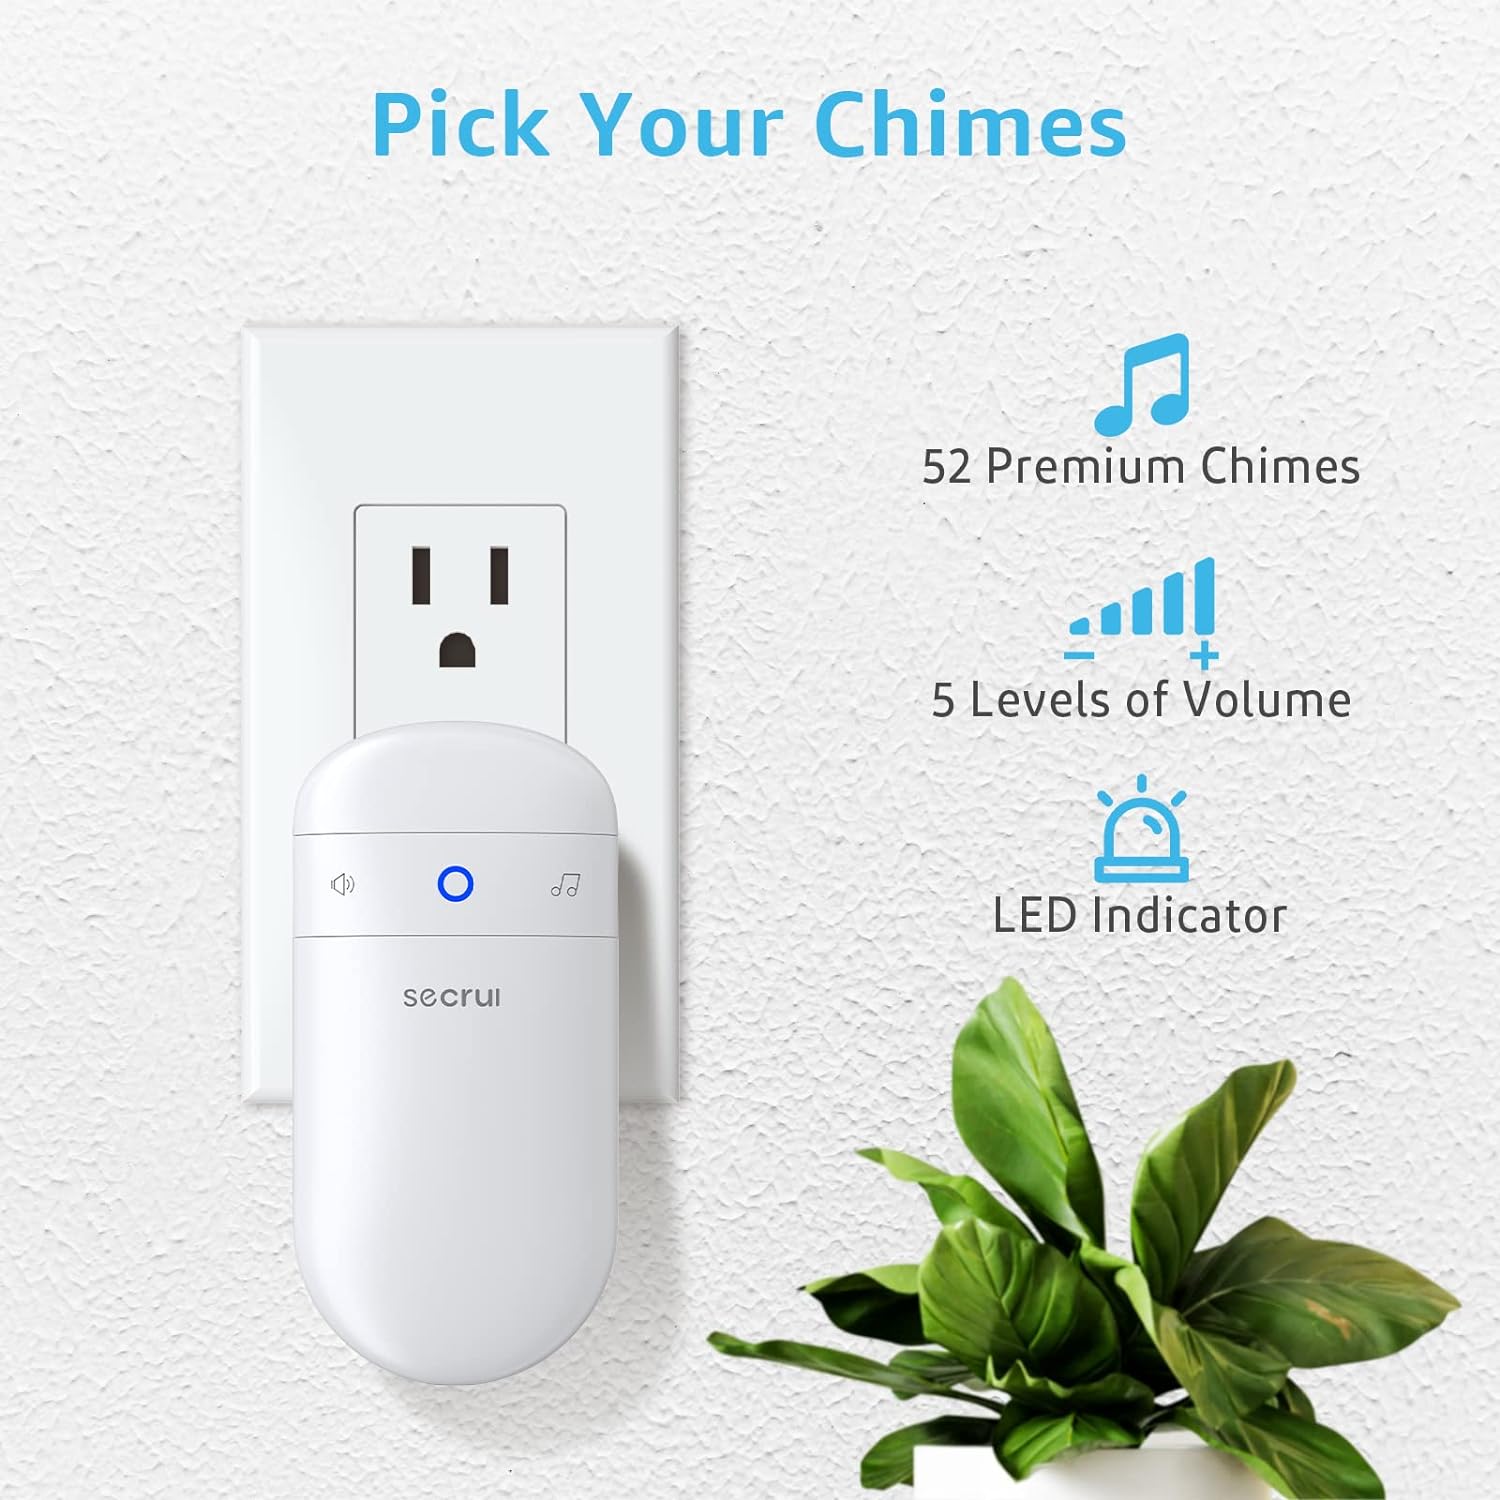
5. Betjeningsvejledning
5.1 Justering af lydstyrke
The receiver offers 5 levels of adjustable volume, ranging from 0 dB (mute) to 110 dB. Press the volume button on the receiver to cycle through the volume levels until you reach your desired setting.
5.2 Selecting a Chime
The receiver has 52 different chimes to choose from. Press the music selection button on the receiver to cycle through the available melodies. The system will remember your last selected chime even after being unplugged.

Image: This diagram illustrates the receiver's features, including 52 chime options, 5 volume levels, and an LED indicator.
6. Vedligeholdelse
6.1 Udskiftning af batteri
The door sensor is powered by one AAA battery. When the sensor's LED indicator no longer flashes or the receiver fails to chime upon door opening, it is time to replace the battery. Open the battery compartment, remove the old battery, and insert a new AAA battery, ensuring correct polarity. Dispose of old batteries responsibly.
6.2 Rengøring
Wipe the receiver and sensor units with a soft, dry cloth. Do not use liquid cleaners or abrasive materials, as these may damage the devices.
7. Fejlfinding
- Receiver does not chime:
- Sørg for, at modtageren er tilsluttet en fungerende stikkontakt.
- Check the battery in the door sensor and replace if necessary.
- Verify that the sensor and magnetic strip are properly aligned and within 0.6 inches of each other when the door/window is closed.
- Ensure the receiver's volume is not set to 0 (mute).
- Reduced operating range or intermittent alerts:
- The stated 400ft range is for open areas. Walls, metal structures, and other obstacles can significantly reduce the effective range. Try repositioning the receiver or sensor.
- Strong electromagnetic interference from other devices may affect performance.
- Sensor does not work on metal doors:
- Metal surfaces can interfere with the magnetic field required for the sensor to function correctly. If possible, mount the sensor on a non-metal part of the door frame or use spacers to create a small air gap between the sensor and the metal surface.
8. Specifikationer
| Modelnummer | M508+D7 |
| Sensor Technology | Kontakt sensor |
| Arbejdsområde | Op til 400 meter (åbent område) |
| Dørklokkeindstillinger | 52 |
| Lydstyrkeniveauer | 5 (0-110 dB) |
| Modtager strømkilde | AC Powered (Plug-in) |
| Sensor Power Source | 1 x AAA alkalisk batteri |
| Sensor Activation Distance | 0.6 tommer (ca. 1.5 cm) |
| Produktdimensioner | 4.5 x 2.76 x 2.37 cm (modtager) |
| Varens vægt | 5 g (samlet pakke) |
| Monteringstype | Vægmontering (klæbende eller med skruer) |
9. Garanti og support
9.1 Garantioplysninger
Specific warranty details for the SECRUI M508+D7 Wireless Door Chime are not provided in this manual. Please refer to the product packaging or contact SECRUI customer support for warranty terms and conditions.
9.2 Kundesupport
For technical assistance, troubleshooting, or any questions regarding your SECRUI product, please visit the official SECRUI store or contact their customer service department. You can find more information at the SECRUI Amazon Store.
10. Yderligere ressourcer
10.1 Produkt overview Video
Video: An official product video from SECRUI demonstrating the features and functionality of the Wireless Door Alarm Contact Sensor.