
1. Introduktion
Thank you for choosing the Banda Audioparts Viking 8000.1 Car Audio Amplifier. This high-performance Class D amplifier is designed to deliver powerful sound for your car audio system, offering 8000 Watts RMS at 1 Ohm. Crafted with a durable aluminum chassis and featuring advanced thermal management, the Viking 8000.1 ensures reliable operation and exceptional audio quality. This manual provides essential information for proper installation, operation, and maintenance to ensure optimal performance and longevity of your amplivligere.
2. Sikkerhedsoplysninger
Læs venligst alle sikkerhedsinstruktioner omhyggeligt, inden du installerer og bruger ampleverandør. Manglende overholdelse af disse retningslinjer kan resultere i personskade, beskadigelse af ampskade på dit køretøj.
- Professionel installation anbefales: Installation of car audio equipment can be complex. It is highly recommended that a qualified professional perform the installation to prevent damage to the amplift eller køretøj.
- Afbryd batteriet: Frakobl altid bilens negative batteripol, inden du påbegynder elektrisk arbejde, for at undgå kortslutninger.
- Korrekt ledningsføring: Use appropriate gauge wiring as specified in this manual. Incorrect wiring can lead to overheating, fire, or component failure.
- Ventilation: Sørg for amplifier is installed in a location with adequate ventilation to prevent overheating. Do not block the cooling fans or heat sinks.
- Undgå fugt: Udsæt ikke ampmodstandsdygtig over for fugt eller vand.
- Sikker montering: Monter amplåsen sikkert for at forhindre den i at løsne sig under kørsel, hvilket kan forårsage personskade eller beskadigelse.
- Lydstyrkeniveauer: Langvarig eksponering for høje lydstyrker kan forårsage høreskader. Juster lydniveauerne ansvarligt.
3. Produktet er slutview
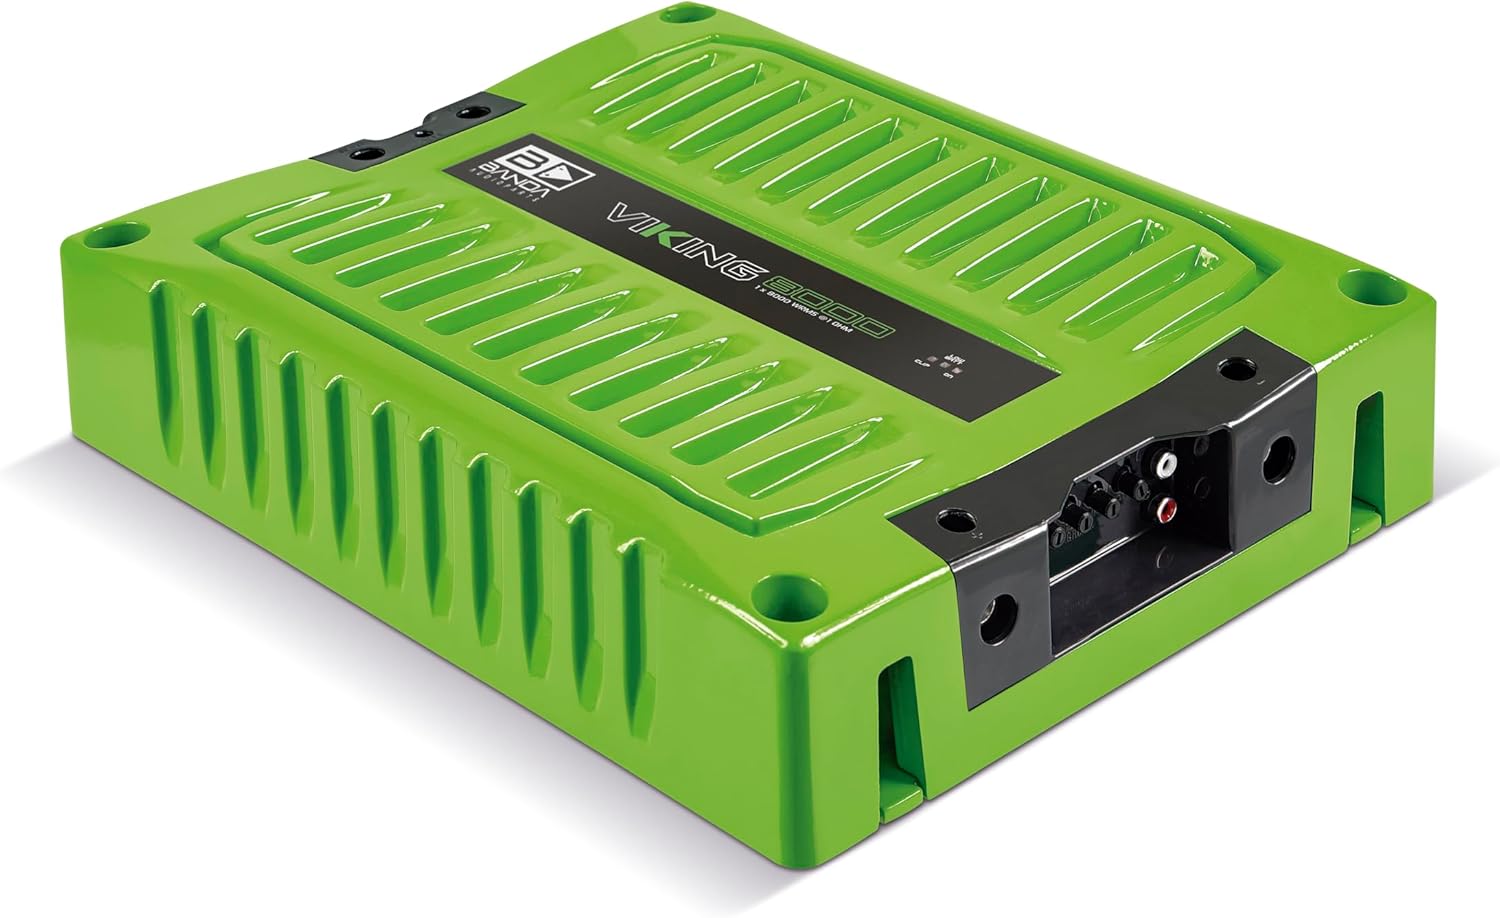
The Banda Viking 8000.1 amplifier features a robust design for high-power car audio applications. Its aluminum chassis aids in superior heat dissipation, contributing to stable performance. The amplifier includes LED indicators for power and clipping status, providing visual feedback on its operational state.

4. Opsætning og installation
Korrekt installation er afgørende for din ydeevne og sikkerhed ampFølg disse trin omhyggeligt.
4.1 Monteringssted
- Vælg et tørt, godt ventileret sted væk fra direkte sollys og varmekilder.
- Sørg for tilstrækkelig luftgennemstrømning omkring amplifier, especially near the cooling fans.
- Monter ampFastgør løfteren sikkert til en solid overflade med passende beslag.
4.2 Ledningsforbindelser
Before making any connections, ensure the vehicle's battery is disconnected.
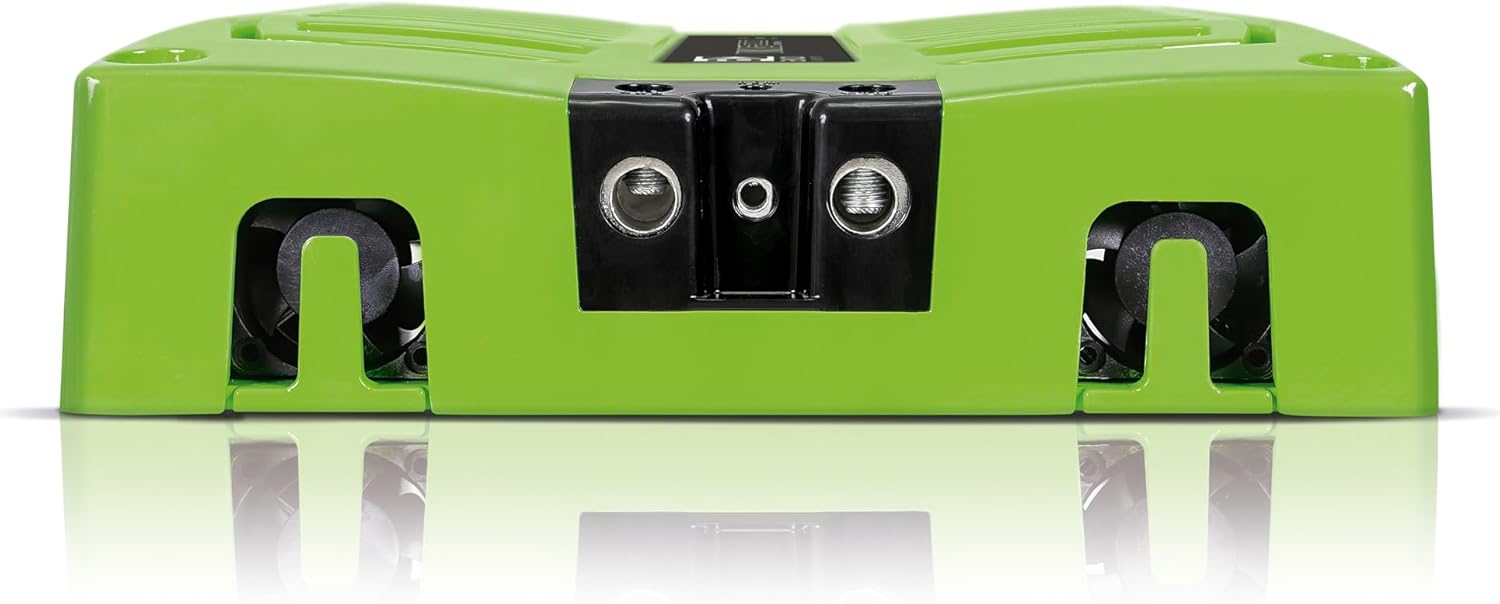
- Power Input (BATT+): Connect a 0 AWG (70mm²) power cable from the vehicle's positive battery terminal to the amplifier's BATT+ terminal. Install a fuse holder with the recommended fuse (2 x 225A) as close to the battery as possible.
- Jordforbindelse (GND): Connect a 0 AWG (70mm²) ground cable from the ampForbind GND-terminalen på forsyningen til et rent, umalet metalpunkt på køretøjets chassis. Sørg for en solid forbindelse med lav modstand.
- Fjerntænding (REM): Tilslut en fjernbetjeningsledning fra din hovedenheds fjernbetjeningsudgang til ampforsyningens REM-terminal. Denne ledning tænder amptænd og sluk for støjrelæet med din hovedenhed.
- Højttaler output: Tilslut dine højttalere til amplifier's speaker output terminals using 2 x 3 AWG (2 x 6mm²) cables. Ensure correct polarity (+ to + and - to -). The Viking 8000.1 is designed for 1 Ohm operation.

- RCA-indgang: Tilslut din hovedenheds RCA-udgang til amplifier's RCA input jacks. The amplifier features a differential input signal for improved noise rejection.
4.3 Indledende indstillinger
- Gain Control: Start with the gain control set to minimum. Gradually increase it until the desired volume is achieved without distortion. The input sensitivity ranges from 200mV to 8V.
- High-Pass Filter (Subsonic): Adjust the HPF (Subsonic) between 16 - 120Hz (12dB/octave Linkwitz-Riley) to protect subwoofers from playing frequencies below their safe operating range.
- Lavpas-crossover: Adjust the LPF between 50 - 16kHz (12dB/octave Linkwitz-Riley) to control the upper frequency limit for your speakers.
- Variabel basforstærkning: Adjust the bass boost between 30 - 80Hz with up to 12dB boost to enhance low-frequency response. Use sparingly to avoid distortion.
5. Betjeningsvejledning
Once installed and configured, operating your Banda Viking 8000.1 amplifier is straightforward.
- Tænd/sluk: De amplifier will automatically turn on when your head unit is powered on (via the REM wire) and turn off when the head unit is off.
- LED-indikatorer:
- TIL LED Lyser, når ampLifieren er tændt og fungerer normalt.
- CLIP LED: Illuminates when the audio signal is clipping (distorting). If this LED frequently lights up, reduce the gain setting or the input signal level from your head unit to prevent damage to speakers and the amplivligere.
- Lydjustering: Use your head unit's volume control for overall system volume. Fine-tune the amplifier's gain, crossover, and bass boost settings as needed to achieve your desired sound balance.
6. Vedligeholdelse
Regelmæssig vedligeholdelse er med til at sikre din bils levetid og optimale ydeevne. amplivligere.
- Rensning: Tør regelmæssigt af amplifier's exterior with a soft, dry cloth. Do not use harsh chemicals or abrasive cleaners. Ensure ventilation openings are free from dust and debris.
- Tilslutningstjek: Annually, inspect all wiring connections (power, ground, remote, speaker, RCA) to ensure they are secure and free from corrosion. Loose connections can cause performance issues or damage.
- Ventilation: Sørg for amplifier's cooling fans and heat sinks remain unobstructed. Proper airflow is critical for thermal management.
7. Fejlfinding
Hvis du oplever problemer med din amplifier, refer to the following troubleshooting guide before seeking professional assistance.
| Problem | Mulig årsag | Løsning |
|---|---|---|
| Ingen strøm / Amplifer tænder ikke |
|
|
| Ingen lydudgang |
|
|
| Forvrænget lyd |
|
|
| AmpOverophedning af væske |
|
|
8. Tekniske specifikationer
Below are the detailed technical specifications for the Banda Viking 8000.1 amplivligere.
| Feature | Specifikation |
|---|---|
| Modelnummer | VIK8000.1 |
| Driftsklasse | Klasse D |
| Maximum Power at 12.6V @ 1 Ohm | 8000 watt RMS |
| Maximum Power at 12.6V @ 2 Ohms | 5100 watt RMS |
| Maximum Power at 14.4V @ 1 Ohm | 9000 watt RMS |
| Maximum Power at 14.4V @ 2 Ohms | 7400 watt RMS |
| Effektivitet @ 2 Ohm | 83 % |
| Effektivitet @ 1 Ohm | 77 % |
| Input bindtage | 9 - 15V (DC) |
| Indgangsimpedans | 100K ohm |
| Total harmonisk forvrængning + støj | ~3 % |
| Indgangsfølsomhed | 200mV til 8V |
| Signal-støjforhold | 80dB |
| Frekvensrespons | 16 til 16 kHz (-3dB) |
| High-Pass Filter (Subsonic) | 16 - 120Hz @ 12dB/octave Linkwitz-Riley |
| Lavpas crossover | 50 - 16kHz @ 12dB/octave Linkwitz-Riley |
| Variabel basforstærkning | 30 - 80Hz with up to 12dB boost |
| Anbefalet sikring | 2 x 225A |
| Standby aktuel trækning | ~3A |
| Maximum Current Draw (Musical Signal) | 400A |
| Sinusoidal Current | 850A |
| Minimum Recommended Power Cable | 70 mm² / 0 AWG |
| Minimum Recommended Output Cable | 2 x 6mm² / 2 x 3 AWG |
| Vægt | 6.3 kg (13.9 lbs) |
| Højde | 7.3 cm (2.8 tommer) |
| Bredde | 25.6 cm (10 tommer) |
| Dybde | 31.7 cm (12.5 tommer) |
| Chassis materiale | 100% Aluminum |
| Køling | Forced Ventilation with Micro Fans |
9. Garanti og support
For information regarding the warranty coverage for your Banda Viking 8000.1 amplifier, please refer to the warranty card included with your product or visit the official Banda Audioparts webwebsted.
If you require technical support, have questions about installation, or need assistance with troubleshooting beyond what is covered in this manual, please contact Banda Audioparts customer service through their official channels.
- Officiel Webwebsted: Banda Audioparts Store on Amazon (for generel mærkeinformation)
- Kontaktoplysninger: Refer to the product packaging or official Banda Audioparts webwebstedet for specifikke kontaktoplysninger til kundeservice.