1. Produktet er slutview & Funktioner
The NIIMBOT D110 Upgraded Version Mini Label Maker is a compact, portable Bluetooth thermal printer designed for efficient labeling in various environments, including home, office, kitchen, and school. Its lightweight design (149g) allows for easy portability, fitting into a pocket for on-the-go labeling.
- New Upgraded Design: Smaller and smarter than previous versions, offering true portability.
- Smart Label Rewinds: Features automatic paper rewind and calibration upon startup, preventing printing offset and label waste.
- Bred anvendelse: Supports label tapes up to 15mm width, suitable for diverse uses such as jar stickers, food dates, cosmetics, barcodes, name tags, cable identification, and price tags.
- Termisk udskrivning i høj kvalitet: Utilizes 203DPI direct thermal technology, eliminating the need for ink or toner. Equipped with a 1500mAh rechargeable battery for up to 4 hours of continuous printing.
- Easy to Use with App: Compatible with iOS & Android phones via Bluetooth. The "NIIMBOT" app offers multiple creative functions and templates (fonts, texts, symbols, icons, borders, logos) for customized label creation.
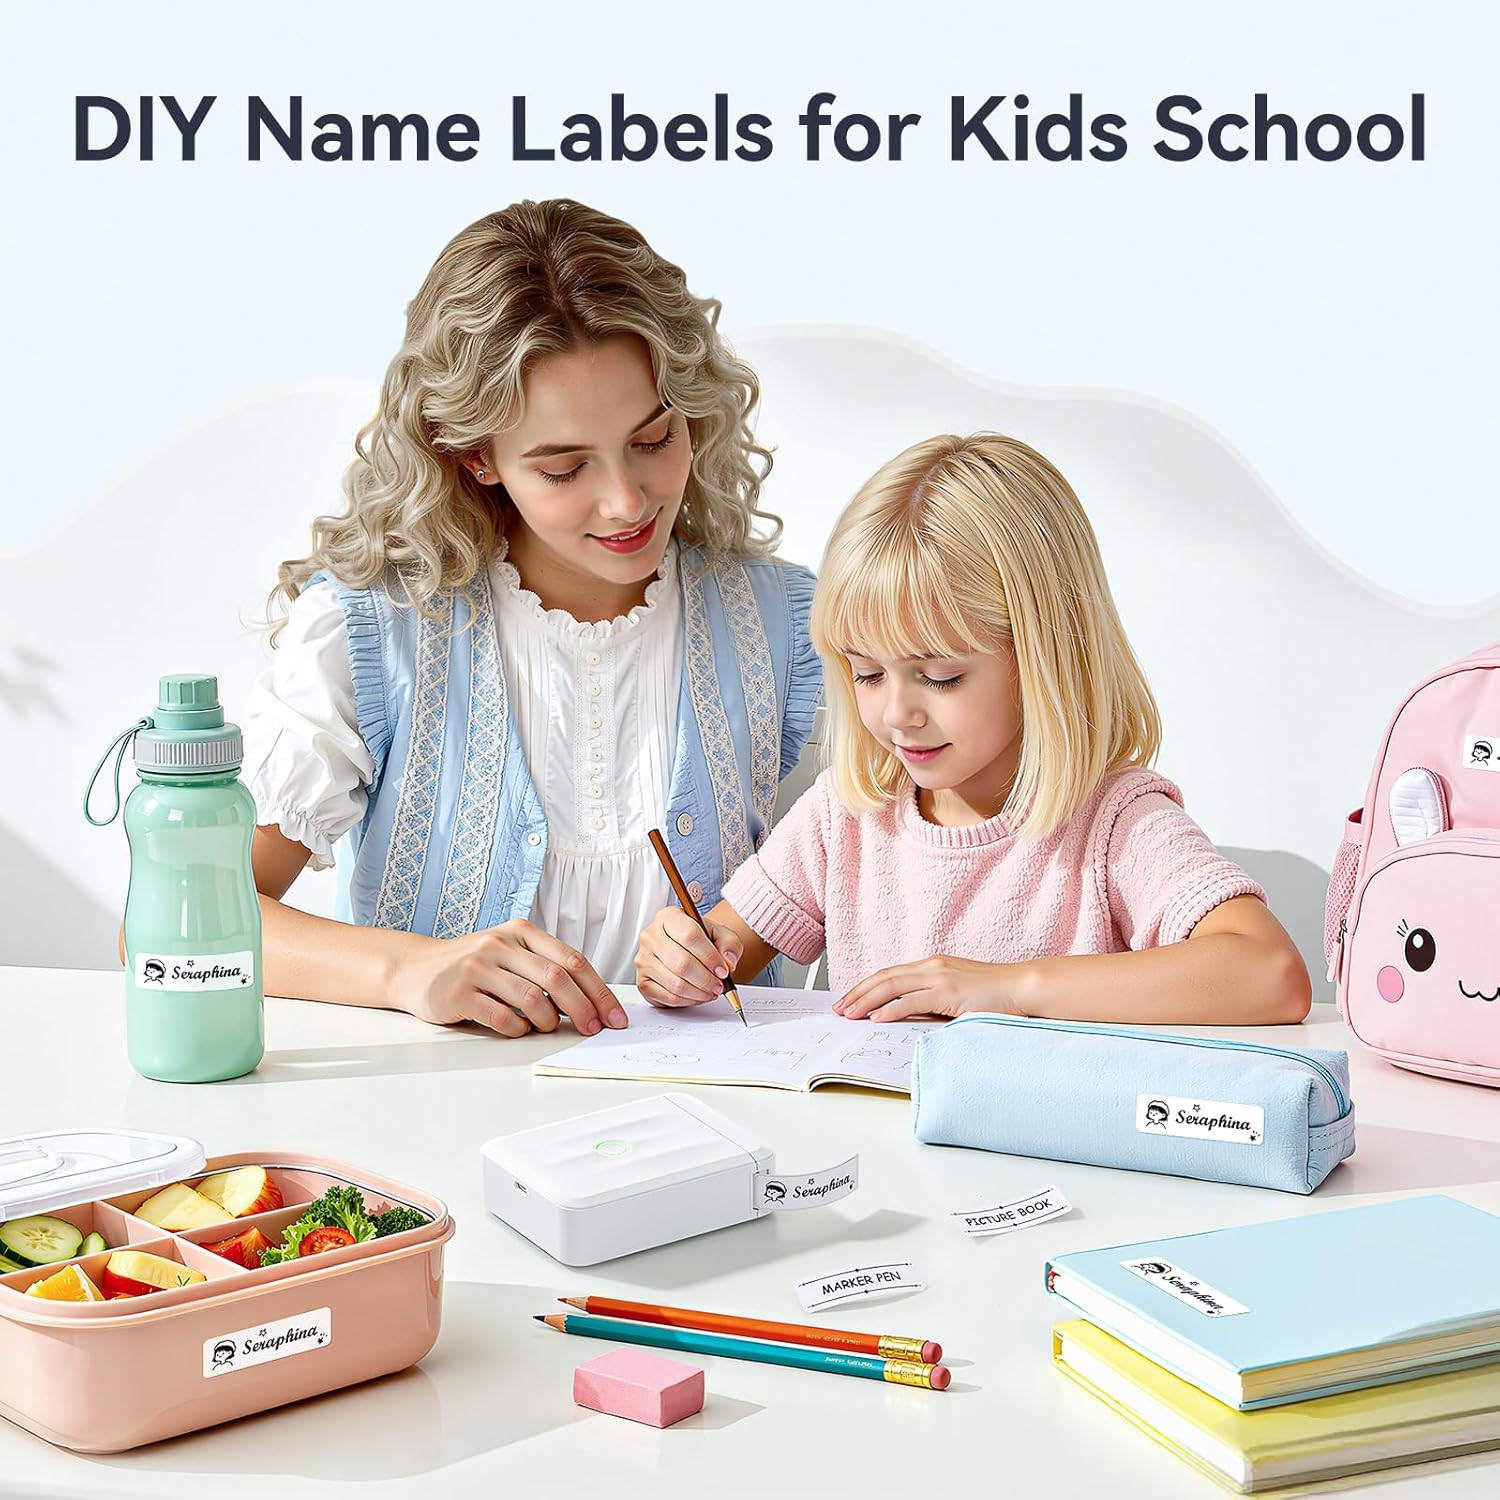
Image: A child and adult labeling school supplies with the NIIMBOT D110 Mini Label Maker.

Image: The NIIMBOT D110 Mini Label Maker used for various home organization tasks.
2. Pakkens indhold
Bekræft at alle varer er til stede i din pakke:
- 1 × NIIMBOT D110 Mini Label Maker
- 1 × Roll label tape (12×40mm, pre-installed inside the machine)
- 1 × Type-C-kabel
- 1 × Brugervejledning

Image: All items included in the NIIMBOT D110 Mini Label Maker package: the printer, a roll of label tape, a Type-C cable, and a user manual.
3. Opsætning
3.1 Opladning af enheden
Before first use, fully charge your NIIMBOT D110 Label Maker using the provided Type-C cable. The device features a 1500mAh rechargeable battery.
3.2 App Download & Installation
Download the official "NIIMBOT" app from your device's app store:
- For iOS devices: Search "NIIMBOT" in the App Store.
- For Android devices: Search "NIIMBOT" in Google Play.
3.3 Ilægning af etiketbånd
- Slide the 'OPEN' switch to open the label compartment cover.
- Insert the label roll with the printing side facing down. Ensure the label is fed through the slot.
- Close the cover firmly until it clicks into place. The printer will automatically calibrate the label position.
Vigtig: Do not tear or destroy the printing sensor chip on the side of the label roll, as this will affect printing quality and functionality.
3.4 Bluetooth-forbindelse
- Long press the power button on the label maker to turn it on. The indicator light will illuminate.
- Open the "NIIMBOT" app on your smartphone.
- In the app, navigate to the device connection interface (usually indicated by a Bluetooth icon or a 'Connect' button).
- Select your NIIMBOT D110 from the list of available devices. The indicator light will turn solid green upon successful connection.

Image: A visual guide showing the three main steps for using the NIIMBOT D110: downloading the app, connecting via Bluetooth, and editing/printing labels.

Image: Diagram explaining the NIIMBOT D110's indicator light statuses: Blue (Powered on, not connected/Firmware upgrading), Green (Bluetooth connected/Printing), Red (Device abnormality).
4. Betjeningsvejledning
4.1 Oprettelse af etiketter i appen
The NIIMBOT app offers a user-friendly interface for designing your labels:
- Tekstinput: Easily type and customize text with various fonts, sizes, and styles.
- Ikoner og symboler: Choose from over 1,500 icons and symbols to enhance your labels.
- Borders & Templates: Utilize over 100 borders and 160+ templates for quick and creative designs.
- Særlige funktioner: Add barcodes, QR codes, images, and even use AI design features.
- Dato og tid: Automatically add production dates or other time-related information.

Image: Screenshot of the NIIMBOT app showcasing multiple creative templates, fonts, icons, and borders available for label design.

Image: Screenshots illustrating advanced app features like image recognition, table printing, text recognition, and scan code recognition for labels.
4.2 Udskrivning af etiketter
Når dit etiketdesign er færdigt:
- Tryk på knappen 'Udskriv' i appen.
- Adjust print settings such as 'Print Copy' (number of labels) and 'Print Density' (darkness).
- Confirm your settings and tap 'Print' again to send the job to the label maker.
Video: Official NIIMBOT HK video demonstrating the Mini D110 Upgraded Version Label Maker for home use, including app interaction and printing.
4.3 Applying Labels
Carefully tear off the printed label from the printer's output slot. The labels are designed for easy peeling and strong adhesion without leaving residue when removed.

Billede: Eksamples of various label styles and applications, including white, patterned, colored, transparent, and cable labels.
5. Vedligeholdelse
5.1 Rengøring af printhovedet
For at opretholde optimal udskriftskvalitet skal du rengøre printhovedet med jævne mellemrum. Brug en blød, fnugfri klud, der let tørres af.ampened with isopropyl alcohol. Gently wipe the print head surface.
5.2 Opbevaring af etiketter
Store label rolls in a cool, dry place away from direct sunlight and extreme temperatures to preserve their quality and adhesive properties.
5.3 Pleje af batterier
For long-term battery health, avoid fully discharging the device frequently. Charge the device regularly, even if not in constant use.
5.4 Sensor Chip Warning
As mentioned in setup, do not remove or damage the RFID sensor chip on the side of the label roll. This chip is crucial for the printer to recognize label type and size, ensuring proper print effect and quality.

Image: Illustration highlighting the RFID chip technology on NIIMBOT label tape and a warning not to damage it.
6. Fejlfinding
6.1 Printing Offset
The D110 features automatic paper rewind positioning. If you experience printing offset, ensure the label roll is correctly installed and the printer has completed its automatic calibration upon startup.
6.2 Forbindelsesproblemer
If the printer fails to connect via Bluetooth:
- Ensure the label maker is powered on and within range of your smartphone.
- Check your phone's Bluetooth settings to confirm it's enabled and the printer is paired.
- Restart both the label maker and your smartphone, then try connecting again.
6.3 Dårlig udskriftskvalitet
If labels are faint or unclear:
- Check the 'Print Density' setting in the app and increase it if necessary.
- Ensure the label roll is correctly installed and the sensor chip is not damaged.
- Rengør printhovedet som beskrevet i afsnittet Vedligeholdelse.
7. Specifikationer
| Feature | Detalje |
|---|---|
| Mærke | NIIMBOT |
| Modelnummer | D110M |
| Forbindelsesteknologi | Bluetooth |
| Udskrivningsteknologi | Termisk |
| Printer output | Monokrom |
| Max Print Speed Monokrom | 40.0 mm/s |
| Opløsning | 203 x 203 DPI |
| Varens vægt | 149 gram |
| Produktmål (D x B x H) | 3.86" D x 2.99" B x 1.18" H |
| Batterikapacitet | 1500mAh |
| Kompatible enheder | Smartphones (iOS og Android) |
| Hardware-interface | USB Type C |
8. Garanti og support
The NIIMBOT D110 Mini Label Maker comes with a 2 års begrænset garanti from the manufacturer, NIIMBOT. For support or warranty claims, please contact NIIMBOT customer service directly.