
Geemax DDXDC002
Geemax DDXDC002 Electric Fat Tire Bike User Manual
Model: DDXDC002
1. Introduktion og sikkerhedsretningslinjer
This manual provides essential information for the safe operation, assembly, and maintenance of your Geemax DDXDC002 Electric Fat Tire Bike. Please read it thoroughly before your first ride and keep it for future reference. Failure to follow these instructions can result in serious injury or product damage.
Generelle sikkerhedsforanstaltninger:
- Brug altid hjelm og passende sikkerhedsudstyr, når du kører.
- Sæt dig bekendt med lokale færdselslove og -regler.
- Udfør en inspektion før hver brug, hvor du kontrollerer bremser, dæktryk og batteriopladning.
- Rid ikke under påvirkning af alkohol eller stoffer.
- Avoid riding in adverse weather conditions or on excessively rough terrain unless specifically designed for it.
- Ensure all quick releases and fasteners are securely tightened before riding.

Image: The Geemax DDXDC002 Electric Fat Tire Bike, showcasing dens robuste design og tykke dæk.
2. Pakkens indhold
Ved udpakning skal du kontrollere, at alle følgende varer er inkluderet i din pakke:
- Geemax DDXDC002 Electric Fat Tire Bike (90% assembled)
- LED forlygte
- Værktøjssæt
- Brugervejledning (dette dokument)
- Batterioplader
3. Samling og indledende opsætning
Your Geemax Electric Bike arrives approximately 90% assembled. The following steps detail the completion of the assembly process. For detailed visual guidance, please refer to the included installation video guide.
Monteringstrin:
- Monter forhjulet: Securely attach the front wheel to the fork using the quick-release mechanism or axle nuts provided. Ensure the brake rotor is correctly aligned with the caliper.
- Fastgør styret: Insert the handlebar stem into the fork's steerer tube and tighten the bolts. Adjust the handlebar angle for comfortable riding.
- Monter pedalerne: Identificér venstre (V) og højre (H) pedal. Den venstre pedal strammes mod uret, og den højre pedal strammes med uret. Påfør en lille smule fedt på gevindene før montering.
- Monter sadelpinden: Insert the seat post into the frame's seat tube. Adjust the seat height for comfortable leg extension while pedaling and secure it with the quick-release lever.
- Oplad batteriet: Before first use, fully charge the battery. Refer to the 'Battery Charging' section for instructions.
- Tjek før kørsel: Before your first ride, double-check all bolts, quick releases, and connections to ensure they are secure. Verify brake functionality and tire pressure.

Image: Diagram illustrating the dimensions (A: 188cm/74in, B: 91cm/35.8in, C: 108cm/42.5in, D: 72cm/28.3in), load capacity (Max. 350 lbs), and recommended rider height (5'2" - 6'4" Max) for the Geemax Electric Bike.
4. Betjening af din elcykel
Installation og fjernelse af batteri:
The Geemax DDXDC002 features a removable battery for convenient charging and security.
- Installation: Align the battery with the frame mount and slide it in until it clicks securely into place. Use the key to lock it.
- Fjernelse: Unlock the battery with the key, then gently slide it out of the frame mount.

Image: Close-up of the Geemax Electric Bike's removable 36V 10.4Ah lithium battery, highlighting its accessibility and capacity for extended range.
Billede: Detaljeret view showing the battery on/off switch and the mechanism for removing the battery from the Geemax Electric Bike frame.
Batteriopladning:
Connect the charger to the battery charging port, then plug the charger into a standard wall outlet. The indicator light on the charger will show the charging status (typically red for charging, green for fully charged). Do not overcharge the battery. Unplug the charger once charging is complete.
Driftstilstande:
Your Geemax Electric Bike offers four distinct operating modes, selectable via the LCD display:
- 1. Pure Electric Mode: The bike is propelled solely by the motor, without pedal assistance.
- 2. Pedalhjælpstilstand: Motoren yder assistance, når du træder i pedalerne, hvilket gør kørsel lettere, især på stigninger.
- 3. Walking Mode: Designed to assist you when pushing the bike, particularly with heavy loads. Activate by long-pressing the "-" button on the LCD display.
- 4. Classic Bike Mode: The electric system is off, and the bike operates like a traditional bicycle, powered entirely by pedaling.

Image: An illustration of the Geemax Electric Bike's LCD display, showing controls for speed, battery level, and the four working modes: Pure Electric, Pedal-Assist, Walking, and Classic Bike. It also indicates how to activate the LED headlight and walking mode.
LCD-skærmfunktioner:
The LCD display provides real-time information and control over your bike's electric functions:
- Power knap: Turns the electric system on/off.
- "+"-knap: Increases assist level. Long press to turn on the LED Headlight.
- "-"-knap: Decreases assist level. Long press to activate Walking Mode.
- Informationsdisplay: Shows current speed, battery level, assist level, and trip distance.
Gearskift:
Your bike is equipped with a 21-speed gear system. Use the thumb shifters on the handlebars to change gears according to terrain and desired effort. Shift smoothly to avoid damage to the drivetrain.
Bremsesystem:
The bike features front and rear disc brakes for reliable stopping power. Always apply both brakes simultaneously for balanced and effective braking. Test brakes before each ride.
Belysning:
The integrated LED headlight and taillight enhance visibility. Turn on the headlight by long-pressing the "+" button on the LCD display for night riding.

Image: A collage of detailed features of the Geemax Electric Bike, including the bright LED headlight, IPX5 water resistance, battery on/off switch, kickstand, comfortable seat, and front disc brake.

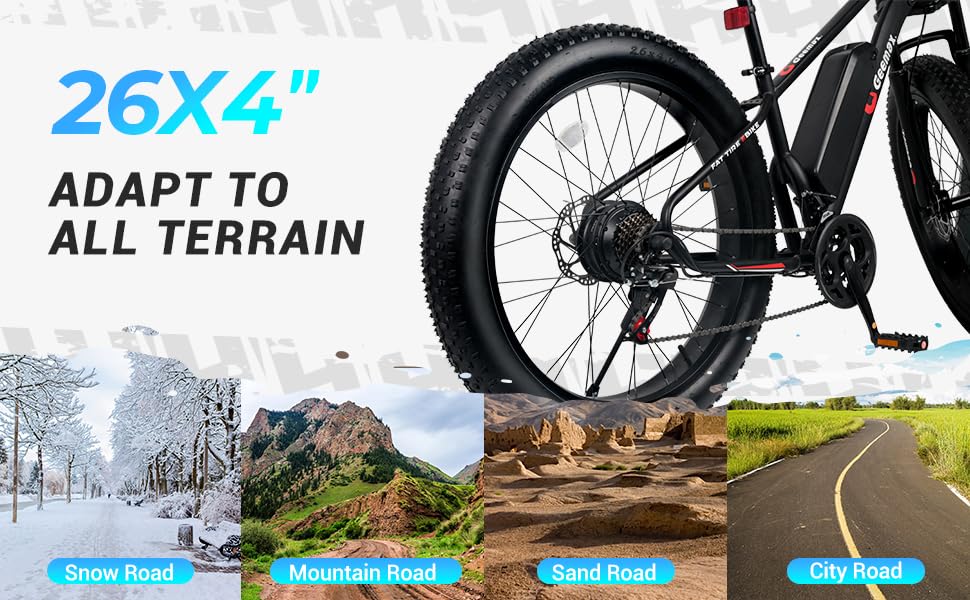
Image: A rider on the Geemax Electric Bike with 26x4 inch fat tires, illustrating its capability on various terrains such as snow, mountain roads, sand roads, and city roads.
5. Vedligeholdelse
Regelmæssig vedligeholdelse sikrer din elcykels levetid og sikre drift.
Generel rengøring:
Rengør din cykel regelmæssigt med reklameamp cloth and mild soap. Avoid high-pressure washing directly on electrical components, motor, or battery.
Batteripleje:
- Oplad batteriet helt efter hver tur.
- If storing the bike for an extended period, charge the battery to 50-70% and recharge every 1-2 months.
- Opbevar batteriet et køligt, tørt sted, væk fra direkte sollys og ekstreme temperaturer.
Dæk:
Check tire pressure before each ride. The recommended pressure is typically indicated on the tire sidewall. Inspect tires for wear, punctures, or damage.
Bremser:
Regularly check brake pads for wear and replace them when necessary. Ensure brake levers are firm and responsive. Adjust brake cables or hydraulic fluid if needed.
Kæde og drivlinje:
Keep the chain clean and lubricated. Inspect gears and derailleur for proper alignment and function. Adjust as needed to ensure smooth shifting.
Fastgørelsesmidler:
Periodically check all bolts, nuts, and quick releases for tightness. Loose fasteners can lead to component failure or accidents.
6. Fejlfinding
This section addresses common issues you might encounter with your Geemax Electric Bike.
| Problem | Mulig årsag | Løsning |
|---|---|---|
| Cyklen tænder ikke | Battery not charged; Battery not properly installed; Power cable loose; Display issue | Charge battery; Reinstall battery securely; Check all connections; Contact support if display is faulty |
| Motoren hjælper ikke | Assist level set to 0; Battery low; Motor connection loose; Sensor issue | Increase assist level on display; Charge battery; Check motor cable connections; Contact support |
| Kort batterirækkevidde | Under-inflated tires; Riding uphill frequently; Heavy load; Cold weather; Old battery | Inflate tires to recommended pressure; Use lower assist levels; Reduce load; Battery performance decreases in cold; Consider battery replacement if very old |
| Bremserne føles svage | Worn brake pads; Loose brake cable; Air in hydraulic system (disc brakes) | Replace brake pads; Adjust brake cable tension; Bleed hydraulic brakes (professional service recommended) |
| Gearskiftet går ikke jævnt | Dirty or unlubricated chain; Misaligned derailleur; Damaged shifter cable | Clean and lubricate chain; Adjust derailleur (refer to bike repair guide); Replace shifter cable |
7. Specifikationer
Detailed technical specifications for the Geemax DDXDC002 Electric Fat Tire Bike:
| Feature | Detalje |
|---|---|
| Modelnavn | DDXDC002 |
| Type cykel | Elcykel, Mountainbike |
| Motor | 350W Brushless DC Motor (Peak 500W) |
| Batteri | 36V 10.4Ah UL Certified Lithium Battery |
| Assist Range | Up to 35 miles (56 km) on a single charge |
| Ebike Range | Up to 20 miles (32 km) on a single charge |
| Tophastighed | 20 mph (32 km/t) |
| Vægtgrænse | Op til 350 lbs (158 kg) |
| Rammemateriale | Durable Carbon Steel |
| Dimensioner (LxBxH) | 188 x 81.3 x 108 cm (74 x 32 x 42.5 tommer) |
| Varens vægt | 29.5 kg (65 lbs) |
| Dækstørrelse | 26" x 4" fede dæk |
| Gear | 21-trins gearsystem |
| Bremser | Front og bageste skivebremser |
| Affjedring | Front Suspension Fork (Lockable) |
| Belysning | Integrated LED Headlight and Taillight |
| Vandmodstand | IPX5 (as indicated in product images) |

Image: An illustration of the Geemax Electric Bike's 36V 500W front hub brushless motor, highlighting its internal components and mentioning a 25 MPH top speed and 12 months warranty.
8. Garanti og support
Garantioplysninger:
Your Geemax DDXDC002 Electric Fat Tire Bike typically comes with a 12 måneders garanti covering manufacturing defects. Please retain your proof of purchase for warranty claims. Specific warranty terms and conditions may vary; refer to your purchase documentation for full details.
Kundesupport:
For technical assistance, warranty claims, or any questions regarding your Geemax Electric Bike, please contact the retailer or manufacturer's customer service department. Contact information can usually be found on the product packaging or the official Geemax webwebsted.
Ask a question about this manual
Ask about setup, troubleshooting, compatibility, parts, safety, or missing instructions. Manuals+ will review the question and use this page’s manual context to help answer it.