1. Vigtige sikkerhedsoplysninger
Please read and understand all instructions before installing or operating this fixture. Failure to follow these instructions may result in electric shock, fire, or other hazards that could cause personal injury or property damage.
- ADVARSEL: Risiko for elektrisk stød. Afbryd strømmen ved sikringen eller afbryderen før installation eller service.
- ADVARSEL: Brandfare. Hold brandbare materialer væk fraamp.
- This fixture is intended for indoor use only. Do not use in wet locations or where directly exposed to water.
- Sørg for, at forsyningen voltage is compatible with the fixture's requirements (120V-277V).
- Alle ledningsforbindelser skal udføres i overensstemmelse med lokale og nationale el-forskrifter. Hvis du er usikker på ledningsføringen, skal du kontakte en kvalificeret elektriker.
- Forsøg ikke at ændre eller adskille armaturet. Der er ingen dele indeni, som kan serviceres af brugeren.
2. Hvad er der i æsken
Kontroller, at alle komponenter er til stede, før installationen påbegyndes:
- LED Shop Light Fixture(s)
- Monteringsudstyr (skruer, ankre)
- Linking Cables (1.5" and 8" for daisy-chaining)
- Trådmøtrikker
3. Specifikationer
| Feature | Specifikation |
|---|---|
| Mærke | Sunco belysning |
| Modelnavn | LED Shop Light, 4ft Wraparound, Prismatic Lens, 8.5 Inch |
| Dimensioner (L x B x H) | 48 cm L x 8.58 cm B x 2.56 cm H |
| Wattage | 60 watt |
| Lysstyrke | 7200 lumen |
| Effektivitet | 120 LM/W |
| Farvetemperatur (CCT) | Valgbar: 4000K, 5000K, 6000K |
| Voltage | 120V-277V |
| Dæmpbar | Nej (ikke-dæmpbar) |
| Materiale | Alloy Steel, Polycarbonate |
| Monteringstype | Ceiling Mount (Flush Mount) |
| Særlige funktioner | Linkable, Wide Beam Angle (110°) |
| Certificeringer | ETL, FCC, RoHS |
| Gennemsnitligt liv | 50,000 timer |
The fixture features a durable build with an impact-resistant prismatic lens for wide and consistent light dispersion.

This image illustrates key features including impact resistance, the prismatic lens design, non-dimmable functionality, and the wide voltage compatibility of 120-277V.
4. Opsætning og installation
Follow these steps for proper installation. Ensure power is disconnected before starting.
4.1. Forbered til installation
- Sluk for strømmen: Locate the circuit breaker controlling the installation area and turn off the power.
- Remove Diffuser: Gently remove the prismatic diffuser from the lamp base to access the internal components.
- Vælg farvetemperatur (CCT): Before mounting, locate the CCT switch inside the fixture. Select your desired color temperature (4000K, 5000K, or 6000K). This setting cannot be changed easily after installation.

This image shows the internal CCT switch, allowing selection between 4000K, 5000K, and 6000K before installation.
4.2. Montering af armaturet
The fixture is designed for flush mounting to a ceiling or surface. It includes keyhole slots for easy installation.
- Marker monteringspunkter: Hold the fixture in the desired mounting location and mark the positions for the mounting screws. Ensure these align with a junction box or suitable support structure.
- Installer monteringshardware: Drill pilot holes if necessary and install the provided mounting screws, leaving a small gap for the fixture to slide onto.
- Forbered ledningsføring: If connecting to a junction box, knock out the appropriate punch hole on the fixture's housing.

This diagram illustrates the three main steps for installation: securing the housing, connecting electrical wires, and attaching the light fixture.
4.3. Elektrisk tilslutning
- Tilslut ledninger: Using the provided wire nuts, connect the fixture's wires to the supply wires: Live (black) to Live, Neutral (white) to Neutral, and Ground (yellow/green) to Ground. Ensure all connections are secure.
- Tuck-ledninger: Carefully tuck all wires and wire nuts into the junction box or fixture housing.
4.4. Linking Multiple Fixtures (Daisy Chain)
This fixture supports daisy-chaining to extend lighting coverage. Use the provided linking cables.
- Connect Linking Cable: Insert one end of a linking cable into the designated port on the first fixture and the other end into the port on the next fixture.
- Sikre forbindelser: Ensure linking cables are securely connected and properly routed.
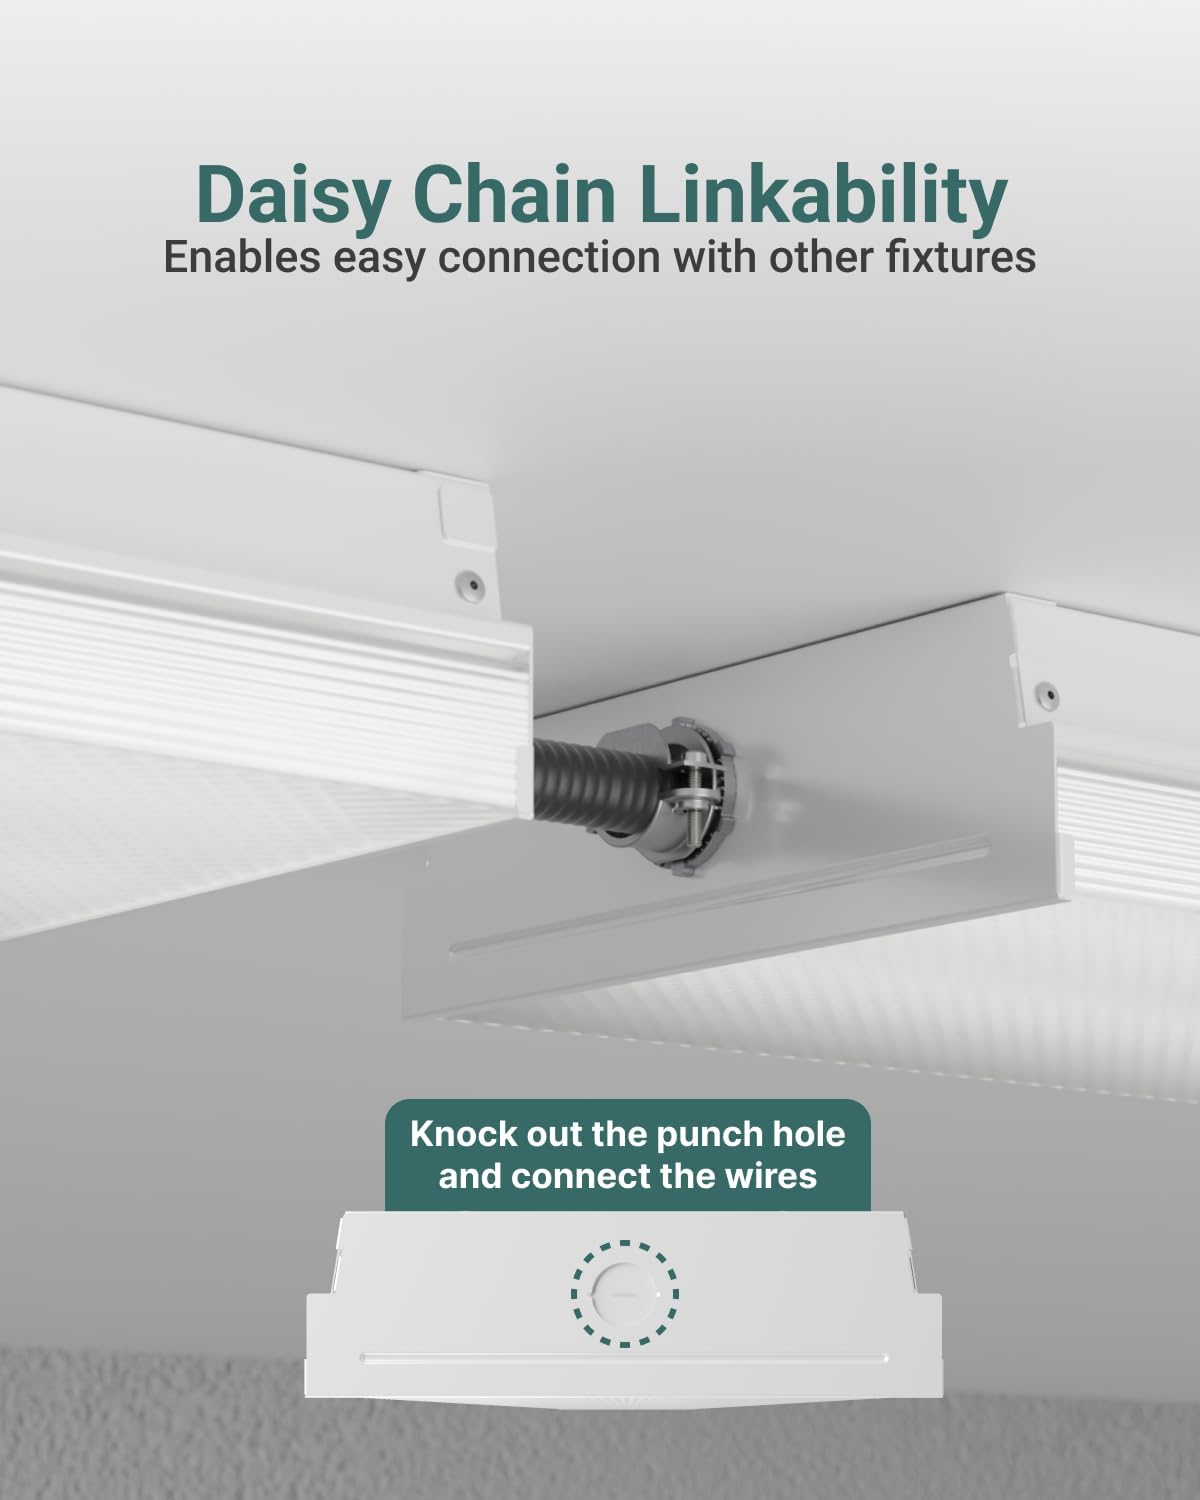
This image demonstrates how to daisy-chain multiple fixtures using the linking cables and highlights the knockout punch hole for electrical connections.
4.5. Sidste trin
- Reattach Diffuser: Align one end of the diffuser with the aluminum base and push it into place until it snaps securely.
- Gendan strøm: Turn the circuit breaker back on to restore power to the fixture.
5. Betjeningsvejledning
The Sunco Lighting LED Shop Light is designed for straightforward operation once installed.
5.1. Valg af farvetemperatur (CCT)
This fixture features a selectable color temperature (CCT) switch, allowing you to choose between 4000K (Cool White), 5000K (Daylight), and 6000K (Bright White) to suit your preference or application. The CCT switch is located inside the fixture and must be set during installation before the diffuser is reattached.
- 4000K: Provides a neutral white light, suitable for offices or general workspaces.
- 5000K: Offers a bright, crisp daylight-like illumination, ideal for tasks requiring high visibility.
- 6000K: Delivers a very bright, cool white light, often preferred for industrial settings or areas needing maximum brightness.

This image displays the internal components and wiring, emphasizing the high efficiency of the LED fixture operating within a 120-277V range.
5.2. Tænd/sluk
The fixture is non-dimmable and operates via a standard wall switch connected to its power supply. Simply toggle the wall switch to turn the light on or off.
6. Vedligeholdelse
The Sunco Lighting LED Shop Light requires minimal maintenance. Always ensure power is disconnected before performing any maintenance.
- Rensning: Tør armaturets yderside af med en blød, tør eller let fugtet klud.amp cloth. Do not use harsh chemicals or abrasive cleaners, as these can damage the finish or lens.
- Inspektion: Undersøg regelmæssigt armaturet for tegn på skader, løse ledninger eller slid. Hvis der findes problemer, skal strømmen afbrydes og en kvalificeret elektriker kontaktes.
- Ingen pæreudskiftning: This fixture uses integrated LEDs, meaning there are no bulbs to replace. The LEDs are designed for a long lifespan of 50,000 hours.
7. Fejlfinding
If you experience issues with your LED Shop Light, refer to the following common troubleshooting steps:
- Lyset tænder ikke:
- Tjek afbryderen for at sikre, at strømmen er tændt.
- Verify all wire connections are secure and correct.
- Sørg for, at vægkontakten er i ON-positionen.
- Lys flimrer:
- Confirm the fixture is not connected to a dimmer switch, as it is non-dimmable.
- Tjek for løse ledningsforbindelser.
- Sørg for, at forsyningen voltage er stabil og inden for det angivne område.
- Forkert farvetemperatur:
- The CCT switch must be set before installation. If the diffuser is already installed, carefully remove it to access and adjust the switch.
If these steps do not resolve the issue, contact Sunco Lighting customer support for assistance.
8. Garanti og support
Sunco Lighting står inde for kvaliteten af sine produkter.
- Garanti: This product is backed by a 3-Year Warranty. Please refer to the official Sunco Lighting webwebstedet eller din købsdokumentation for at få alle garantioplysninger og vilkår.
- Kundesupport: For technical assistance, troubleshooting, or warranty claims, please contact Sunco Lighting customer support.