
Indledning
Welcome to the user manual for the ZEBRONICS H310 D4M2 Micro-ATX Motherboard. This guide provides essential information for the proper installation, configuration, and maintenance of your motherboard. Please read these instructions carefully before beginning the installation process to ensure correct setup and optimal performance.
Produkt overview
The ZEBRONICS H310 D4M2 is a Micro-ATX motherboard designed for Intel 8th and 9th Generation processors using the LGA 1151 socket. It supports DDR4 memory, features an NVMe M.2 slot, 5.1 channel audio, and a variety of connectivity options including USB 3.0, HDMI, and DisplayPort.
Nøglefunktioner
- DDR4 Memory Support: Compatible with memory modules offering speeds between 2133MHz and 2666MHz.
- LGA 1151 Socket: Designed to support Intel 8th & 9th Generation Processors.
- 5.1 Channel Audio: Provides an immersive audio experience.
- LAN Support: Ensures fast and reliable internet connectivity with speeds of 10/100 Mbps.
- PCIe 16x Slot: Facilitates seamless data transfer for graphics cards and other expansion cards.
- 3 SATA Ports: Allows connection of multiple storage devices.
- SATA M.2 Slot: Supports M.2 (NVMe and NGFF) drives for high-speed storage.
- USB 3.0 Ports: Offers swifter and more effective connectivity for external devices.
Bundkortlayout

This diagram illustrates the main components and connectors on the ZEBRONICS H310 D4M2 motherboard. Refer to this layout for component identification during installation.

Visual representation of the motherboard's core features including DDR4 support, M.2 slot, H310 chipset, and PCIe x16.
Opsætning og installation
Before starting, ensure your system is powered off and disconnected from the power source. Handle the motherboard by its edges to avoid static discharge. It is recommended to wear an anti-static wrist strap.
CPU-installation
- Find LGA 1151 CPU-sokkelen på bundkortet.
- Åbn CPU-sokkelhåndtaget, og løft metalpladen.
- Carefully align the CPU with the socket, matching the golden triangle indicator on the CPU to the corresponding mark on the socket. Do not force the CPU into the socket; it should sit naturally.
- Close the load plate and secure it by pushing down the lever until it clicks into place.
- Apply a thin, even layer of thermal paste to the CPU's integrated heat spreader (IHS) and install the CPU cooler according to its manufacturer's instructions.
RAM (Memory) Installation
- Find de to DDR4 DIMM-pladser på bundkortet.
- Open the clips at both ends of the DIMM slot by pushing them outwards.
- Juster hukommelsesmodulet med stikket, og sørg for, at hakket på modulet passer til nøglen i stikket.
- Tryk godt ned i begge ender af hukommelsesmodulet, indtil klemmerne klikker på plads og fastgør modulet.
Installation af lagerenhed
Dette bundkort understøtter både SATA- og M.2-lagerenheder.
SATA-drev
- Connect one end of a SATA data cable to an available SATA port on the motherboard (SATA1, SATA2, or SATA3).
- Tilslut den anden ende af SATA-datakablet til din SATA-harddisk eller SSD.
- Tilslut et SATA-strømkabel fra din strømforsyning (PSU) til SATA-drevet.
M.2 Drive
- Find M.2-slottet på bundkortet.
- Insert the M.2 drive into the slot at approximately a 30-degree angle.
- Gently push down the M.2 drive and secure it with the provided screw into the standoff.

Image showing included SATA cables and I/O shield, essential for storage and case installation.
Strømforbindelser
- Connect the 24-pin ATX power connector from your PSU to the main power socket on the motherboard. Ensure it is fully seated.
- Connect the 8-pin CPU power connector (EPS 12V) from your PSU to the CPU power socket located near the CPU.
Peripheral Connections (Front Panel, USB, Audio, LAN)
Refer to the Motherboard Layout diagram in the Product Overview section for exact locations of these headers and ports.
- Connect front panel headers (Power SW, Reset SW, HDD LED, Power LED) to the corresponding pins on the motherboard's front panel header block.
- Connect front panel USB 2.0 and USB 3.0 headers from your PC case to the respective headers on the motherboard.
- Connect the front panel audio header from your PC case to the motherboard's audio header.
- Install the I/O shield into your PC case's rear opening before mounting the motherboard.
- Connect external peripherals such as keyboard, mouse, monitor, and network cable to the rear I/O ports.
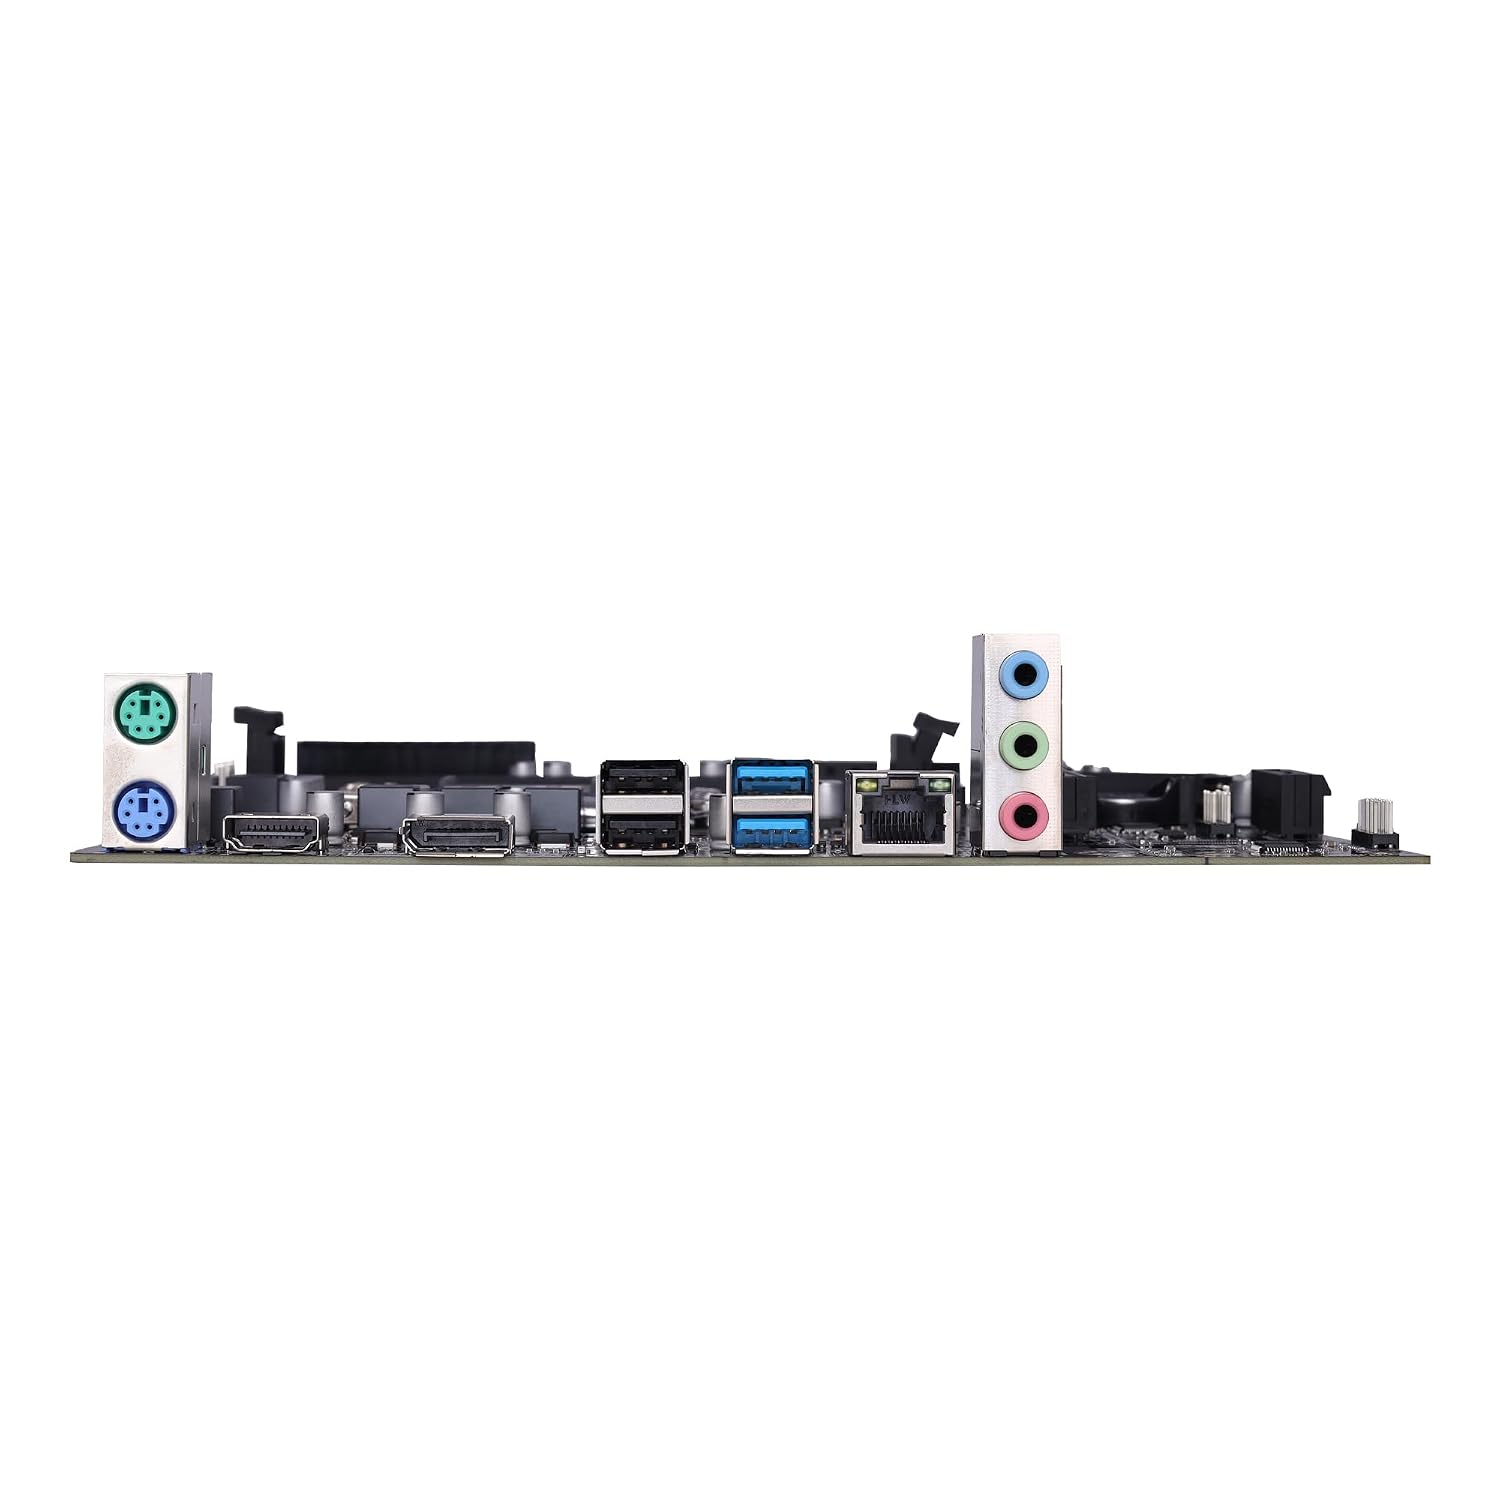
This image displays the rear input/output ports available on the motherboard, including USB, video outputs (HDMI, DP), and audio jacks.
Operativsystem og drivere
Første opstart og BIOS-opsætning
After assembling your system, power it on. During the initial startup sequence, press the designated key (commonly DEL or F2) repeatedly to enter the BIOS/UEFI setup utility. Here you can configure boot order, system time, and other advanced settings necessary for your operating system installation.
Driver installation
For optimal performance and stability, it is crucial to install all necessary drivers after installing your operating system.
- Use the included driver CD (if applicable) to install chipset, audio, LAN, and other essential drivers.
- Alternatively, download the latest drivers from the official ZEBRONICS website by navigating to the support section and searching for the H310 D4M2 model.
Opretholdelse
Regelmæssig vedligeholdelse er med til at sikre lang levetid og stabil drift af dit bundkort og det samlede system.
- Keep the system clean: Periodically clean dust from the motherboard and components using compressed air. Ensure all fans and heatsinks are free of obstructions to maintain efficient cooling.
- Sørg for korrekt luftstrøm: Maintain good ventilation within your PC case by ensuring proper cable management and fan placement to prevent overheating.
- Softwareopdateringer: Keep your operating system, device drivers, and BIOS/UEFI firmware updated to the latest versions for improved performance, security, and compatibility.
Fejlfinding
If you encounter issues with your system, refer to the following common troubleshooting steps:
- Ingen strøm: Check all power connections, including the 24-pin ATX and 8-pin CPU power cables, the power supply unit (PSU) switch, and the wall outlet.
- Ingen visning: Ensure the monitor is connected to the correct video output port (HDMI or DisplayPort) on the motherboard or dedicated graphics card. Verify that RAM modules and any installed graphics card are properly seated.
- Systemustabilitet/nedbrud: Verify that all RAM modules are correctly installed. Check CPU and GPU temperatures to ensure they are within safe operating limits. Update all system drivers.
- Enhed ikke fundet: Ensure the device (e.g., hard drive, SSD, USB device) is properly connected and powered. Check BIOS settings to confirm the device is detected and enabled.
- BIOS-nulstilling: If the system becomes unbootable due to incorrect BIOS settings, locate the CMOS reset pins on the motherboard and short them briefly, or remove the CMOS battery for a few minutes to reset BIOS to default settings.
Specifikationer
| Feature | Detalje |
|---|---|
| Mærke | ZEBRONIK |
| Modelnavn | ZEBRONICS H310 D4M2 |
| CPU socket | LGA 1151 |
| Kompatible processorer | Intel 8th & 9th Generation Processors |
| Chipsættype | Intel H310 |
| RAM-hukommelsesteknologi | DDR4 |
| Hukommelses urhastighed | 2133 MHz - 2666 MHz |
| Hukommelsespladser til rådighed | 2 |
| Max Drive Memory Storage Capacity | 32 GB |
| Total SATA Ports | 3 |
| Grafikkort interface | PCI Express (PCIe 16x) |
| Total PCIe Ports | 1 (PCIe 16x) |
| Samlet USB-porte | 4 (Rear I/O, plus internal headers) |
| Total HDMI Port | 1 |
| Antal Ethernet-porte | 1 (10/100 Mbps LAN) |
| Type hovedstrømstik | 24-benet |
| Emnemål L x B x H | 22L x 5.5W x 27H Centimeter |
| Varens vægt | 800 gram |
Garanti og support
Garantioplysninger
This ZEBRONICS H310 D4M2 Motherboard comes with a 1-year carry-in warranty. For warranty claims, please retain your proof of purchase and contact the authorized ZEBRONICS service center.
Teknisk support
For further assistance, technical support, or detailed product information, please visit the official ZEBRONICS webwebsted eller kontakt deres kundeserviceafdeling.