
1. Produktet er slutview
The LIORQUE Digital Kitchen Timer Model YGH5249 is a multi-functional device designed to assist with various timing needs. It features a large LCD display, adjustable alarm volume, and multiple placement options. This timer can function as a countdown timer, a count-up stopwatch, and a digital clock.

Billede 1.1: Forside view of the LIORQUE Digital Kitchen Timer, highlighting its large LCD screen and control buttons.
Nøglefunktioner:
- 3-i-1 funktionalitet: Timer, Stopwatch, and Clock modes.
- Stort LCD-display: Ensures clear readability of time.
- Justerbar alarmvolumen: Three levels (Mute, Low, High) to suit different environments.
- Tilpasset tilstand: Save frequently used countdown times for quick access.
- Alsidig placering: Magnetic back, foldable stand, and lanyard hole for flexible use.
- Delay Reminder: Automatically starts counting up after countdown finishes.
- Auto-Restore: Remembers the last set countdown time.

Image 1.2: Visual representation of the timer's main features and functions.
2. Opsætning og batteriinstallation
The timer requires 2 AAA batteries (included) for operation. Follow these steps to install them:
- Find batteridækslet på bagsiden af timeren.
- Skub dækslet åbent.
- Isæt to AAA-batterier, og sørg for at polerne (+ og -) vender korrekt som angivet i batterirummet.
- Luk batterirummets dæksel forsvarligt.
The timer will power on automatically once batteries are installed.
3. Betjeningsvejledning
3.1 Switching Modes (Timer/Stopwatch/Clock)
The LIORQUE timer offers three modes: Timer (countdown), Stopwatch (count-up), and Clock. To switch between Timer mode and Clock mode, press and hold the ST/SP button for 2 seconds. The timer will display the current time in Clock mode or the timer interface in Timer mode.

Image 3.1: Switching between Counting Mode and Clock Mode.
3.2 Indstilling af nedtællingstimer
- Ensure the timer is in Timer mode (displaying H:M:S).
- Brug 1H, 5M, 1M, og 5S buttons to set the desired countdown time. Each press adds the corresponding time increment.
- Tryk på ST/SP knappen for at starte nedtællingen.
- For at sætte nedtællingen på pause, tryk på ST/SP igen. Tryk én gang til for at genoptage.
- To reset the timer to zero, press the NULSTIL knap.
- When the countdown reaches zero, the alarm will sound for 1 minute.
3.3 Using Stopwatch (Count-Up)
- Ensure the timer is in Timer mode and reset to 00:00:00.
- Tryk på ST/SP knappen for at begynde at tælle op.
- Tryk på for at sætte stopuret på pause ST/SP igen. Tryk én gang til for at genoptage.
- For at nulstille stopuret skal du trykke på NULSTIL knap.

Image 3.2: Illustration of Count-up and Countdown modes.
3.4 Shortcut Setting
The timer allows for quick setting of common intervals:
- Trykke 1H i 1 time.
- Trykke 5M i 5 minutter.
- Trykke 1M i 1 minut.
- Trykke 5S i 5 sekunder.

Billede 3.3: Eks.amples of using shortcut buttons for quick time setting.
3.5 Brugerdefineret tilstand
The Custom Mode allows you to save a frequently used countdown time for instant recall.
- In Timer mode, set your desired countdown time using the 1H, 5M, 1M, og 5S knapper.
- Tryk og hold på SKIK button for 2 seconds. The timer will remember this setting.
- Each subsequent short press of the SKIK button will automatically load the saved time.

Image 3.4: Setting and recalling a custom timer value.
3.6 Justering af alarmlydstyrke
The timer features a 3-level alarm volume adjustment (Mute, Low, High). A switch on the side of the timer allows you to select the desired volume level.

Image 3.5: Volume adjustment switch and its three settings.
3.7 Placeringsmuligheder
The LIORQUE timer offers flexible placement options:
- Magnetisk: Attach the timer to metal surfaces like refrigerators using its strong magnetic back.
- Stå: Use the integrated foldable stand to place the timer on any flat surface, such as a countertop or desk.
- Snorhul: Hang the timer using a rope through the designated lanyard hole.
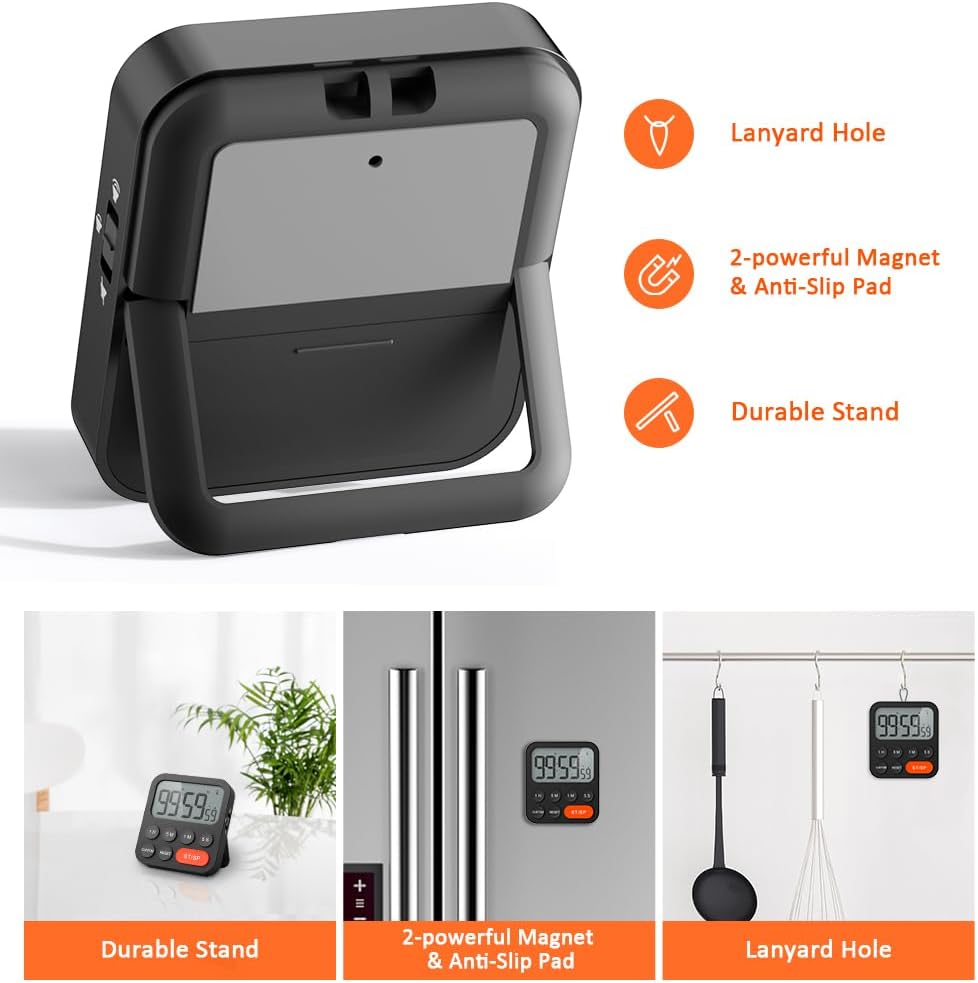
Image 3.6: Various ways to place and use the timer.
3.8 Yderligere funktioner
- Delay Reminder: After a countdown finishes, the timer will automatically start counting up, indicating the elapsed time since the alarm.
- Auto-Restore: Once a countdown is complete and the alarm has sounded, pressing the ST/SP button will restore the timer to the last set countdown time, making it convenient for repetitive tasks.

Image 3.7: Explanation of Delay Reminder and Auto-restore features.
4. Vedligeholdelse
- Rengør timeren med en blød, tør klud. Brug ikke slibende rengøringsmidler, og nedsænk den ikke i vand.
- Replace batteries when the display becomes dim or the timer functions erratically.
- Opbevar timeren et køligt og tørt sted, når den ikke er i brug i længere perioder.
5. Fejlfinding
- Timeren reagerer ikke: Kontroller, om batterierne er korrekt installeret og har tilstrækkelig opladning. Udskift om nødvendigt.
- Alarm too quiet/loud: Adjust the volume switch on the side of the timer to your preferred level.
- Displayet er tomt: Ensure batteries are installed and functional. If the issue persists, contact customer support.
6. Specifikationer
| Feature | Detalje |
|---|---|
| Mærke | LIORQUE |
| Modelnummer | YGH5249 |
| Farve | Sort |
| Produktdimensioner | 0.94 cm D x 0.94 cm H |
| Varens vægt | 4.2 ounce |
| Strømkilde | 2 AAA batterier (medfølger) |
| Antal indstillinger | 3 (bind) |
| Skærmstørrelse | 1E+1 centimeter |
7. Garanti og support
For warranty information or technical support, please refer to the product packaging or contact LIORQUE customer service through their official webwebstedet eller forhandleren, hvor produktet blev købt. Gem din købskvittering i tilfælde af garantikrav.