
1. Introduktion
This manual provides detailed instructions for the setup, operation, and maintenance of your TELLUR Shade Wireless Mouse (Model 491261). This mouse features multi-device connectivity, silent click buttons, RGB lighting, and adjustable DPI settings for enhanced productivity and comfort across various operating systems.
2. Pakkens indhold
Bekræft at alle varer er til stede i din pakke:
- 1 x TELLUR Shade Wireless Mouse
- 1 x Nano receiver (USB-A)
- 1 x Type-C ladekabel
- 1 x Brugermanual (dette dokument)

Image: The TELLUR Shade Wireless Mouse, accompanied by its USB Nano receiver and Type-C charging cable, illustrating the complete package contents.
3. Produktet er slutview
Familiarize yourself with the components of your TELLUR Shade Wireless Mouse:

Billede: Top-down view of the TELLUR Shade Wireless Mouse, highlighting the left and right silent click buttons, the main scroll wheel, DPI adjustment button, and the multi-device switch button.
- Venstreklikknap: Lydløs drift.
- Højreklik-knap: Lydløs drift.
- Scroll Wheel (Main): Til lodret rulning.
- DPI-justeringsknap: Cycles through DPI settings (800/1200/1600/2400/3200).
- Multi-Device Switch Button: Toggles between connected devices (1, 2, 3, 4).
- Frem-knap: Navigerer fremad i web browsere eller file opdagelsesrejsende.
- Baglæns knap: Navigerer baglæns i web browsere eller file opdagelsesrejsende.
- Horizontal Scroll Wheel: For horizontal scrolling.
- Windows Home Button: Minimizes all windows to show the desktop; pressing again restores them.
- USB-C opladningsport: Located on the front for recharging the internal battery.
- Afbryderen: On/Off switch on the bottom of the mouse.
- Nano-modtageropbevaring: Compartment on the bottom for storing the USB receiver.
4. Opsætning
4.1. Opladning af musen
Before initial use, ensure the mouse is fully charged. Connect the provided Type-C charging cable to the USB-C port on the front of the mouse and the other end to a USB power source (e.g., computer USB port, USB wall adapter).

Billede: Side view of the TELLUR Shade Wireless Mouse, clearly showing the USB-C charging port located at the front for convenient recharging.
The RGB lighting may indicate charging status. A full charge typically provides approximately 20 days of average use.
4.2. Tilslutning til en enhed
The TELLUR Shade Wireless Mouse supports up to 4 devices simultaneously via Bluetooth and a 2.4GHz USB Nano receiver. Turn on the mouse using the power switch on the bottom.
4.2.1. 2.4GHz Wireless Connection (USB Nano Receiver)
- Locate the USB Nano receiver stored in the compartment on the bottom of the mouse.
- Plug the Nano receiver into an available USB-A port on your computer.
- Press the Multi-Device Switch Button on the mouse to select one of the 2.4GHz channels (usually indicated by a specific LED color or number).
- The mouse should automatically connect. If not, ensure the mouse is powered on and try replugging the receiver.
4.2.2. Bluetooth-forbindelse (BT1, BT2, BT3)
- Press the Multi-Device Switch Button to select one of the Bluetooth channels (BT1, BT2, or BT3). The corresponding indicator light will flash.
- Press and hold the Multi-Device Switch Button for 3-5 seconds until the indicator light flashes rapidly. This puts the mouse into pairing mode.
- Gå til Bluetooth-indstillingerne på din enhed (computer, tablet, smartphone) og søg efter nye enheder.
- Select "TELLUR Shade Mouse" or a similar name from the list of available devices.
- Once paired, the indicator light on the mouse will stop flashing and remain solid for a few seconds before turning off.
Repeat these steps for additional Bluetooth devices on BT2 and BT3 channels.
5. Betjeningsvejledning
5.1. Skift mellem enheder
To switch between connected devices, simply press the Multi-Device Switch Button. The mouse will cycle through the 2.4GHz channel and the three Bluetooth channels (BT1, BT2, BT3).
5.2. Justering af DPI-følsomhed
Press the DPI Adjustment Button to cycle through the available DPI settings: 800, 1200, 1600, 2400, and 3200 DPI. Each press will change the cursor speed, allowing you to find your preferred sensitivity.
5.3. RGB-lysstyring
The mouse features customizable RGB lighting. To change the RGB lighting mode or turn it off, simultaneously press the Forward and Backward buttons located on the side of the mouse. Continue pressing to cycle through different lighting effects or to disable the lighting.

Billede: Nærbillede view of the TELLUR Shade Wireless Mouse, highlighting the side buttons (Forward and Backward) and the integrated RGB lighting strip.
5.4. Using the Windows Home Button
The dedicated Windows Home Button (often located near the thumb rest) allows for quick desktop access. Pressing this button will minimize all open windows, revealing your desktop. Pressing it again will restore the previously open windows.
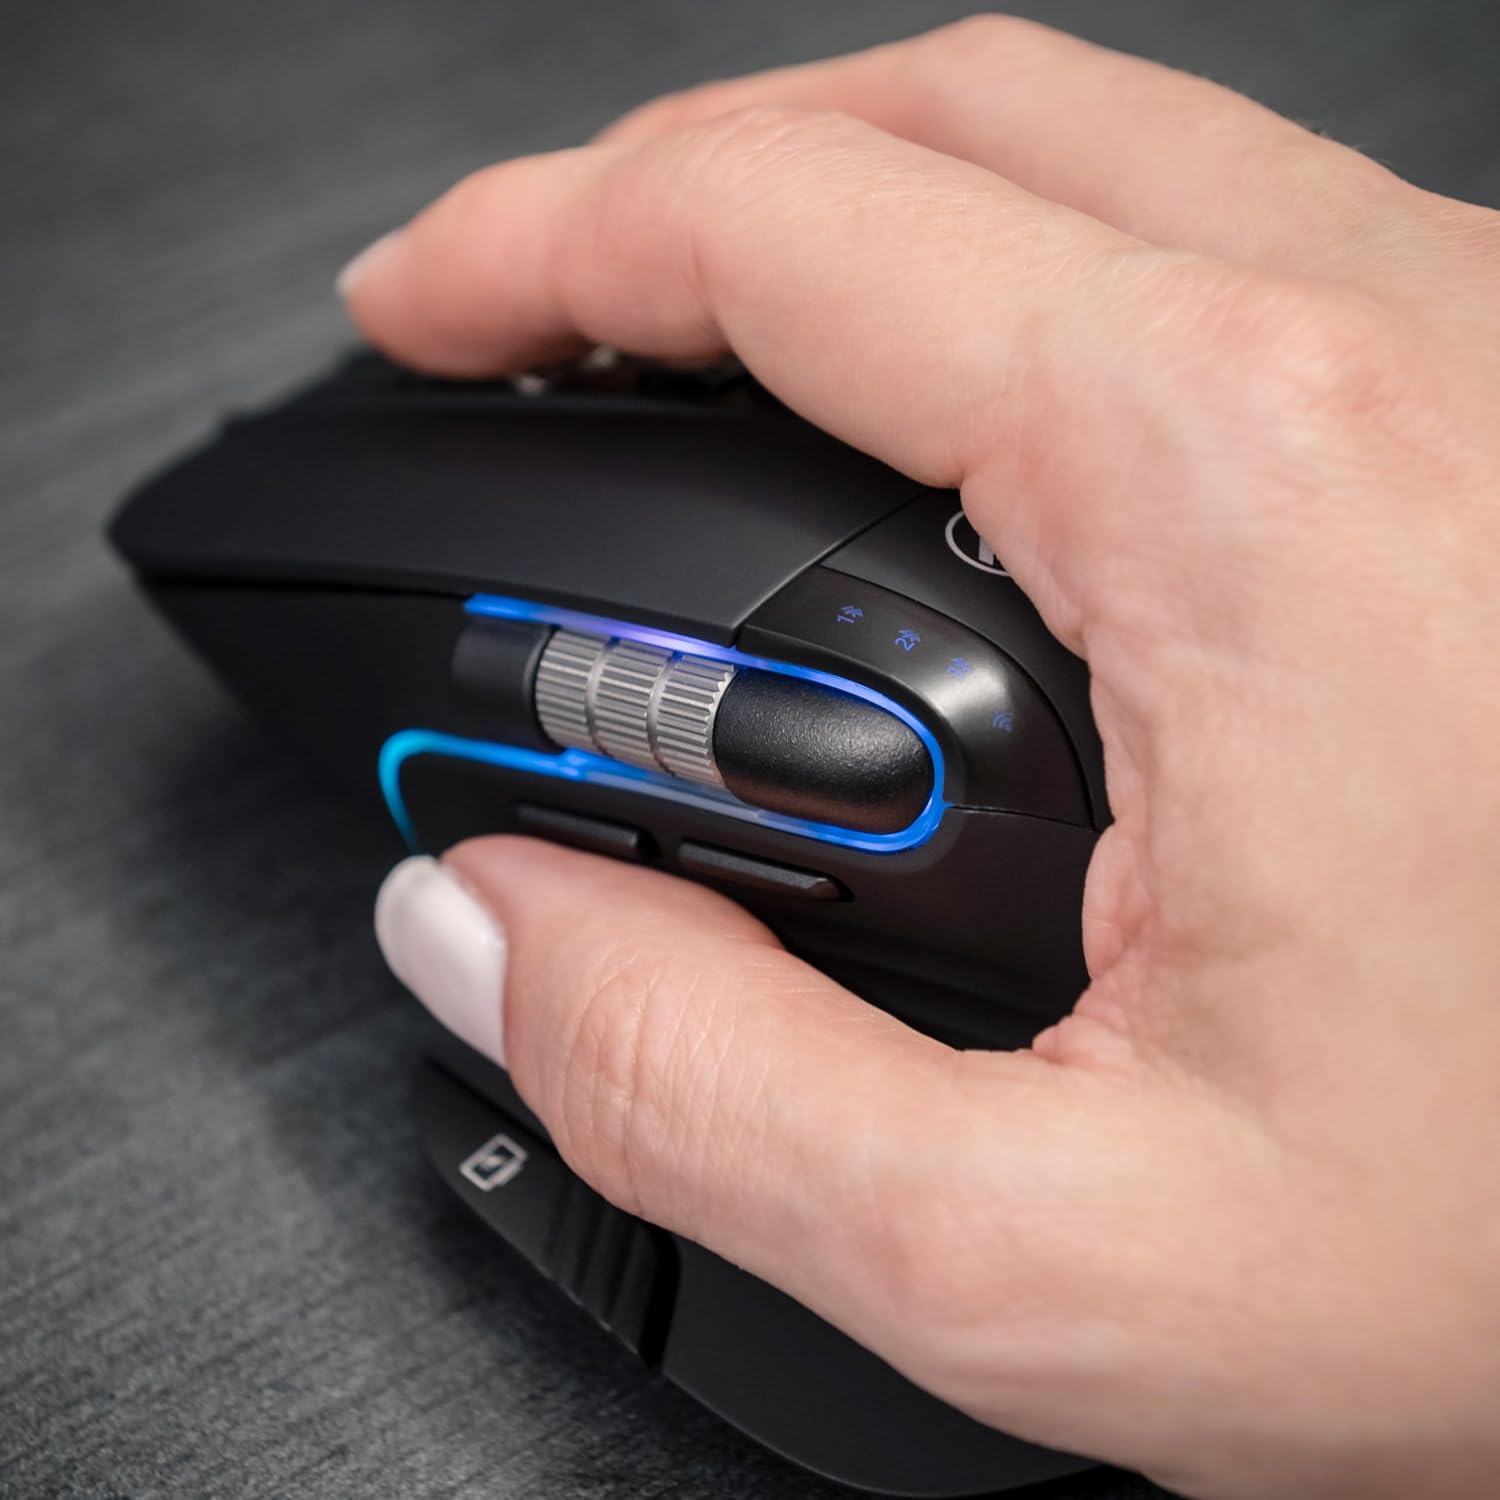
Image: A hand operating the TELLUR Shade Wireless Mouse, demonstrating the ergonomic grip and the placement of the Windows Home button accessible by the thumb.
6. Vedligeholdelse
- Rensning: Brug en blød, tør klud til at rengøre musen. Ved genstridigt snavs, brug en let tør klud.amp En klud kan bruges, men sørg for, at der ikke trænger fugt ind i enheden.
- Opbevaring: Når musen ikke er i brug i længere tid, skal den slukkes for at spare på batteriet. Opbevar den et køligt og tørt sted.
- Batteripleje: Undgå at aflade batteriet helt ofte. Genoplad det, når batteriindikatoren er lav.
- Undgå ekstreme forhold: Udsæt ikke musen for ekstreme temperaturer, direkte sollys eller høj luftfugtighed.
7. Fejlfinding
7.1. Musen reagerer ikke
- Sørg for, at musen er tændt.
- Kontrollér batteriniveauet, og oplad musen om nødvendigt.
- Verify that the correct connection channel (2.4GHz, BT1, BT2, or BT3) is selected using the Multi-Device Switch Button.
- For 2.4GHz connection, ensure the Nano receiver is securely plugged into a working USB port. Try a different USB port.
- For Bluetooth connection, ensure Bluetooth is enabled on your device and try re-pairing the mouse.
- Genstart din computer eller enhed.
7.2. Intermitterende forbindelse
- Ensure the mouse is within the effective range (up to 10 meters).
- Minimér interferens fra andre trådløse enheder (f.eks. Wi-Fi-routere, andre Bluetooth-enheder).
- Undgå at bruge musen på metaloverflader, da dette kan forstyrre trådløse signaler.
7.3. Problemer med markørbevægelse
- Rengør den optiske sensor på undersiden af musen.
- Brug musen på en ren, ikke-reflekterende overflade eller en musemåtte.
- Adjust the DPI setting using the DPI Adjustment Button.
7.4. RGB-belysning virker ikke
- Sørg for, at musen er tændt.
- Press the Forward and Backward buttons simultaneously to cycle through lighting modes or to turn it on if it was previously off.
- Check battery level; low battery might disable RGB lighting to conserve power.
8. Specifikationer
| Mærke | TELLUR |
| Modelnavn | TLL491261 |
| Modelnummer | 491261 |
| Forbindelsesteknologi | Bluetooth, 2.4GHz Wireless (via Nano receiver) |
| Bevægelsesdetektion | Optisk |
| DPI-følsomhed | 800/1200/1600/2400/3200 DPI |
| Antal knapper | 8 (including silent click, DPI, multi-device switch, forward/backward, horizontal scroll, Windows Home) |
| Håndorientering | Ambidekstrøs |
| Særlige funktioner | Silent Click, RGB Light, Multi-device (4 devices), Lightweight, Portable |
| Kompatible enheder | Personal Computer, Laptop, Smartphones, Tablets |
| Operativsystemsupport | Windows, Mac, iOS, Android, Linux |
| Wireless Range | Op til 10 meter |
| Strømkilde | Batteridrevet (genopladelig via USB-C) |
| Batteriets gennemsnitlige levetid | Cirka 20 dage |
| Materiale | Plast |
| Varens vægt | 0.29 kilo |
9. Garanti og support
For garantioplysninger og teknisk support henvises til garantikortet, der følger med dit produkt, eller besøg den officielle TELLUR-side. webwebsted. Gem din købskvittering som købsbevis i tilfælde af garantikrav.
Contact information for support can typically be found on the manufacturer's webwebstedet eller på produktemballagen.