
1. Produktet er slutview
The PrimeCables 15U 19" Wall Mount Server Rack Cabinet is designed to house standard rackmount equipment such as NAS devices, servers, routers, AV systems, and gaming consoles. Constructed from durable SPCC cold-rolled steel with a powder-coated finish, it offers rust resistance and supports up to 440 lbs (200 kg). Its open-frame design promotes optimal airflow, and the inclusion of ventilated shelves and cable management slots helps maintain an organized setup. This versatile rack can be wall-mounted or used freestanding with its four locking casters, making it suitable for various home and office environments.
2. Funktioner
- Multifunktionelt design: Supports 19" standard rackmount devices (NAS, servers, routers, AV systems, gaming consoles) with 15U vertical space.
- Kraftig konstruktion: Made of SPCC cold-rolled steel with a powder-coated finish for rust resistance, supporting up to 440 lbs (200 kg) with a 4-post reinforced structure.
- Ventilated & Organized: Open-frame design improves airflow to prevent overheating; includes ventilated shelves and cable management slots for tidy wiring and accessible equipment.
- Pladsbesparende design: Can be wall-mounted or used freestanding with 4 locking casters for easy mobility. Compact dimensions (20.5x20x29 inches) fit small spaces.
- Værktøjsfri samling: Quick setup in minutes without professional tools; includes all necessary hardware for immediate use.
3. Sikkerhedsoplysninger
Please read and understand all safety instructions before assembly and use. Failure to follow these instructions may result in injury or damage to the product or connected equipment.
- Ensure the rack is assembled on a flat, stable surface.
- Overskrid ikke den maksimale vægtkapacitet på 200 kg.
- When wall-mounting, ensure the wall structure can safely support the weight of the rack and all installed equipment. Consult a professional if unsure.
- Distribute equipment weight evenly within the rack to prevent tipping.
- Use appropriate personal protective equipment (e.g., gloves) during assembly to avoid cuts or pinches.
- Hold små dele og emballagematerialer væk fra børn for at forhindre kvælningsfare.
4. Pakkens indhold
Kontroller, at alle komponenter er til stede, før monteringen påbegyndes. Hvis der mangler eller er beskadigede dele, bedes du kontakte kundesupport.
- Rack Frame Components (Top, Bottom, Side Panels, Front/Rear Rails)
- Ventilated Shelves
- 4 låsehjul
- Samlebeslag (skruer, møtrikker, skiver)
- Basic Assembly Tool (screwdriver)
5. Opsætnings- og monteringsvejledning
Follow these steps to assemble your PrimeCables 15U Wall Mount Server Rack Cabinet. A Phillips head screwdriver is recommended for assembly.
5.1. Visuel monteringsvejledning
Watch the official assembly video for a step-by-step visual guide:
Video: How to Assemble 15U Network Server Cabinet Rack. This video demonstrates the assembly process for a similar PrimeCables network server cabinet.
Video: PrimeCables Server Rack Wall Mount Network Server Cabinet. This video provides an overview of the assembly and features of a PrimeCables server rack.
5.2. Trin-for-trin samling
- Udpak komponenter: Tag forsigtigt alle dele ud af emballagen, og læg dem på en ren, blød overflade for at undgå ridser. Kontroller, at alle dele er til stede, i forhold til indholdslisten på pakken.
- Saml bundrammen: Attach the side rails to the bottom panel using the provided screws. Ensure all connections are secure but do not overtighten initially.
- Fastgør toppanel: Secure the top panel to the side rails using the appropriate screws. This will form the main structure of the rack.
- Install Front and Rear Rails: Insert the front and rear mounting rails into the designated slots on the top and bottom panels. Secure them with screws. These rails are where your equipment will be mounted.
- Attach Casters (Optional for Freestanding Use): If using the rack freestanding, attach the four locking casters to the bottom panel. Ensure they are securely fastened.

Image: The server rack featuring 360-degree rotating silent wheels with brakes, highlighting the mobility and stability provided by the casters.
- Installer hylder: Position the ventilated shelves at your desired height within the rack. The shelves are customizable and can be moved up, down, or faced in different directions. Secure them using the provided hardware.
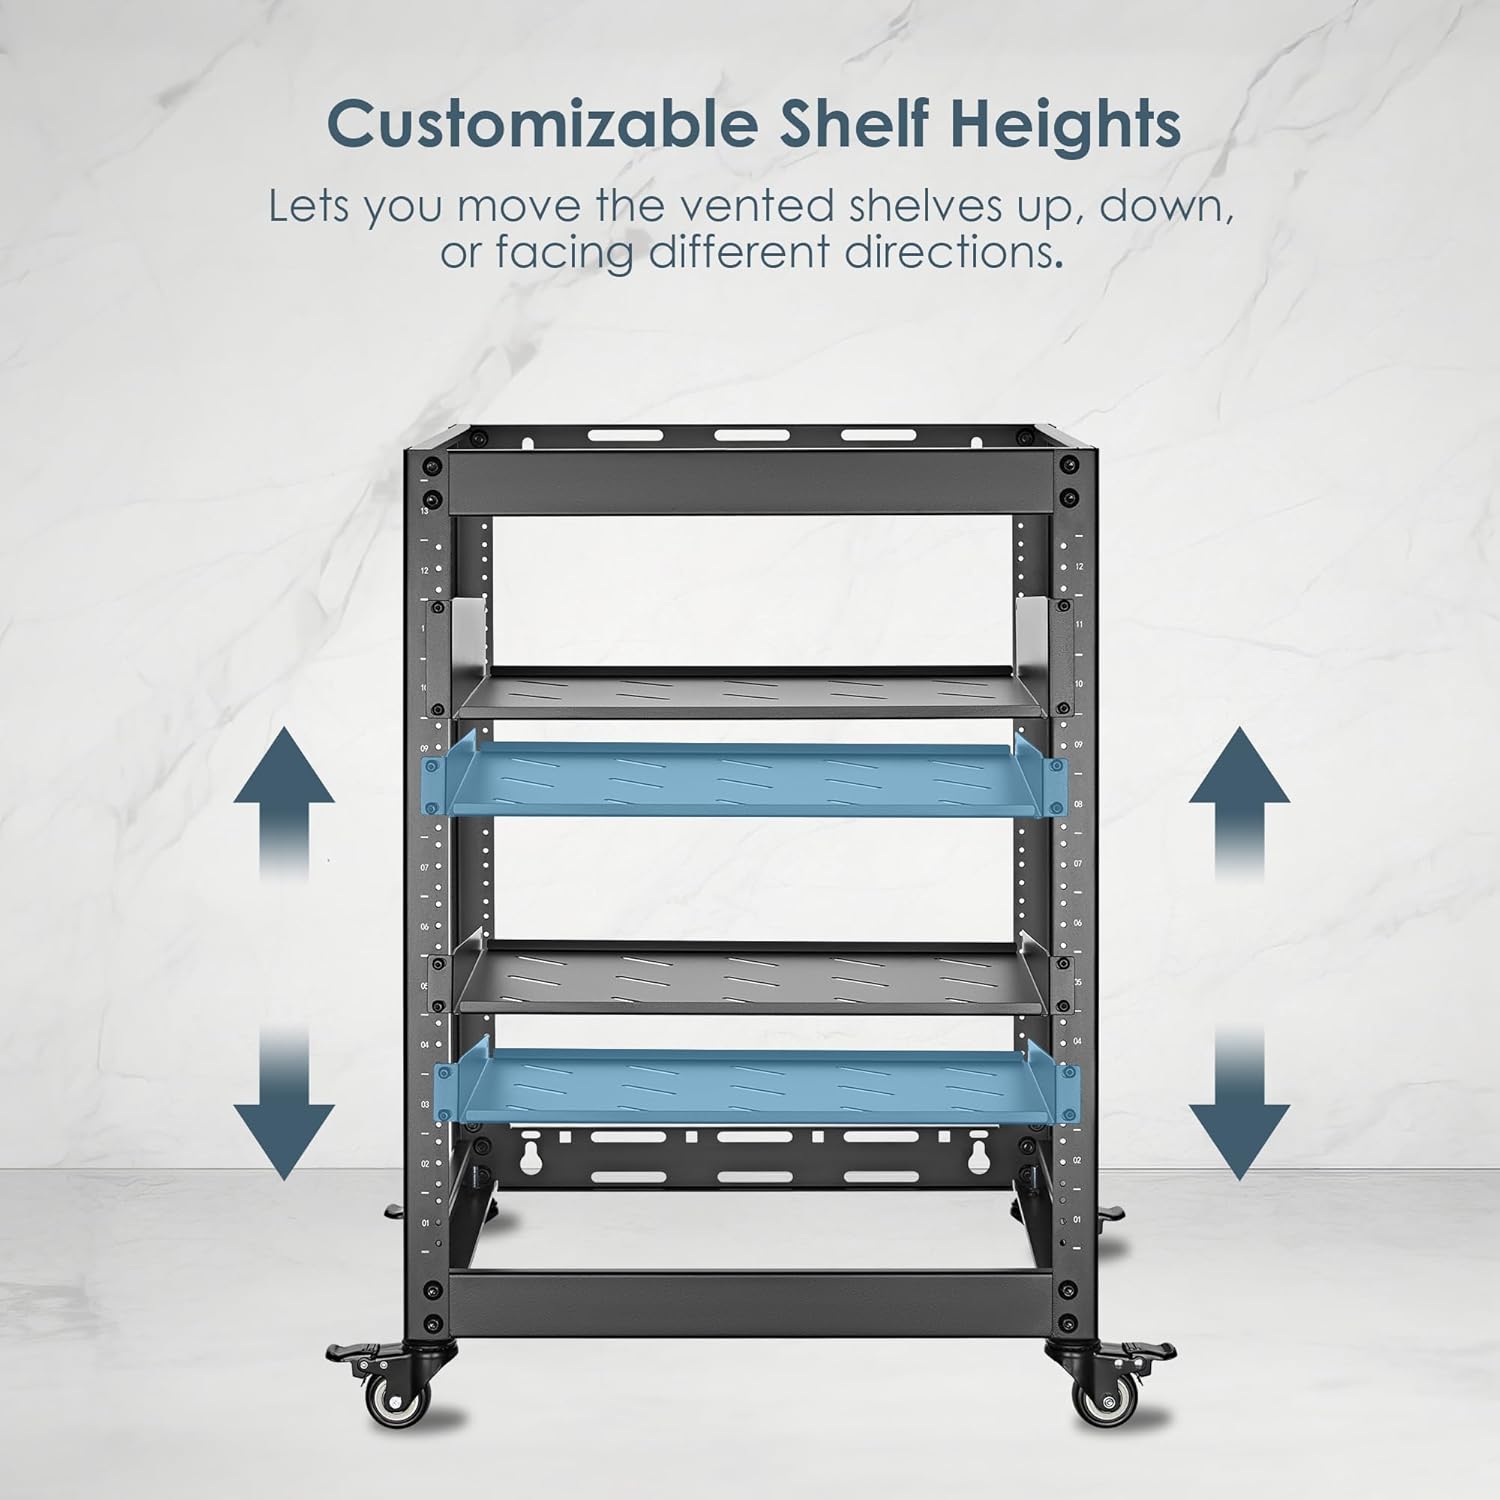
Image: Customizable shelf heights within the rack, allowing users to adjust vented shelves for optimal equipment placement and airflow.
- Endelig stramning: Once all components are in place, go back and securely tighten all screws.
- Vægmontering (valgfrit): If wall-mounting, use appropriate wall anchors and screws (not always included, depending on wall type) to secure the rack to a sturdy wall. Ensure the mounting points are level and capable of supporting the total weight.
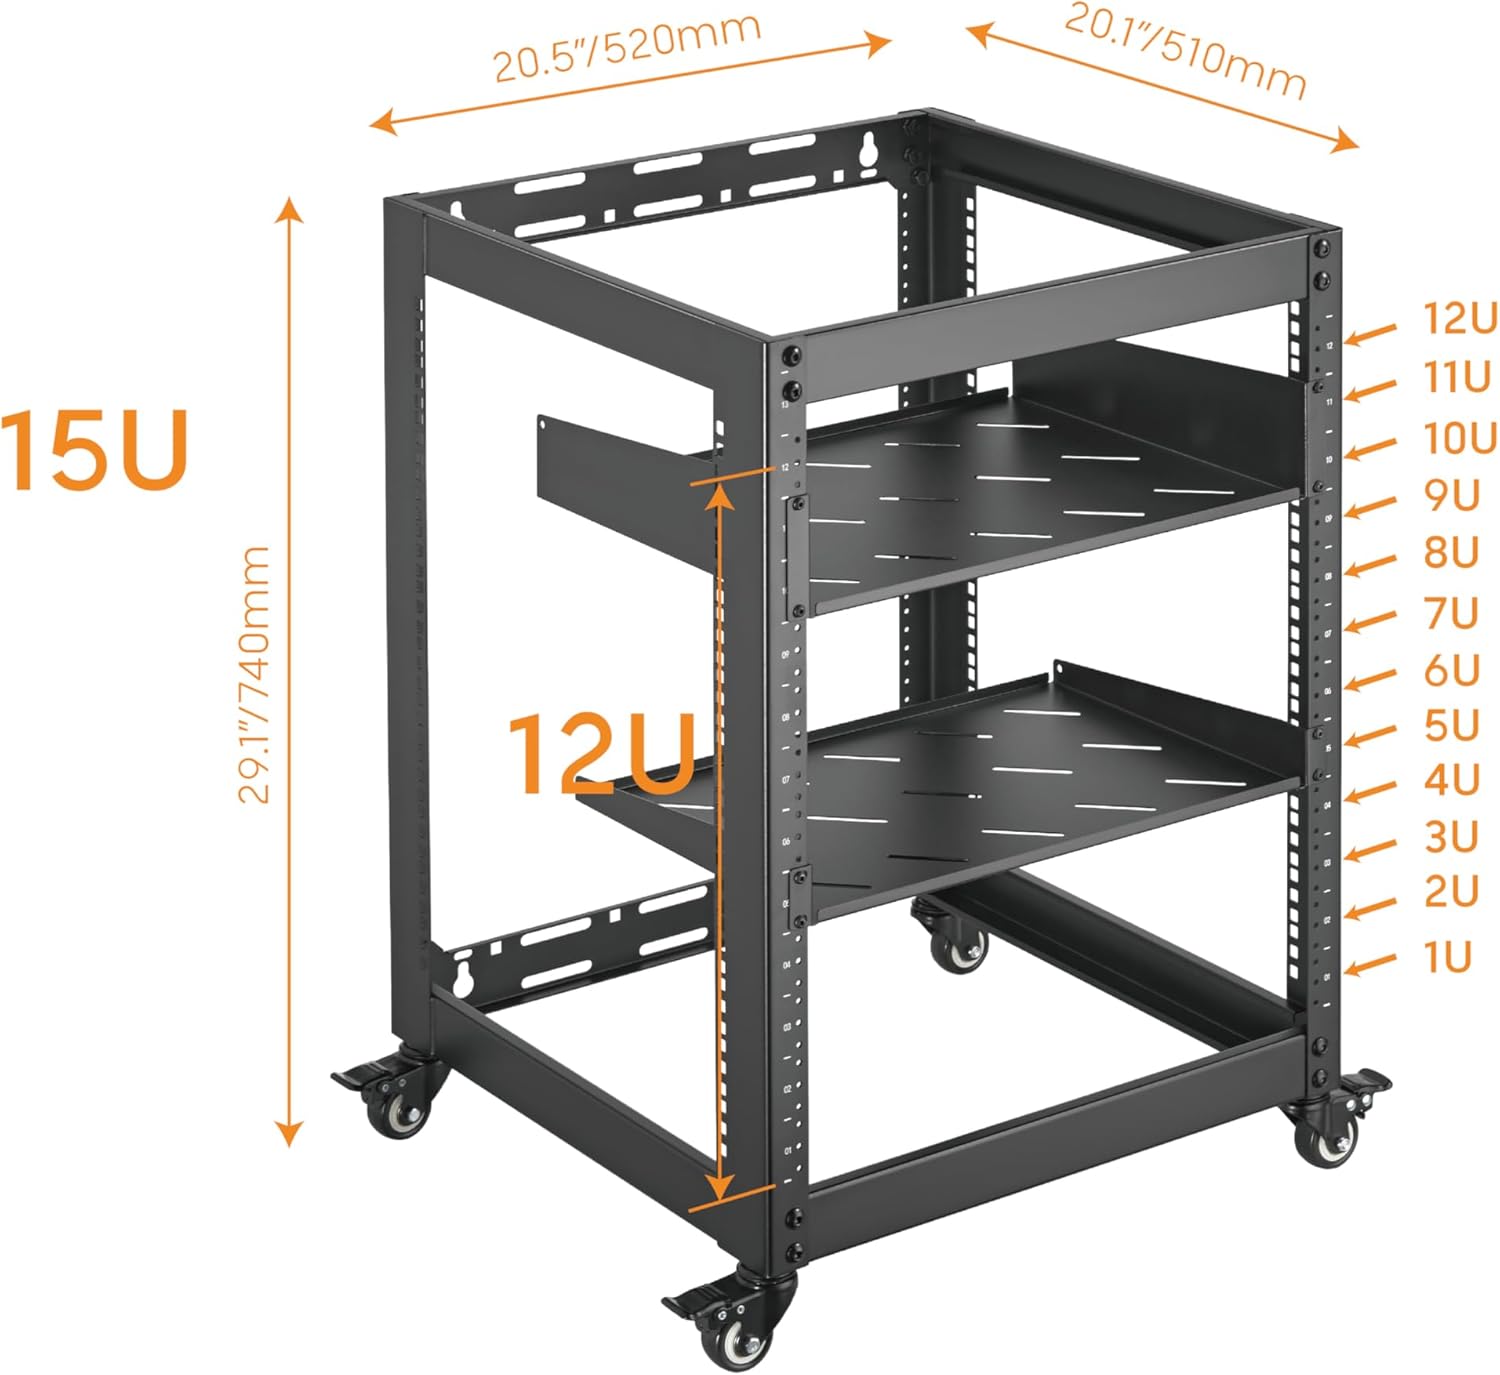
Image: Overall dimensions of the 15U server rack, indicating its height, width, and depth, along with the internal 12U rack space.

Image: Technical drawing providing precise dimensions in millimeters for the server rack, useful for planning equipment installation.
6. Betjeningsvejledning
Once assembled, the server rack is ready for equipment installation.
- Installation af udstyr: Mount 19-inch standard rackmount equipment directly onto the front and rear rails using appropriate rack screws (often supplied with equipment). For non-rackmount items, use the provided ventilated shelves.
- Kabelstyring: Utilize the integrated cable management slots to route and secure cables, preventing tangles and improving airflow.
- Luftstrøm: The open-frame design facilitates natural convection. Ensure adequate space around the rack for optimal air circulation, especially if placing it in an enclosed area.
- Mobility (Freestanding): If using casters, unlock them to move the rack. Always lock the casters once the rack is in its desired position to prevent accidental movement.
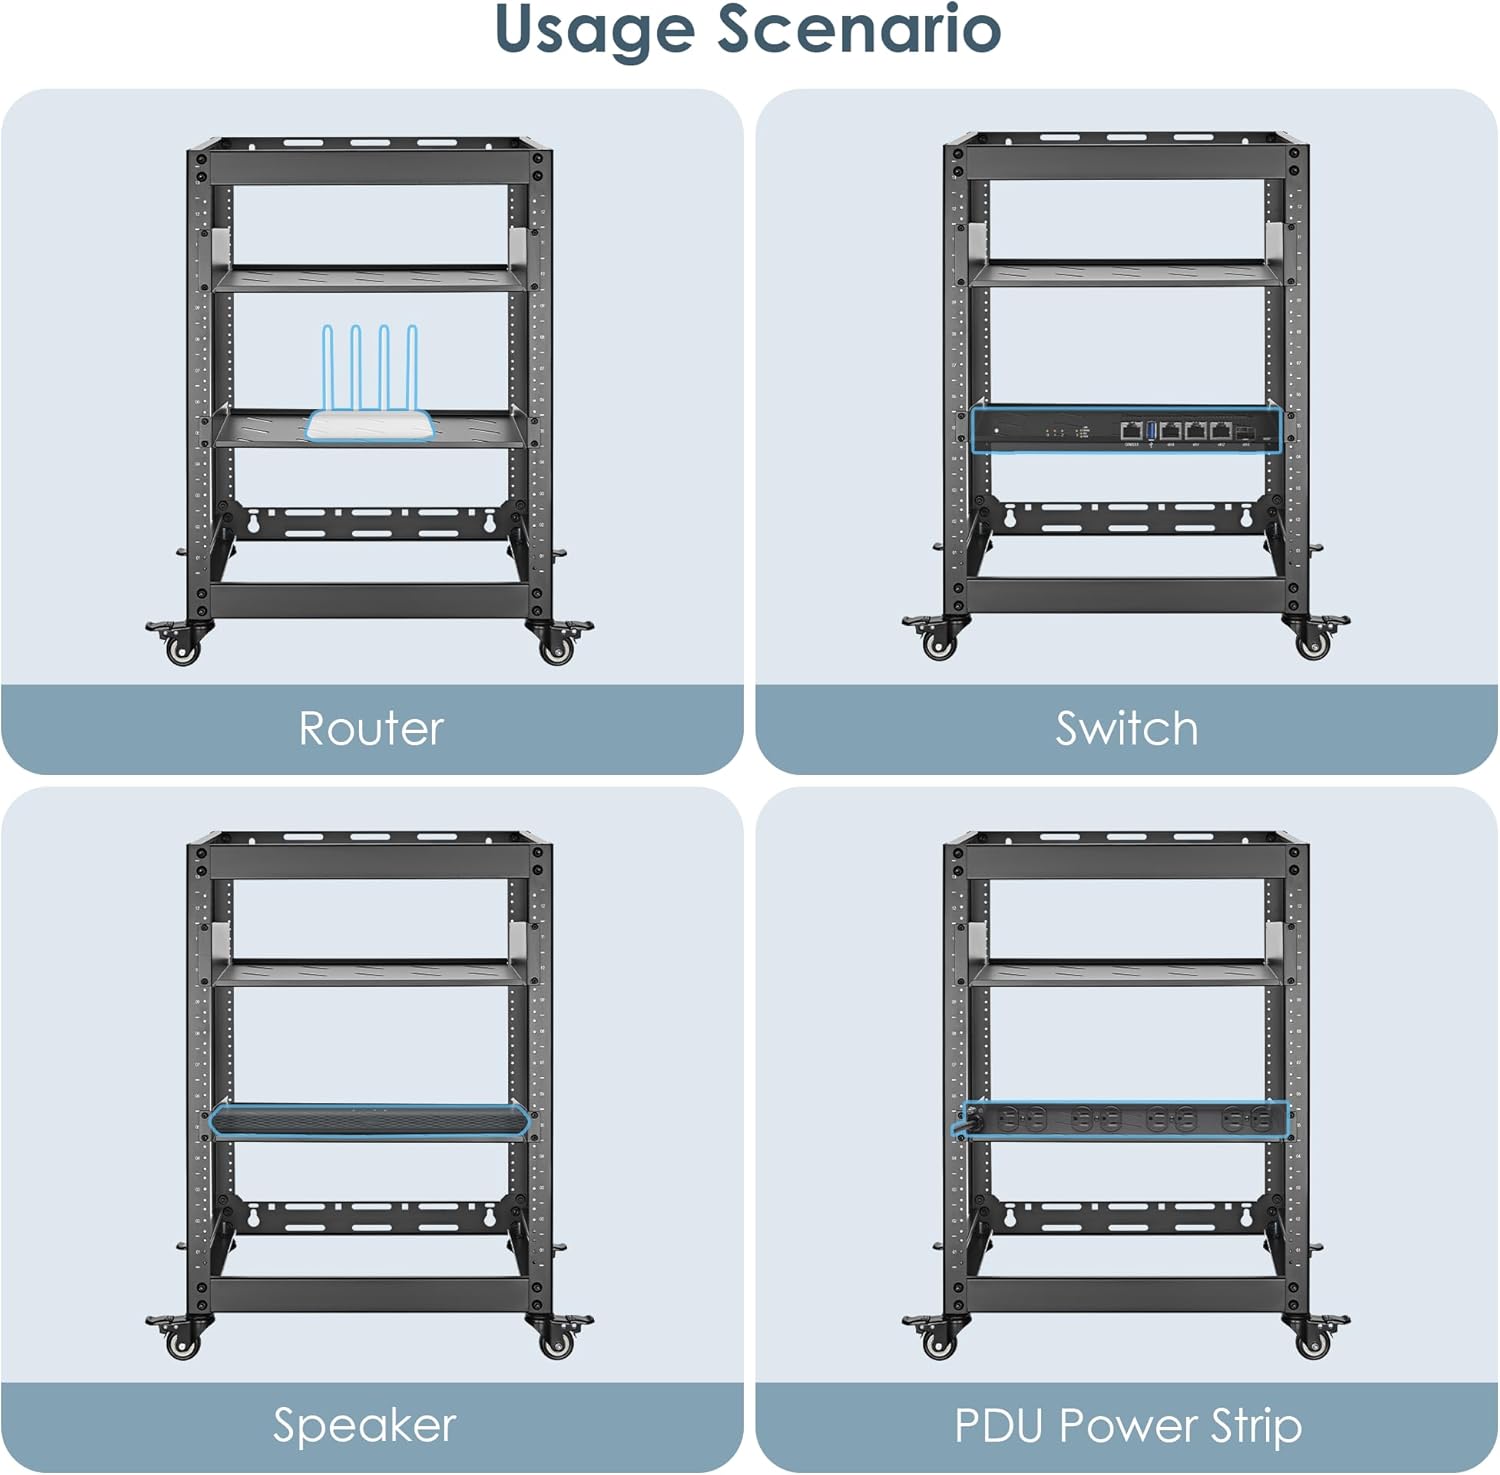
Billede: Eksamples of equipment that can be housed in the rack, including routers, switches, speakers, and power distribution units (PDUs).
7. Vedligeholdelse
Regular maintenance ensures the longevity and optimal performance of your server rack.
- Rensning: Wipe down the rack with a soft, damp klud til at fjerne støv og snavs. Undgå slibende rengøringsmidler eller opløsningsmidler, der kan beskadige overfladen.
- Hardwarekontrol: Periodically inspect all screws and connections to ensure they remain tight. Retighten as necessary.
- Hjulinspektion: If using casters, check them for smooth operation and ensure the locking mechanisms function correctly.
- Luftstrømsblokering: Ensure that the ventilated areas of the rack and any installed equipment are not obstructed, maintaining proper airflow.
8. Fejlfinding
If you encounter issues with your server rack, refer to these common solutions.
- Rack-ustabilitet:
- Sørg for, at alle monteringsskruer er helt spændt.
- Verify the rack is on a level surface.
- If using casters, ensure they are locked when stationary.
- Check that equipment weight is evenly distributed.
- Overophedningsudstyr:
- Ensure the open-frame design is not obstructed by walls or other objects.
- Verify that equipment fans are not blocked.
- Consider adding external cooling fans if necessary, especially in warm environments.
- Vanskeligheder ved montering af udstyr:
- Confirm equipment is 19-inch rackmount standard.
- Ensure the mounting rails are correctly installed and aligned.
- Use appropriate rack screws for your equipment.
9. Specifikationer
| Attribut | Detalje |
|---|---|
| Mærke | PrimeCables |
| Modelnummer | Cab-PC-08446-15U |
| Rack Units (U) | 15U |
| Materiale Type | SPCC Cold-Rolled Steel (Alloy Steel) |
| Farve | Sort |
| Monteringstype | Vægmontering / Fritstående |
| Vægt kapacitet | 440 lbs (200 kg) |
| Produktmål (L x B x H) | 51 x 52 x 74 cm (20.5 x 20 x 29 tommer) |
| Varens vægt | 12.3 kg |
| Kompatible enheder | Servers, NAS, Routers, AV Systems, Gaming Consoles (19" standard rackmount) |
| Montering påkrævet | Ja |

Image: Illustration of the rack's robust construction, highlighting its 440 lbs (200 kg) weight capacity for professional-grade equipment.
10. Garanti og support
For warranty information, technical support, or to inquire about replacement parts, please contact PrimeCables customer service. Refer to your purchase documentation for specific warranty terms and contact details.
You can typically find support information on the official PrimeCables webhjemmeside eller gennem den forhandler, hvor produktet blev købt.