
Indledning
Thank you for choosing the CREATE WIPEBOT Pro Automatic Window Cleaning Robot. This advanced device is designed to provide efficient and thorough cleaning for your windows, featuring dual water outlets, two spray levels, and intelligent corner and edge detection. With its 5-meter safety cable and 60ml water tank, it ensures a reliable and extended cleaning experience. This manual provides essential information for the safe and effective operation, maintenance, and troubleshooting of your WIPEBOT Pro.
Sikkerhedsinstruktioner
Please read all safety instructions carefully before using the WIPEBOT Pro. Failure to follow these instructions may result in electric shock, fire, or serious injury.
- Always attach the safety rope securely to a fixed anchor point before operation. The 5-meter safety cable is crucial for preventing falls.
- Ensure the power adapter and cable are securely connected and free from damage. Do not use if damaged.
- Brug ikke robotten i regnfulde eller ekstremt fugtige forhold.
- Hold hænder, hår og løstsiddende tøj væk fra bevægelige dele.
- Use only the cleaning solution recommended by CREATE or clean water. Do not use corrosive liquids.
- Brug ikke robotten på revnede eller beskadigede glasoverflader.
- Supervise the robot during operation, especially when used on high windows.
- Opbevares utilgængeligt for børn og kæledyr.
- Afbryd strømmen før rengøring eller vedligeholdelse.
Pakkens indhold
Bekræft at alle varer er til stede i pakken:

WIPEBOT Pro Robot Unit

Mikrofiber rengøringspuder (flere)
Power Adapter and AC Cable
5m Safety Rope with Carabiner
Fjernbetjening
Cleaning Solution Bottle (empty)
Produkt overview
Familiarize yourself with the components of your WIPEBOT Pro.
Front View: Displays the power button and the start/pause button. The "CREATE" logo is centered.
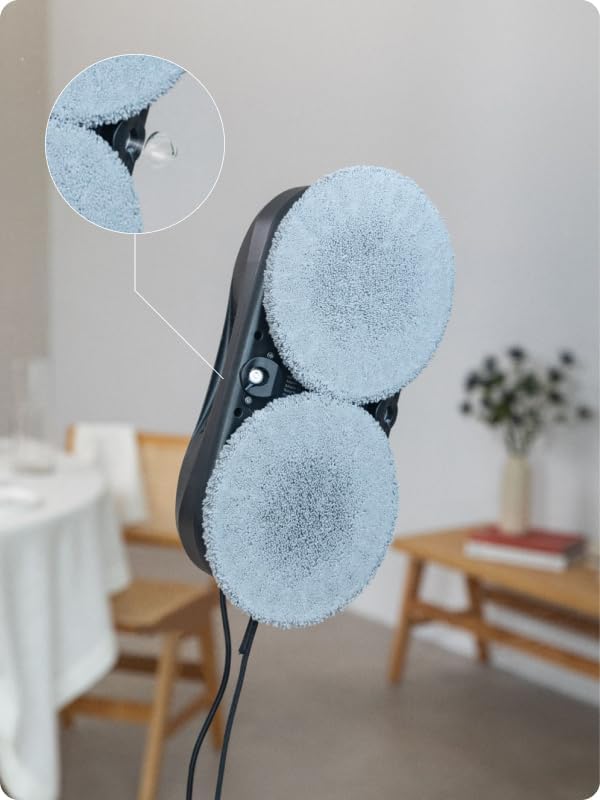
Water Spray Nozzles: Located between the cleaning pads, these nozzles provide precise water or cleaning solution application.

Water Tank Inlet: The opening for filling the 60ml water tank, typically located on the top surface.
Opsætning
- Oplad robotten: Before first use, ensure the robot is fully charged. Connect the power adapter to the robot and a power outlet. The indicator light will show charging status.
- Fastgør rengøringspuder: Securely attach the microfiber cleaning pads to the designated areas on the bottom of the robot. Ensure they are clean and dry or slightly damp as per cleaning requirements.
- Fyld vandtank: Open the water tank inlet and carefully fill the 60ml tank with clean water or a recommended window cleaning solution. Close the cap tightly.
Filling the water tank with cleaning solution.
- Fastgør sikkerhedsrebet: Connect the 5-meter safety rope to the robot's safety attachment point and secure the other end to a strong, fixed anchor point indoors. This is critical for safety.
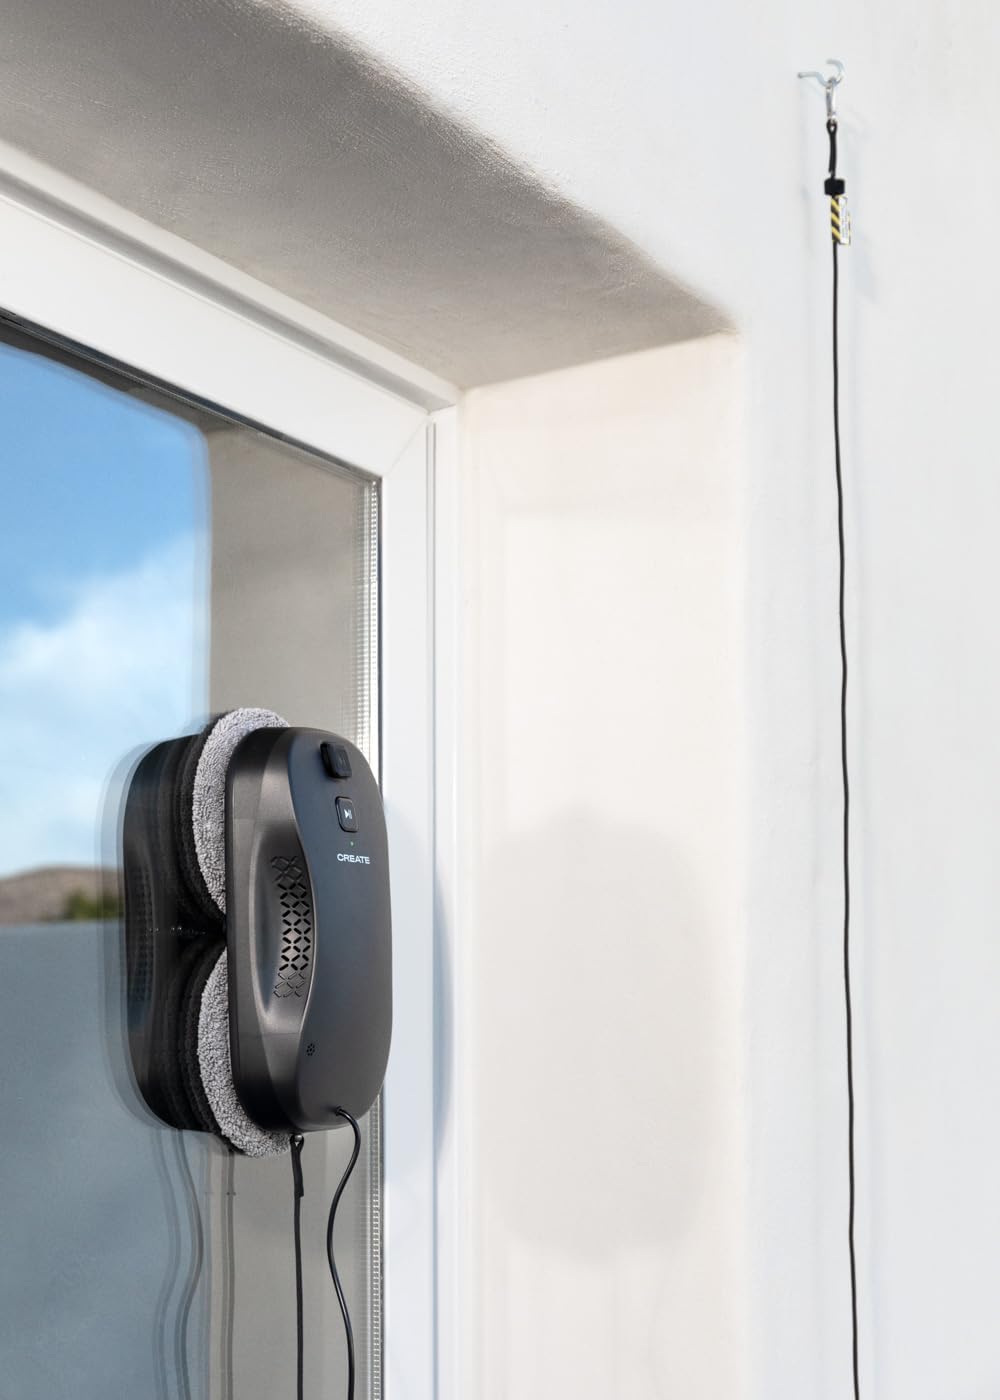
Ensure the safety rope is securely fastened.
- Strømtilslutning: Connect the robot to the power adapter. The robot requires continuous power during operation.
- App-forbindelse (valgfrit): Download the CREATE app on your smartphone. Follow the in-app instructions to connect your WIPEBOT Pro via WiFi for remote control and additional features.

Controlling the robot via the CREATE app on a smartphone.
Betjeningsvejledning
- Placering: Place the robot firmly on the center of the window surface you wish to clean. Ensure it adheres securely.
- Start rengøring:
- Manuel start: Tryk på Start/Pause-knappen på robotten.

Pressing the start button on the robot.
- Fjernbetjening: Use the remote control to start, pause, or direct the robot.

Controlling the robot with the remote control.
- App kontrol: Use the CREATE app on your smartphone to initiate cleaning cycles and adjust settings.
- Manuel start: Tryk på Start/Pause-knappen på robotten.
- Adjust Spray Levels: The WIPEBOT Pro offers two polishing modes/spray levels. Adjust the intensity of the sprayer via the remote or app to suit the cleaning needs.
The robot's dual water outlets provide precise spraying.
- Edge and Corner Detection: The robot is equipped with intelligent sensors to detect edges and corners, ensuring comprehensive cleaning coverage.
- Stopping and Removing: Once cleaning is complete, the robot will return to its starting position or stop. Carefully remove the robot from the window by holding it firmly and pressing the release button (if applicable) or gently pulling it off.
Opretholdelse
Regular maintenance ensures optimal performance and extends the lifespan of your WIPEBOT Pro.
- Rene rengøringspuder: After each use, remove and wash the microfiber cleaning pads. They can typically be hand-washed or machine-washed with mild detergent. Ensure they are completely dry before reattaching.
- Rengør robotkrop: Tør robottens yderside af med en blød kludamp klud. Brug ikke slibende rengøringsmidler, og nedsænk ikke robotten i vand.
- Tøm vandtank: After each use, empty any remaining water or cleaning solution from the tank to prevent residue buildup.
- Tjek dyser: Periodically check the spray nozzles for blockages and clean them if necessary using a small brush or pin.
- Opbevaring: Opbevar robotten et køligt, tørt sted væk fra direkte sollys og ekstreme temperaturer.
Fejlfinding
If you encounter issues with your WIPEBOT Pro, refer to the following common problems and solutions:
| Problem | Mulig årsag | Løsning |
|---|---|---|
| Robotten starter eller reagerer ikke. | Low battery; power cable disconnected; robot not securely placed. | Ensure robot is charged and connected to power. Re-position robot firmly on the window. |
| Robot leaves streaks or dirty marks. | Dirty cleaning pads; insufficient cleaning solution; window too dirty initially. | Replace or clean pads. Refill water tank. Pre-clean heavily soiled windows manually. |
| Robotten falder ned ad vinduet. | Safety rope not attached; insufficient suction; surface too wet/slippery. | Always attach the safety rope. Ensure window is not excessively wet. Check for obstructions. |
| Problemer med app-forbindelse. | WiFi signal weak; incorrect pairing. | Ensure strong WiFi signal. Restart robot and app. Re-pair the device following app instructions. |
| Robot is too noisy. | Normal operating noise; internal component issue. | A certain level of noise (approx. 75 dB) is normal during operation. If noise is excessive or unusual, contact support. |
Specifikationer
| Feature | Detalje |
|---|---|
| Mærke | SKABE |
| Model | WIPEBOT Pro |
| Produktdimensioner | 27L x 13.6W x 8H centimeter |
| Pakkedimensioner | 32.4 x 22 x 11 cm; 1.25 kg |
| Vandtankkapacitet | 60 milliliter |
| Strøm/Wattage | 72 watt |
| Voltage | 240 Volts AC (VAC) |
| Støjniveau | 75 dB |
| Kompatible modeller | Smartphones (til app-styring) |
| Særlige funktioner | Anti-fall mechanism, Dual Water Outlet, 2 Spray Levels, Corner and Edge Detection |
| Overfladeanbefaling | Glas |
| Controller type | App-styring, fjernbetjening |
| Strømkilde | Battery (for backup), Mains powered during operation |
Garanti og support
The CREATE WIPEBOT Pro comes with a standard manufacturer's warranty. Please refer to the warranty card included in your package or visit the official CREATE webhjemmeside for detaljerede garantivilkår.
For technical support, troubleshooting assistance, or spare parts, please contact CREATE customer service. You can usually find contact information on the product packaging, the official webhjemmeside eller gennem din forhandler.
Webwebsted: www.create.com (Bemærk: Dette er en pladsholder URL. Please refer to your product documentation for the actual support webwebsted.)