1. Introduktion
The ETA Gratus Evo Max is a powerful and versatile all-metal food processor designed to assist with a wide range of kitchen tasks. Featuring a 1500W motor and a planetary mixing system, it is equipped for kneading, beating, mixing, grating, meat grinding, and blending. This manual provides essential information for safe and efficient operation, maintenance, and troubleshooting of your appliance.
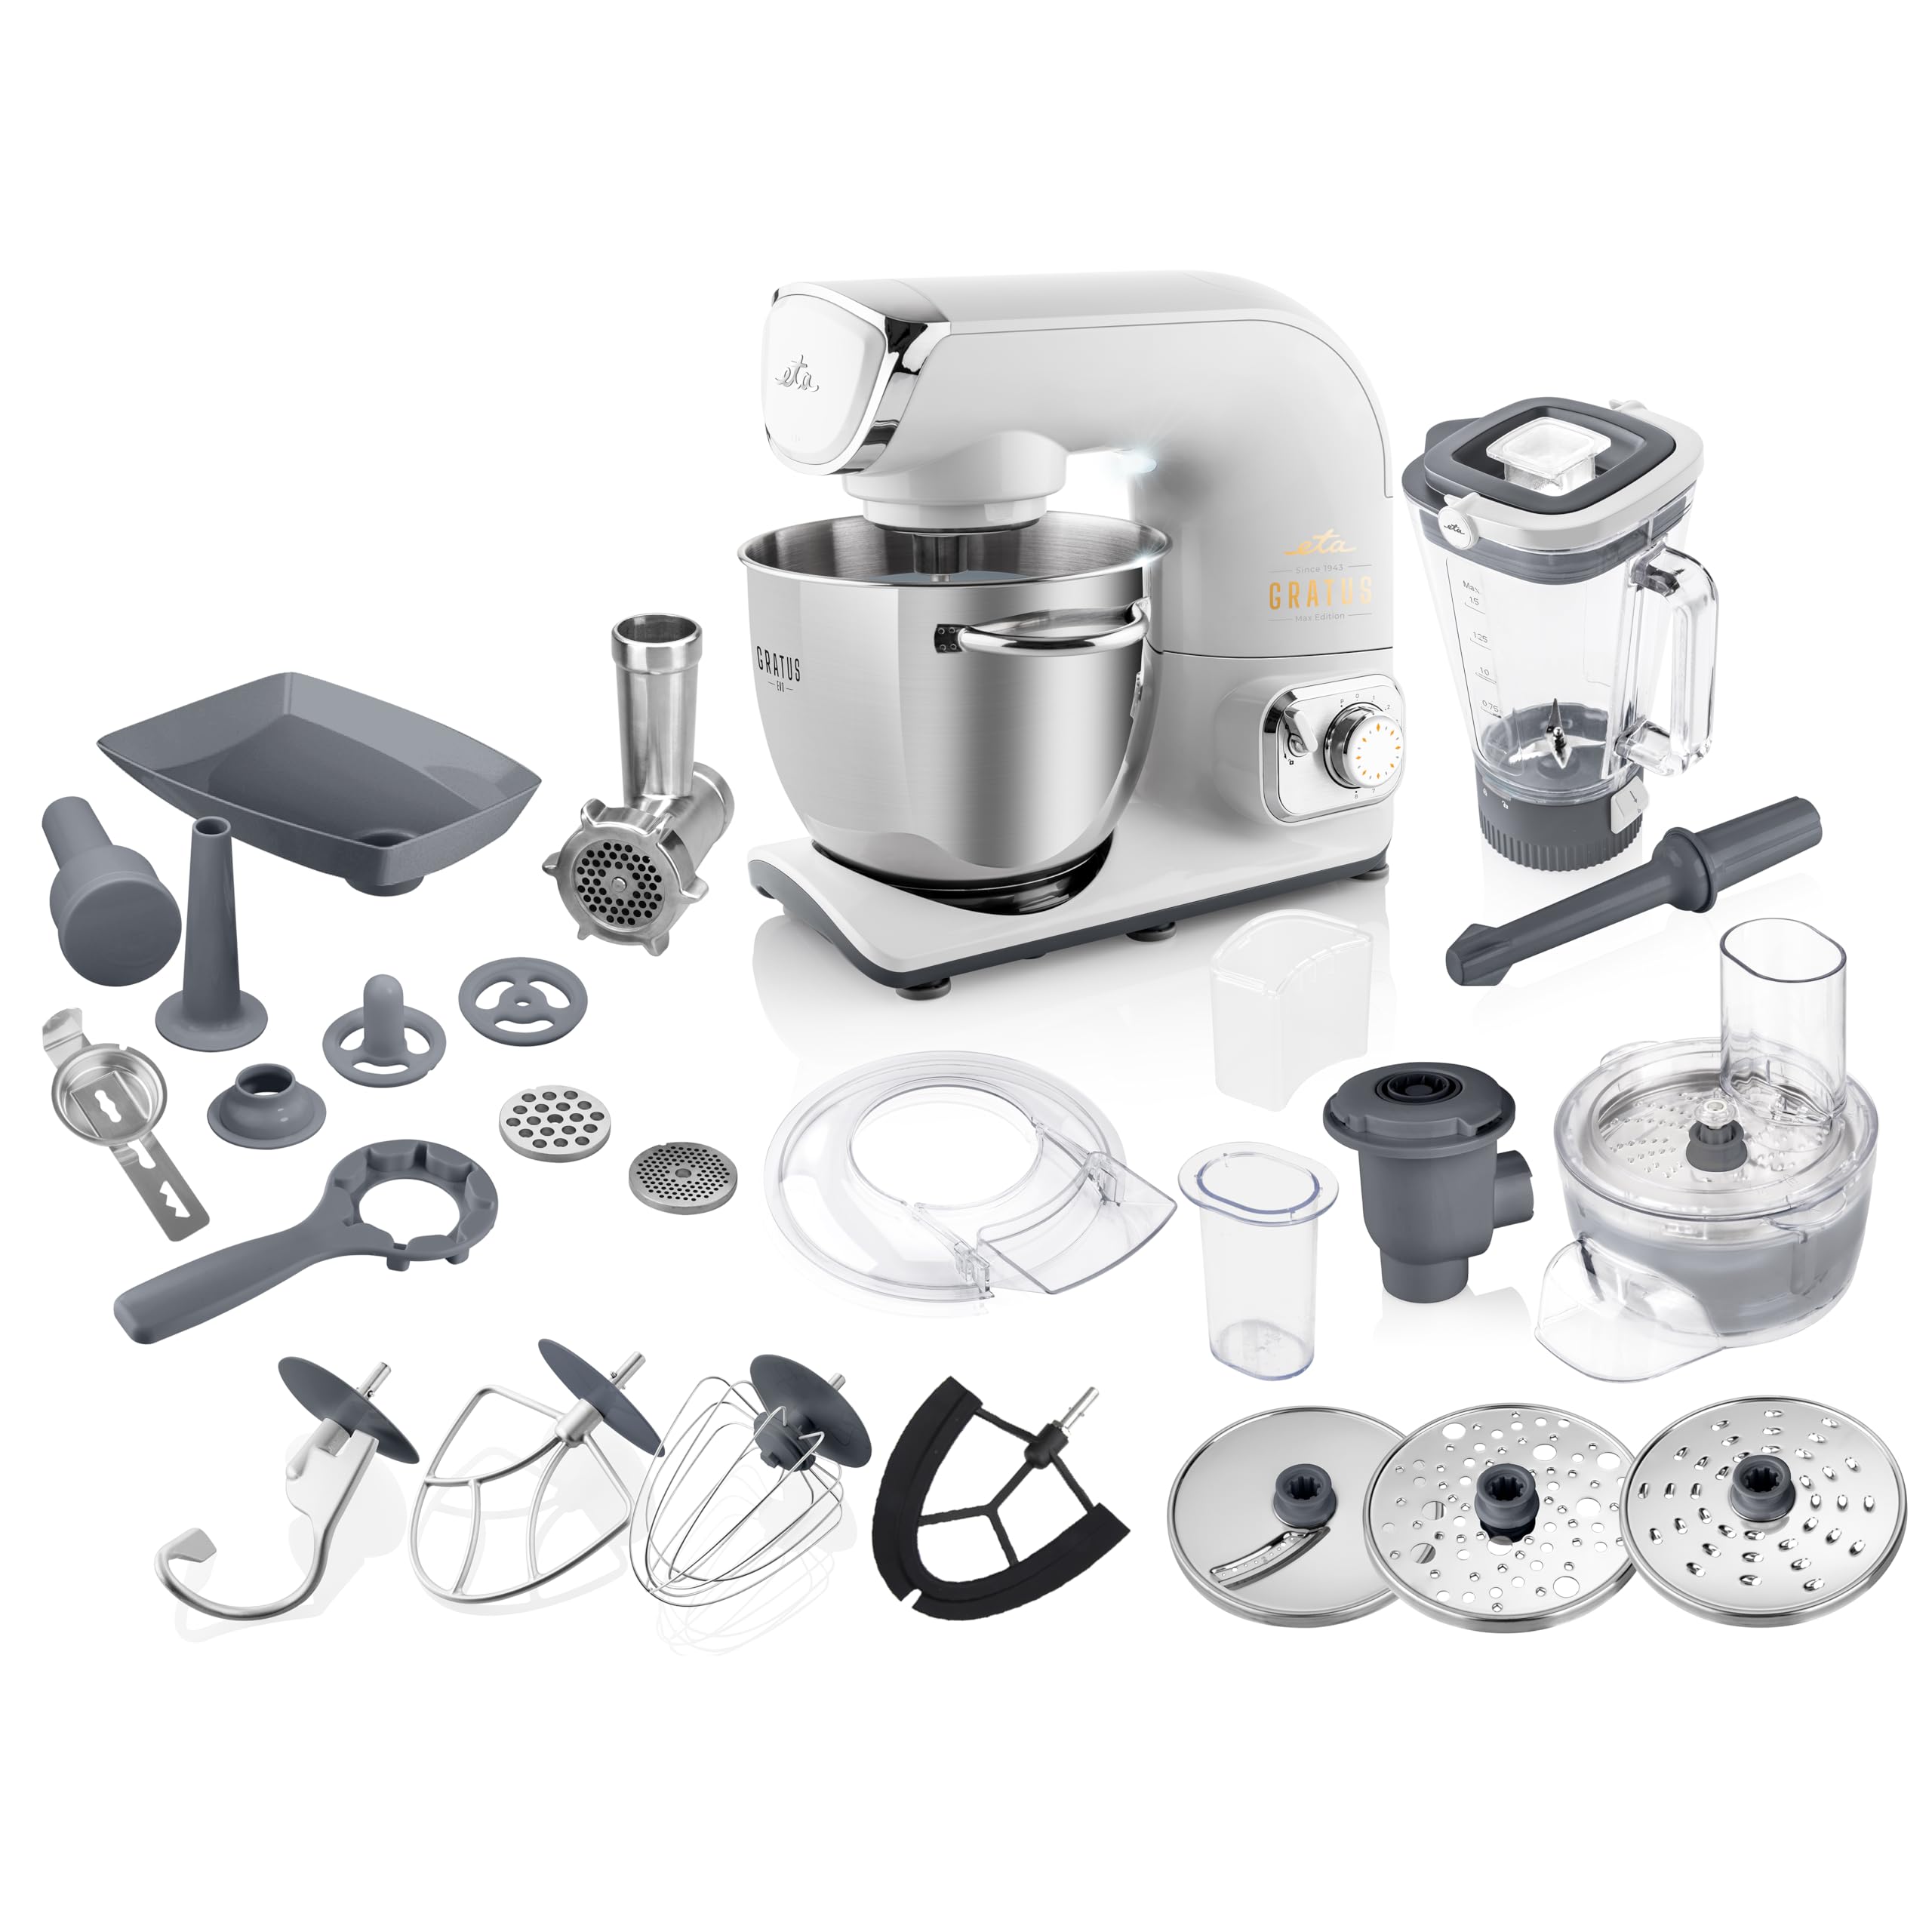
Image 1.1: The ETA Gratus Evo Max Food Processor with its stainless steel bowl.
2. Vigtige sikkerhedsinstruktioner
- Læs alle instruktioner omhyggeligt, før du bruger apparatet.
- Sørg altid for, at apparatet er taget ud af stikkontakten før montering, adskillelse eller rengøring.
- Nedsænk ikke motorenheden i vand eller anden væske.
- Hold hænder og redskaber væk fra bevægelige dele under drift for at forhindre skader.
- Never operate the appliance with a damaged cord or plug. Contact customer support for repairs.
- Dette apparat er ikke beregnet til brug af børn eller personer med nedsatte fysiske, sensoriske eller mentale evner, medmindre de er under opsyn.
- Ensure the pivoting arm safety system is engaged before starting the appliance to prevent unintentional starts.
- Use only original ETA accessories and attachments.
3. Pakkens indhold
Pak forsigtigt alle komponenter ud, og kontroller dem i henhold til listen nedenfor. Kontakt kundesupport, hvis der mangler eller er beskadigede dele.
- ETA Gratus Evo Max Food Processor main unit
- 5.5L stainless steel bowl with transparent lid
- Æltekrog
- Pisk
- Flexible beater (for creams and light batters)
- 1.5L glass blender
- Meat grinder (62mm diameter)
- 3 grinding plates for meat grinder
- Tilbehør til pølsefyld
- Kebbe vedhæftning
- Candy dough mold
- Puree press
- Slip nøglen
- Grater attachment with 3 stainless steel graters
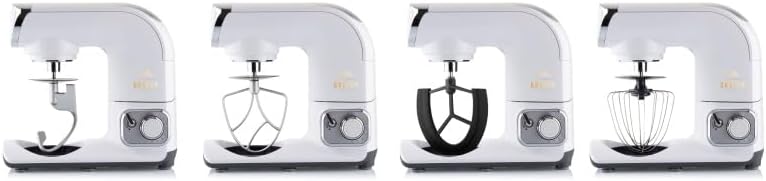
Image 3.1: The kneading hook, beater, flexible beater, and whisk attachments.
4. Kom godt i gang (opsætning)
4.1 Udpakning og første rengøring
- Fjern alle emballagematerialer og reklameetiketter.
- Clean all parts that will come into contact with food before first use. Refer to the 'Maintenance and Cleaning' section.
4.2 Samling af hovedenheden
- Placer hovedenheden på en stabil, flad og tør overflade.
- Lift the mixing arm by pressing the release button and raising it until it locks into position.
- Place the stainless steel bowl onto the base and turn it clockwise until it locks securely.
- Select the desired attachment (kneading hook, whisk, or beater) and insert it into the attachment shaft. Push upwards and turn slightly until it clicks into place.
- Lower the mixing arm by pressing the release button and gently pushing it down until it locks.
- Attach the transparent splash guard to the mixing arm if desired.
5. Betjeningsvejledning
5.1 Generel drift
- Sørg for, at apparatet er korrekt samlet og tilsluttet en passende stikkontakt.
- Turn the speed control dial to the desired setting. The appliance features continuous speed adjustment.
- For short bursts of maximum power, use the Pulse function.
- Always start at a low speed and gradually increase to prevent splashing.
- The planetary mixing system ensures thorough mixing by rotating the attachment in one direction while the drive head rotates in the opposite direction.
5.2 Using the Kneading Hook
The kneading hook is ideal for heavy doughs such as bread, pizza, or pasta dough.
- Attach the kneading hook as described in Section 4.2.
- Tilsæt ingredienserne til skålen af rustfrit stål.
- Select a low to medium speed for kneading.

Image 5.1: The kneading hook positioned in the mixing bowl.
5.3 Brug af piskeriset
The whisk is suitable for whipping cream, egg whites, light batters, and sauces.
- Attach the whisk.
- Tilføj ingredienser til skålen.
- Start at a low speed and gradually increase to a higher speed for best results.

Image 5.2: The whisk attachment in operation.
5.4 Using the Flexible Beater
The flexible beater is designed for creams and light batters, ensuring ingredients are scraped from the sides of the bowl for even mixing.
- Attach the flexible beater.
- Tilføj ingredienser.
- Use medium speeds for thorough mixing.
5.5 Using the Glass Blender
The 1.5L glass blender is perfect for smoothies, soups, sauces, and purees.
- Ensure the main mixing arm is raised and locked.
- Place the blender onto the high-speed drive outlet on top of the main unit and twist to lock.
- Add ingredients to the blender jug, ensuring not to exceed the MAX fill line.
- Select desired speed or use the Pulse function.
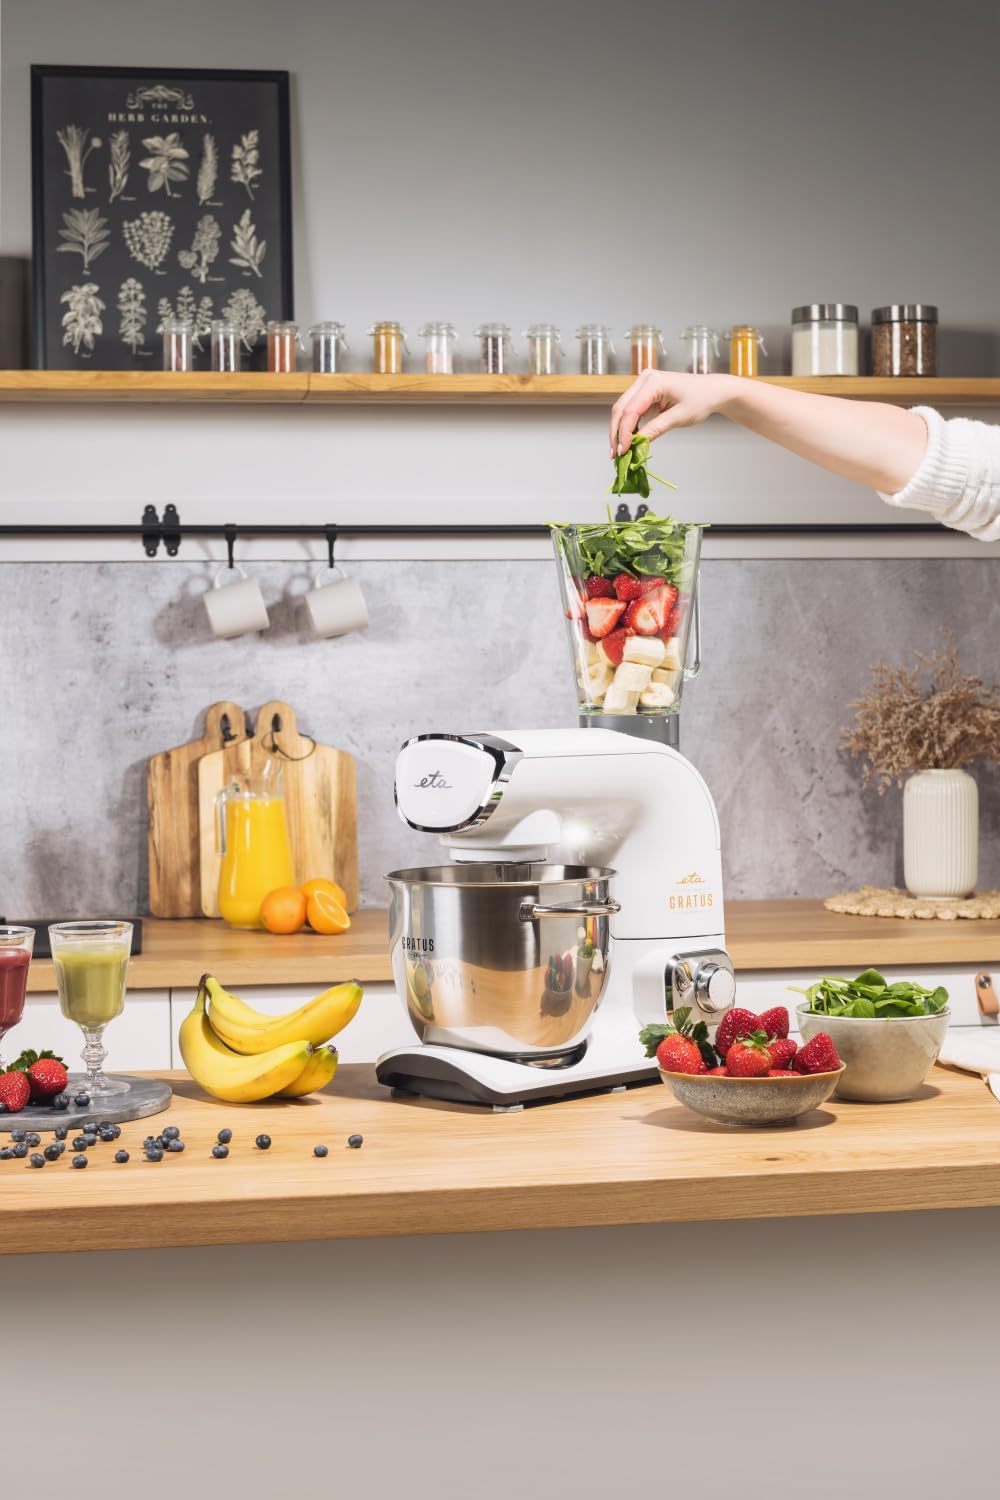
Image 5.3: The glass blender attachment in use.
5.6 Brug af kødhakkeren
The 62mm meat grinder attachment is used for grinding meat, making sausages, and kebbe.
- Ensure the main mixing arm is raised and locked.
- Attach the meat grinder to the front drive outlet and secure it.
- Assemble the desired grinding plate, blade, and screw into the grinder housing.
- Place a bowl under the outlet.
- Feed pre-cut meat into the hopper using the food pusher.
- Use a medium speed setting.

Image 5.4: The meat grinder attachment in operation.
5.7 Using the Grater Attachment
The grater attachment with its three stainless steel graters allows for fine, coarse, and slicing functions for vegetables, cheese, and more.
- Ensure the main mixing arm is raised and locked.
- Attach the grater housing to the front drive outlet and secure it.
- Insert the desired grater disc.
- Place a bowl under the outlet.
- Feed ingredients into the chute using the food pusher.
- Use a medium to high speed setting.

Image 5.5: The three stainless steel grating discs: fine, coarse, and slicing.
6. Vedligeholdelse og rengøring
Korrekt rengøring og vedligeholdelse sikrer din foodprocessors lange levetid og optimale ydeevne.
6.1 Generel rengøring
- Tag altid stikket ud af stikkontakten før rengøring.
- Tør hovedmotorenheden af med enamp klæde. Nedsænk den aldrig i vand.
- The stainless steel bowl, kneading hook, whisk, and flexible beater are generally dishwasher safe, but hand washing is recommended for best care.
- The glass blender jug, meat grinder components, and grater attachment parts should be hand washed with warm soapy water.
- Tør alle dele grundigt, før de monteres igen eller opbevares.
6.2 Vedligeholdelsesinstruktioner
- Kun håndvask for specific components as indicated above to preserve their finish and functionality.
- Avoid abrasive cleaners or scouring pads that could damage surfaces.
- Opbevar apparatet og dets tilbehør et tørt sted.
7. Fejlfinding
If you encounter issues with your ETA Gratus Evo Max, refer to the following common problems and solutions:
| Problem | Mulig årsag | Løsning |
|---|---|---|
| Apparatet starter ikke | Not plugged in; Mixing arm not locked down; Safety switch not engaged. | Check power connection; Ensure mixing arm is fully lowered and locked; Verify all attachments are correctly installed. |
| Motor stopper under drift | Overload protection activated; Appliance overheated. | Reduce load; Turn off and unplug, allow to cool for 30 minutes before restarting. |
| Vedhæftede filer blandes ikke korrekt | Attachment not correctly installed; Too much or too little ingredient. | Re-install attachment; Adjust ingredient quantities according to recipes. |
| Høj støj eller vibrationer | Appliance not on a stable surface; Attachment loose or damaged. | Place on a flat, stable surface; Check attachment installation; Inspect for damage. |
8. Tekniske specifikationer
Detailed specifications for the ETA Gratus Evo Max Food Processor.
| Specifikation | Værdi |
|---|---|
| Mærke | ETA |
| Modelnavn | Gratus Evo Max |
| Modelnummer | 08590393376797 |
| Magt | 1500 watt |
| Materiale | Metal |
| Farve | Hvid |
| Skålekapacitet | 5.5 Liters (stainless steel) |
| Blenderkapacitet | 1.5 Liters (glass) |
| Meat Grinder Diameter | 62 mm |
| Varens vægt | 15.5 kilo |
| Speciel funktion | Adjustable Speed Control, Planetary Mixing System |
| Plejevejledning | Hand wash (for specific components) |

Image 8.1: Key features including 1500W motor, all-metal design, and speed stabilization.
9. Garanti og kundesupport
For garantioplysninger henvises til garantikortet, der følger med dit produkt, eller besøg den officielle forventede leveringsdato. website. If you require technical assistance, spare parts, or have any questions not covered in this manual, please contact ETA customer support through their official channels.
- Online support: Visit the official ETA webhjemmeside med ofte stillede spørgsmål og kontaktmuligheder.
- Servicecentre: Information on authorized service centers can be found on the ETA webwebsted.