
1. Introduktion
Thank you for choosing the Polibi 30" Bathroom Vanity with Top Sink. This manual provides detailed instructions for the safe assembly, proper operation, and effective maintenance of your new bathroom vanity. Please read all instructions carefully before beginning assembly and retain this manual for future reference.
2. Sikkerhedsoplysninger
- Always use appropriate tools and follow all assembly steps as outlined.
- Sørg for, at alt hardware er forsvarligt fastspændt før brug. Kontroller regelmæssigt og efterspænd om nødvendigt.
- Overfyld ikke skuffer eller hylder. Fordel vægten jævnt.
- Hold små dele og emballagematerialer væk fra børn og kæledyr for at forhindre kvælningsfare.
- If any parts are missing or damaged, do not attempt to assemble the product. Contact customer service for assistance.
3. Pakkens indhold
Kontroller, at alle komponenter er til stede, før monteringen påbegyndes.
- Vanity Cabinet (MDF+Solid Wood Pine)
- Ceramic Top Sink
- Handles (Iron)
- Monteringshardwaresæt
- Instruktionsmanual
4. Opsætning og montering
Assembly is required for this bathroom vanity. The cabinet parts and hardware are shipped together. Each part has marks and reserved holes to facilitate step-by-step assembly according to the instructions provided in the package.
4.1 Dimensions Overview
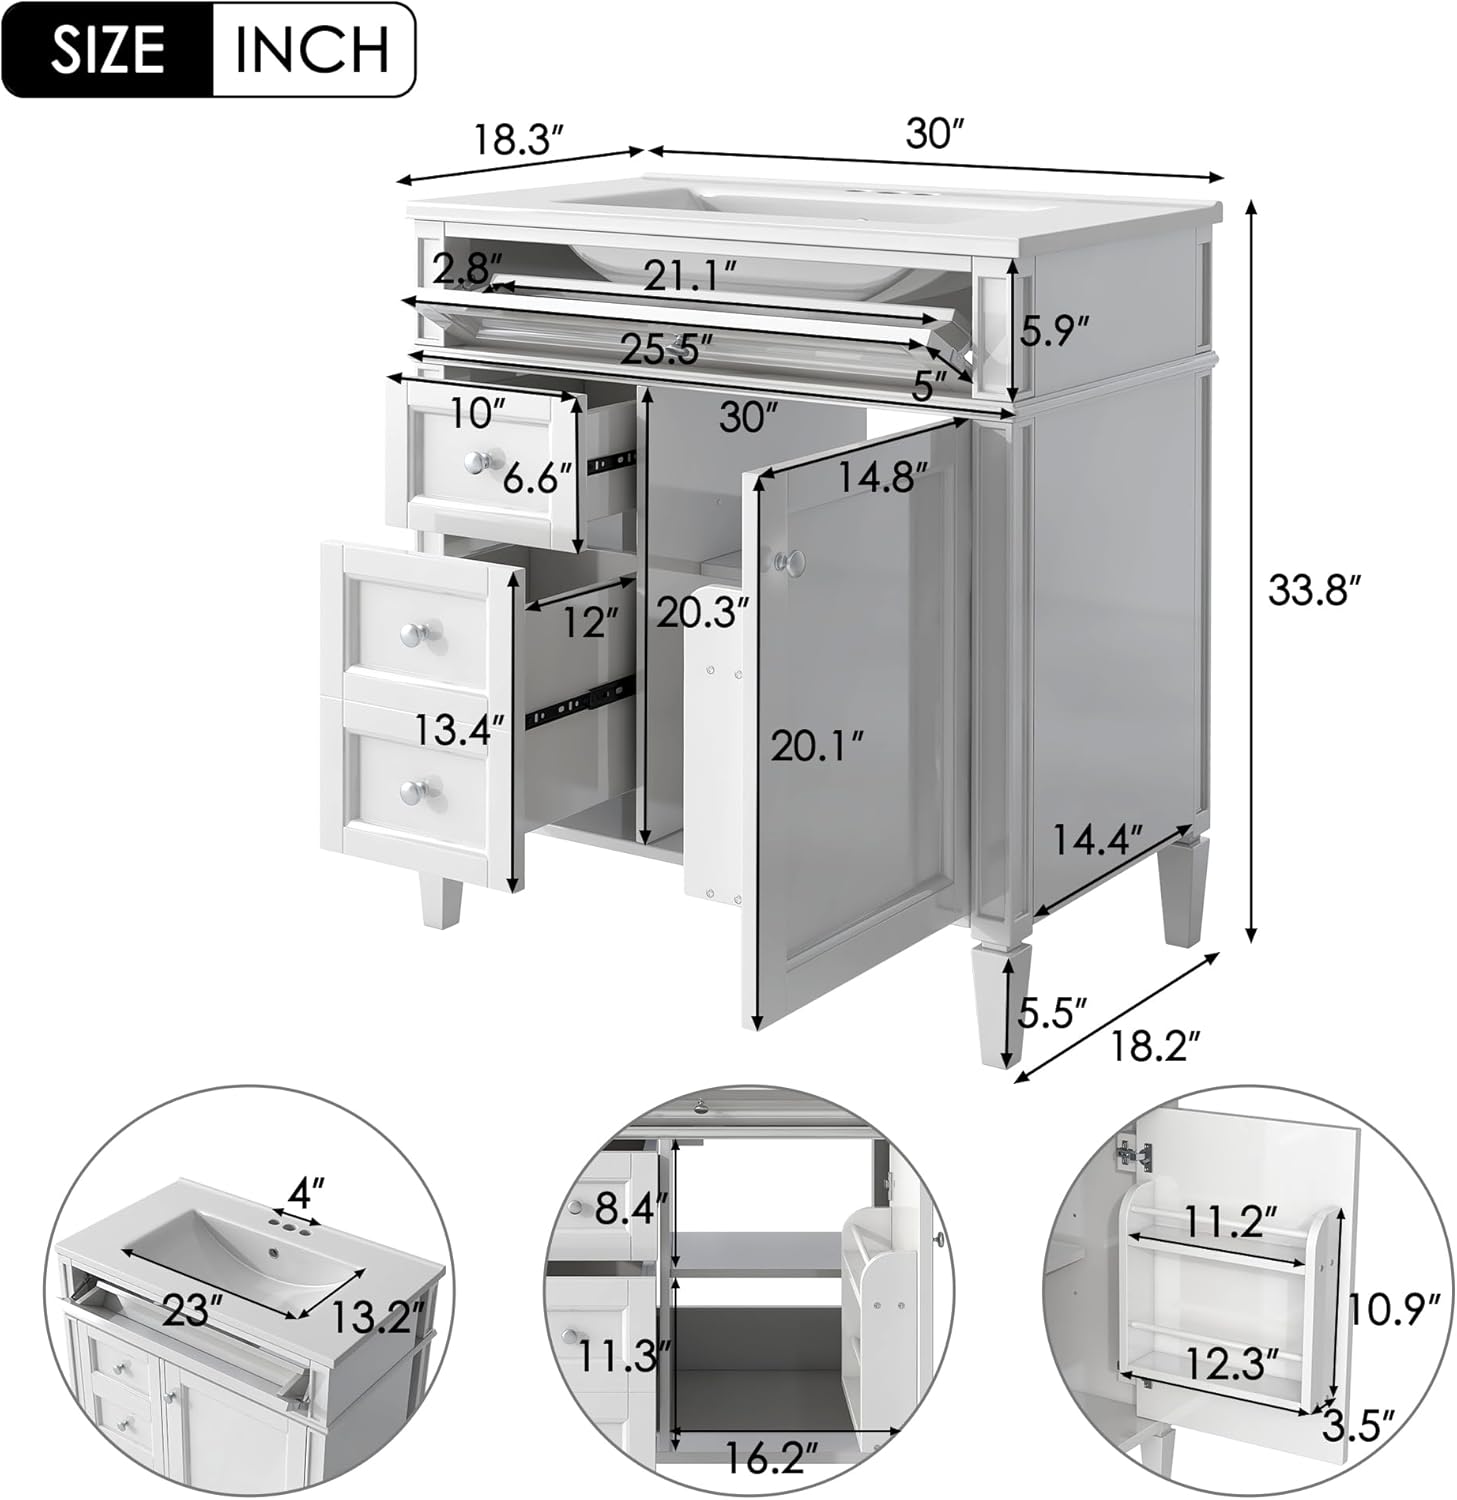
Image: Detailed dimensions of the Polibi 30-inch bathroom vanity, showing measurements for width, depth, and height, as well as internal drawer and cabinet dimensions.
4.2 Samlingstrin (generelle retningslinjer)
- Udpak og identificer dele: Carefully remove all components from the packaging. Lay them out and compare with the parts list in the included assembly guide.
- Saml kabinetrammen: Follow the numerical or alphabetical sequence in the assembly guide to connect the main panels of the cabinet using the provided hardware.
- Installer skuffer og hylder: Assemble the two main drawers and the tip-out drawer. Install the drawer runners into the cabinet frame. Insert the adjustable shelf into the main cabinet compartment.
- Attach Cabinet Doors and Door Organizer: Secure the cabinet doors to the frame using hinges. Attach the door organizer to the inside of one cabinet door.
- Installer håndtag: Attach the iron handles to the drawers and cabinet doors.
- Place the Ceramic Sink Top: Carefully position the ceramic sink top onto the assembled vanity cabinet. Ensure it is properly aligned and secured according to the specific instructions.
- Afsluttende kontrol: Verify that all connections are tight and the vanity is stable.

Image: The Polibi 30-inch bathroom vanity shown with its two main drawers, tip-out drawer, and cabinet door open, revealing the internal storage and adjustable shelf.
5. Betjening af toiletbordet
The Polibi bathroom vanity is designed for functional storage and daily use in a bathroom environment.
5.1 Lagringsfunktioner
- Skjult opbevaring: The main cabinet area, accessible via soft-close doors, provides ample space for larger toiletries and bathroom essentials, keeping them protected from water and dust.
- Skuffer: Two main drawers offer organized storage for daily necessities. A tip-out drawer is included for smaller items, providing convenient access.
- Justerbar hylde: The internal shelf within the main cabinet can be adjusted to accommodate items of various heights, optimizing storage space.
- Cabinet Door Organizer: A dedicated organizer on the cabinet door further expands usable space for smaller bottles or accessories.

Billede: Et diagram, der fremhæver ample storage features of the vanity, including the tip-out drawer, cabinet door organizer, and adjustable shelf.
5.2 Sink Usage
The ceramic top sink is designed for standard bathroom faucet installations (faucet not included). Ensure proper plumbing connections are made by a qualified professional to prevent leaks.
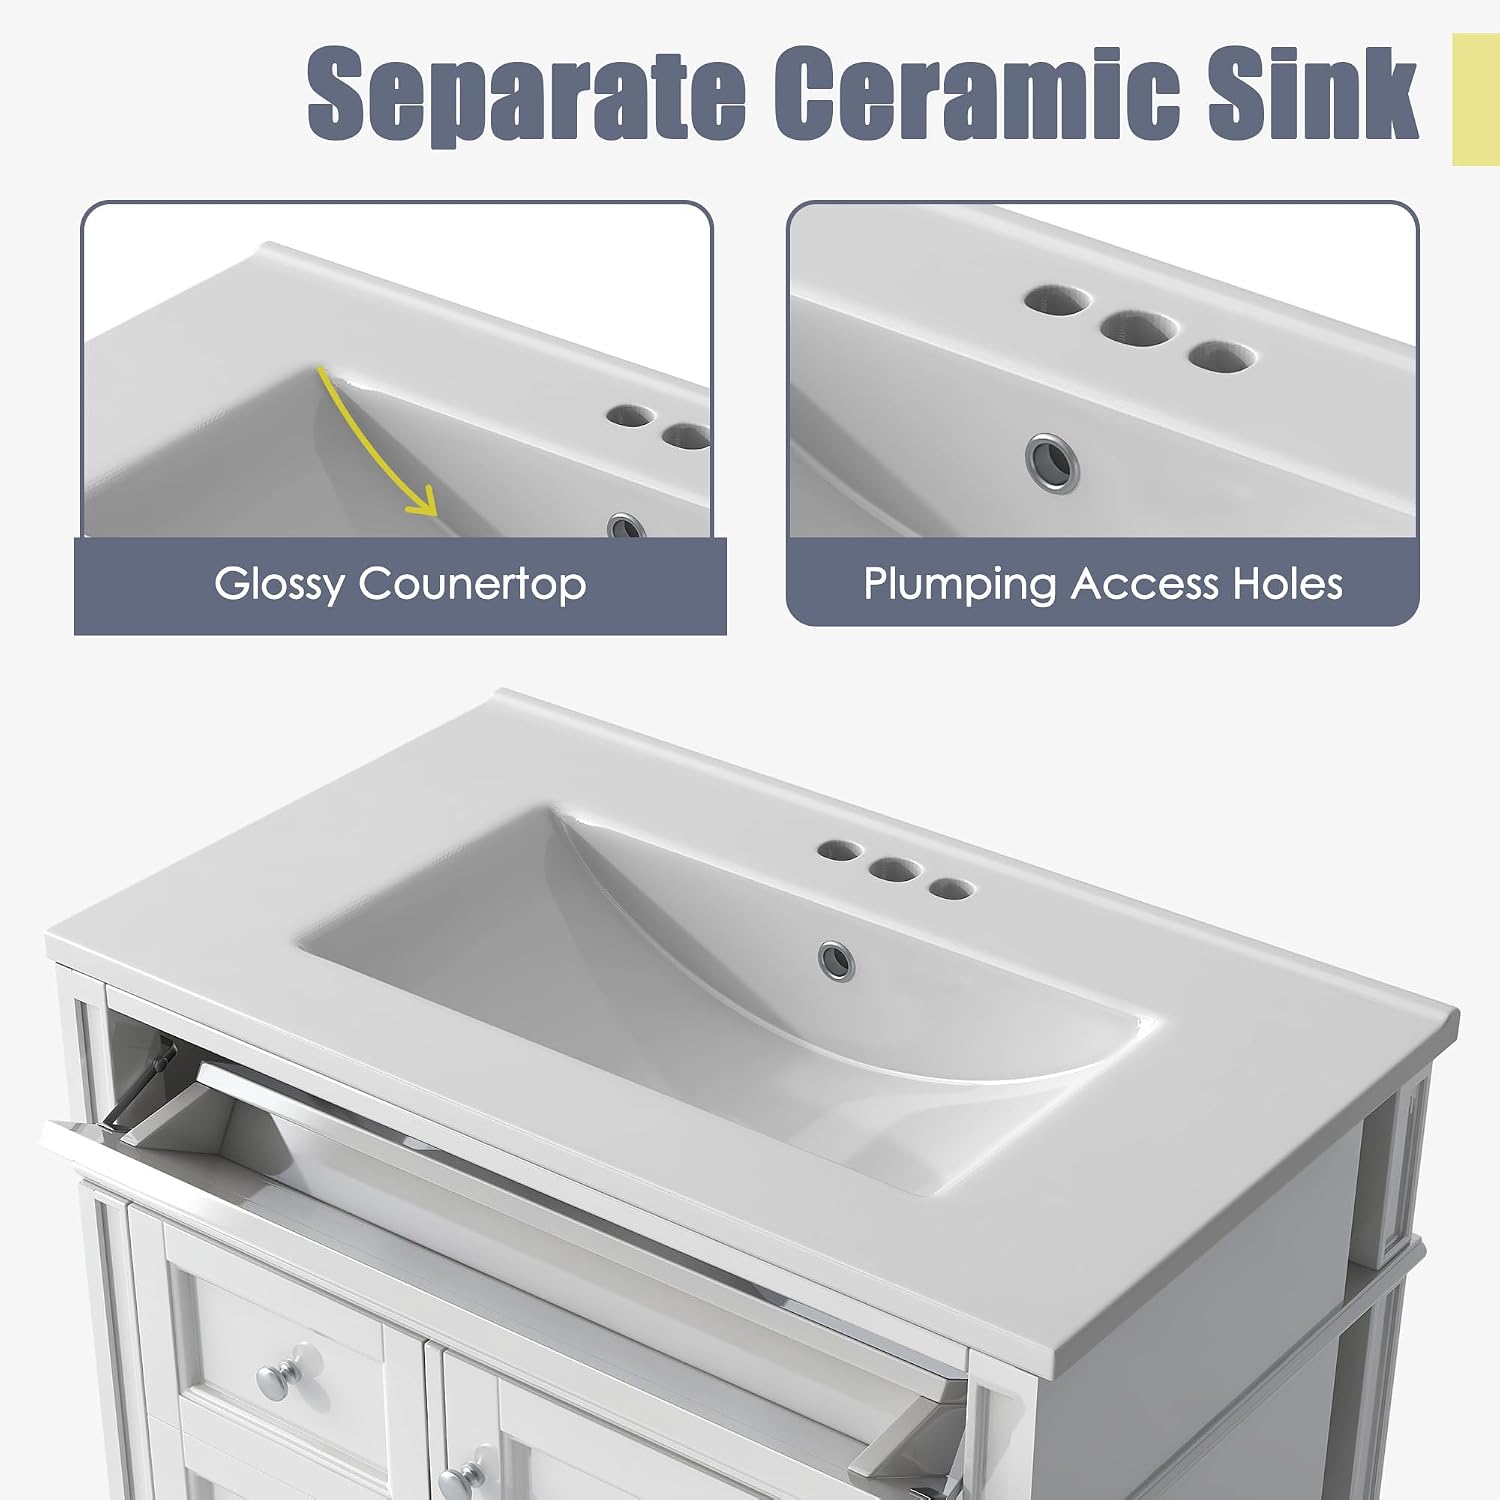
Billede: Nærbillede views of the separate ceramic sink, showing its glossy countertop and pre-drilled plumbing access holes for faucet installation.
6. Vedligeholdelse
Proper care will ensure the longevity and appearance of your Polibi bathroom vanity.
- Rensning: Wipe the vanity surfaces with a damp cloth. For stubborn stains, use a mild, non-abrasive cleaner. Avoid harsh chemicals or abrasive scrubbing pads, which can damage the finish.
- Spild: Promptly wipe up any water spills or splashes to prevent moisture damage to the wood components.
- Hardware: Kontroller og spænd regelmæssigt alle skruer og beslag for at opretholde stabiliteten.
- Keramisk vask: Clean the ceramic sink regularly with a non-abrasive bathroom cleaner to prevent mineral buildup and maintain its glossy finish.
7. Fejlfinding
- Skuffer lukker ikke jævnt: Check if the drawer runners are clean and free of debris. Ensure the drawers are properly aligned on their tracks.
- Cabinet doors misaligned: Adjust the hinges on the cabinet doors to correct any misalignment.
- Water leaks from sink: Verify that all plumbing connections are securely tightened. If leaks persist, consult a professional plumber.
- Loose handles: Re-tighten the screws securing the handles to the drawers and doors.
8. Specifikationer
| Feature | Detalje |
|---|---|
| Mærke | polybi |
| Modelnummer | 103 |
| Produktmål (D x B x H) | 18.3 cm x 30 cm x 33.8 cm |
| Farve | Hvid |
| Materiale | Cabinet: MDF+Solid Wood(Pine); Handle: Iron; Sink: Ceramic |
| Antal skuffer | 3 (2 standard, 1 tip-out) |
| Antal døre | 2 |
| Antal hylder | 2 (justerbar) |
| Monteringstype | Frit stående |
| Påkrævet samling | Ja |
| Produktplejevejledning | Tør med Damp Klæde |
9. Garanti og support
For warranty information, missing parts, or any product-related inquiries, please contact Polibi customer support directly. Refer to the contact information provided with your purchase or visit the official Polibi webwebsted for hjælp.