1. Introduktion
This manual provides detailed instructions for the installation, operation, and maintenance of your VOVO STYLEMENT TCB-8200SA Smart Toilet. Please read this manual thoroughly before installation and use to ensure proper function and safety. Keep this manual for future reference.

Image 1.1: VOVO STYLEMENT TCB-8200SA Smart Toilet, a modern elongated one-piece toilet with integrated bidet functions.
2. Sikkerhedsoplysninger
Observe all safety warnings and instructions to prevent injury or damage. This appliance is for household use only.
- Ensure the power outlet is a 120-volt grounded outlet.
- Produktet må ikke nedsænkes i vand, og der må ikke sprøjtes vand direkte på elektriske komponenter.
- Tag stikket ud af enheden, før du rengør eller udfører vedligeholdelse.
- Forsøg ikke at reparere enheden selv. Kontakt kvalificeret servicepersonale.
- Hold børn og personer med nedsatte fysiske, sensoriske eller mentale evner væk fra enheden, medmindre de er under opsyn.
3. Produktfunktioner
The VOVO STYLEMENT TCB-8200SA Smart Toilet offers a range of advanced features for enhanced comfort and hygiene:
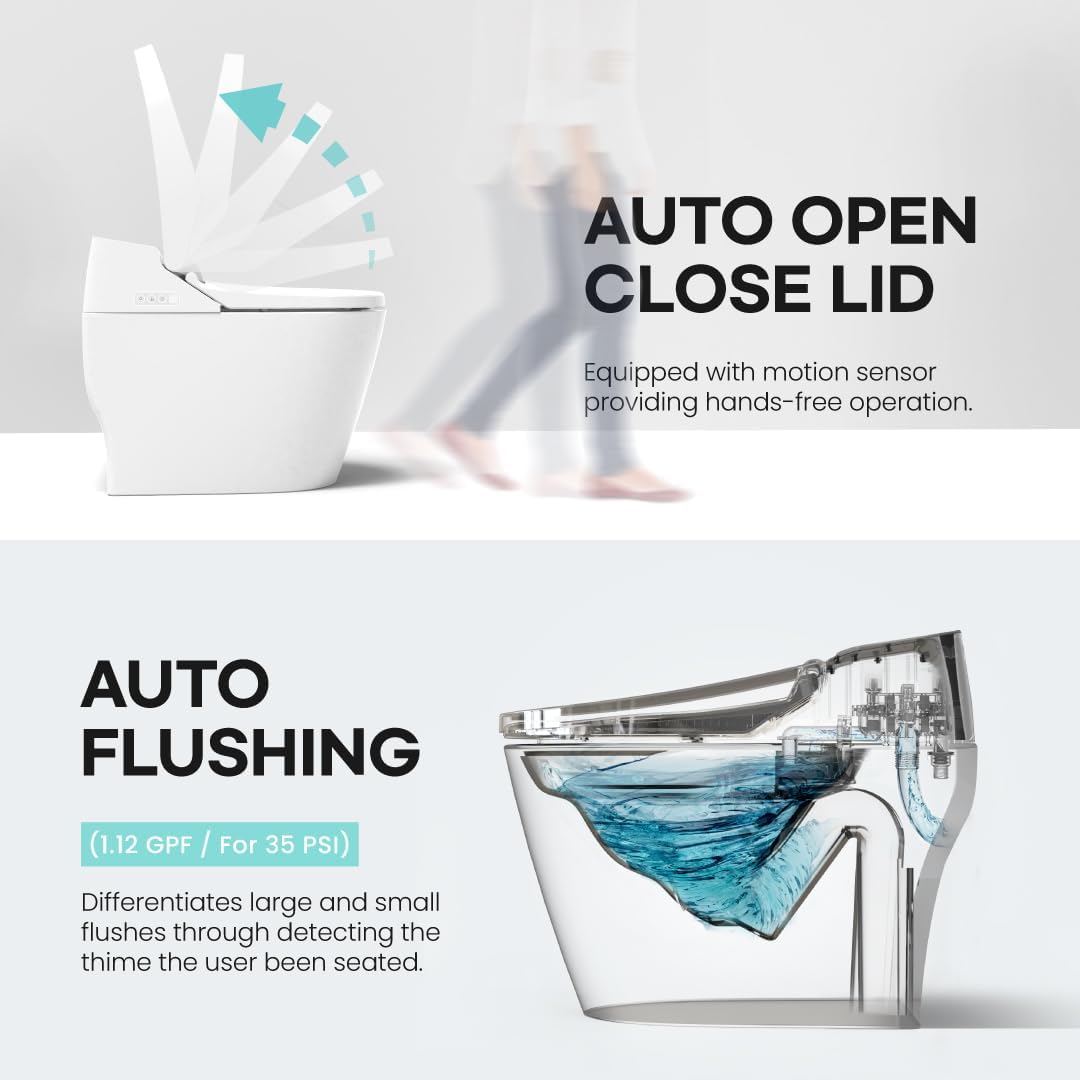
- Automatisk åbning/luk låg: Motion sensor activated lid for hands-free operation.
- Auto Flushing: Differentiates between large and small flushes based on seated time, using 1.12 GPF (for 35 PSI).
- Opvarmet sæde: Adjustable heated seat for comfort, especially in colder environments.
- Varm tørretumbler og vand: Water heating system and built-in air dryer with 3 adjustable temperatures.
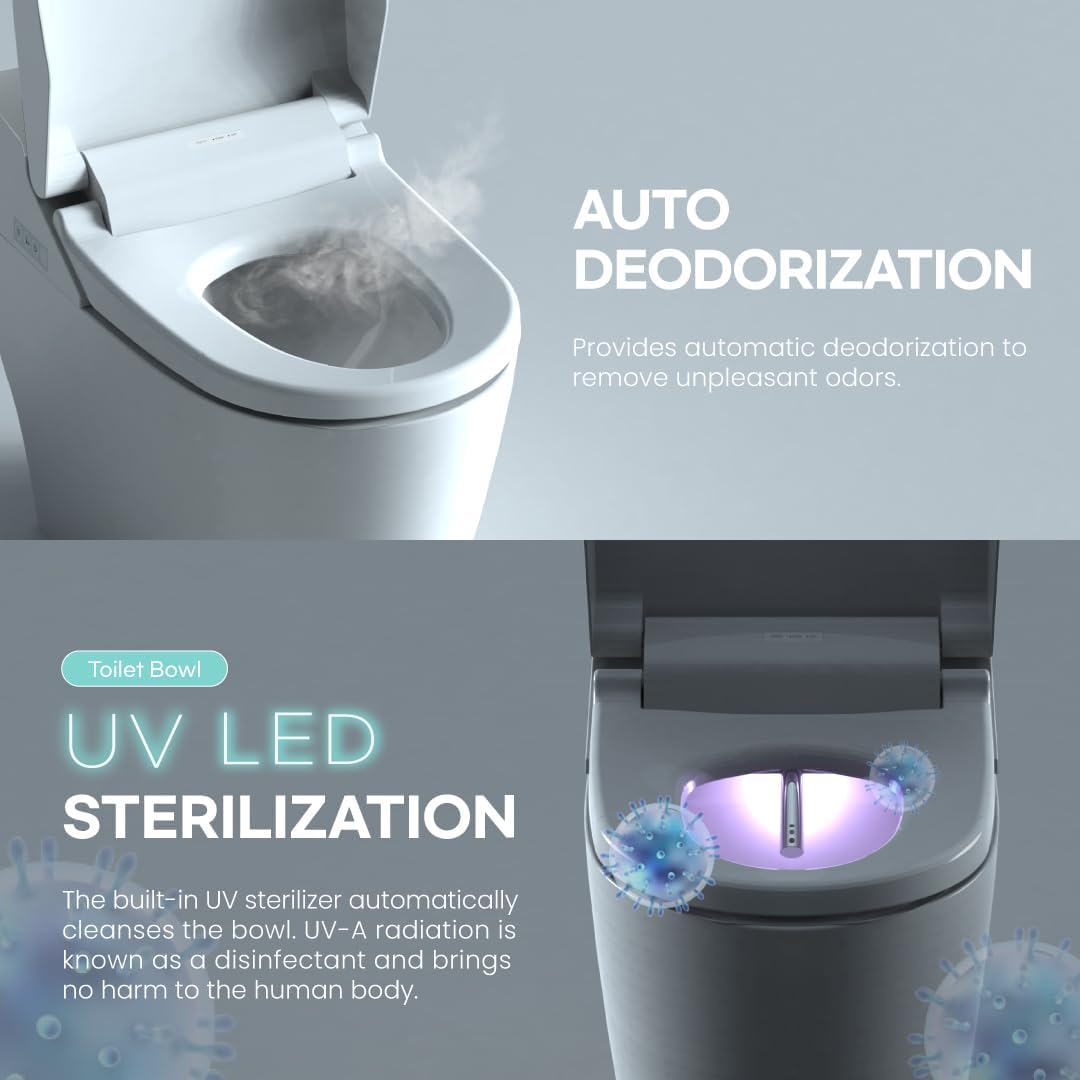
- Automatisk lugtfjerning: Automatic deodorizer to remove unpleasant odors.
- UV LED Sterilization: Built-in UV sterilizer for the nozzle and bowl, providing disinfection.
- 3-i-1 dyse i rustfrit stål: Offers Posterior, Feminine, and Turbo Wash functions.
- Selvrensende dyse: Dysen renser sig selv automatisk før og efter hver brug.
- Blackout Manual Flushing: Manual flush buttons on the side for use during power outages.
- Sleek and Acrylic Design: Modern, tankless design with a luxurious acrylic remote controller.


4. Installationsvejledning
Professional installation is recommended. Ensure all local plumbing and electrical codes are followed. Before beginning, verify the product dimensions and required clearances.
4.1 Kontrol før installation
Confirm that the product dimensions fit your bathroom space and plumbing rough-in. A 120-volt outlet is required, and the power cord length is 1.2M (4ft).

Image 4.1: Product dimensions (19 x 31 x 29 inches) and 12-inch rough-in requirement. A 120-volt outlet is necessary.
4.2 Installationstrin
- Prepare the Floor Flange: Ensure the floor flange is properly installed and secure. Place the toilet over the floor bolts.
- Connect the Seat Unit: Carefully align and connect the smart seat unit to the toilet bowl. Ensure all connections are secure.
- Tilslut vandforsyning: Connect the water supply line to the toilet's inlet valve. Ensure a tight, leak-free connection. Turn on the water supply slowly and check for leaks.
- Tilslut strøm: Sæt netledningen i en jordforbundet 120-volt stikkontakt.

Image 4.2: Aligning the toilet with the floor bolts for secure placement.

Image 4.3: Securing the smart seat unit to the toilet bowl.

Image 4.4: Connecting the water line to the toilet's inlet valve.

Image 4.5: Plugging the toilet into a standard electrical outlet.
5. Betjeningsvejledning
The VOVO STYLEMENT TCB-8200SA is operated primarily via its remote control. Familiarize yourself with the remote's functions for optimal use.

Billede 5.1: Overview of the remote control buttons and their corresponding functions.
5.1 Fjernbetjeningsfunktioner
- Fuld skylning: Press the "Full Flush" button for a large flush.
- Lille skylning: Press the "Small Flush" button for a small flush.
- Cover Open/Close: Controls the automatic opening and closing of the lid.
- Bagtil: Activates the posterior wash function.
- Feminine: Activates the feminine wash function.
- Turbovask: Initiates a powerful wash. Water pressure starts at level 1 and can be adjusted during operation.
- Tørretumbler: Activates the warm air dryer after wash functions.
- Position/Pressure/Dry: Use the +/- buttons to adjust nozzle position, water pressure, or dryer temperature/intensity.
5.2 Manual Flushing (Power Outage)
I tilfælde af en magt outage, locate the manual flush buttons on the side of the toilet. Press the appropriate button for a flush or rim wash.
6. Vedligeholdelse
Regelmæssig rengøring og vedligeholdelse vil sikre dit smarte toilets levetid og optimale ydeevne.
- Udvendig rengøring: Tør de udvendige overflader af med en blød, damp klud og mildt, ikke-slibende rengøringsmiddel. Undgå skrappe kemikalier.
- Rengøring af dyse: The nozzle has a self-cleaning function. For deeper cleaning, refer to the remote control for manual nozzle extension and clean with a soft brush.
- Rengøring af skål: Use standard toilet bowl cleaners. Ensure the UV sterilization function is active for continuous hygiene.
- Filtervedligeholdelse: Periodically check the water filter (if installed) for sediment buildup and clean or replace as necessary to maintain water pressure.
- Strømafbrydelse: Always unplug the unit from the power outlet before performing any extensive cleaning or maintenance.
7. Fejlfinding
If you encounter issues with your smart toilet, refer to the following common problems and solutions. If the problem persists, contact customer support.
| Problem | Mulig årsag | Løsning |
|---|---|---|
| Ingen strøm / Enheden reagerer ikke | Power cord unplugged, circuit breaker tripped, remote batteries low. | Check power connection, reset breaker, replace remote batteries (3 AA batteries required). |
| Water spray not working or weak | Vandtilførselsventil lukket, vandfilter tilstoppet, lavt vandtryk. | Ensure water supply valve is fully open. Clean or replace water filter. Check household water pressure. |
| Låget åbner/lukker ikke automatisk | Motion sensor obstructed or dirty, sensor malfunction. | Clean the motion sensor area. If issue persists, contact support. |
| Sædevarme varmer ikke op | Sædevarmefunktion deaktiveret, temperaturindstilling for lav. | Activate heated seat function via remote. Adjust temperature setting higher. |
| Unpleasant odors persist | Deodorizer filter needs cleaning/replacement, severe odor source. | Ensure deodorizer is active. Clean the toilet thoroughly. |
8. Specifikationer
| Feature | Detalje |
|---|---|
| Modelnummer | TCB-8200SA |
| Mærke | VOVO |
| Farve | Hvid |
| Materiale | Rustfrit stål (dyse), polypropylen (sæde) |
| Installationstype | Gulvmonteret |
| Form | Aflang (Oflang) |
| Varens vægt | 109.8 pund |
| Produktdimensioner | 19 x 31 x 29 tommer |
| Skyllevolumen | 1.12 GPF |
| Strømbehov | 120 volt udtag |
| Batterier (fjernbetjening) | 3 AA batterier (medfølger) |
| UPC | 850056923224 |
9. Garanti og support
VOVO provides customer support and warranty services for its products. For specific warranty details, please refer to the warranty card included with your product or visit the official VOVO webwebsted.
- Beskyttelsesplaner: Additional protection plans may be available for purchase, such as 4-Year Protection Plans.
- Kundeservice: For technical assistance, troubleshooting, or warranty claims, please contact VOVO USA customer support.
- Kontaktoplysninger: Refer to your product packaging or the official VOVO webwebstedet for de mest aktuelle kontaktoplysninger til kundesupport.