
1. Introduktion
This manual provides detailed instructions for the installation, operation, and maintenance of your EVTSCAN Digital Thermoregulator. This device is designed to precisely control heating equipment, such as wall-mounted boilers and gas boilers, ensuring a stable and energy-efficient temperature environment. Please read this manual thoroughly before installation and use to ensure proper function and safety.
2. Sikkerhedsoplysninger
Overhold altid følgende sikkerhedsforanstaltninger for at forhindre skader på enheden eller personskade:
- Sørg for, at strømforsyningen er afbrudt før installation eller vedligeholdelse.
- Installationen bør udføres af en kvalificeret fagmand, hvis du er usikker på de elektriske ledninger.
- Udsæt ikke enheden for vand eller for høj luftfugtighed.
- Use only the specified battery type (2 AA batteries) and ensure correct polarity.
- Hold enheden væk fra brændbare materialer.
3. Produktet er slutview
The EVTSCAN Digital Thermoregulator features a clear LCD display for easy monitoring and a simple interface for temperature control. Its compact design allows for discreet integration into your living space.

Figur 3.1: Forside view of the Digital Thermoregulator. The LCD screen displays current settings and room temperature, with a rotary knob below for adjustments.
Nøglekomponenter:
- LCD-skærm: Shows set temperature, room temperature, time, and operational icons.
- Control Knob/Button: Bruges til at navigere i menuer og justere indstillinger.
- Batterirum: Located on the rear or side for 2 AA batteries.
- Ledningsklemmer: For connection to the heating system.
4. Specifikationer
| Feature | Specifikation |
|---|---|
| Model | EVTSCANok0g9ct2zq |
| Strømtilstand | 2 AA batterier (medfølger ikke) |
| Screen Accuracy | 0.5 ℃ |
| Probe sensor | NTC (10k) 1 % |
| Kontaktkapacitet | Greater than 30-230 V DC working voltage, lower current. Reference: 5 A 30 V (HF relay) or 2 A 30 V (NEC relay) |
| Temperaturvisningsområde | 1 til 40 ℃ |
| Standard temperaturjusteringsområde | 5 til 35 ℃ |
| Driftstemperaturområde | 0 til 50 ℃ |
| Kørende program | Set once a week |
| Produktion | Skifterelæ |
| Materiale | Flammehæmmende polycarbonat |
| Vægt | 170 g |
5. Opsætning og installation
The EVTSCAN Digital Thermoregulator is designed for simple installation. Follow these steps carefully:
5.1. Udpakning og inspektion
Carefully remove all components from the packaging. Verify that all items listed in the package contents are present and undamaged.
- 1 Digital Temperature Controller
- 2 skruer
5.2. Batteriinstallation
The device requires 2 AA batteries for operation. These are not included in the package.
- Locate the battery compartment on the back of the thermoregulator.
- Åbn batterirummets dæksel.
- Indsæt 2 AA-batterier, og sørg for korrekt polaritet (+/-).
- Luk batterirummets dæksel forsvarligt.

Figur 5.1: Vinklet view of the thermoregulator, illustrating its compact size and potential location for battery access or mounting points.
5.3. Montering og ledningsføring
The thermoregulator is designed for wall mounting. Ensure the power to your heating system is turned off before proceeding with wiring.
- Vælg en passende placering på en indvendig væg, væk fra direkte sollys, træk eller varmekilder, der kan påvirke temperaturaflæsningerne.
- Mount the backplate (if detachable) to the wall using the provided screws.
- Connect the thermoregulator to your boiler or heating system according to the wiring diagram provided with your boiler and the thermoregulator's terminal markings. This typically involves connecting the switching relay output to the boiler's control input.
- Secure the thermoregulator onto the mounted backplate.
Note: For wiring, consult a qualified electrician if you are unfamiliar with electrical installations.
6. Betjeningsvejledning
The EVTSCAN Digital Thermoregulator uses a microcomputer control technology to maintain your desired temperature efficiently.
6.1. Powering On and Initial Display
Once batteries are installed, the LCD display will illuminate, showing the current room temperature, set temperature, and time.
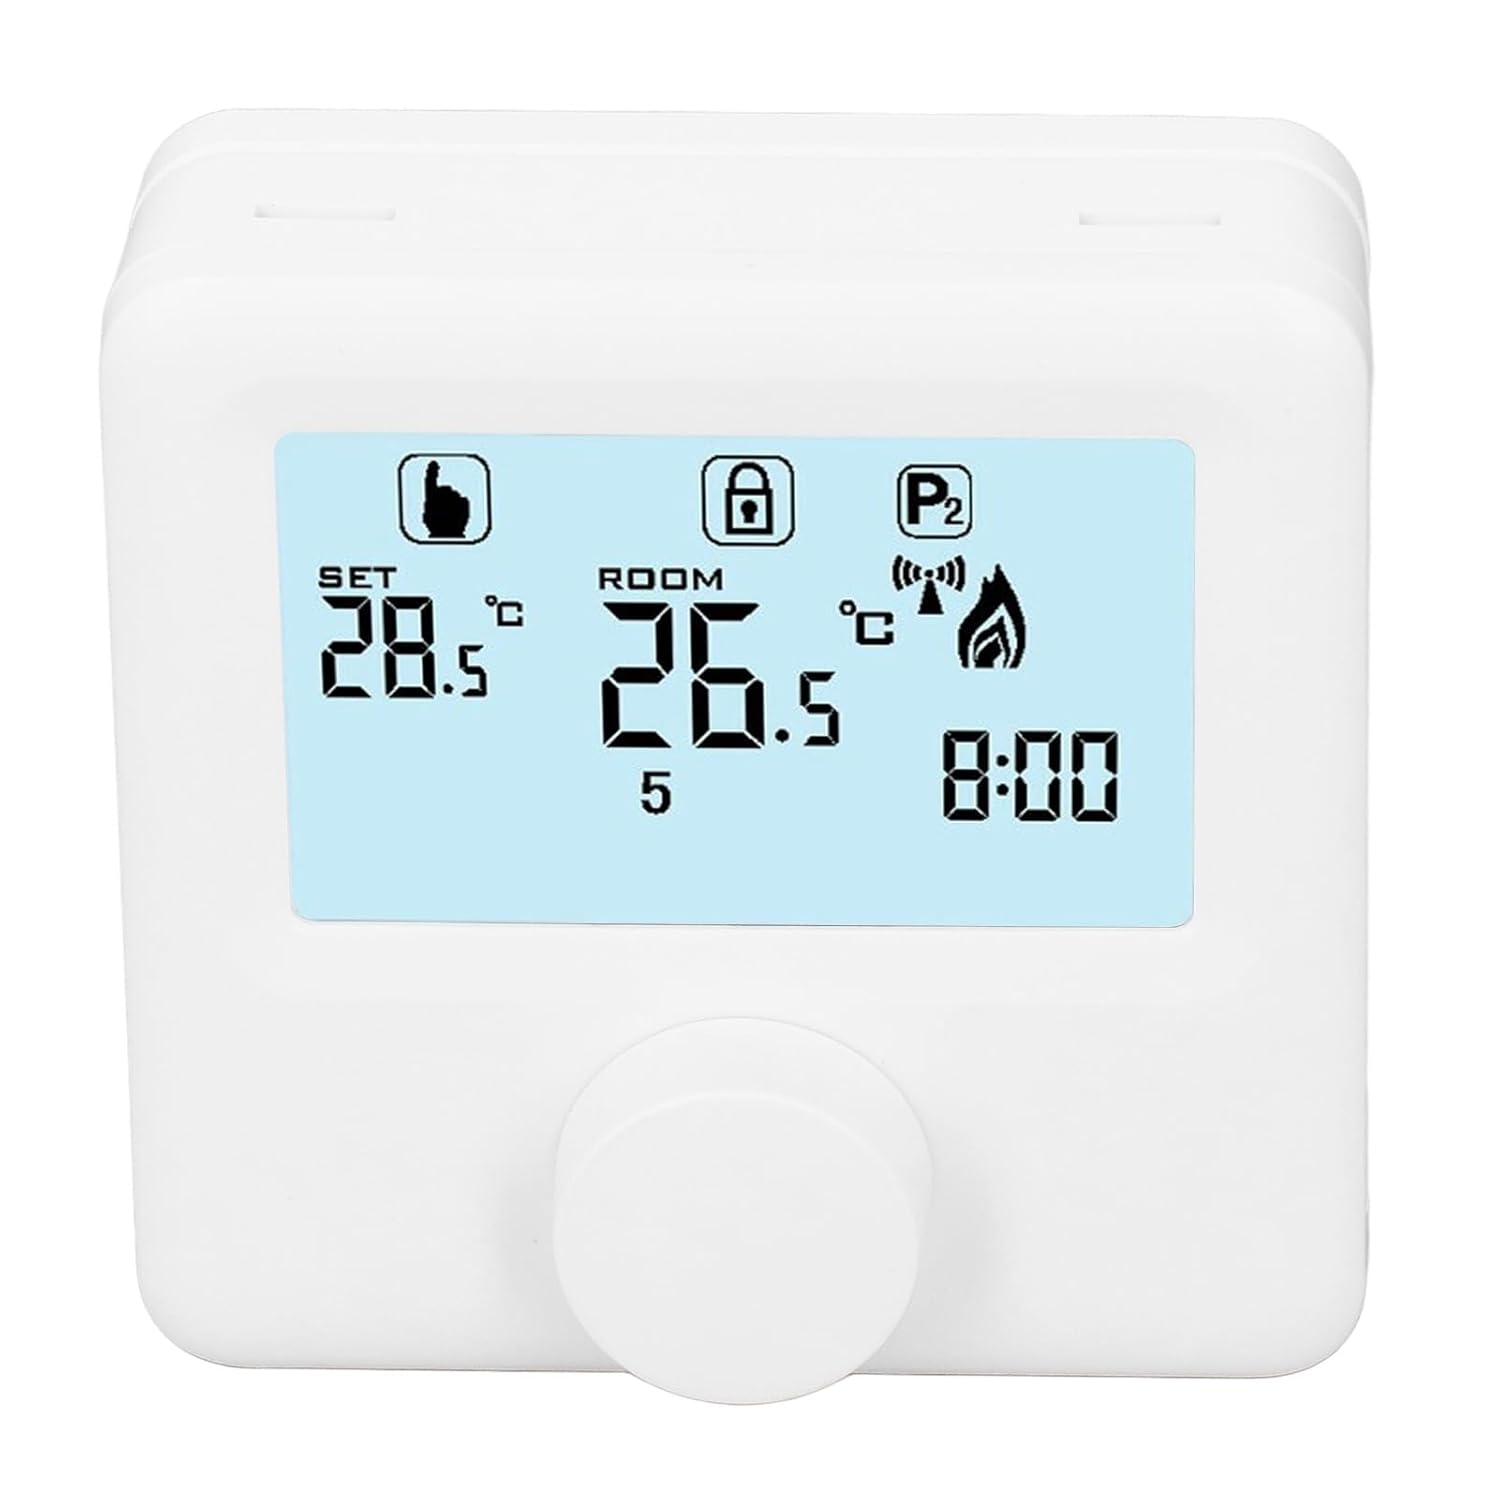
Figur 6.1: Detaljeret view of the LCD display. It shows the set temperature (SET), room temperature (ROOM), a lock icon, a program icon (P2), a signal icon, a flame icon indicating heating, and the current time.
6.2. Indstilling af temperaturen
For at justere den ønskede temperatur:
- Rotate the control knob to increase or decrease the set temperature. The "SET" value on the display will change accordingly.
- The device will automatically activate or deactivate the heating system to maintain the set temperature within the range of 1 to 40 ℃. The default adjustment range is 5 to 35 ℃.
6.3. Programmering af ugentlig tidsplan
The thermoregulator supports a weekly programming schedule. This allows you to set different temperatures for various times of the day across the week.
- Press and hold the control knob (or a designated button, if available) to enter programming mode.
- Use the control knob to navigate through days of the week and time slots.
- Adjust the desired temperature for each programmed period.
- Confirm your settings to save the weekly program. The device will then operate according to this schedule.
6.4. Understanding Display Icons
- SÆT: Indicates the target temperature you have set.
- VÆRELSE: Viser den aktuelle omgivende rumtemperatur.
- Flammeikon: Illuminates when the heating system is active.
- Låseikon: May indicate a keypad lock feature to prevent accidental changes.
- P1/P2 Icon: Indicates the current program mode (e.g., P1 for comfort, P2 for economy, or specific weekly program segments).
- Signalikon: May indicate wireless communication status if applicable.
7. Vedligeholdelse
Regular maintenance ensures the longevity and optimal performance of your thermoregulator.
- Rensning: Tør enheden af med en blød, tør klud. Brug ikke slibende rengøringsmidler eller opløsningsmidler.
- Udskiftning af batteri: Replace batteries when the low battery indicator appears on the display. Always replace both batteries simultaneously with new AA batteries.
- Sensorområde: Ensure the temperature sensor area (usually a small vent on the device) is free from dust and obstructions for accurate readings.
8. Fejlfinding
If you encounter issues with your EVTSCAN Digital Thermoregulator, refer to the following common problems and solutions:
- Displayet er tomt:
- Kontroller om batterierne er korrekt installeret.
- Udskift gamle batterier med nye.
- Varmesystemet reagerer ikke:
- Ensure the thermoregulator is powered on and the flame icon is displayed when heating is expected.
- Verify wiring connections to the boiler are secure and correct.
- Kontroller kedlens strømforsyning og status.
- Sørg for, at den indstillede temperatur er højere end den aktuelle rumtemperatur.
- Unøjagtige temperaturaflæsninger:
- Ensure the device is not exposed to direct sunlight, drafts, or heat sources.
- Clean any dust or debris from the sensor area.
- Kan ikke ændre indstillinger:
- Check if the lock icon is displayed. If so, refer to the operating instructions to unlock the keypad.
Kontakt kundesupport, hvis problemet fortsætter.
9. Garanti og support
Specific warranty information for this product is not provided in the available data. Please refer to the product packaging or the retailer's webwebsted for garantioplysninger.
For technical support or further assistance, please contact EVTSCAN customer service through their official channels or the retailer from whom you purchased the product.
You can visit the EVTSCAN store on Amazon for more information: EVTSCAN Store