Bisnick TENS Unit Replacement Pads SM9126
Instruktionsmanual
1. Introduktion
Thank you for choosing Bisnick TENS Unit Replacement Pads. These electrodes are designed for use with Transcutaneous Electrical Nerve Stimulation (TENS) machines to provide effective muscle stimulation. This 12-pack includes assorted sizes of reusable, latex-free pads compatible with 3.5mm lead wires. Please read this manual thoroughly before use to ensure proper and safe operation.
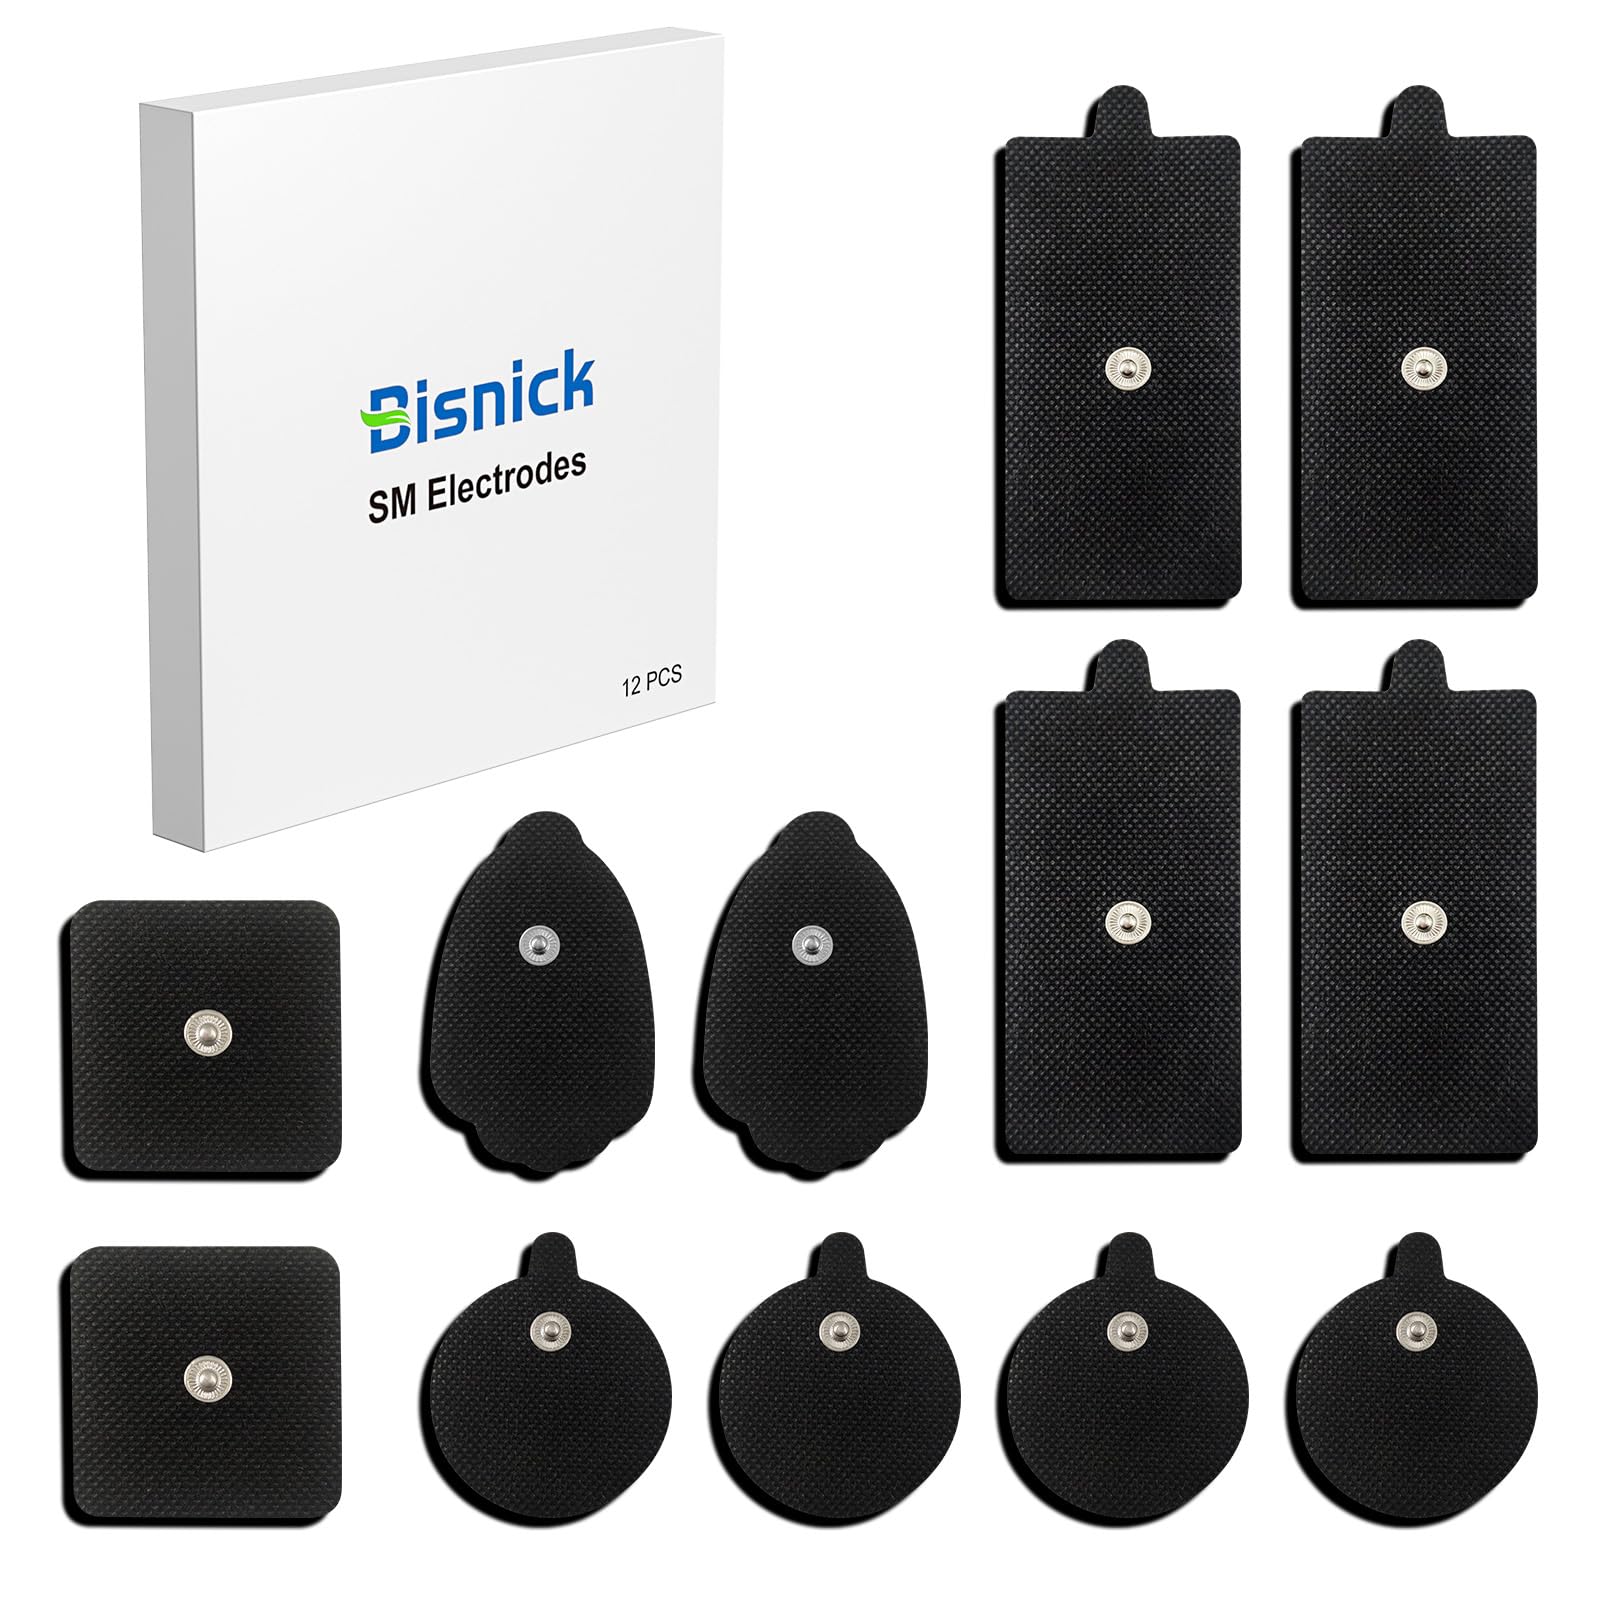
Image 1.1: Assorted Bisnick TENS Unit Replacement Pads.
2. Sikkerhedsoplysninger
Vigtig: Consult your physician before using any TENS device or electrode pads, especially if you have pre-existing medical conditions, are pregnant, or have a pacemaker.
- Do not apply pads over open wounds, rashes, swollen, red, infected, or inflamed skin areas.
- Avoid placing pads over the carotid sinus nerves (front of the neck), directly over the heart, or on the head.
- Discontinue use immediately if you experience skin irritation, discomfort, or any adverse reactions.
- Opbevares utilgængeligt for børn.
- These pads are for external use only.
- Udtalelser vedrørende kosttilskud er ikke blevet evalueret af FDA og er ikke beregnet til at diagnosticere, behandle, helbrede eller forebygge nogen sygdom eller sundhedstilstand.
3. Pakkens indhold
Your Bisnick TENS Unit Replacement Pads package includes:
- 12 x TENS Unit Replacement Pads (Assorted Sizes)

Image 3.1: Illustration of the assorted pad sizes included in the 12-pack.
4. Opsætning og anvendelse
- Forbered huden: Ensure the skin where the pads will be applied is clean, dry, and free of oils, lotions, or hair. This helps maximize adhesion and conductivity.
- Tilslut ledninger: Plug the dual-channel cable from your TENS unit into the designated ports on the device. Then, connect the snap connectors of the lead wires to the metal studs on the electrode pads. Ensure all four pads are linked to the lead wires for proper operation.
- Påfør puder: Carefully peel the protective film from the gel side of the electrode pads. Place the pads firmly onto the prepared skin area. Ensure good contact across the entire surface of each pad. For the TENS unit to function correctly, all four pads must be in contact with the skin.
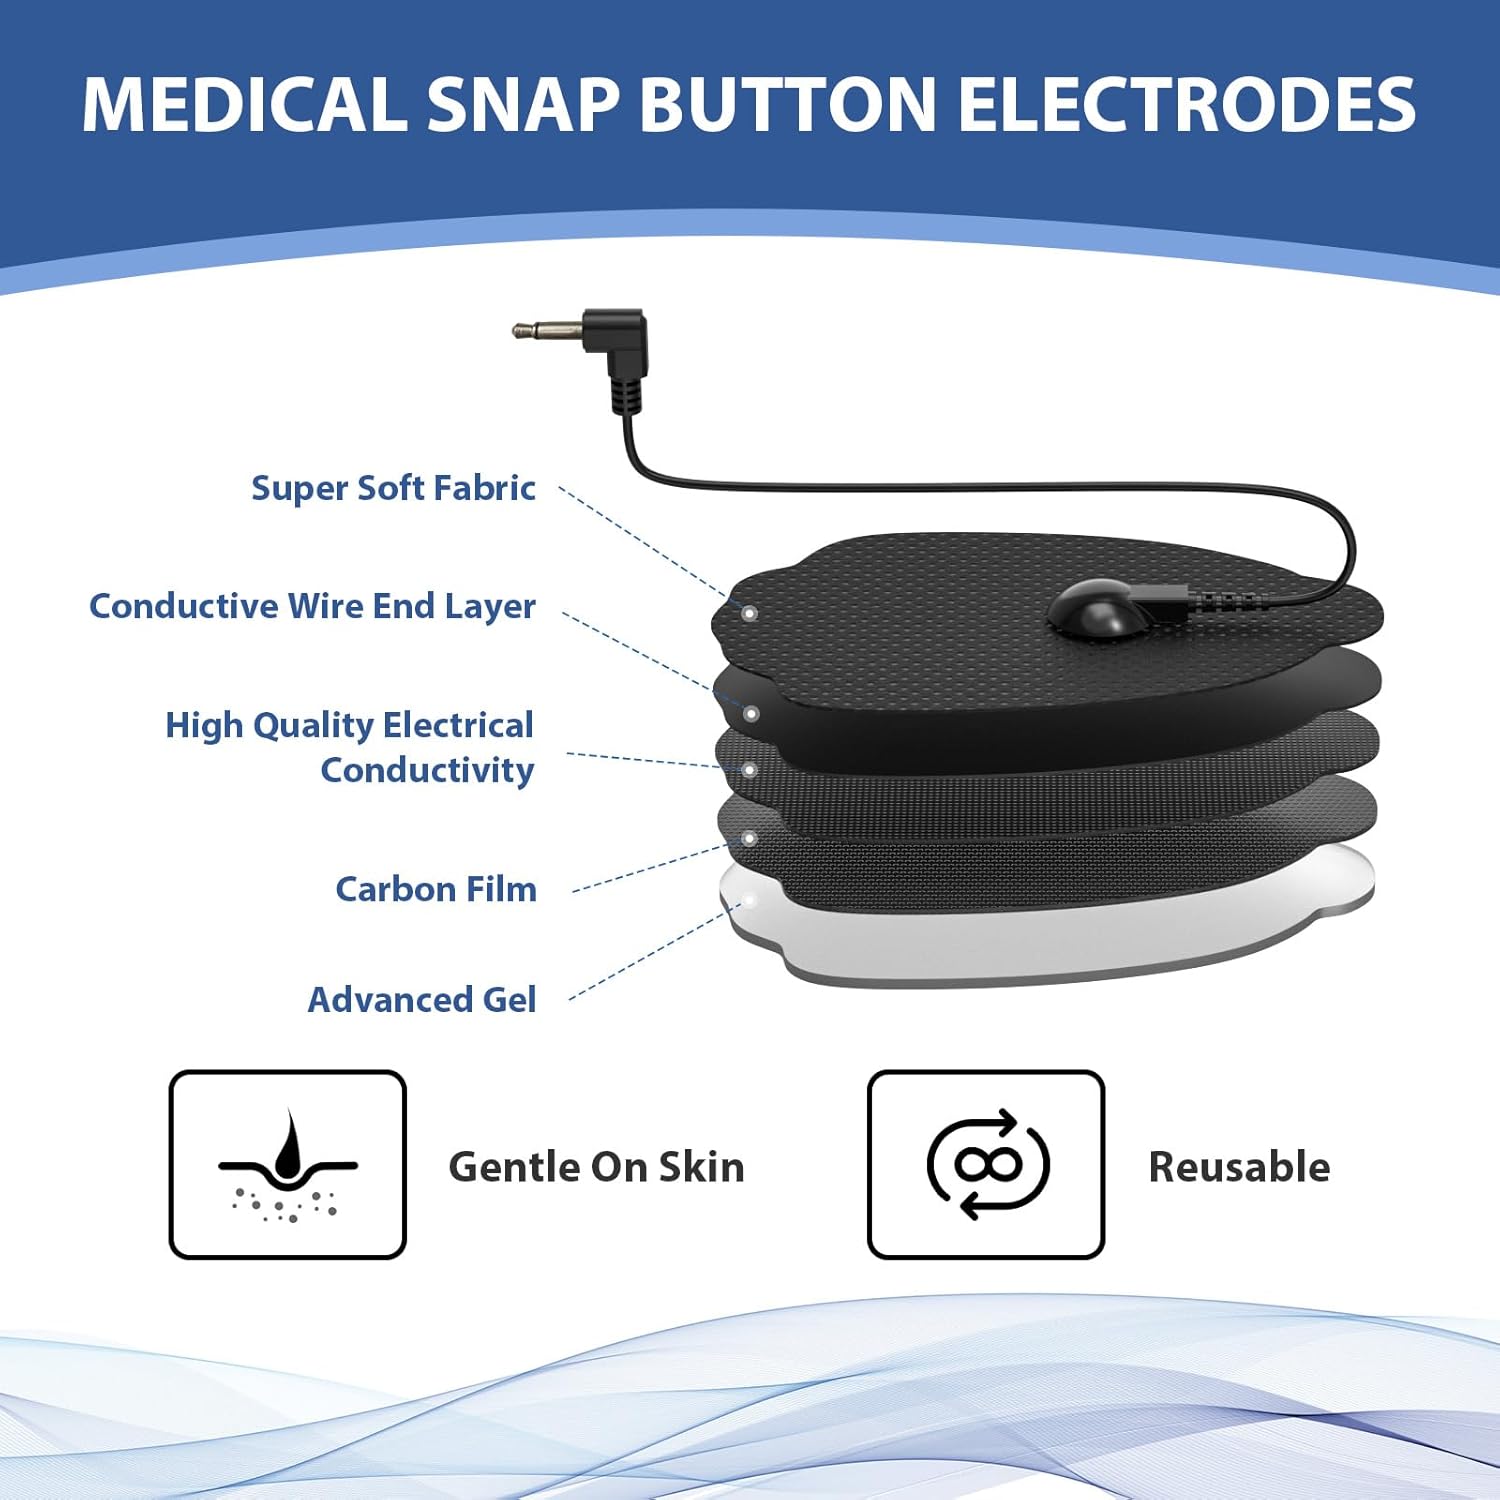
Image 4.1: Proper application of a TENS unit pad on the arm.
For a visual guide on setup and application, please refer to the video below:
Video 4.2: This video demonstrates the step-by-step process of connecting the dual-channel cable, linking the electrode pads, and applying them to the skin for proper TENS unit operation.
5. Betjeningsvejledning
Once the pads are securely applied and connected to your TENS unit, follow these general operating steps:
- Tænd: Turn on your TENS unit.
- Vælg kanal: If your TENS unit has multiple channels (e.g., A/B), select the desired channel using the appropriate button.
- Vælg tilstand: Select the desired massage mode (e.g., kneading, tapping, acupuncture) using the 'M' (Mode) button on your TENS unit.
- Indstil timer: Adjust the treatment duration using the 'T' (Timer) button.
- Juster intensitet: Gradually increase the intensity using the '+' button until you feel a comfortable, stimulating sensation. Avoid setting the intensity too high, which can cause discomfort. Decrease intensity with the '-' button if needed.
- Monitor Sensation: The sensation should be strong but comfortable, not painful. If the sensation diminishes, you may need to slightly increase the intensity or reposition the pads.
- Sluk: After the session, turn off the TENS unit before removing the pads.

Billede 5.1: Eks.ample of TENS unit pads in use on an arm.
6. Vedligeholdelse og pleje
Proper care extends the life of your Bisnick TENS Unit Replacement Pads:
- Rensning: If the pads lose their adhesiveness due to dirt or lint, gently rinse the gel surface with a small amount of water. Do not use soap or harsh chemicals. Allow them to air dry completely, gel side up, before re-applying the protective film.
- Opbevaring: After each use, re-apply the protective film to the gel side of the pads. Store them in a cool, dry place, ideally in their original packaging or on a pad holder.
- Genanvendelighed: These pads are designed for multiple uses, typically up to 30-50 times, or approximately 45 times with proper care. Replace pads when they no longer adhere well to the skin or when the sensation becomes uneven.

Image 6.1: Visual guide on rinsing TENS pads to restore adhesiveness for repeated use.
7. Fejlfinding
| Problem | Mulig årsag | Løsning |
|---|---|---|
| Puder sidder ikke fast | Dirty gel surface, oily skin, worn out pads | Clean skin thoroughly. Gently rinse pads with water and air dry. Replace pads if they are old or severely worn. |
| Ingen følelse eller svag følelse | Pads not making full contact, lead wires loose, TENS unit off/low intensity, pads worn out | Ensure pads are firmly applied. Check lead wire connections. Increase TENS unit intensity. Replace pads if worn. |
| Hudirritation | Allergic reaction, prolonged use, high intensity, dirty pads | Discontinue use. Consult a physician. Reduce session duration or intensity. Ensure pads are clean. |
8. Specifikationer
- Modelnummer: SM9126
- Fabrikant: Bisnick
- Pad Quantity: 12-pakke
- Pudetype: Assorted Sizes, Reusable, Latex-Free
- Kompatibilitet: 3.5mm Lead Wires
- Pakkedimensioner: 5.16 x 5.12 x 0.83 tommer
- Varens vægt: 3.84 ounce

Billede 8.1: Tværsnit view illustrating the layers of a Bisnick TENS electrode pad, including super soft fabric, conductive wire end layer, high quality electrical conductivity, carbon film, and advanced gel.
9. Garanti og support
Bisnick is committed to providing quality products and customer satisfaction.
- Livsvarig support: We offer lifetime support and aim to provide satisfied solutions for our customers.
- 30-dages returpolitik: Få 30 dages returret uden begrundelse.
- 24/7 Services: Quick service is available via phone or email.
- 3 års gratis udskiftning: Benefit from a 3-year free replacement policy.