1. Introduktion
Denne manual indeholder detaljerede instruktioner til FUNLAB Grily Hall Effect Wireless Controller. Læs venligst denne manual grundigt inden brug for at sikre korrekt betjening og for at maksimere din spiloplevelse. Denne controller er designet til brug med Nintendo Switch-, Switch OLED- og Switch Lite-konsoller samt pc'er, Steam Deck-, iOS- og Android-enheder.

Dette billede viser den lyserøde FUNLAB Grily Hall Effect trådløse controller set ovenfra og ned.asing dens kattepotemønsterdesign og knaplayout.
2. Produktfunktioner
- Skjult-til-oplyst display: Unikt design, hvor mønstrene lyser op, når LED-lyset er aktivt, og forbliver diskrete, når det er slukket.
- Polykrom åndings-LED: Har 7 LED-farver med 4 lystilstande: vejrtrækning, hurtig blinken, vibrationslys og altid tændt.
- Hall-effekt joysticks: Giver præcis og følsom kontrol, reducerer mekanisk slid og forhindrer afdrift.
- Bevægelsesregistrering og turbofunktion: Udstyret med præcis bevægelseskontrol og en turbofunktion til kontinuerlig input.
- Lang batterilevetid: Indbygget 3.7V/950mAH litiumbatteri giver op til 12.5 timers spiltid med slukket lys.
- Programmerbare knapper til bagpadlen: To brugerdefinerbare tilbageknapper for forbedret kontrol og personligt gameplay.
- Ergonomisk design: Formet til komfortabel håndtering under længere spillesessioner.
- Vibrationsfunktion: Giver fordybende haptisk feedback under spillet.
- Bred kompatibilitet: Understøtter Nintendo Switch (2/OLED/Lite), Windows PC, Steam Deck, iOS og Android-enheder.
2.1 Detaljeret funktion ovenforview

Dette billede illustrerer controllerens unikke display med skjult lys, hvor kattepotemønstrene lyser, når de interne LED'er er aktive, hvilket skaber en tydelig visuel effekt.

Billedet fremhæver controllerens 7-farvede LED-åndedrætsfunktion, der demonstrerer forskellige lystilstande såsom altid tændt, ånding, hurtig blinken og vibration.

Dette diagram illustrerer Hall-effekt-joystickteknologien og fremhæver dens præcision og modstand mod stickdrift sammenlignet med traditionelle joysticks.

Billedet viser controllerens batterispecifikationer, der angiver en spilletid på 12 timer og en batterikapacitet på 950 mAh.
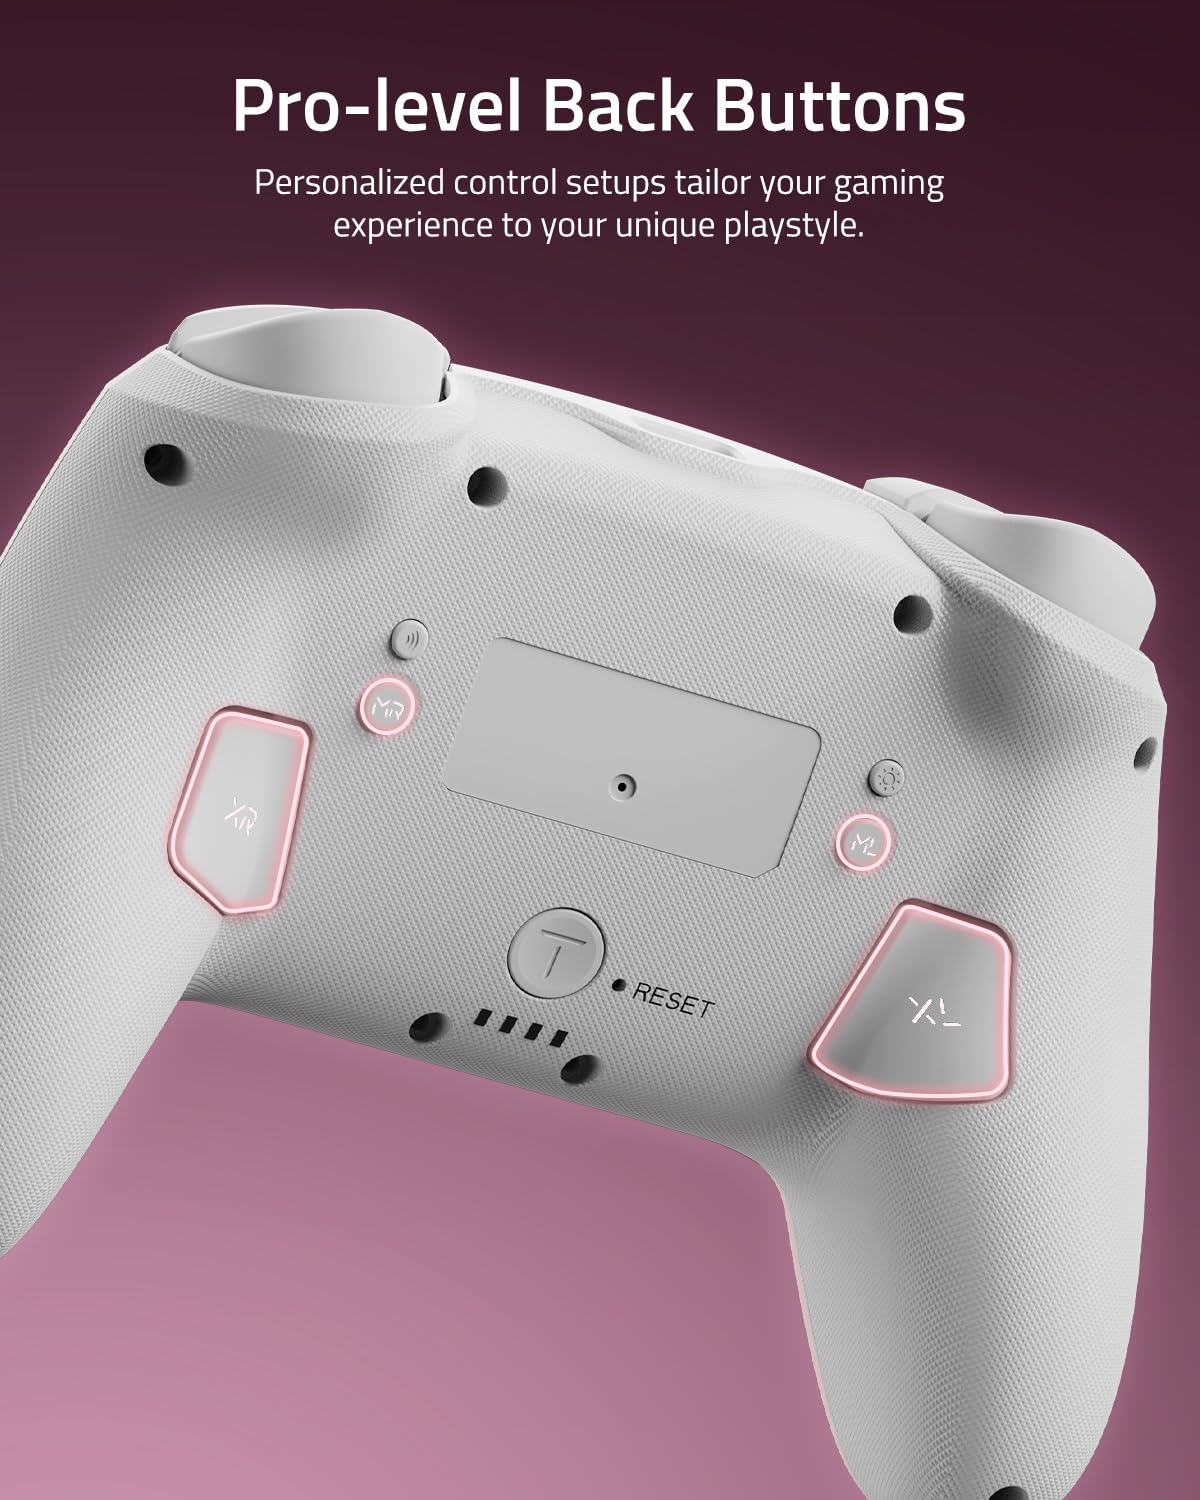
Dette nærbillede view viser de to programmerbare knapper til bagpadlen (XL og XR), der er placeret på undersiden af controlleren og designet til brugerdefinerede tildelinger.
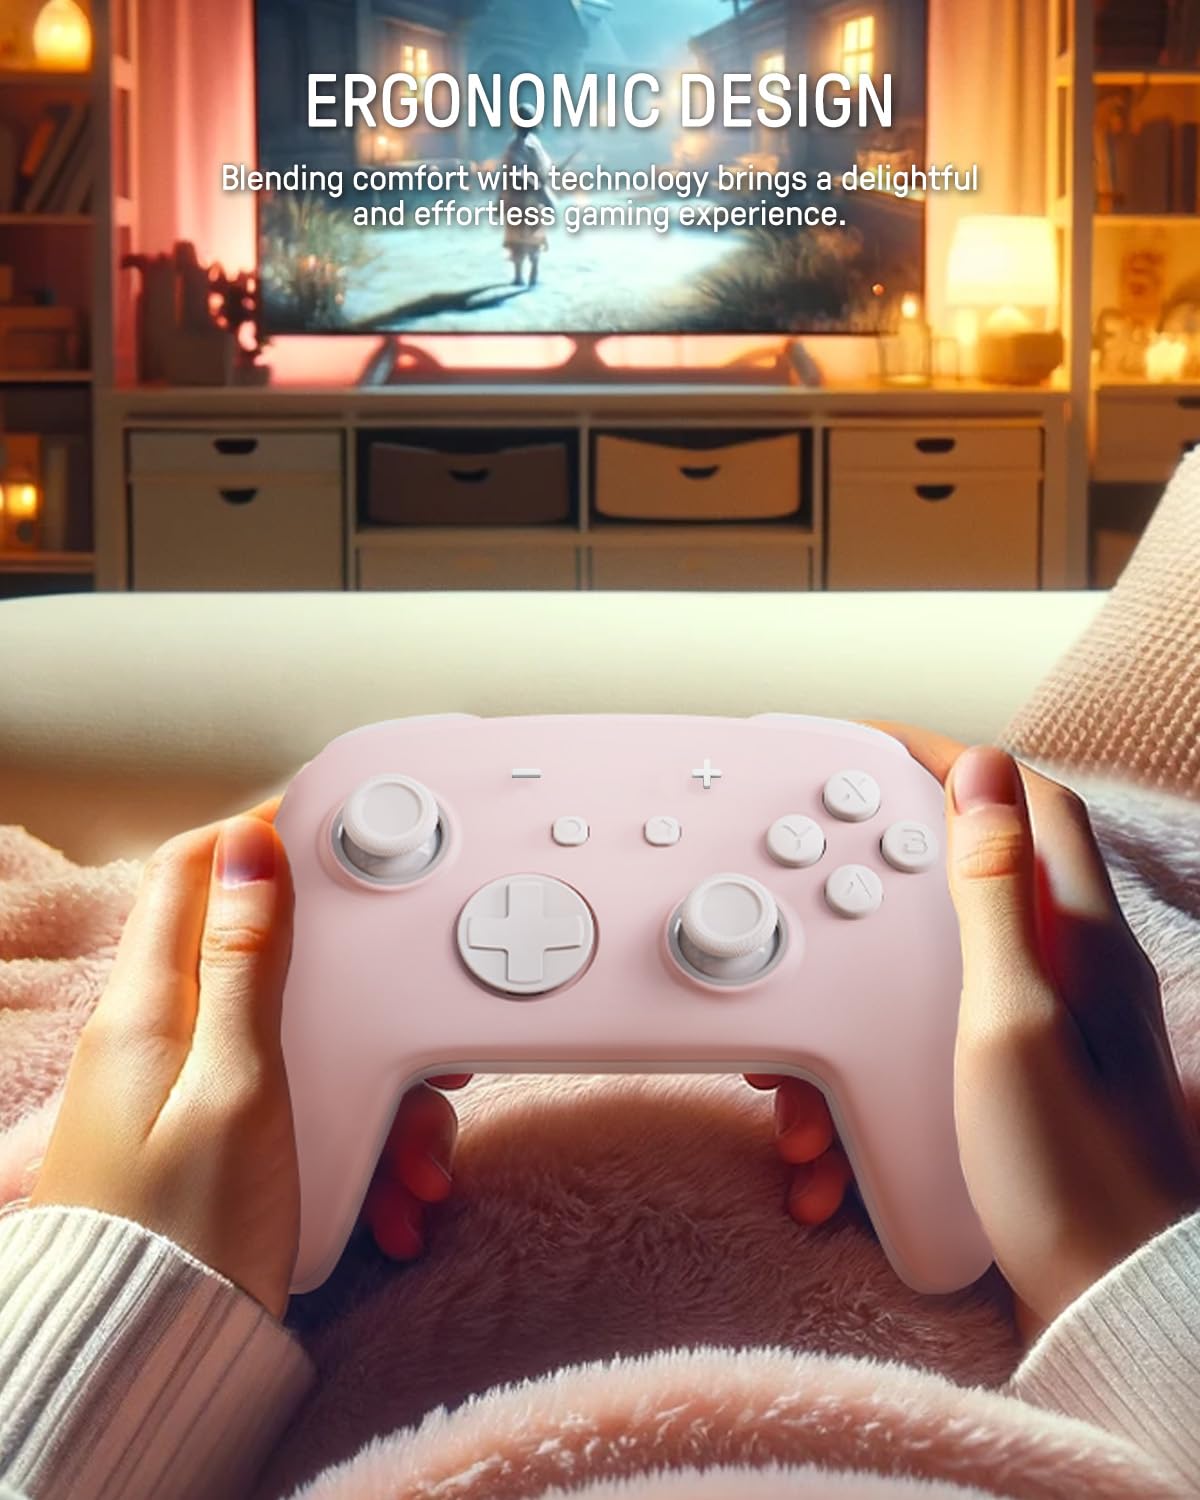
Billedet viser en person, der holder controlleren, hvilket fremhæver dens ergonomiske form, der er designet til komfortabelt og langvarigt gameplay.
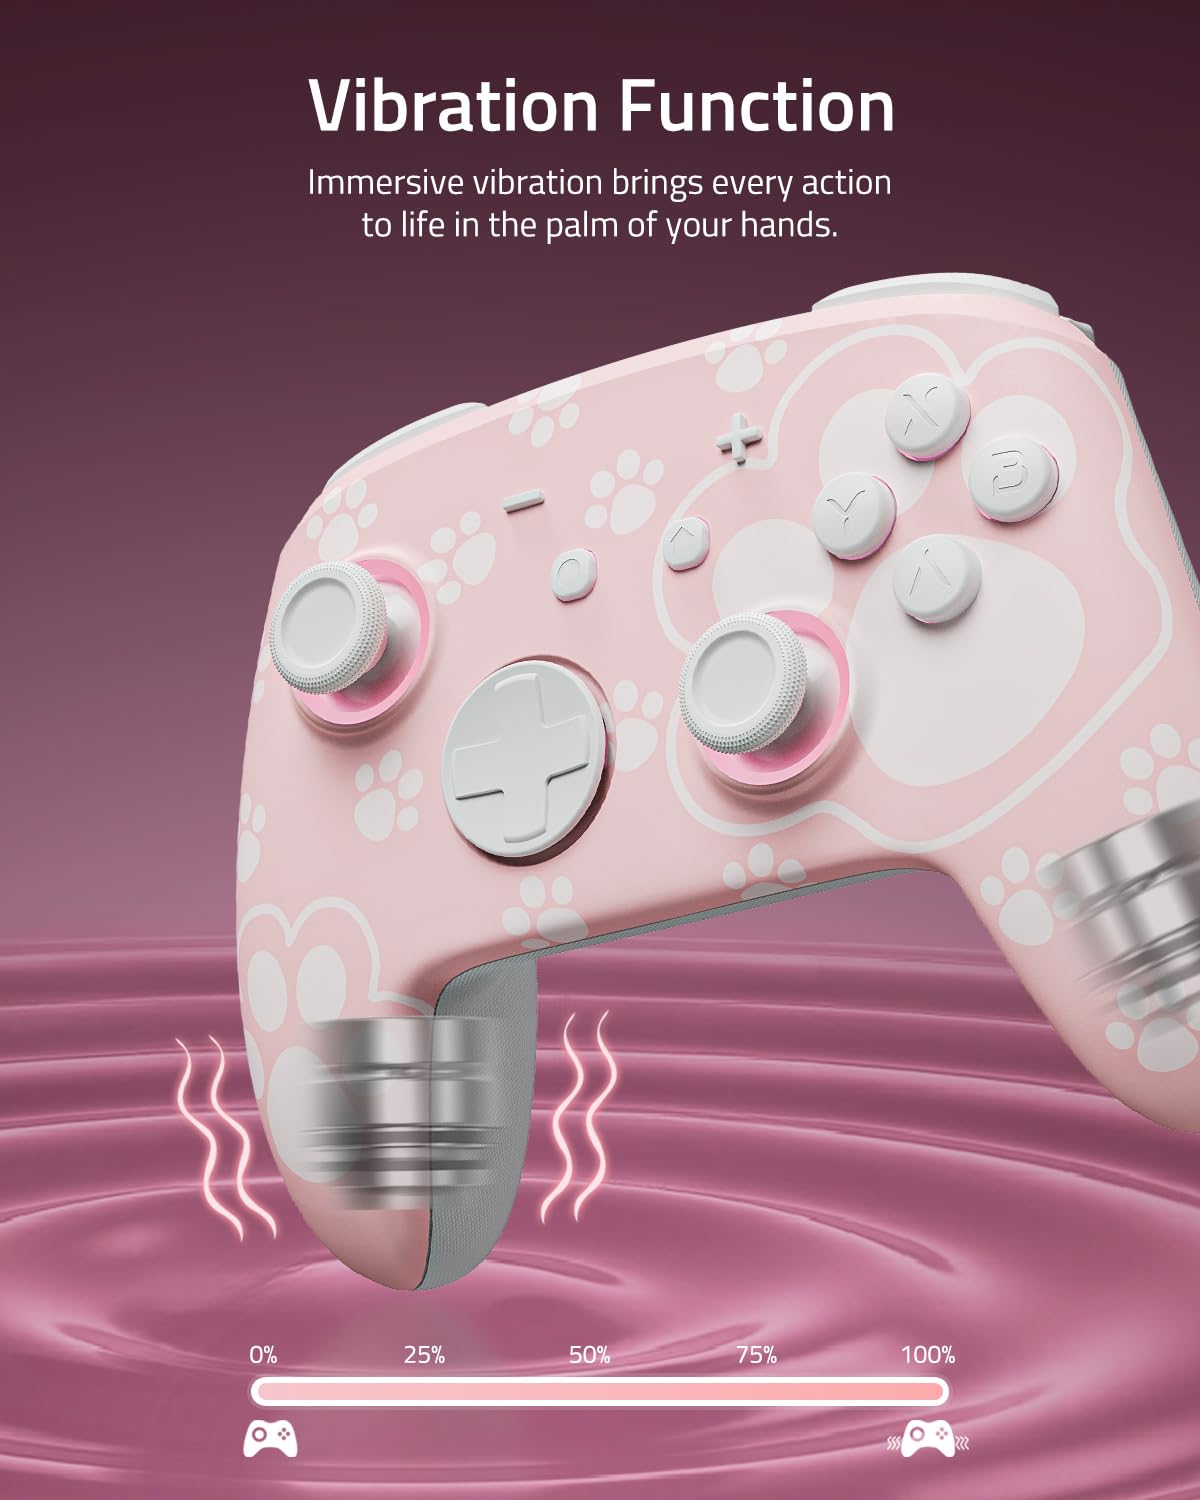
Dette billede repræsenterer visuelt controllerens vibrationsfunktion, hvor intensitetsniveauer vises for at indikere immersiv haptisk feedback.

Billedet viser controllerens brede kompatibilitet med flere platforme, herunder Nintendo Switch-systemer, Windows-pc'er, Steam Deck, iOS- og Android-enheder.
3. Opsætning og tilslutning
3.1 Opladning af controlleren
Oplad controlleren helt før første brug. Tilslut det medfølgende USB-C-kabel til controllerens opladningsport og den anden ende til en USB-strømkilde (f.eks. Nintendo Switch-dock, pc eller USB-vægadapter). LED-indikatorerne viser opladningsstatus og slukker eller skifter farve, når den er fuldt opladet.
3.2 Parring med Nintendo Switch
- Vælg HOME-menuen Controllere > Skift greb/rækkefølge.
- På controlleren skal du trykke på og holde Parringsknap (normalt en lille knap øverst eller bagpå) i et par sekunder, indtil indikatorlamperne begynder at blinke hurtigt.
- Når den er parret, vil afspillerens indikator-LED('er) på controlleren forblive tændt.
3.3 Parring med pc (Windows)
- Sørg for, at din pc har Bluetooth aktiveret.
- Gå til Indstillinger > Enheder > Bluetooth og andre enheder > Tilføj Bluetooth eller anden enhed.
- Vælge Bluetooth.
- På controlleren skal du trykke på og holde Parringsknap indtil indikatorlamperne blinker hurtigt.
- Vælg controlleren fra listen over tilgængelige enheder på din pc.
3.4 Parring med iOS-enheder
- På din iOS-enhed skal du gå til Indstillinger > Bluetooth og tænd Bluetooth.
- På controlleren skal du trykke på og holde Parringsknap indtil indikatorlamperne blinker hurtigt.
- Vælg controlleren fra listen over tilgængelige enheder på din iOS-enhed.
3.5 Parring med Android-enheder
- På din Android-enhed skal du gå til Indstillinger > Tilsluttede enheder > Bluetooth og tænd Bluetooth.
- På controlleren skal du trykke på og holde Parringsknap indtil indikatorlamperne blinker hurtigt.
- Vælg controlleren fra listen over tilgængelige enheder på din Android-enhed.
4. Betjening
4.1 Grundlæggende knaplayout
Controlleren har standard gamepad-knapper, herunder A/B/X/Y, D-pad, venstre/højre joysticks, L/R, ZL/ZR, Home, Capture, Plus (+), Minus (-) og to programmerbare backpaddle-knapper (XL, XR).
4.2 Justering af LED-lystilstande
Tryk på Lys knap (se placeringen af controlleren på diagrammet) for at skifte mellem de 7 LED-farver. For at ændre lystilstande (åndedræt, hurtig blinken, vibrationslys, altid tændt), skal du læse den specifikke vejledning, der følger med din controller, eller producentens webwebsted for den præcise knapkombination.
4.3 Brug af turbofunktionen
Turbofunktionen muliggør hurtig og kontinuerlig indtastning af et knaptryk. Sådan aktiverer du Turbo for en knap:
- Tryk og hold på Turbo-knap.
- Mens du holder Turbo nede, skal du trykke på den ønskede handlingsknap (f.eks. A, B, X, Y, L, R, ZL, ZR).
- Slip begge knapper. Den valgte handlingsknap vil nu kontinuerligt blive inputtet, når den holdes nede.
Gentag processen for at deaktivere Turbo for en knap. For at slette alle Turbo-indstillinger skal du trykke på Turbo-knappen og holde den nede i 5 sekunder.
4.4 Programmering af knapper til rygpadlen (XL, XR)
XL- og XR-bagpaddelknapperne kan tildeles til at gentage andre knapinput eller udføre makrosekvenser. Se den specifikke programmeringsvejledning, der fulgte med din controller, da metoden kan variere. Typisk involverer dette en kombination af at holde en programmeringsknap (ofte mærket 'M' eller 'MR') nede og trykke på den/de ønskede inputknap(per).
4.5 Bevægelseskontrolfunktionalitet
Controlleren understøtter bevægelseskontrol til kompatible spil. Sørg for, at controlleren er parret korrekt med din enhed. Kalibrering kan være nødvendig i spillet eller systemindstillingerne, hvis bevægelseskontrollerne ikke reagerer korrekt.
5. Vedligeholdelse og pleje
5.1 Rengøring
- Brug en blød, tør klud til at tørre controllerens overflade af.
- Til genstridigt snavs, let dampda kluden med vand eller et mildt, ikke-slibende rengøringsmiddel.
- Undgå at bruge skrappe kemikalier, opløsningsmidler eller slibende materialer, da disse kan beskadige controllerens finish.
- Lad ikke væsker trænge ind i betjeningsenhedens åbninger.
5.2 Opbevaring
- Opbevar controlleren et køligt, tørt sted væk fra direkte sollys og ekstreme temperaturer.
- Hvis den opbevares i en længere periode, skal du sørge for, at controlleren er fuldt opladet inden opbevaring, og genoplade den med jævne mellemrum (f.eks. hver 3.-6. måned) for at opretholde batteriets tilstand.
- Hold controlleren væk fra støv og fugt.
6. Fejlfinding
6.1 Forbindelsesproblemer
- Controlleren forbinder ikke: Sørg for, at controlleren er opladet. Prøv at parre controlleren igen ved at følge opsætningsvejledningen til din specifikke enhed.
- Intermitterende forbindelse: Flyt tættere på konsollen/enheden. Sørg for, at der ikke er stærke interferenskilder (f.eks. Wi-Fi-routere, andre Bluetooth-enheder) i nærheden.
- Controlleren genkendes ikke: Genstart din konsol/enhed og controlleren, og prøv derefter at parre igen.
6.2 Controlleren reagerer ikke
- Ingen indtastning: Kontrollér batteriniveauet. Hvis batteriet er lavt, skal du oplade controlleren.
- Knapper reagerer ikke: Udfør en blød nulstilling ved at trykke på den lille nulstillingsknap (hvis tilgængelig, ofte placeret i et nålehul på bagsiden) med en tynd genstand som en papirclips.
6.3 LED'er virker ikke
- Sørg for, at controlleren er tændt.
- Tryk på Lys knap at skifte mellem farver og tilstande.
- Hvis den stadig ikke reagerer, kan du prøve at nulstille controlleren.
6.4 Batteriet oplades ikke
- Kontroller, at USB-C-kablet er korrekt tilsluttet til både controlleren og strømkilden.
- Prøv et andet USB-C-kabel eller strømadapter.
- Sørg for, at strømkilden er aktiv og leverer tilstrækkelig strøm.
6.5 Stick Drift
Selvom Hall-effekt-joysticks er designet til at forhindre joystickdrift, kan du prøve følgende, hvis du oplever utilsigtet input fra joysticks:
- Kalibrer joystickene igen via din konsols eller enheds systemindstillinger.
- Sørg for, at controllerens firmware er opdateret (tjek FUNLAB webhjemmeside for opdateringer).
7. Specifikationer
| Feature | Detalje |
|---|---|
| Model | Grily Hall-effektcontroller |
| Dimensioner | 5.91 x 2.36 x 4.33 tommer |
| Vægt | 8.8 ounce |
| Batteri | 1 litium-ion-batteri (inkluderet), 3.7V/950mAH |
| Batterilevetid | Op til 12.5 timer (lys slukket) |
| Forbindelse | Trådløs (Bluetooth) |
| Kompatibilitet | Nintendo Switch (2/OLED/Lite), Windows PC, Steam Deck, iOS, Android |
| Særlige funktioner | Hall-effekt-joysticks, polykrome LED'er, turbofunktion, programmerbare bagknapper, bevægelseskontrol |
8. Supportoplysninger
For yderligere assistance, produktregistrering eller garantioplysninger, besøg venligst den officielle FUNLAB webwebstedet eller kontakt kundesupport gennem den forhandler, hvor produktet blev købt.
Fabrikant: SJOVLAB
Dato først tilgængelig: 4. november 2023