
Goldair GOR-900A
Goldair 2000W 9-Fin Oil Radiator User Manual
Model: GOR-900A
1. Introduktion
Thank you for choosing the Goldair 2000W 9-Fin Oil Radiator, Model GOR-900A. This instruction manual provides important information for the safe and efficient operation of your new oil radiator. Please read this manual thoroughly before use and retain it for future reference.
This portable oil radiator is designed to provide efficient and consistent warmth for indoor spaces. It features automatic thermostat control, overheat protection, and multi-directional castors for easy movement.
2. Vigtige sikkerhedsinstruktioner
Ved brug af elektriske apparater skal grundlæggende sikkerhedsforanstaltninger altid følges for at reducere risikoen for brand, elektrisk stød og personskade.
- Læs alle instruktioner, før du bruger denne radiator.
- Do not use this radiator outdoors.
- This radiator is hot when in use. To avoid burns, do not let bare skin touch hot surfaces.
- Always unplug the radiator when not in use.
- Do not operate any radiator with a damaged cord or plug, or after the radiator malfunctions or has been dropped or damaged in any manner.
- Før ikke ledningen under gulvtæpper. Dæk ikke ledningen med tæpper, løbere eller lignende belægninger. Anbring ledningen væk fra trafikområdet, og hvor den ikke vil blive snublet over.
- To disconnect the radiator, turn controls to OFF, then remove plug from outlet.
- Do not insert or allow foreign objects to enter any ventilation or exhaust opening as this may cause an electric shock or fire, or damage the radiator.
- For at forhindre en mulig brand, må du ikke blokere luftindtag eller udstødning på nogen måde. Må ikke bruges på bløde overflader, som f.eks. en seng, hvor åbninger kan blive blokeret.
- A radiator has hot and arcing or sparking parts inside. Do not use it in areas where gasoline, paint, or flammable liquids are used or stored.
- Use this radiator only as described in this manual. Any other use not recommended by the manufacturer may cause fire, electric shock, or injury to persons.
- Always plug radiators directly into a wall outlet/receptacle. Never use with an extension cord or relocatable power tap (outlet/power strip).
- Ensure the radiator is placed on a stable, level surface.
- Keep flammable materials such as furniture, pillows, bedding, papers, clothes, and curtains at least 1 meter (3 feet) from the front and sides of the radiator.
3. Pakkens indhold
Kontroller venligst pakkens indhold ved åbning for at sikre, at alle varer er til stede og ubeskadigede.
- 1 x Goldair 2000W 9-Fin Oil Radiator (Model GOR-900A)
- 2 x Castor Wheel Assemblies (with mounting hardware)
- 1 x brugsanvisning
4. Opsætning og montering
Before operating the radiator, follow these steps to assemble the castor wheels and prepare the unit for use.
4.1 Attaching the Castor Wheels
- Carefully turn the radiator upside down on a soft, non-abrasive surface to prevent damage to the finish.
- Locate the two U-shaped bolts and four wing nuts provided.
- Align each castor wheel assembly with the mounting holes on the bottom of the radiator, positioning them between the fins at each end.
- Insert the U-shaped bolts through the holes in the castor assembly and around the base of the radiator fins.
- Secure each U-bolt with two wing nuts, tightening them firmly but without over-tightening.
- Once both castor assemblies are securely attached, carefully turn the radiator upright.
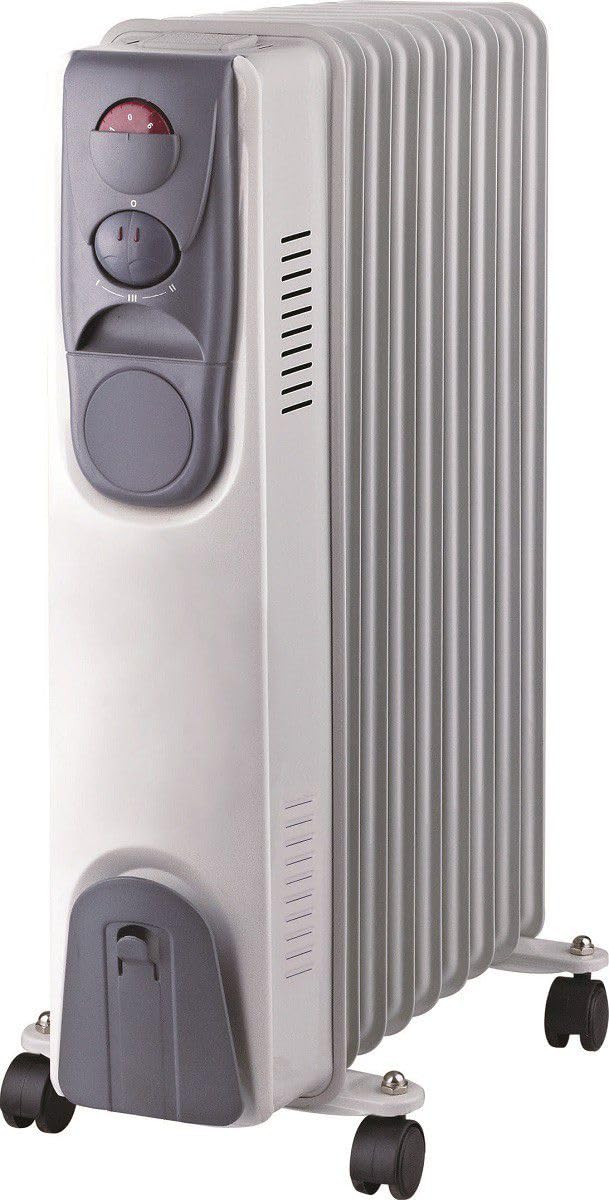
Image: The Goldair 2000W 9-Fin Oil Radiator with its castor wheels correctly installed, ready for use.
4.2 Placering
- Placer radiatoren på en fast, plan overflade.
- Ensure there is at least 1 meter (3 feet) of clear space around the radiator from walls, furniture, and other objects to allow for proper air circulation and prevent fire hazards.
- Placer ikke radiatoren direkte under en stikkontakt.
- Avoid placing the radiator in areas where it could be easily knocked over.
5. Betjeningsvejledning
Familiarize yourself with the controls before operating the radiator.
5.1 kontroller overview
- Afbryderen: Tænder eller slukker for enheden.
- Varmeindstillingsknapper: Allows selection between two heat settings.
- Termostat kontrolskive: Justerer den ønskede rumtemperatur.
- Indikatorlys: Illuminates when the heating elements are active.
5.2 Indledende drift
- Ensure the radiator is placed on a stable surface and the power cord is fully uncoiled.
- Plug the power cord into a suitable 220-240V AC wall outlet.
- Turn the thermostat control dial to its maximum setting (usually marked 'MAX' or '6').
- Select a heat setting using the heat setting switches. You can choose between two settings for different heat outputs.
- The indicator light will illuminate, signifying that the heating elements are active.
- Allow the radiator to operate for a few minutes to reach its initial operating temperature.
5.3 Indstilling af termostaten
Once the room reaches a comfortable temperature:
- Slowly turn the thermostat control dial counter-clockwise until the indicator light turns off.
- The radiator will now maintain this temperature by cycling on and off automatically.
- If the room temperature drops below the set level, the radiator will switch on again. If the room temperature rises, it will switch off.
5.4 Overheat Protection and Auto Safety Cut-Off
This radiator is equipped with an overheat protection system and an auto safety cut-off feature. If the radiator overheats due to restricted airflow or other reasons, the safety system will automatically switch off the unit. To reset:
- Unplug the radiator from the power outlet.
- Allow the radiator to cool down for at least 30 minutes.
- Identify and remove the cause of overheating (e.g., clear any obstructions).
- Plug the radiator back in and resume normal operation. If the issue persists, contact customer support.
6. Vedligeholdelse og opbevaring
6.1 Rengøring
- Tag altid stikket ud af radiatoren, og lad den køle helt af, inden du rengør den.
- Tør de udvendige overflader af med en blød, damp klæde. Brug ikke slibende rengøringsmidler eller opløsningsmidler.
- Do not immerse the radiator in water or allow water to drip into the interior.
- Regularly remove dust from the fins and control panel using a soft brush or vacuum cleaner with a brush attachment.
6.2 Opbevaring
- When not in use, store the radiator in a cool, dry place.
- If possible, store it in its original packaging to protect it from dust and damage.
- Coil the power cord neatly and secure it to prevent tangling or damage.
7. Fejlfinding
If your radiator is not operating correctly, please refer to the following common issues and solutions:
| Problem | Mulig årsag | Løsning |
|---|---|---|
| Radiatoren tænder ikke. |
|
|
| Radiator produces insufficient heat. |
|
|
| Radiator cycles on and off too frequently. |
|
|
If the problem persists after checking these solutions, please contact Goldair customer support.
8. Specifikationer
| Feature | Detalje |
|---|---|
| Modelnummer | GOR-900A |
| Mærke | Goldair |
| Strømudgang | 2000W |
| Antal finner | 9 |
| Varmeindstillinger | 2 |
| Særlige funktioner | Portable, Automatic Thermostat Control, Overheat Protection, Auto Safety Cut-Off, Cool Touch Handles, Multi-directional Castors |
| Opvarmningsmetode | Konvektion (oliefyldt) |
| Strømkilde | Elektrisk med ledning |
| Indendørs/Udendørs brug | Indendørs |
| Produktmål (D x B x H) | 46D x 16W x 66H centimeter |
| Farve | Hvid |
9. Garanti og kundesupport
Goldair products are manufactured to the highest quality standards. In the unlikely event of a defect arising from faulty materials or workmanship, your product is covered by a manufacturer's warranty.
Please retain your purchase receipt as proof of purchase. For warranty claims, technical assistance, or any questions regarding your Goldair 2000W 9-Fin Oil Radiator, please contact Goldair customer support through their official webwebstedet eller de kontaktoplysninger, der følger med din købsdokumentation.
Do not attempt to repair the appliance yourself, as this will void the warranty and could lead to electric shock or fire.
Ask a question about this manual
Ask about setup, troubleshooting, compatibility, parts, safety, or missing instructions. Manuals+ will review the question and use this page’s manual context to help answer it.