
1. Introduktion
The Xigmatek Hero II Air 3F is a mid-tower PC case designed for optimal airflow and component compatibility. It features a tempered glass side panel, support for various motherboard form factors, and pre-installed cooling fans. This manual provides detailed instructions for the installation of components, operation, maintenance, and troubleshooting of your PC case.
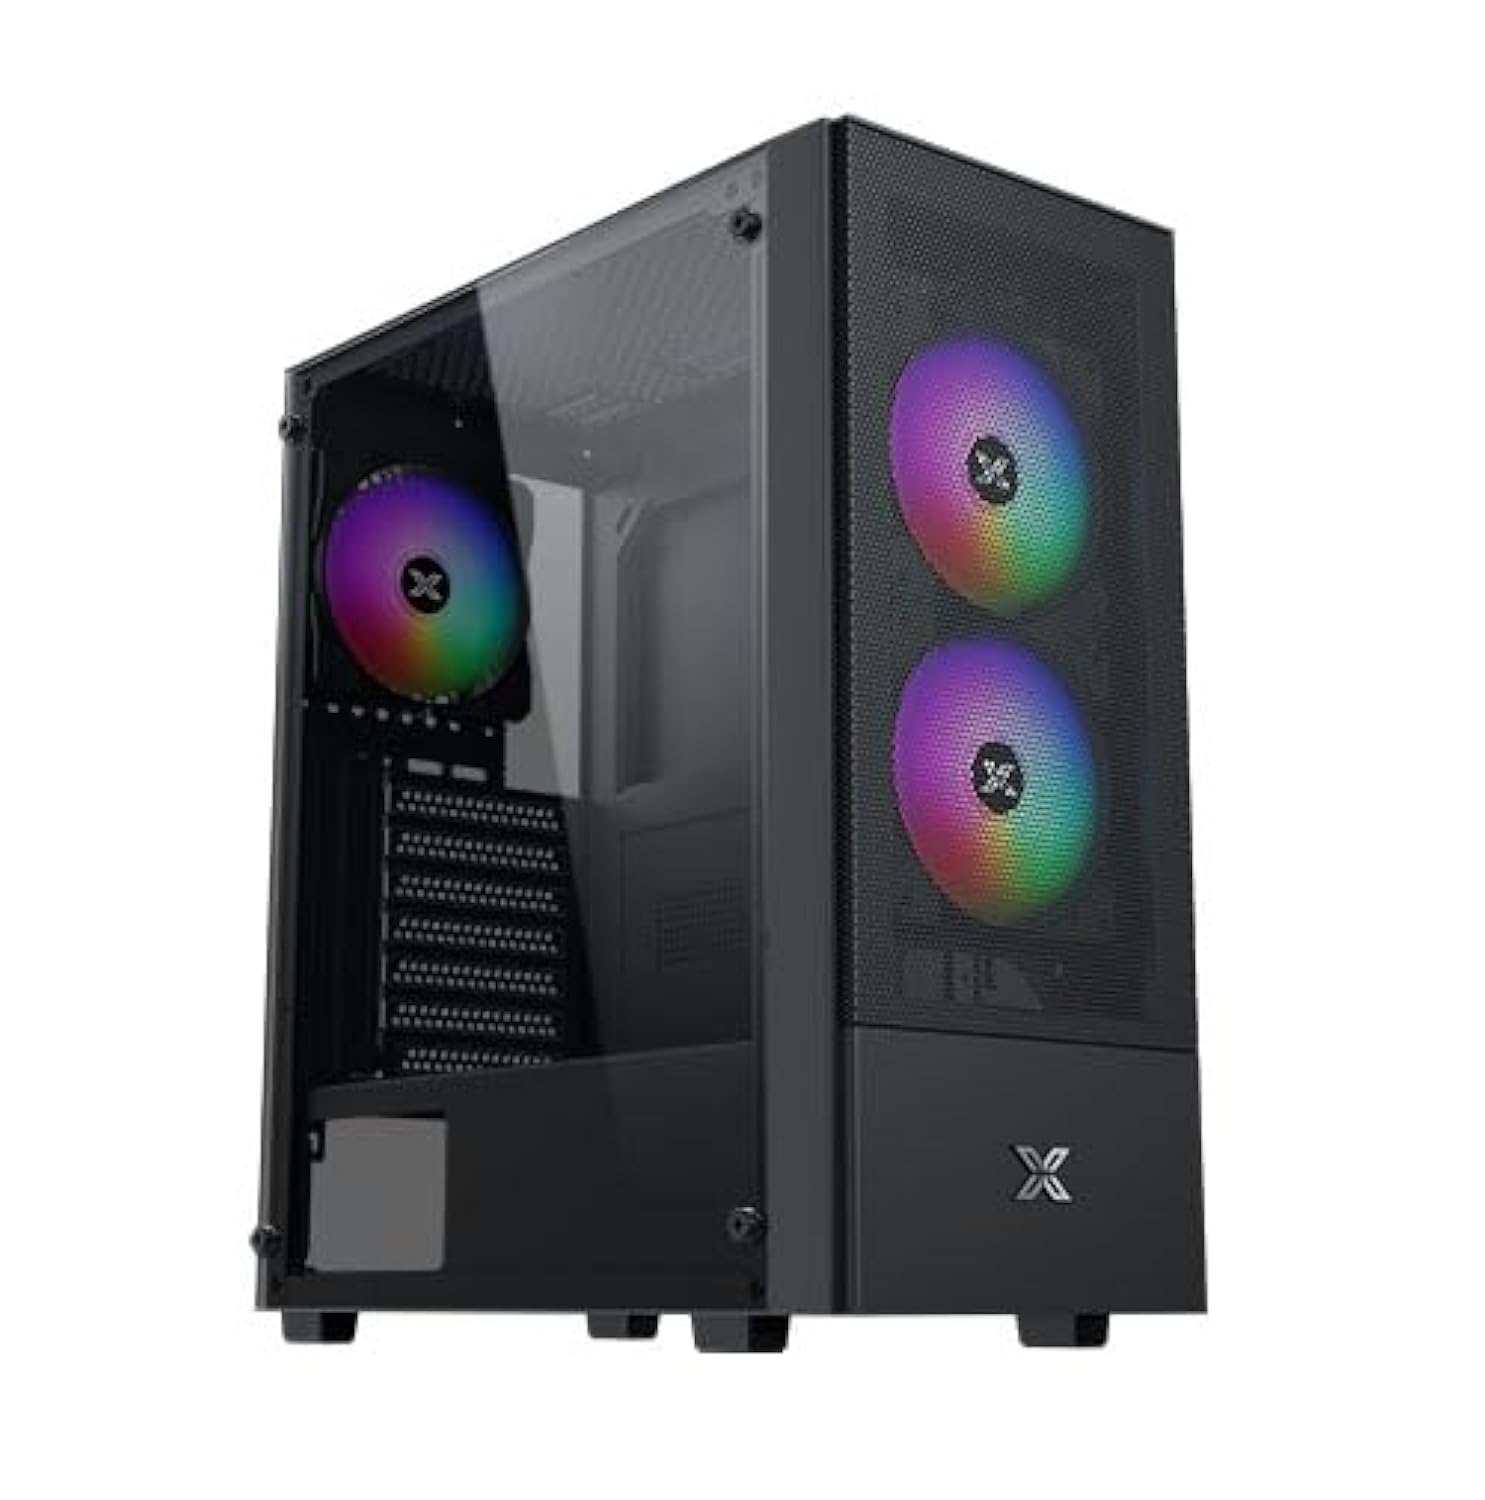
Figure 1: Xigmatek Hero II Air 3F Mid-Tower PC Case overview.
2. Sikkerhedsoplysninger
Please read and understand all safety instructions before installing components into the PC case.
- Afbryd altid strømforsyningen fra stikkontakten, inden du udfører nogen form for installation eller vedligeholdelse.
- Brug en antistatisk håndledsrem for at forhindre elektrostatisk udladning (ESD) på følsomme komponenter.
- Håndter komponenterne forsigtigt for at undgå fysisk skade.
- Hold små dele og skruer væk fra børn.
- Sørg for tilstrækkelig ventilation omkring pc-kabinettet for at forhindre overophedning.
- Do not operate the PC case with the side panel removed unless necessary for troubleshooting or maintenance.
3. Pakkens indhold
Bekræft at alle varer er til stede i pakken:
- Xigmatek Hero II Air 3F Mid-Tower PC Case
- Tilbehørsæske (indeholder skruer, kabelbindere og andre små dele)
- 3 x 120mm fixed RGB fans (pre-installed)
- Brugervejledning (dette dokument)
4. Opsætning og komponentinstallation
Follow these steps to install your PC components into the Xigmatek Hero II Air 3F case.
4.1 Installation af bundkort
Etuiet understøtter ATX, Micro-ATX og Mini-ITX bundkort.
- Fjern sidepanelet af hærdet glas ved at skrue fingerskruerne ud.
- Installer I/O-skjoldet (hvis det ikke er forudmonteret på dit bundkort) i den bageste åbning af kabinettet.
- Align your motherboard with the standoffs inside the case. Ensure the standoffs match your motherboard's form factor.
- Fastgør bundkortet med de medfølgende skruer.
- Install the CPU cooler. The case supports CPU air coolers up to 165mm in height.

Figure 2: Component clearance for motherboard (ATX), CPU cooler (165mm), and graphics card (340mm).
4.2 Installation af lagerdrev
The case offers multiple storage options:
- HDD-bur: Supports 2 x 3.5" HDDs or 2 x 2.5" SSDs in a combo cage located at the bottom.
- MB panel: Supports 2 x 2.5" SSDs mounted behind the motherboard tray.
- For 3.5" HDDs or 2.5" SSDs in the cage, slide the drive into the bay and secure with screws.
- For 2.5" SSDs behind the motherboard tray, mount the SSDs directly onto the designated spots using screws.

Figure 3: Locations for SSDs (behind motherboard tray) and HDD/SSD combo cage.
4.3 Installation af strømforsyningsenhed (PSU).
The case supports standard PS2 ATX PSUs up to 165mm in length.
- Locate the PSU mounting bracket at the rear bottom of the case.
- Skub strømforsyningen ind i det dertil indrettede rum fra bagsiden af kabinettet.
- Fastgør strømforsyningen med skruer fra ydersiden af kabinettet.
4.4 Installation af grafikkort (GPU)
The case accommodates graphics cards up to 340mm in length.
- Fjern de nødvendige dæksler til udvidelsespladserne fra bagsiden af kabinettet.
- Indsæt grafikkortet i det relevante PCIe-slot på dit bundkort.
- Fastgør grafikkortet til kabinettet med skruer.
4.5 Fan and Liquid Cooling Installation
The Hero II Air 3F comes with three pre-installed 120mm fixed RGB fans. Additional fan and liquid cooling support is available:
- Front: 3 x 120mm fans (pre-installed)
- Top: 2 x 120mm or 2 x 140mm fans
- Bag: 1 x 120mm fan (pre-installed)
- Understøttelse af væskekølende radiator: Front 360mm, Top 240mm, Rear 120mm.
- Mount additional fans or radiators to the designated locations using the appropriate screws.
- Ensure proper airflow direction for optimal cooling (intake at front, exhaust at rear/top).

Figure 4: Illustration of superior airflow design with front intake and rear exhaust.
4.6 Kabelstyring
The case provides space behind the motherboard tray and cutouts for efficient cable routing.
- Route power cables and data cables through the designated cutouts to the back of the motherboard tray.
- Use cable ties (provided in the accessory box) to bundle and secure cables, ensuring a clean interior and unobstructed airflow.
5. Betjening af pc-kabinettet
Once all components are installed and cables are connected, you can operate your PC.
5.1 Forreste I/O-porte
The top-mounted I/O panel provides convenient access to essential ports and controls:
- Power knap: For at tænde/slukke systemet.
- Nulstil knap: For at genstarte systemet.
- USB 2.0-porte (x2): Til tilslutning af USB 2.0-enheder.
- USB 3.0-port (x1): Til tilslutning af USB 3.0-enheder.
- HD Audio Jack: Til tilslutning af hovedtelefoner og mikrofoner.
- LED -switch: To control the lighting of the pre-installed RGB fans.

Figure 5: Diagram of the top-mounted I/O ports including Power, Reset, USB 2.0, USB 3.0, HD Audio, and LED Switch.
5.2 Fan Operation and RGB Control
The pre-installed fans provide cooling for your system. The LED Switch on the I/O panel allows you to cycle through different lighting modes for the fixed RGB fans. Note that the pre-installed fans use Molex connectors for power.
6. Vedligeholdelse
Regelmæssig vedligeholdelse er med til at sikre optimal ydeevne og levetid for dine pc-komponenter.
- Støvrensning: Periodically clean dust filters and the interior of the case using compressed air or a soft brush. Dust accumulation can impede airflow and lead to overheating.
- Kabelhåndteringstjek: Ensure cables remain neatly organized and do not obstruct airflow.
- Ventilator inspektion: Check fans for any obstructions or unusual noises.
7. Fejlfinding
Dette afsnit omhandler almindelige problemer, du kan støde på.
- Fans not spinning or RGB not lighting up:
- Ensure all fan power connectors (Molex) are securely connected to the power supply.
- Verify that the LED Switch cable from the I/O panel is correctly connected to the fan controller or motherboard header (if applicable). Note that the pre-installed fans have fixed RGB and are controlled by the LED switch.
- Systemet tænder ikke:
- Kontroller alle strømforbindelser, inklusive 24-bens ATX-, 8-bens CPU- og GPU-strømkabler.
- Ensure the power button cable from the I/O panel is correctly connected to the motherboard's front panel header.
- Verify the PSU switch is in the "ON" position.
- Poor airflow or high temperatures:
- Check for dust buildup on fans and filters and clean them.
- Sørg for, at ventilatorerne er orienteret korrekt for optimal indsugning og udsugning.
- Kontroller, at der ikke er nogen kabler, der blokerer luftstrømmens veje.
8. Specifikationer
Detailed specifications for the Xigmatek Hero II Air 3F PC Case.

Figure 6: Official specifications table for the Hero II Air 3F.
| Feature | Specifikation |
|---|---|
| Produktnavn | Hero II Air 3F |
| Materiale | Stållegering |
| Dimensioner (L x B x H) | 390 x 195 x 450 mm |
| Drive Bays | HDD Cage: 2 x 3.5" & 2.5" combo; MB Panel: 2 x 2.5" SSD |
| Udvidelsesslots | 7 standardpladser |
| Bundkort support | ATX, M-ATX, Mini ITX |
| Understøttelse af strømforsyning | Standard PS2 ATX PSU (Max 165mm length) |
| Fan Support | Top: 2 x 120mm or 2 x 140mm; Front: 3 x 120mm; Rear: 1 x 120mm |
| Væskekøling Support | Foran: 360 mm; Øverst: 240 mm; Bagpå: 120 mm |
| I/O panel | 1 x USB 3.0, 2 x USB 2.0, HD Audio, LED Switch |
| CPU køler Højde | Max 165 mm |
| VGA kort længde | Max 340 mm |
| PSU længde | Max 165 mm |
| Forudinstallerede ventilatorer | 3 x 120mm Fixed RGB Fans |
| Funktioner | Tempered glass side panel, advanced cooling system, easy cable management |
9. Garantioplysninger
The Xigmatek Hero II Air 3F PC Case comes with a 2 års garanti from the date of purchase. This warranty covers manufacturing defects and material faults under normal use. It does not cover damage caused by misuse, accident, modification, or unauthorized repair. Please retain your proof of purchase for warranty claims.
10. Support
For further assistance, technical support, or warranty inquiries, please contact Xigmatek customer service through their official webwebsted eller din lokale distributør.