1. Introduktion
Tak for købetasing the Monster Image Pro MHV1-1051-CAN 720p HD LCD Projector. This manual provides essential information for the safe and efficient operation of your new projector. Please read it thoroughly before use and retain it for future reference.
This projector offers a native resolution of 1280x720p HD, supporting up to 1920x1080p HD maximum resolution. With 6000 lumens brightness, it is designed to deliver clear projections for various applications, from home cinema to presentations.
2. Sikkerhedsoplysninger
- Elektrisk sikkerhed: Always use the provided power adapter. Do not expose the projector to rain or moisture to prevent electric shock.
- Ventilation: Ensure adequate ventilation around the projector. Do not block ventilation openings. Overheating can cause malfunction.
- Håndtering: Håndter projektoren forsigtigt. Undgå at tabe den eller udsætte den for kraftige stød.
- Linsepleje: Se ikke direkte ind i projektorlinsen, når lamp is on, as the bright light can harm your eyes.
- Rensning: Tag stikket ud af stikkontakten før rengøring. Brug en blød, tør klud. Brug ikke flydende rengøringsmidler eller rengøringsmidler på sprayform.
- Placering: Placer projektoren på en stabil, plan overflade. Undgå at placere den i direkte sollys eller i nærheden af varmekilder.
3. Pakkens indhold
Kontroller venligst, at alle følgende varer er inkluderet i din pakke:
- Monster Image Pro MHV1-1051-CAN Projector
- Fjernbetjening
- Strømadapter
- HDMI-kabel (kan variere afhængigt af region)
- Brugervejledning (dette dokument)
4. Produktet er slutview
Gør dig bekendt med de forskellige dele af din projektor.

Figur 4.1: Front view of the Monster Image Pro MHV1-1051-CAN projector, showing the lens, focus and keystone adjustment dials, and control buttons on top. A remote control is positioned next to the projector.
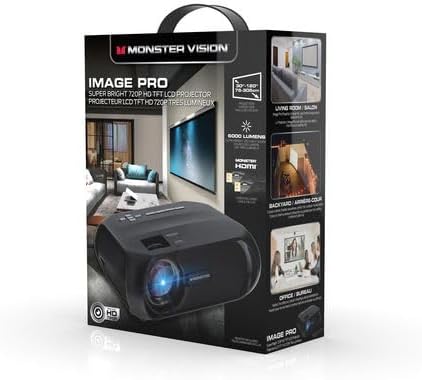
Figur 4.2: Packaging box for the Monster Image Pro projector, highlighting key features such as "Super Bright 720p HD TFT LCD Projector" and usage scenarios like living room, backyard, and office.
4.1 Projektorkomponenter
- Linse: Projicerer billedet på skærmen.
- Fokusring: Justerer billedets klarhed.
- Keystone-korrektion: Adjusts image distortion (trapezoid effect).
- Kontrolpanel: Knapper til grundlæggende navigation og indstillinger.
- Indgangsporte: HDMI, USB, AV, etc. (Refer to the back panel for specific ports).
- Strømport: Tilsluttes strømadapteren.
5. Opsætning
5.1 Placering
Choose a flat, stable surface for the projector. The distance from the screen will determine the image size. Ensure there is enough space for proper ventilation around the projector.
5.2 Strømtilslutning
- Tilslut strømadapteren til projektorens strømport.
- Sæt den anden ende af strømadapteren i en stikkontakt.
5.3 Tilslutning af inputenheder
The projector supports various input sources. For optimal quality, use an HDMI connection.
- HDMI: Connect an HDMI cable from your source device (e.g., laptop, Blu-ray player, streaming stick) to the HDMI port on the projector.
- USB: Indsæt et USB-drev i USB-porten for at afspille medier files direkte.
- AV: Use an AV cable to connect older devices.
5.4 Fokus- og Keystone-justering
- Tænd for projektoren og vis et billede.
- Drej på Fokus ring on the projector lens until the image is clear and sharp.
- Hvis billedet ser trapezformet ud (bredere øverst eller nederst), skal du justere Keystone korrektion dial until the image is rectangular.
6. Betjeningsvejledning
6.1 Tænd/sluk
- Tænd: Tryk på tænd/sluk-knappen på projektoren eller fjernbetjeningen.
- Sluk: Tryk på tænd/sluk-knappen igen. Bekræft nedlukningen, hvis du bliver bedt om det.
6.2 Valg af indgangskilde
After powering on, use the "Source" button on the remote or projector control panel to select the desired input (e.g., HDMI, USB, AV).
6.3 Menunavigation
Use the arrow buttons on the remote or projector to navigate through the on-screen menu. Press "OK" or "Enter" to confirm selections. Use "Back" or "Exit" to return to the previous menu or exit the menu.
6.4 Grundlæggende indstillinger
- Billedtilstand: Juster lysstyrke, kontrast, farve og skarphed.
- Aspektforhold: Select between 4:3 or 16:9 depending on your content.
- Sund: Adjust volume or mute the audio.
7. Vedligeholdelse
7.1 Rengøring af linsen
Use a soft, lint-free cloth specifically designed for optical lenses. Do not use abrasive cleaners or excessive force, as this can scratch the lens.
7.2 Rengøring af projektorhuset
Tør projektorens yderside af med en blød, tør klud. Ved genstridige mærker kan du bruge en let tør klud.amp en klud kan bruges, efterfulgt af en tør klud. Sørg for, at der ikke kommer væske ind i ventilationsåbningerne.
7.3 Ventilation
Regularly check that the ventilation openings are free from dust and obstructions. Use a soft brush or compressed air to gently clean them.
7.4 Opbevaring
When not in use for extended periods, store the projector in a cool, dry, dust-free environment. It is recommended to use the original packaging for storage and transport.
8. Fejlfinding
| Problem | Mulig årsag | Løsning |
|---|---|---|
| Ingen strøm | Power cord not connected; Power outlet faulty; Projector off. | Check power connections; Try a different outlet; Press the power button. |
| Intet billede | Incorrect input source; Input device not connected; Lens cap on. | Select correct input source; Connect input device securely; Remove lens cap. |
| Billedet er sløret | Fokus ikke justeret; Projektor for langt væk/tæt på. | Adjust the focus ring; Adjust projector distance. |
| Billede forvrænget (trapezformet) | Keystone ikke justeret; Projektoren er ikke i vater. | Adjust the keystone correction dial; Ensure projector is on a level surface. |
| Ingen lyd | Volume too low/muted; Audio cable not connected; Source device audio settings. | Increase volume/unmute; Check audio connections; Adjust audio settings on source device. |
9. Specifikationer
| Feature | Detalje |
|---|---|
| Modelnavn | Monster Image Pro MHV1-1051-CAN |
| Indfødt opløsning | 1280 x 720 (720p HD) |
| Maksimal skærmopløsning | 1920 x 1080 (1080p HD) |
| Lysstyrke | 6000 lumen (150 ANSI-lumen) |
| Kontrastforhold | 1000:1 - 2000:1 |
| Display Type | LCD |
| Kaste Ratio Range | 4:3 / 16:9 |
| Forbindelsesteknologi | HDMI |
| Lyskildens levetid | 30000 timer |
| Kontrolmetode | Fjern |
| Formfaktor | Transportabel |
| Pakkedimensioner | 33.29 x 24.9 x 12.4 cm |
| Varens vægt | 1.93 kg |
10. Garanti og support
This product comes with a standard manufacturer's warranty. For detailed warranty information, please refer to the warranty card included in your package or contact the retailer where you purchased the product.
For technical support, troubleshooting assistance, or service inquiries, please contact the customer support provided by the manufacturer or your retailer. Keep your purchase receipt as proof of purchase for warranty claims.