
ANGREBSHAJ X3
Brugermanual til ATTACK SHARK X3 trådløs gamingmus
Model: X3
1. Produktet er slutview
The ATTACK SHARK X3 is an ultra-lightweight wireless gaming mouse designed for high performance and versatility. It features a PixArt PAW3395 sensor, multi-mode connectivity (wired, 2.4G wireless, Bluetooth), and a long-lasting battery, making it suitable for various computing environments and gaming needs.
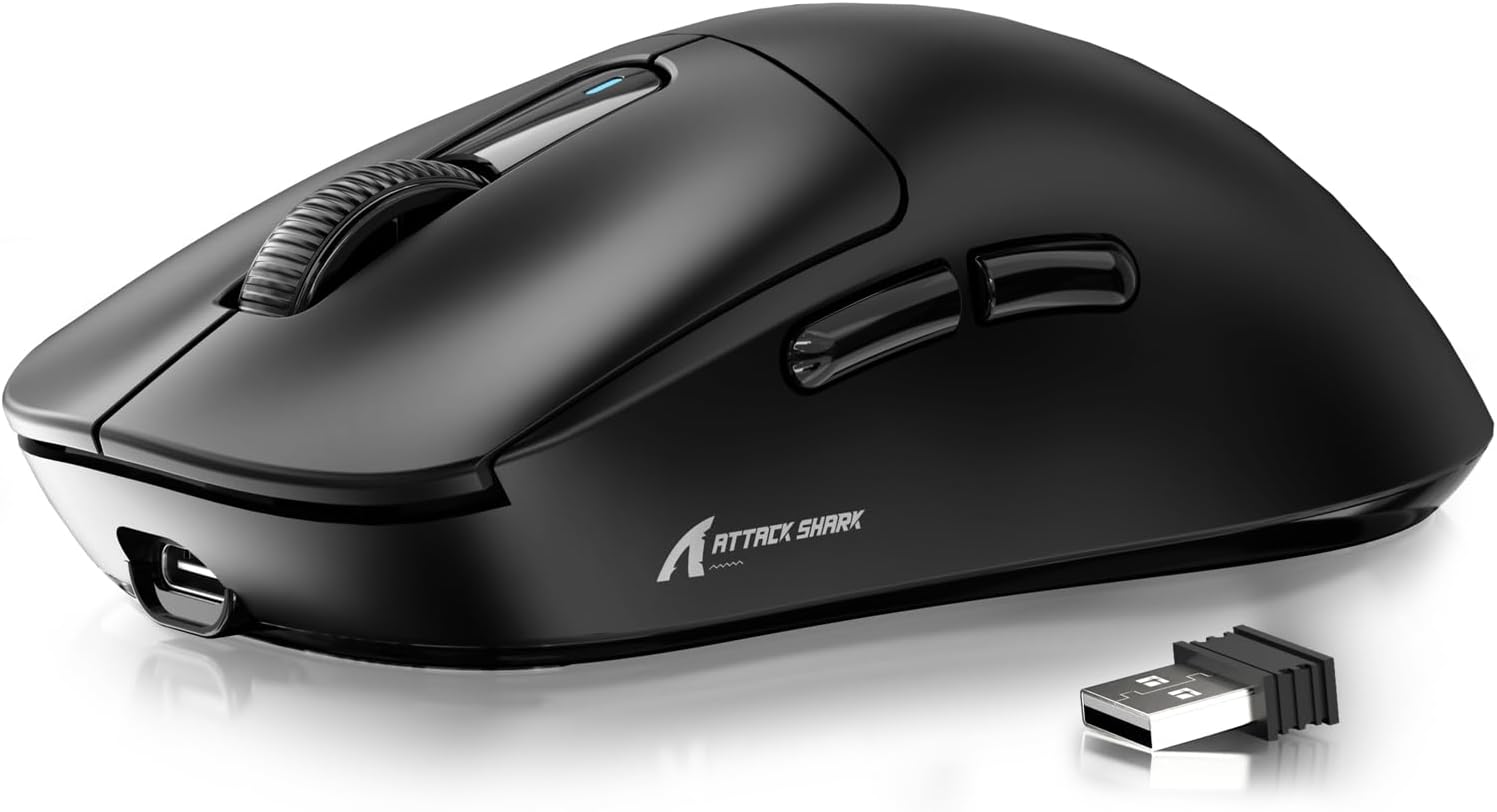
Figure 1: ATTACK SHARK X3 Wireless Gaming Mouse (Black)

Figure 2: X3-Mouse Ultra Lightweight Design
2. Nøglefunktioner
- Ultralet design: Weighing approximately 49g, designed for comfortable and agile movement.
- PixArt PAW3395 Sensor: Flagship gaming sensor offering up to 26000 DPI for precise tracking.
- Tri-mode-tilslutning: Supports wired (Type-C), 2.4G wireless, and Bluetooth (BT5.2) connections.
- Lang batterilevetid: Op til 200 timers kontinuerlig brug på en enkelt opladning.
- Holdbare afbrydere: Equipped with Kailh GM8.0 switches, rated for 80 million clicks.
- Tilpasset DPI: 6 adjustable DPI levels.
- Macro Drivers: Software support for macro customization and button remapping.
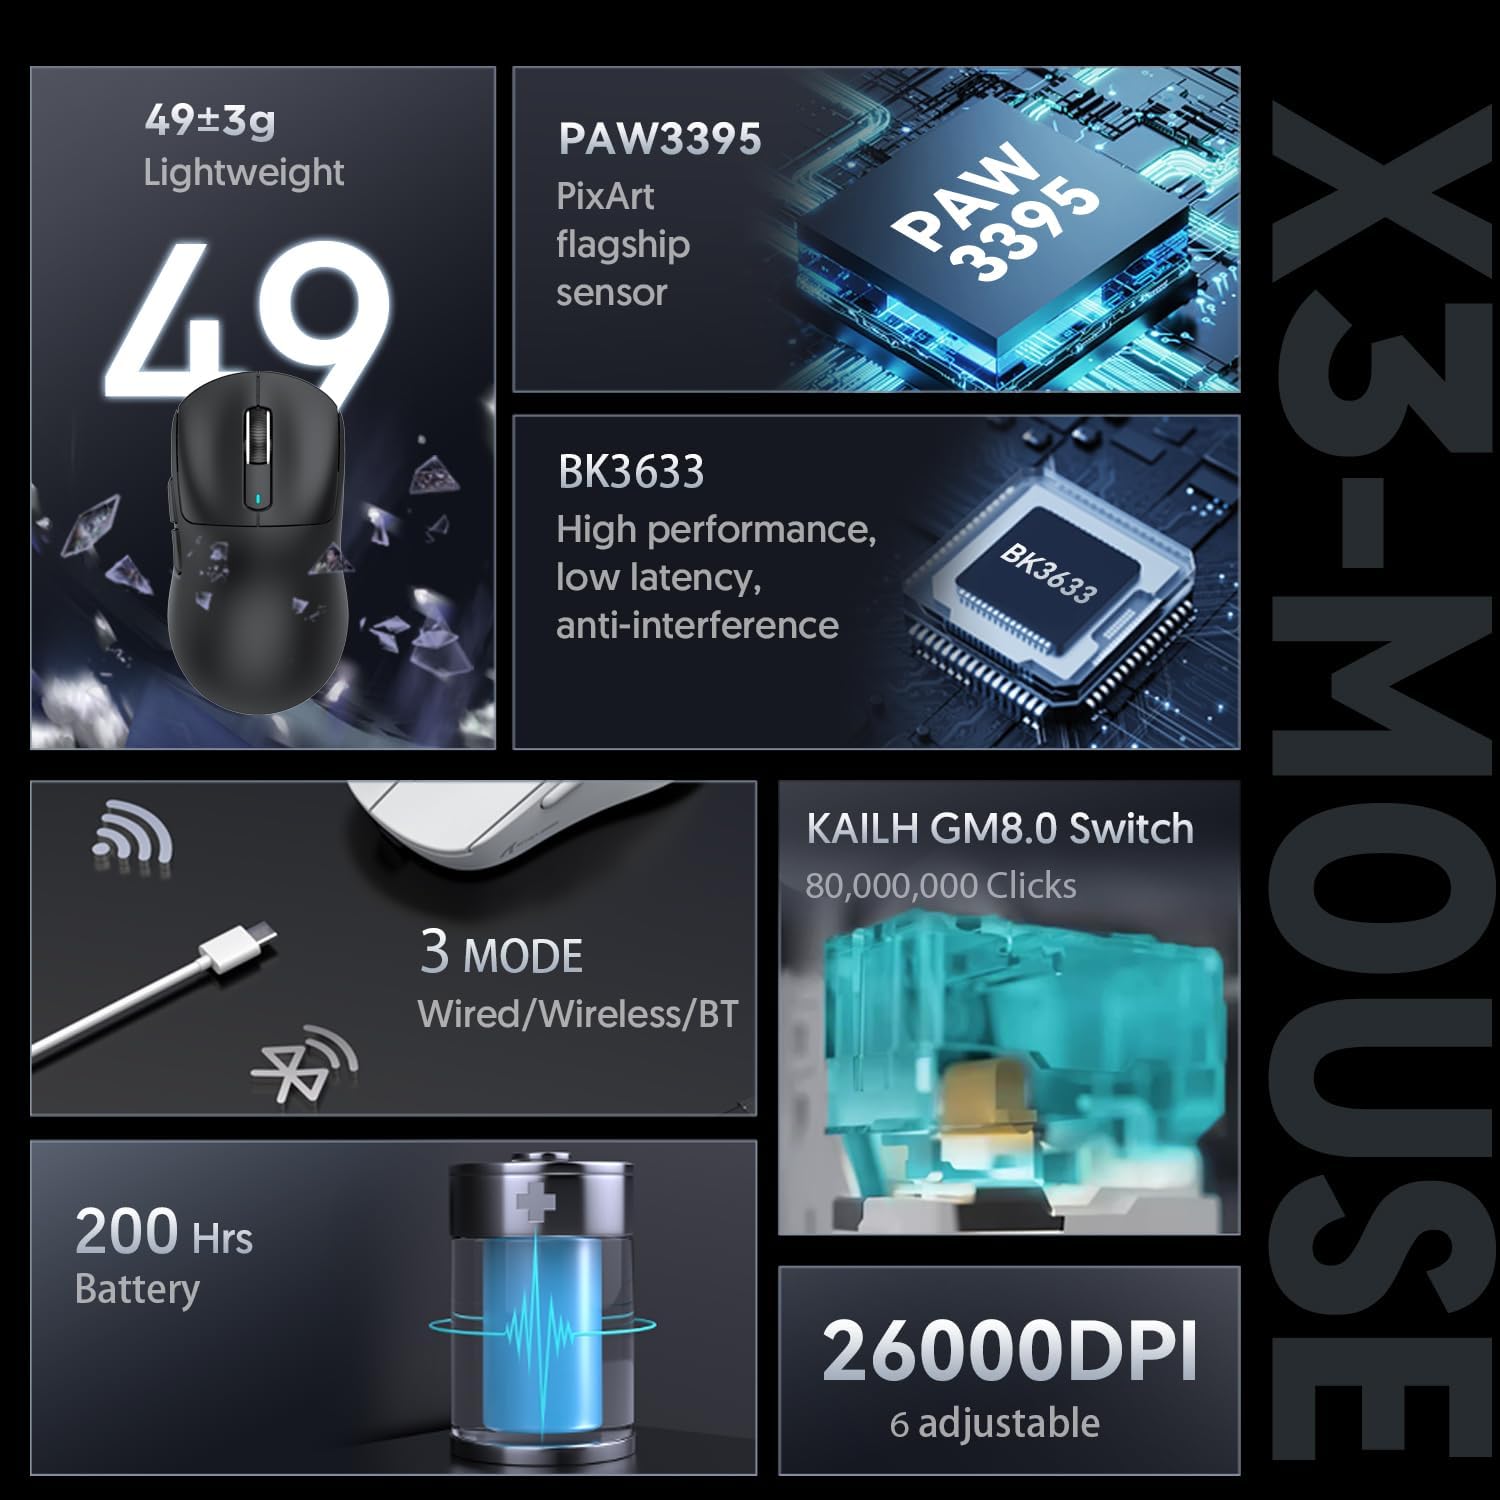
Figure 3: X3-Mouse Feature Overview

Figure 4: PixArt PAW3395 Flagship Sensor Details
3. Opsætning
3.1 Pakkens indhold
- ATTACK SHARK X3 Trådløs Gamingmus
- USB Type-C-kabel
- 2.4G USB-modtager
- Brugervejledning (dette dokument)
- Optional: Grip Tapes (may vary by package)
3.2 Indledende opladning
Before first use, it is recommended to fully charge the mouse. Connect the provided USB Type-C cable to the mouse's front port and the other end to a USB power source (e.g., computer USB port, USB wall adapter). The DPI indicator light will show charging status.
3.3 Tilslutning af musen
The X3 mouse supports three connection modes: Wired, 2.4G Wireless, and Bluetooth.
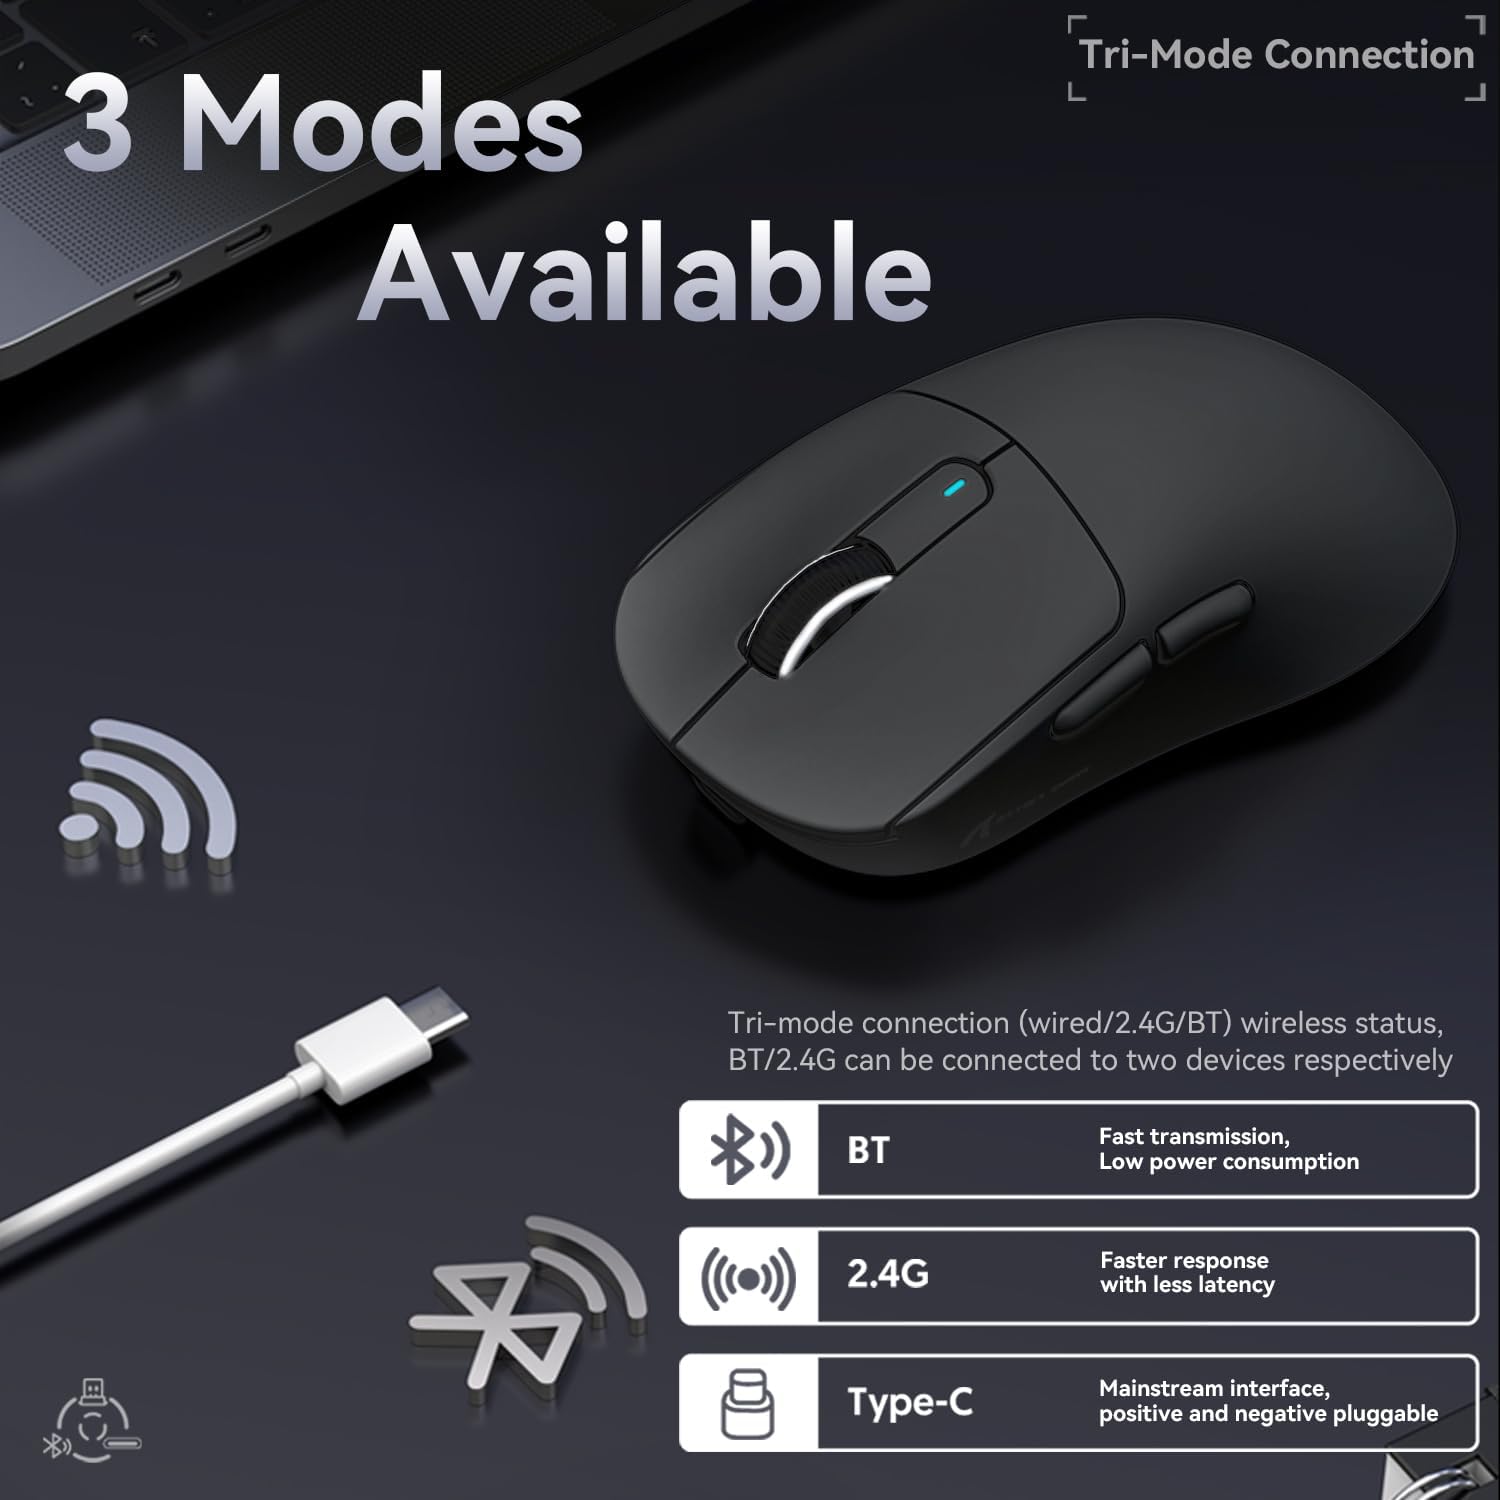
Figur 5: Tri-Mode-forbindelsesmuligheder
- Kablet tilstand:
Connect the USB Type-C cable directly from the mouse to your computer. The mouse will automatically switch to wired mode and begin charging.
- 2.4G trådløs tilstand:
Locate the 2.4G USB receiver stored in the magnetic compartment on the bottom of the mouse. Plug the receiver into an available USB port on your computer. Slide the switch on the bottom of the mouse to the "2.4G" position. The mouse should connect automatically. If not, press and hold the mode switching key on the bottom for 3 seconds to initiate pairing.

Figure 6: Mouse Bottom Layout with Switch and Receiver Slot
- Bluetooth-tilstand:
Slide the switch on the bottom of the mouse to the "BT" position. On your computer or device, open Bluetooth settings and search for new devices. Select "ATTACK SHARK X3" from the list to pair. If pairing fails, press and hold the mode switching key on the bottom for 3 seconds to enter pairing mode.
4. Betjeningsvejledning
4.1 DPI-justering
The mouse features a dedicated DPI switch button on the bottom (or top, depending on model variant) to cycle through preset DPI levels. The DPI indicator light will change color to indicate the current DPI setting. You can customize these levels using the official software.
4.2 Macro Customization
For advanced customization, download the official ATTACK SHARK software from the manufacturer's webwebsted. Denne software giver dig mulighed for at:
- Remap mouse buttons.
- Create and assign macros for complex actions.
- Juster DPI-niveauer og pollingrate.
- Overvåg batteristatus.
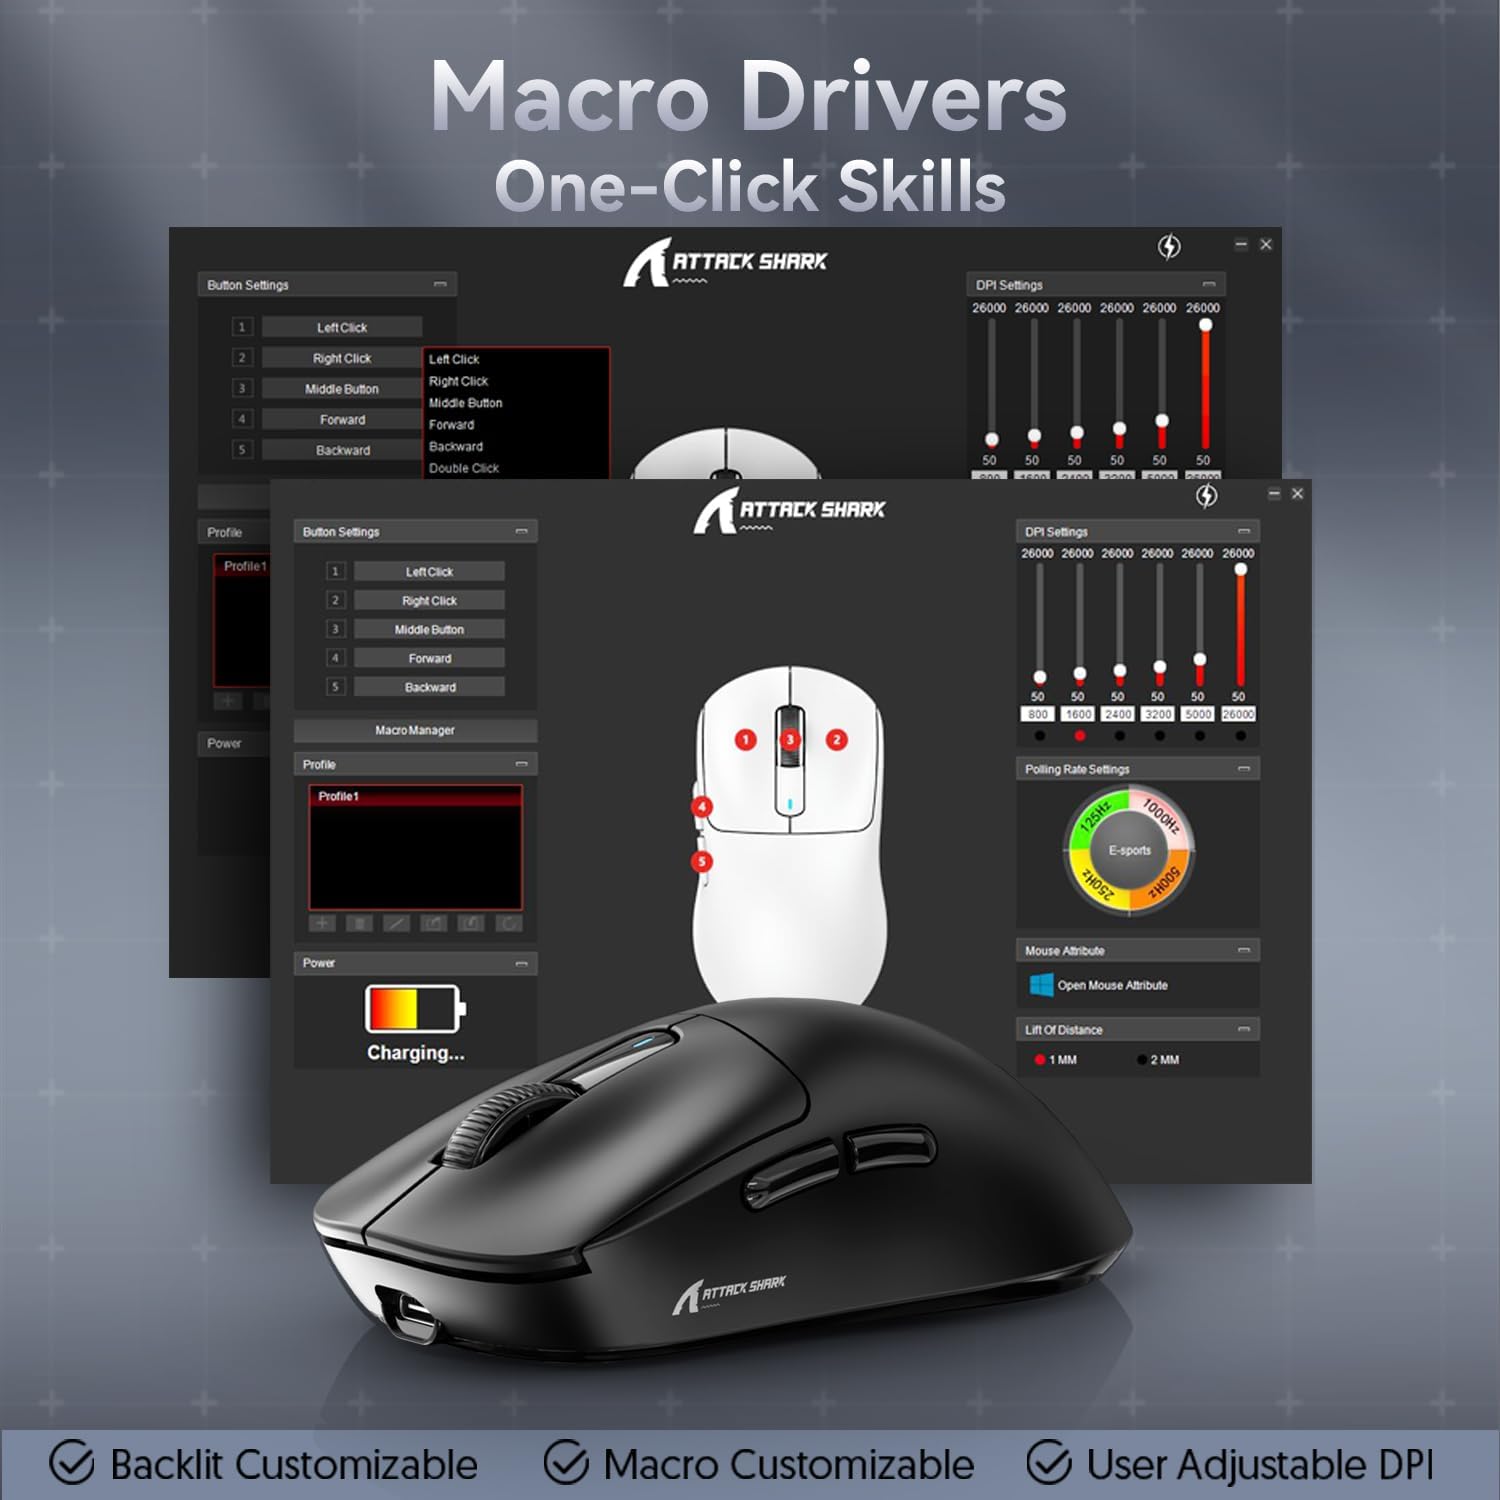
Figure 7: Macro Drivers and Software Interface
5. Batteristyring
The ATTACK SHARK X3 mouse is equipped with a high-capacity lithium battery providing up to 200 hours of usage. To preserve battery life:
- Turn off the mouse using the switch on the bottom when not in use for extended periods.
- Oplad musen, når batteriindikatoren viser lav strøm.
- Undgå at udsætte musen for ekstreme temperaturer.
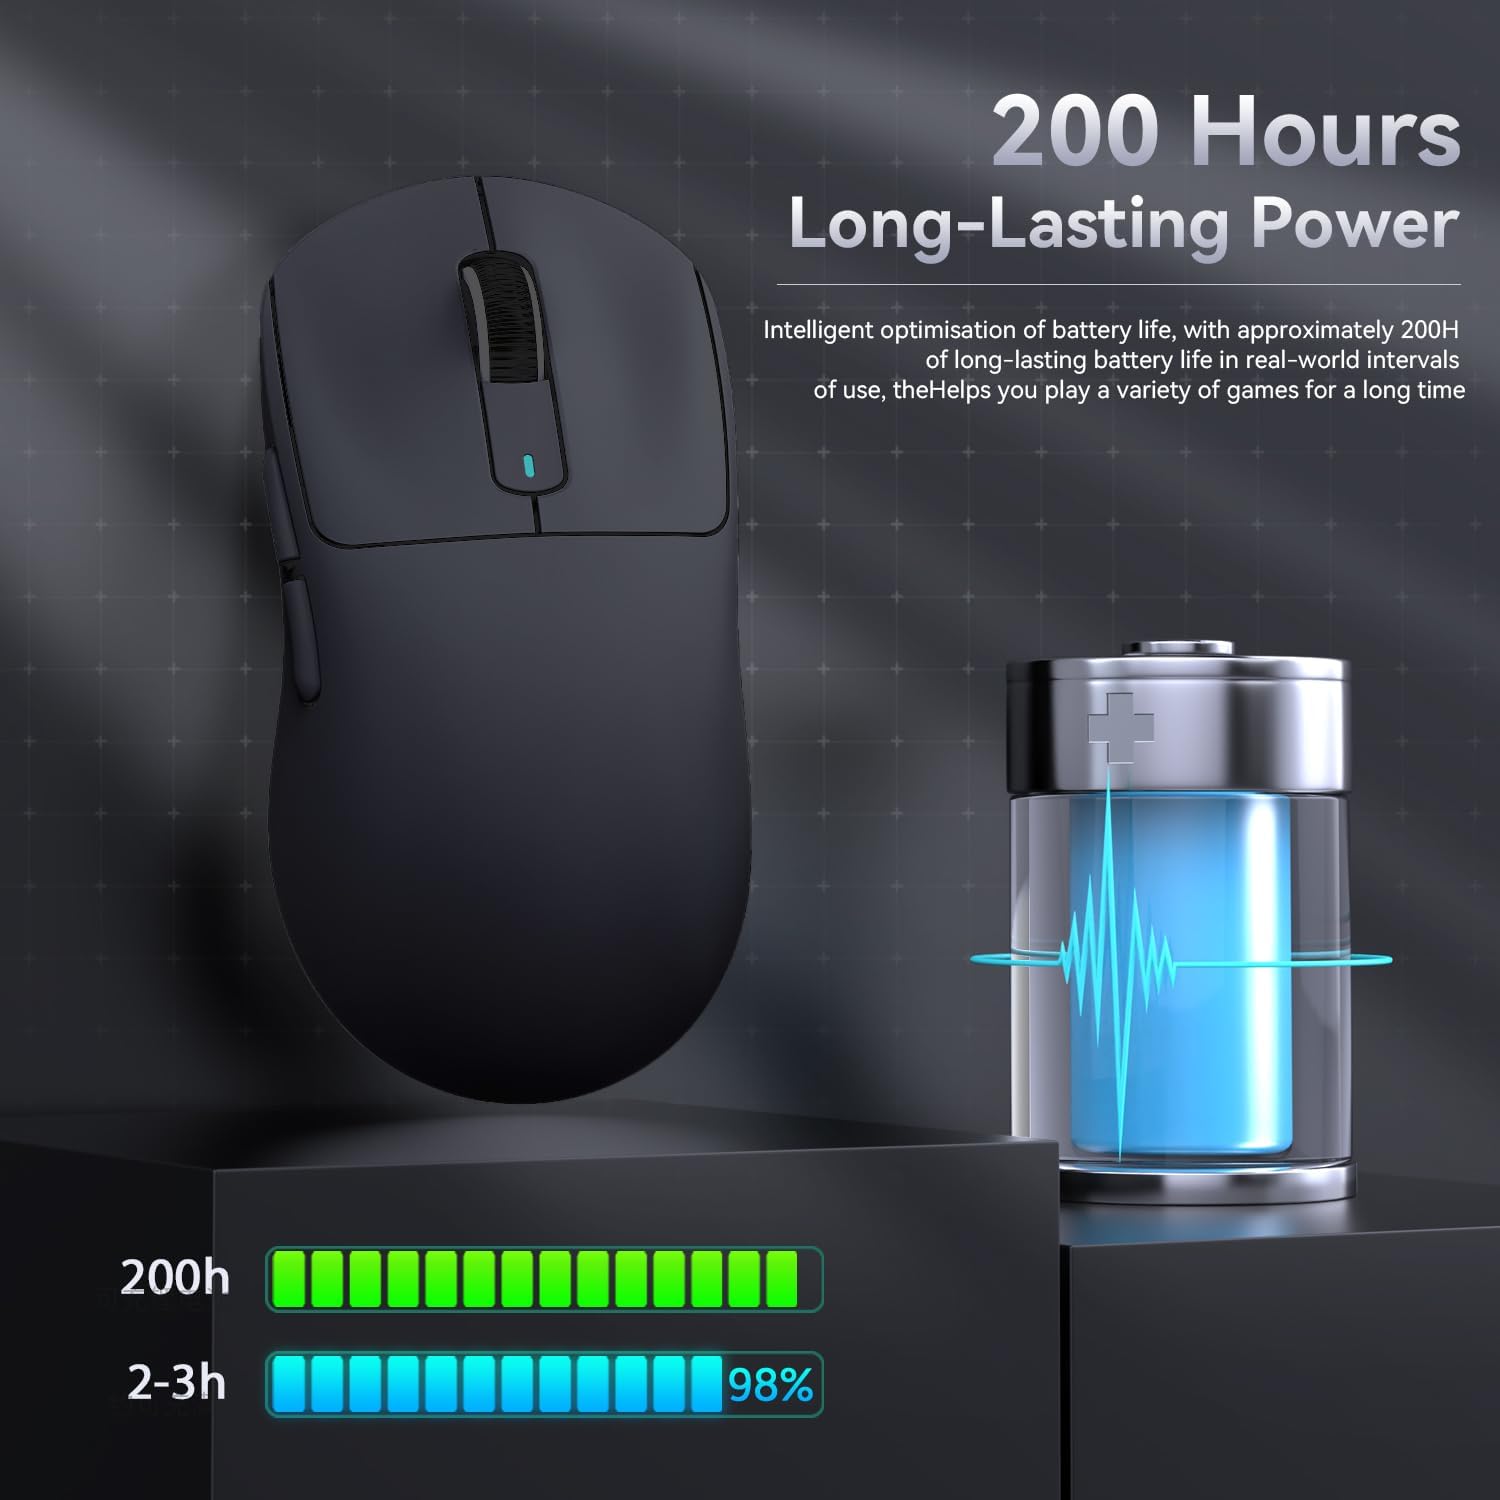
Figur 8: Indikation af batterilevetid
6. Vedligeholdelse
- Rensning: Use a soft, dry cloth to clean the mouse. Do not use harsh chemicals or abrasive materials.
- Opbevaring: Opbevar musen et køligt, tørt sted væk fra direkte sollys og ekstreme temperaturer.
- Sensorpleje: Hold den optiske sensor i bunden af musen ren og fri for støv eller snavs for optimal sporingsydelse.
7. Fejlfinding
| Problem | Mulig årsag | Løsning |
|---|---|---|
| Musen reagerer ikke | Low battery; Incorrect connection mode; USB receiver not plugged in (2.4G); Bluetooth not paired. | Charge the mouse; Ensure the switch on the bottom is in the correct mode (2.4G/BT); Re-insert USB receiver; Re-pair Bluetooth. |
| Lag eller intermitterende forbindelse | Interferens; Afstand fra modtager/enhed; Lavt batteri. | Move closer to the receiver/device; Ensure no strong interference sources nearby; Charge the mouse. |
| DPI ændrer sig ikke | DPI button malfunction; Software conflict. | Ensure the DPI button is pressed correctly; Restart the mouse and computer; Reinstall mouse software. |
| Software registrerer ikke musen | Driver issue; Connection problem. | Ensure mouse is connected via wired or 2.4G mode (Bluetooth might not be supported by all software features); Reinstall drivers/software. |
8. Specifikationer
| Feature | Detalje |
|---|---|
| Model | X3 |
| Sensor | PixArt PAW3395 |
| DPI | Op til 26000 (justerbar) |
| Sporingshastighed | 650 IPS |
| Acceleration | 50G |
| Afstemningsfrekvens | 1000Hz (Adjustable via software) |
| Forbindelse | Wired (Type-C), 2.4G Wireless, Bluetooth 5.2 |
| Afbrydere | Kailh GM8.0 (80 Million Clicks) |
| Batterilevetid | Ca. 200 timer |
| Vægt | Ca. 49 g |
| Dimensioner | 118.5 mm x 61 mm x 39.7 mm (ca.) |
| Kompatibel OS | Windows 11, Xbox, PS, Mac (functionality may vary) |

Figure 9: ATTACK SHARK X3 Super Light Mouse Overview

Figure 10: X3MAX Exploded Diagram (Illustrative of X3 series internal components)
9. Officiel produktvideo
Video 1: ATTACK SHARK X3 Mouse Product Overview. This video provides a visual demonstration of the mouse's features, unboxing, and usage scenarios.
10. Garanti og support
For warranty information, technical support, or to download the latest software and drivers, please visit the official ATTACK SHARK webwebstedet eller kontakt deres kundeservice. Gem din købskvittering til garantikrav.
Officiel mærkebutik: ATTACK SHARK Butik
Ask a question about this manual
Ask about setup, troubleshooting, compatibility, parts, safety, or missing instructions. Manuals+ will review the question and use this page’s manual context to help answer it.