
1. Introduktion
The RedThunder M10 Wireless Gaming Mouse is a lightweight, rechargeable, dual-connectivity (2.4GHz RF and Wired) mouse designed for gaming and general computer use. It features a HyperSpeed Sensor with adjustable DPI settings up to 10,000 DPI, providing precise and responsive control.
This manual provides detailed instructions for setting up, operating, and maintaining your RedThunder M10 mouse, along with troubleshooting tips and product specifications.
2. Pakkens indhold
- RedThunder M10 Wireless Gaming Mouse
- 2.4 GHz USB-modtager
- USB Type-C opladerkabel
- Brugervejledning (dette dokument)

Image: The RedThunder M10 Wireless Gaming Mouse in white, shown with its USB receiver. This is the main product view.
3. Produktet er slutview
The RedThunder M10 mouse is designed for comfort and performance. Familiarize yourself with its key components:
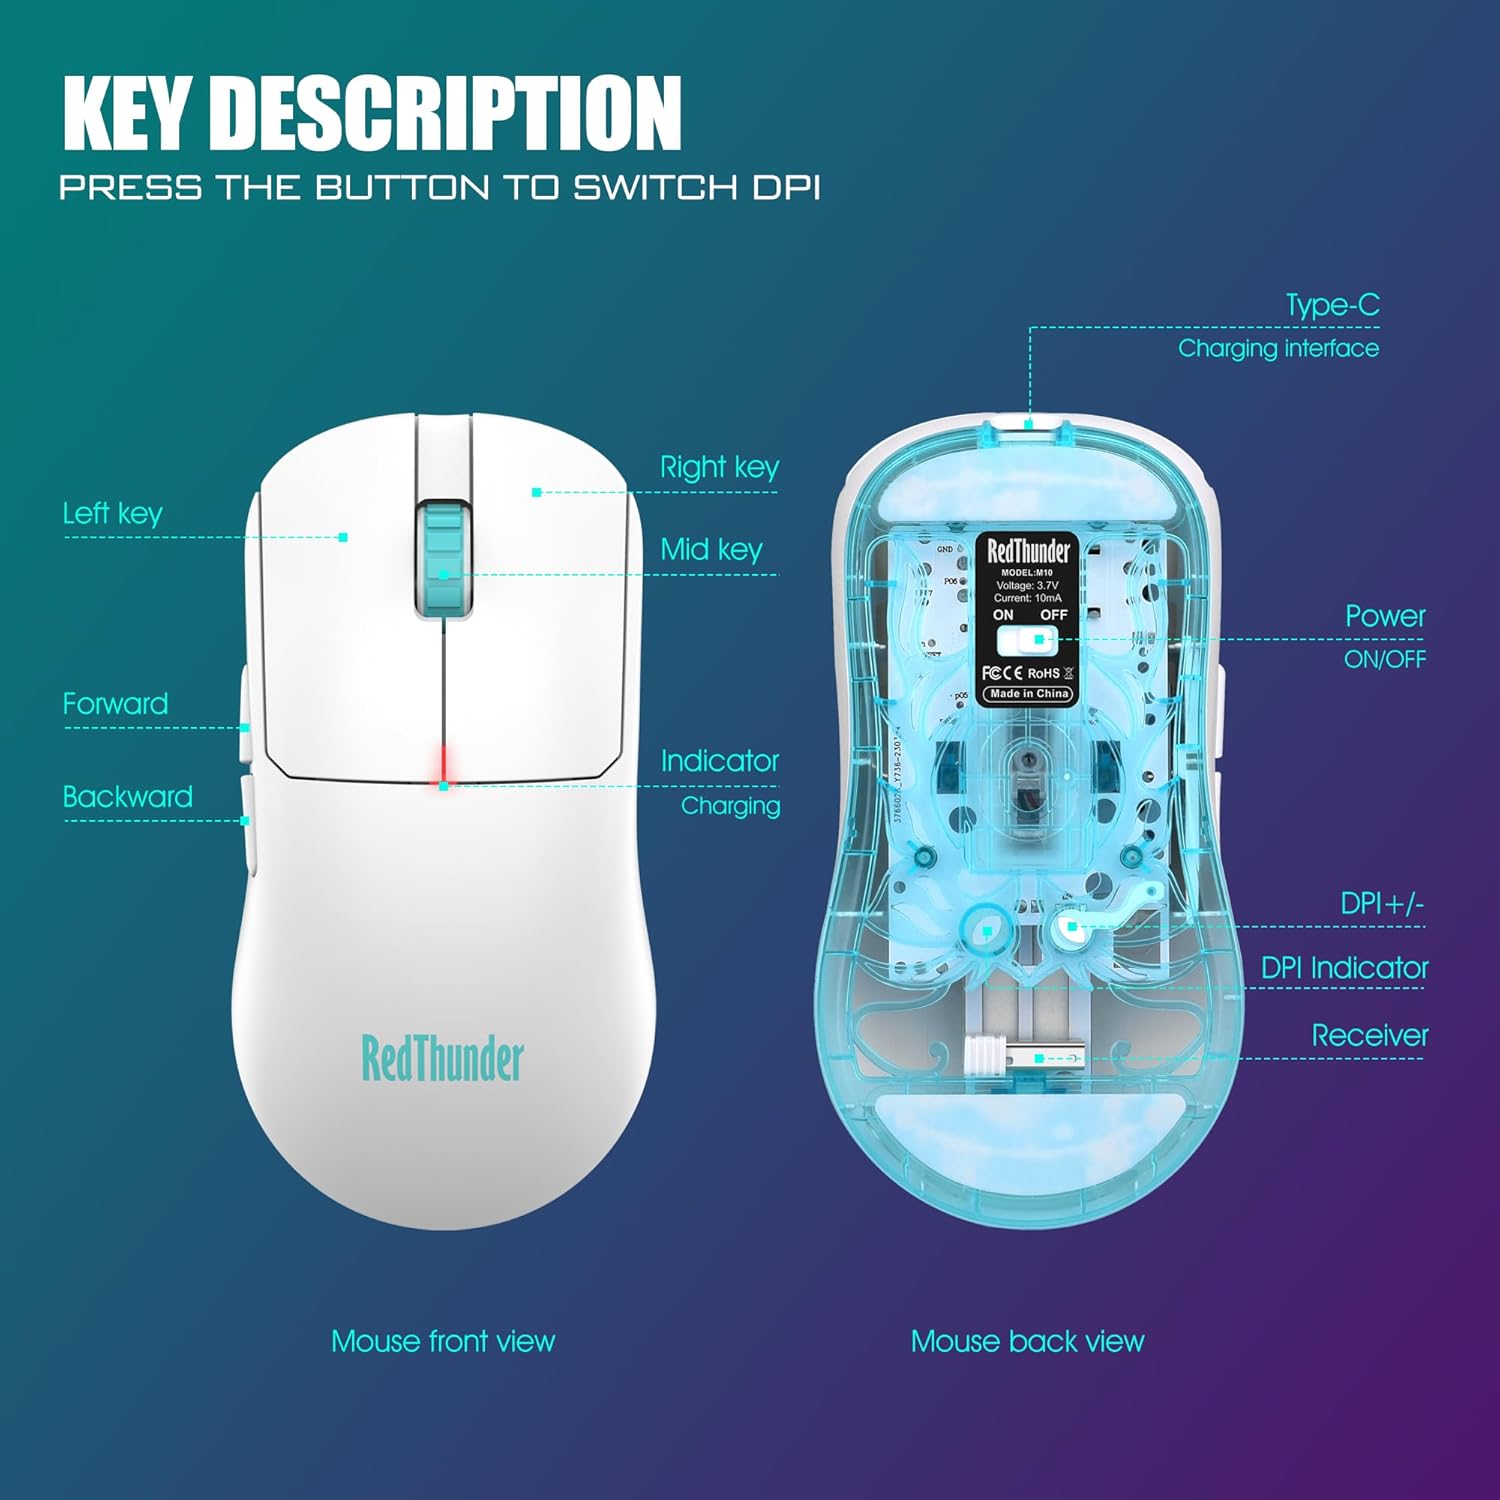
Image: A detailed diagram illustrating the front and back views of the RedThunder M10 mouse, highlighting its buttons, charging port, power switch, DPI button, and USB receiver slot.
- Venstre/højre klikknapper: Standard museknapper.
- Midterste tast (scrollhjul): For scrolling and middle-click functions.
- Frem/Tilbage-knapper: Side buttons for navigation, commonly used in web browsing and gaming.
- Type-C opladningsgrænseflade: Located at the front for charging and wired mode.
- Tænd / sluk-kontakt: Placeret på undersiden af musen.
- DPI+/- knap: Placeret på undersiden, bruges til at skifte mellem DPI-indstillinger.
- DPI Indicator Light: Located near the DPI button, flashes to indicate current DPI setting.
- USB-modtagerstik: Magnetic storage for the 2.4GHz USB receiver on the underside.
4. Opsætningsvejledning
4.1. Wireless Mode (2.4GHz RF)
- Locate the 2.4GHz USB receiver stored in the magnetic slot on the underside of the mouse.
- Plug the USB receiver into an available USB port on your computer (PC, Laptop, Mac, etc.).
- Skub tænd/sluk-knappen på undersiden af musen til "ON"-positionen.
- Musen burde automatisk oprette forbindelse til din computer. Der kræves typisk ingen yderligere drivere.


Image: The USB receiver being removed from the mouse's magnetic storage, and the mouse in use connected wirelessly to a laptop.
4.2. Kablet tilstand
- Connect the supplied USB Type-C charging cable to the Type-C port on the front of the mouse.
- Sæt den anden ende af USB-kablet i en ledig USB-port på din computer.
- The mouse will function as a wired mouse and will also charge its internal battery simultaneously.

Image: The RedThunder M10 mouse being charged via its USB Type-C cable, indicating its ability to operate in wired mode while charging.
5. Betjeningsvejledning
5.1. Justering af DPI-følsomhed
The RedThunder M10 mouse offers 6 adjustable DPI (Dots Per Inch) levels to suit various tasks and gaming preferences. To change the DPI setting:
- Tryk på DPI+/- button placeret på undersiden af musen.
- Each press will cycle through the available DPI settings: 1200 (default), 2400, 3200, 6400, 8200, and 10000 DPI.
- The DPI indicator light at the bottom of the mouse will flash a specific number of times to indicate the current DPI gear (e.g., once for 1st gear, twice for 2nd gear, and so on).

Image: A visual representation of the 6 adjustable DPI settings available on the RedThunder M10 mouse, ranging from 1200 to 10000 DPI.
Video: An official product video demonstrating the unboxing, physical features, and DPI adjustment process of the RedThunder M10 Wireless Gaming Mouse.
5.2. Batteri og opladning
The mouse is equipped with a 300 mAh rechargeable Lithium Ion battery. When the battery is low, the charging indicator light may signal this. To charge the mouse:
- Connect the supplied USB Type-C charging cable to the mouse and a USB power source (e.g., computer USB port, USB wall adapter).
- En fuld opladning tager typisk cirka 2.5 timer.
- Musen kan bruges i kablet tilstand under opladning.
For energy saving, the mouse will enter a sleep mode after approximately 5 minutes of inactivity. To wake it up, simply click any button.
6. Vedligeholdelse
- Rensning: Brug en blød, tør klud til at rengøre musen. Ved genstridigt snavs, brug en let tør klud.amp En klud kan bruges, men sørg for, at der ikke kommer fugt ind i musen. Undgå skrappe kemikalier eller slibende rengøringsmidler.
- Opbevaring: When not in use for extended periods, store the mouse in a cool, dry place. Ensure the USB receiver is securely stored in its magnetic slot to prevent loss.
- Batteripleje: To prolong battery life, avoid fully discharging the battery frequently. Charge the mouse when the low battery indicator appears.
7. Fejlfinding
| Problem | Mulig årsag | Løsning |
|---|---|---|
| Mouse not responding (Wireless Mode) |
|
|
| Mouse not responding (Wired Mode) |
|
|
| DPI-justering virker ikke |
|
|
| Musemarkøren er uregelmæssig eller hoppende |
|
|
8. Specifikationer
| Feature | Detalje |
|---|---|
| Modelnummer | M10 |
| Forbindelse | 2.4GHz RF Wireless, Wired (USB Type-C) |
| DPI niveauer | 1200, 2400, 3200, 6400, 8200, 10000 (Default: 1200) |
| Sensortype | Optisk |
| Batteritype | 1 Lithium Ion (inkluderet) |
| Batterikapacitet | 300 mAh |
| Opladningstid | Ca. 2.5 timer |
| Varens vægt | 1.9 ounces (ca. 54 g) |
| Dimensioner | 6.61 x 5.08 x 1.93 tommer (pakkemål) |
| Farve | Mat hvid |
| Kompatibilitet | Windows 7 / 8 / 10 / XP, Vista 7 / 8, Mac OS, Linux (PC, Laptop, Computer, Mac, Xbox One) |

Image: An illustration emphasizing the ergonomic design of the RedThunder M10 mouse, promoting comfort and reduced fatigue during extended use.
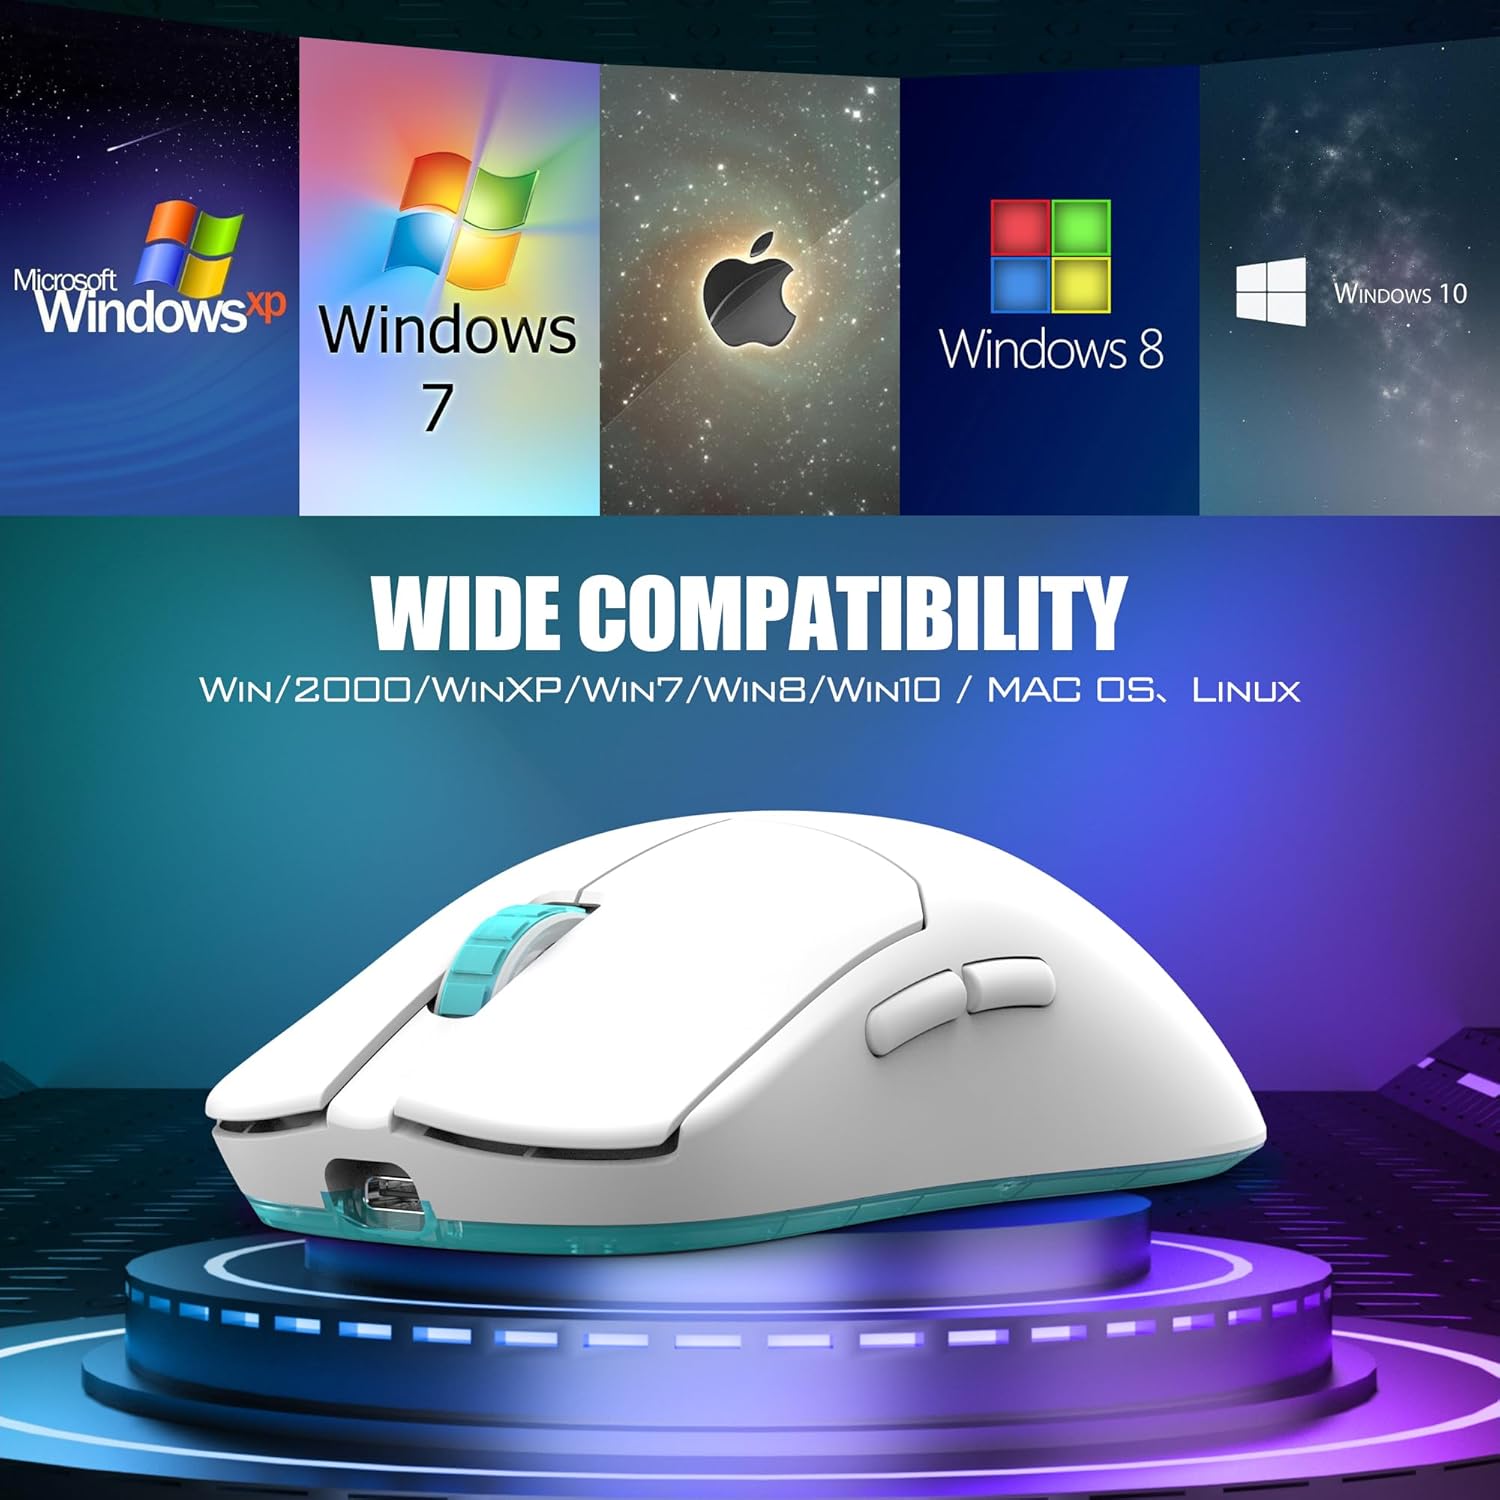
Image: The RedThunder M10 mouse displayed with various operating system logos, demonstrating its wide compatibility with Windows, Mac OS, and Linux systems.
9. Garanti og support
For warranty information and technical support, please refer to the official RedThunder website or contact their customer service directly. Contact details are typically provided on the product packaging or the manufacturer's official webwebsted.
RedThunder is committed to providing quality products and customer satisfaction. If you encounter any issues not covered in this manual, please reach out to their support team for assistance.
You can visit the RedThunder Store on Amazon for more information: RedThunder Amazon Store