1. Introduktion
The MARKLIFE P50 is a compact and portable thermal label maker designed for a wide range of labeling needs, from small business organization to home use. Utilizing thermal printing technology, it requires no ink, offering a cost-effective and convenient labeling solution. This manual provides detailed instructions for setting up, operating, maintaining, and troubleshooting your P50 label maker.
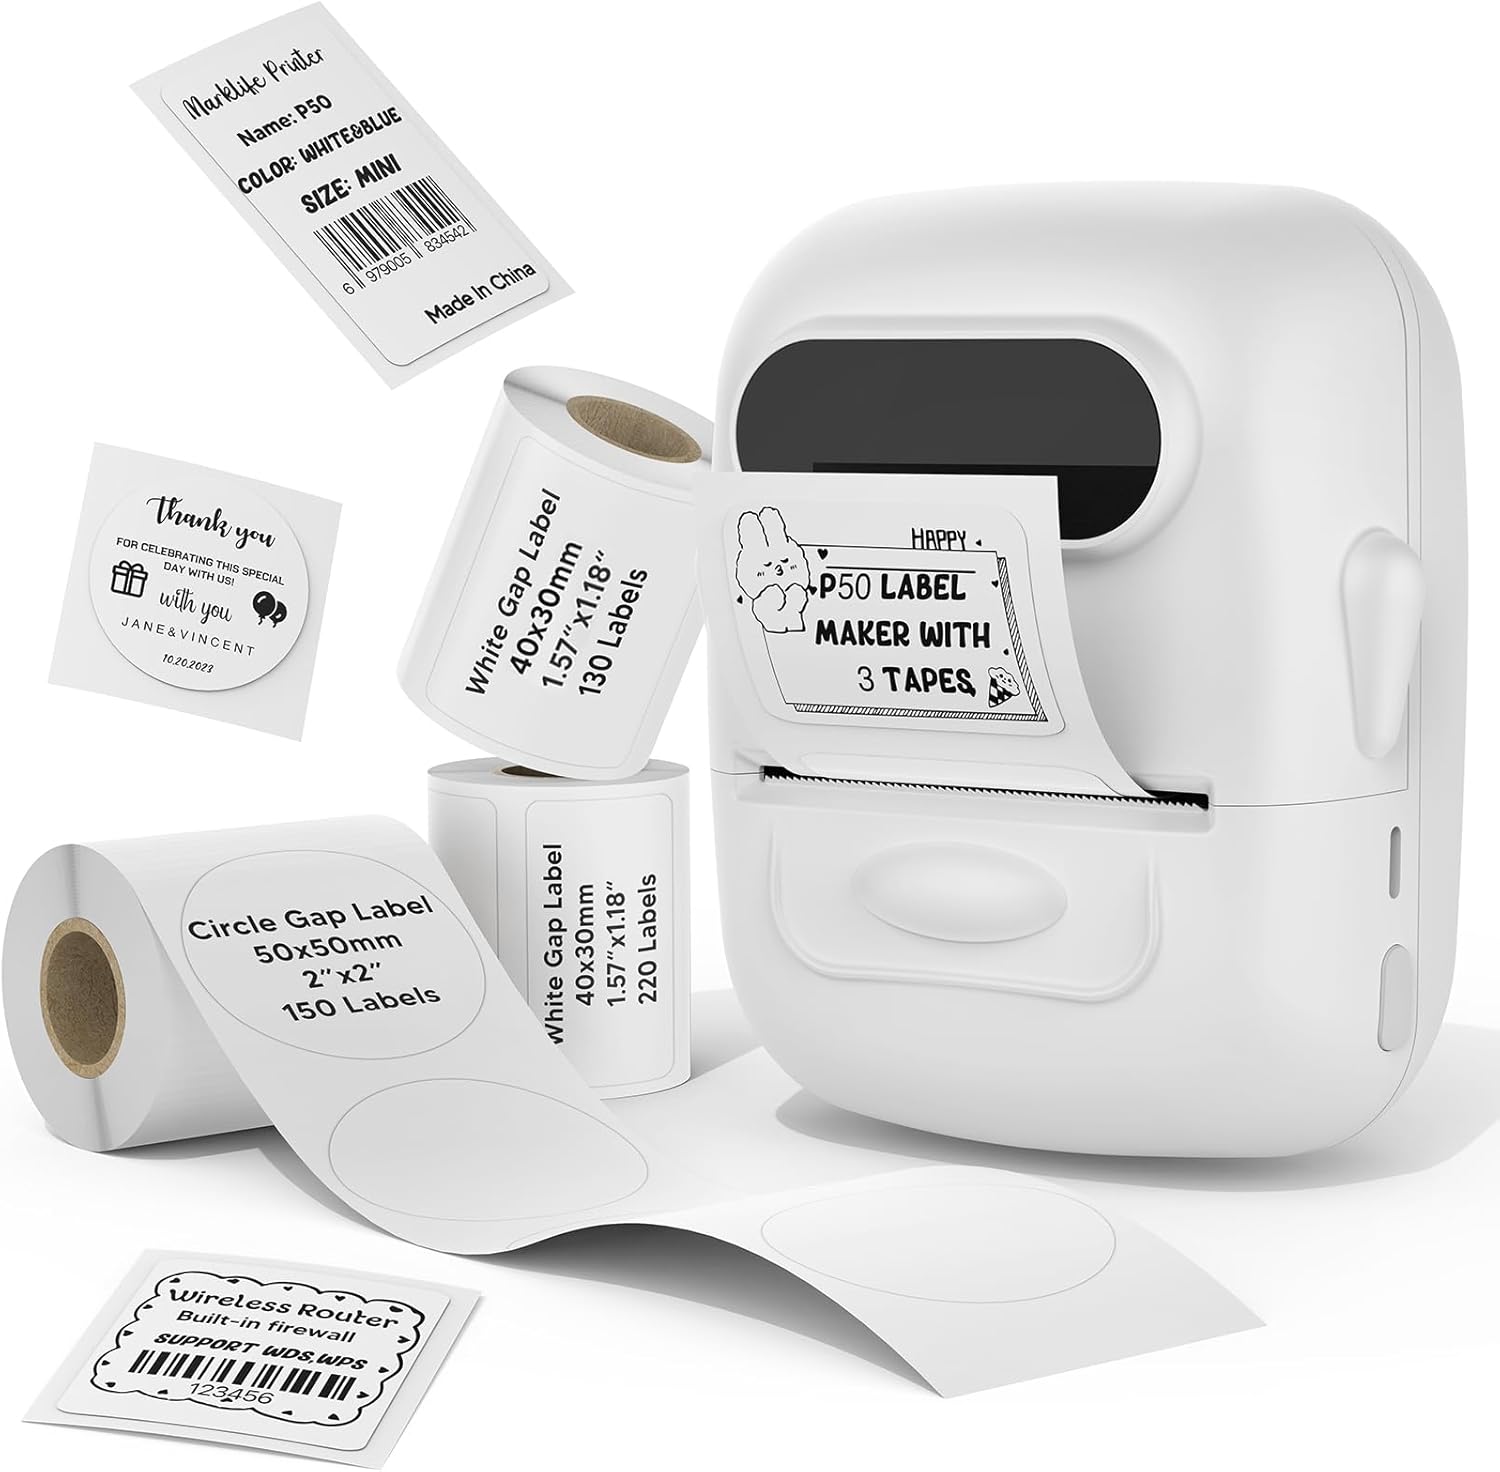
Figure 1: MARKLIFE P50 Label Maker with included label rolls.
2. Opsætningsvejledning
2.1 Udpakning og første opkrævning
Upon unboxing your MARKLIFE P50, ensure all components are present: the label maker, USB-C charging cable, and included label rolls. Before first use, fully charge the device using the provided USB-C cable. The charging port is located on the side of the device.

Figure 2: The P50 label maker is portable and features a built-in 1200mAh battery with Type-C charging.
2.2 Ilægning af etiketruller
To load a label roll:
- Gently hold the sides of the label maker and lift the paper cover to open the compartment.
- Remove the paper roll holder in the paper bin.
- Separate the left flap from the holder.
- Place the label paper roll onto the right movable plate, ensuring the print side faces down.
- Re-insert the left flap in the direction of the arrow, ensuring both left and right baffles are uniformly facing forward.
- Place the assembled roll holder back into the paper bin, ensuring the yellow label on the roll is on the indicated side.
- Træk et stykke etiketpapir til papirudgangen.
- Press down with both hands to securely close the paper cover.
Video 1: Detailed instructions on how to load label paper into the P50 label maker.

Figure 3: The P50 comes with three rolls of labels to meet various needs.
2.3 App-download og Bluetooth-forbindelse
The P50 label maker operates via a dedicated mobile application. It supports both iOS and Android devices.
- Download the "Marklife" app from your device's app store.
- Open the app. You can choose to log in via email, a third-party app, or as a guest.
- Sørg for, at Bluetooth er aktiveret på din mobilenhed.
- In the app, click "UNLINK" or the connection icon to search for nearby print devices.
- Select your P50 printer from the list (e.g., "P50S_..."). Once connected, the indicator in the app will turn green.
Video 2: Guide on connecting the P50 label maker to a computer for printing.

Figure 4: The P50 label printer supports both mobile smart devices and PC devices for versatile use.
3. Betjeningsvejledning
3.1 Oprettelse og redigering af etiketter
The Marklife app offers extensive customization options for your labels:
- In the app, click "Create label".
- Select the label stock type (Continuous Label or Gap Label) and confirm.
- Choose the label size that matches your loaded paper (e.g., 40x30mm).
- Double-click the text box to enter your desired content.
- Use the "Text layout" and "Font Options" to customize:
- Adjust font size by swiping left or right.
- Modify spacing between characters.
- Adjust line spacing for multi-line text.
- Bold, underline, or italicize text.
- Print vertical text.
- Change font style from a variety of options.
- You can also add pictures, stickers, dates, Excel data, barcodes (e.g., 0123456789005), and QR codes.
- Adjust the size and position of elements on the label by pinching or dragging.
Video 3: Comprehensive tutorial on operating the P50 label maker, including label creation and editing.
3.2 Udskrivning af etiketter
Når dit etiketdesign er færdigt:
- Klik på knappen "Udskriv" i appen.
- Adjust the print density for clarity (higher number for darker print).
- Set the number of copies you wish to print.
- Confirm print settings and initiate printing.

Figure 5: The P50 supports efficient batch printing, capable of printing 100 meters on a single charge.
3.3 Ansøgninger
The MARKLIFE P50 is versatile for various applications:
- Retail & Small Business: Opret pris tags, barcode labels (e.g., 6979005834542), clothing labels, jewelry labels, and product identification.
- Hjemme- og kontororganisation: Label food containers, spice jars, cosmetic bottles, cables, storage boxes, and files.
- Personlig brug: Create custom labels for gifts, school supplies, or personal items.

Figur 6: Eksamples of labels for clothing, handmade soap, and bakery products.
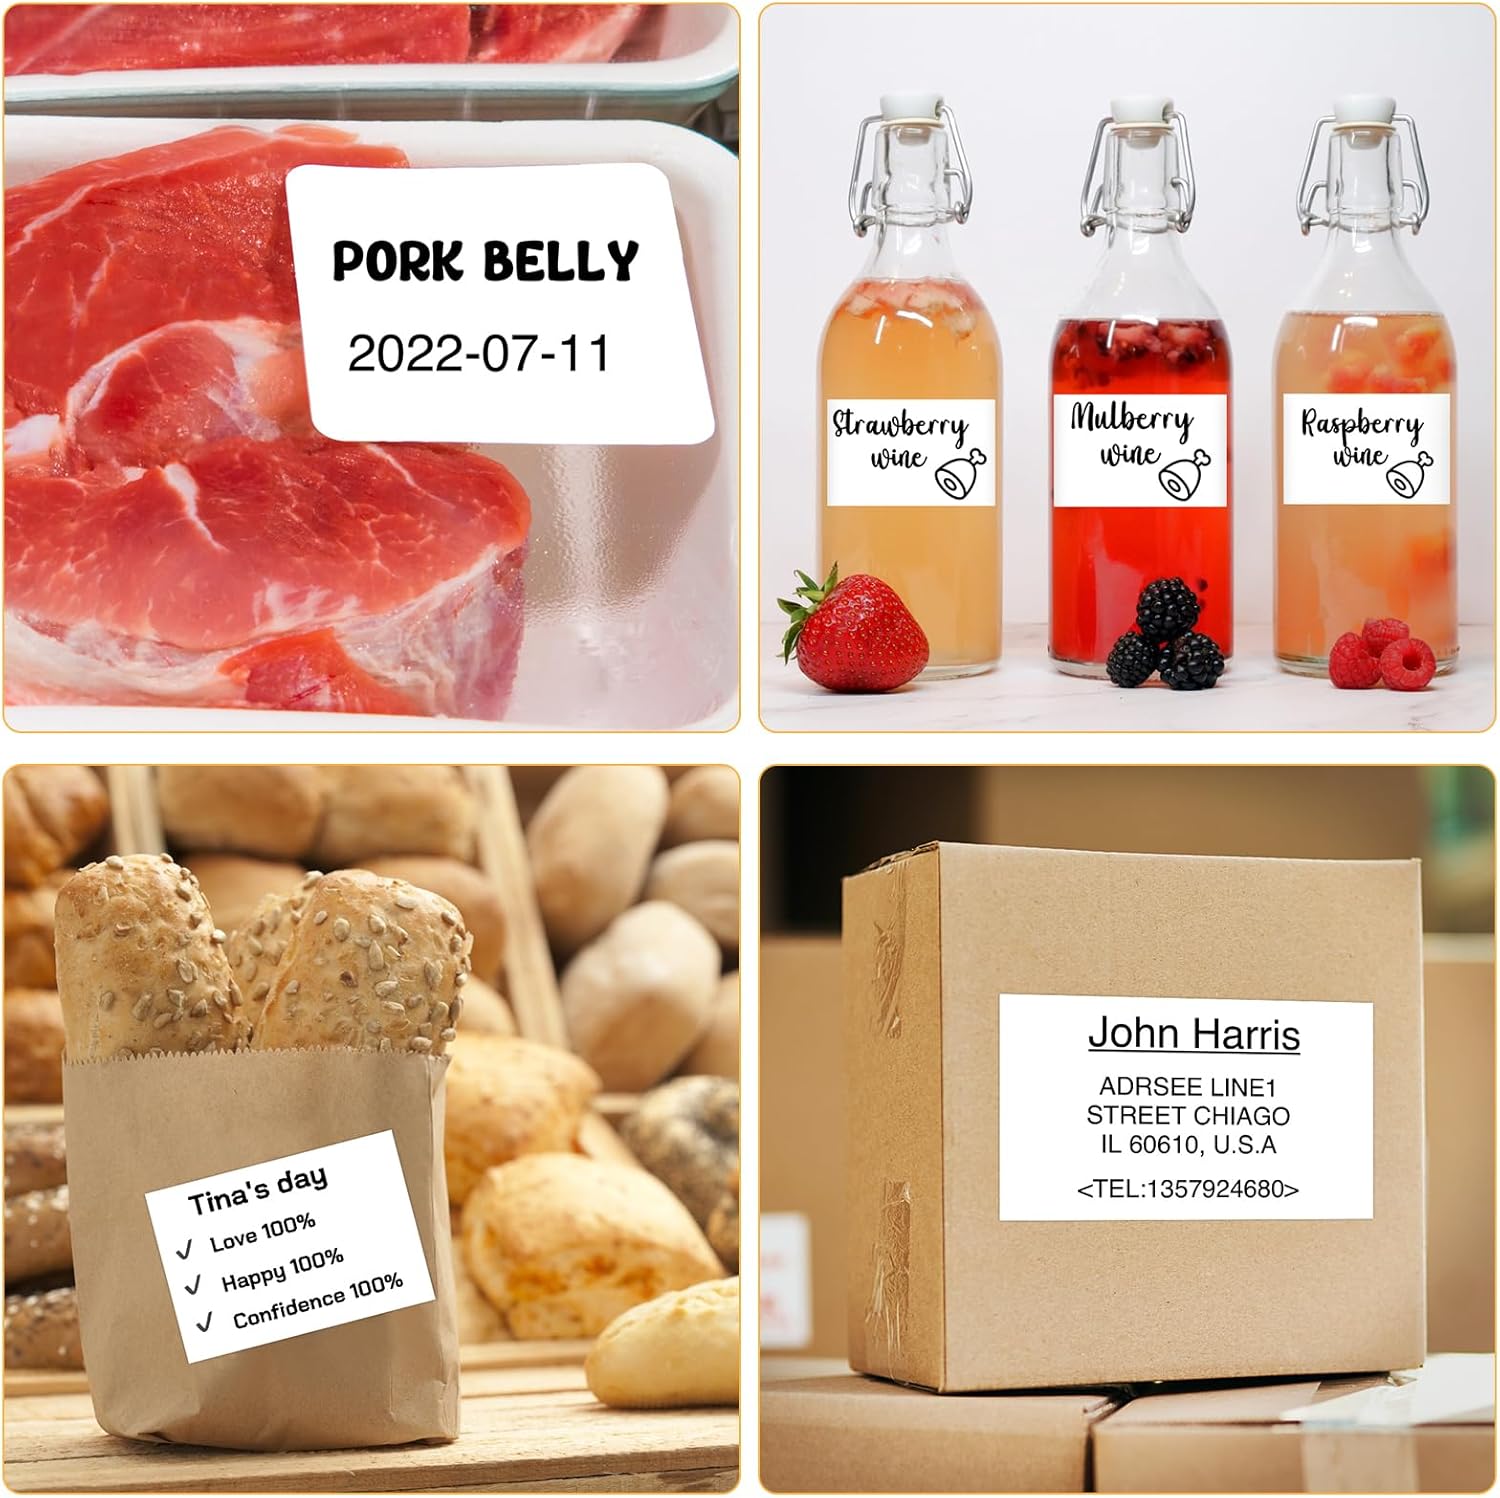
Figure 7: Labels for food preparation, beverages, and shipping addresses.
Video 4: Demonstration of the P50's capability to print labels from 12 to 50 mm wide.
4. Vedligeholdelse
4.1 Rengøring af printhovedet
For at sikre optimal udskriftskvalitet skal du regelmæssigt rengøre det termiske printhoved. Brug en blød, fnugfri klud, der er let tørret.ampened with isopropyl alcohol. Gently wipe the print head surface. Allow it to dry completely before closing the cover.
4.2 Opbevaring af etiketter
Store label rolls in a cool, dry place away from direct sunlight and excessive heat to prevent degradation of the thermal coating and adhesive.
4.3 Pleje af batterier
For long-term battery health, avoid completely draining the battery frequently. If storing the device for an extended period, charge it to about 50% and recharge every few months.
5. Fejlfinding
5.1 Almindelige problemer og løsninger
- Dårlig udskriftskvalitet:
- Check print density settings in the app.
- Rengør printhovedet (se afsnittet Vedligeholdelse).
- Ensure the label roll is inserted correctly with the print side facing down.
- Papirstop eller forkert indføring:
- Ensure the label roll is properly seated and aligned within the paper bin.
- Verify that the paper cover is securely closed.
- Fjern forsigtigt eventuelt fastklemt papir.
- Problemer med Bluetooth-forbindelse:
- Ensure the P50 is powered on and within range of your device.
- Restart the P50 and your mobile device.
- Glem enheden i din telefons Bluetooth-indstillinger, og par den igen.
- Ensure the Marklife app has Bluetooth permissions enabled.
- Labels Sliding During Printing:
- Ensure the label roll holder's baffles are snug against the roll to prevent lateral movement.
For further assistance, refer to the "Help Center" within the Marklife app or contact customer support.
6. Specifikationer
| Feature | Detalje |
|---|---|
| Mærke | MARKLIFE |
| Modelnavn | P50 ETIKETPRINTER |
| Udskrivningsteknologi | Termisk |
| Forbindelsesteknologi | Bluetooth, USB |
| Maksimal printermediestørrelse | 2 tommer (breddeområde 0.59''-2.24'') |
| Printer output | Monokrom (sort-hvid) |
| Varens vægt | 6 ounce |
| Produktdimensioner | 4" D x 3" B x 2" H |
| Batteri | Built-in 1200mAh (Type-C Charging) |
| Kompatible enheder | PC, Tablets, iOS, Android |

Figure 8: The P50 label printer is compatible with labels ranging from 0.59 to 2.24 inches in width.
7. Garanti og support
7.1 Garantioplysninger
The MARKLIFE P50 Label Maker comes with a limited warranty. Please refer to the product packaging or the official MARKLIFE webwebstedet for specifikke garantivilkår.
7.2 Kundesupport
For technical support, product inquiries, or warranty claims, please contact MARKLIFE customer service through the following channels:
- Support i appen: Access the "Help Center" or "View tutorial video & Technical Support" section within the Marklife app.
- E-mail: Refer to the contact information provided in the app or on the product packaging.
- Online: Visit the official MARKLIFE store on Amazon: MARKLIFE Store.