1. Introduktion
This manual provides essential instructions for the proper installation, operation, and maintenance of the Generic Recoil Starter Assembly designed for the Stihl Brush Cutter FR 3001. Adhering to these guidelines will ensure safe and efficient use of the product and prolong its lifespan.
2. Produktet er slutview
The recoil starter assembly is a critical component for manually starting your Stihl Brush Cutter FR 3001. It consists of a housing, a pull cord, a handle, and an internal spring mechanism that engages with the engine's flywheel to initiate combustion.
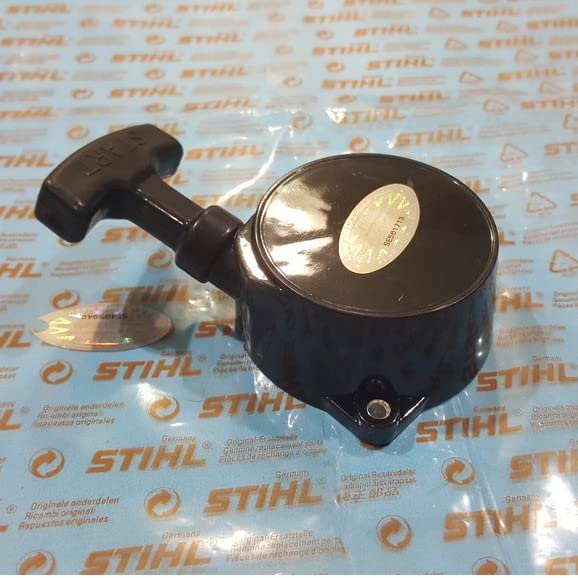
Figur 1: Front view of the Recoil Starter Assembly, showing the main housing and the ergonomic pull handle.

Figur 2: Bag view of the Recoil Starter Assembly, illustrating the internal winding mechanism and mounting points.
3. Sikkerhedsoplysninger
- Always ensure the brush cutter's engine is turned off and the spark plug cap is disconnected before attempting any installation or maintenance.
- Wear appropriate personal protective equipment (PPE), including gloves and eye protection, during installation and maintenance.
- Håndter værktøj forsigtigt for at undgå skader.
- Hold børn og omkringstående væk fra arbejdsområdet.
4. Pakkens indhold
Kontroller, at alle komponenter er til stede og ubeskadigede, når du åbner pakken.
- 1 x Recoil Starter Assembly for Stihl Brush Cutter FR 3001
5. Installationsvejledning
Follow these steps to replace or install the recoil starter assembly:
- Forberedelse: Ensure the brush cutter engine is cool, turned off, and the spark plug wire is disconnected to prevent accidental starting.
- Fjern den gamle starter (hvis relevant): Locate the existing recoil starter assembly on your Stihl Brush Cutter FR 3001. Typically, it is secured by several screws. Use an appropriate screwdriver or wrench to remove these fasteners. Carefully detach the old starter.
- Rent monteringsområde: Clean any debris, dirt, or old gasket material from the engine's mounting surface where the new starter will be attached.
- Stilling Ny starter: Align the new recoil starter assembly with the mounting holes on the engine. Ensure the starter pawls (the parts that engage the flywheel) are correctly positioned.
- Sikker starter: Insert the mounting screws and tighten them securely. Do not overtighten, as this can strip threads or crack the housing. Ensure the starter is firmly seated and does not wobble.
- Testengagement: Gently pull the starter cord a few times to ensure the pawls engage and retract smoothly without binding.
- Tilslut tændrøret igen: Når installationen er færdig og verificeret, skal tændrørskablet tilsluttes igen.
6. Betjeningsvejledning
To start the brush cutter using the recoil starter:
- Place the brush cutter on a stable, flat surface.
- Engage the choke (if required by your brush cutter model) and set the throttle to the starting position.
- Hold the brush cutter firmly with one hand.
- Grasp the starter handle firmly with the other hand.
- Pull the starter cord slowly until you feel resistance (the point where the starter pawls engage the flywheel).
- Once resistance is felt, pull the cord with a swift, strong, and continuous motion. Do not pull the cord to its full extension or let it snap back. Guide the cord back slowly.
- Repeat until the engine starts. Once started, disengage the choke as per your brush cutter's operating manual.
7. Vedligeholdelse
Regular maintenance ensures optimal performance and longevity:
- Rensning: Periodically clean the exterior of the recoil starter assembly to remove dirt, grass clippings, and debris. This prevents foreign material from entering the mechanism.
- Ledningsinspektion: Inspect the pull cord for signs of fraying, cuts, or excessive wear. Replace the cord if any damage is observed.
- Fjederspænding: If the cord does not retract fully or feels loose, the internal spring may need adjustment or replacement. This typically requires disassembly and is best performed by a qualified technician.
- Monteringsskruer: Periodically check that the mounting screws are tight. Loose screws can cause vibration and damage.
8. Fejlfinding
| Problem | Mulig årsag | Løsning |
|---|---|---|
| Ledningen trækkes ikke helt ind. | Broken or weak recoil spring; debris inside housing. | Inspect for debris and clean. If spring is faulty, replace the assembly or consult a technician. |
| Cord is hard to pull or stuck. | Starter pawls jammed; internal mechanism seized; cord frayed. | Inspect for visible obstructions. If cord is frayed, replace it. If internal mechanism is seized, replace the assembly. |
| Starteren aktiverer ikke motoren. | Worn or broken starter pawls; flywheel engagement surface damaged. | Inspect pawls for wear. If damaged, replace the recoil starter assembly. Check flywheel for damage. |
| Cord breaks frequently. | Friction from housing edge; improper pulling technique; low-quality cord. | Ensure cord is not rubbing. Use proper pulling technique. Replace with a high-quality starter cord. |
9. Specifikationer
| Attribut | Værdi |
|---|---|
| Modelnummer | Starter for Sthil Brush Cutter FR 3001 |
| Produktmål (LxBxH) | 10 x 5 x 5 cm |
| Varens vægt | 454 g |
| Fabrikant | Manish & Co. |
| Generisk navn | Starter |
10. Garanti og support
Specific warranty information for this Generic Recoil Starter Assembly is not provided in the product data. For any support or warranty inquiries, please refer to the retailer or manufacturer at the point of purchase.