HYIEAR 7010B
HYIEAR 7-Inch Double DIN Car Stereo User Manual
Model: 7010B
1. Introduktion
Thank you for choosing the HYIEAR 7-inch Double DIN Car Stereo. This manual provides detailed instructions for the installation, operation, and maintenance of your new car stereo system. Please read this manual thoroughly before using the product to ensure proper functionality and safety.
2. Sikkerhedsoplysninger
- Always turn off your vehicle's power before attempting any installation or wiring. Failure to do so may result in short circuits, damage to speakers, or other electrical issues.
- Ensure all wiring connections are secure and properly insulated to prevent short circuits and electrical hazards.
- The blue wire on the stereo is a signal transmission line and should not be used as a power line for an amplifier. Audio signals cannot be used as a power source for a power amplivligere.
- Before connecting all wires, test the unit's power-on function by connecting the red and yellow wires to the positive terminal of the battery and the black wire to the negative terminal. Once confirmed, proceed with full installation.
- Do not operate the device in extreme temperatures outside the specified working range (-10 °C to 60 °C).
- Avoid exposing the unit to water or excessive moisture, except for the waterproof rear camera.
- Forsøg ikke at skille enheden ad eller ændre den. Dette kan ugyldiggøre garantien og forårsage skade.
3. Pakkens indhold
Tjek venligst pakken for følgende varer:
- HYIEAR 7-inch Double DIN Car Stereo Unit
- 12-LED Rear Camera
- Fjernbetjening
- Rat fjernbetjening
- Strøm ledningsnet
- Video Input/Output Cables
- Monteringsbeslag
- Brugermanual
4. Produktfunktioner
High-Quality 7-Inch HD Touchscreen

Experience clear and vibrant visuals with the 7-inch HD 1080P touchscreen display. The high-definition panel and light transmission technology ensure excellent image quality and responsive touch control.
Mirror Link-funktionalitet
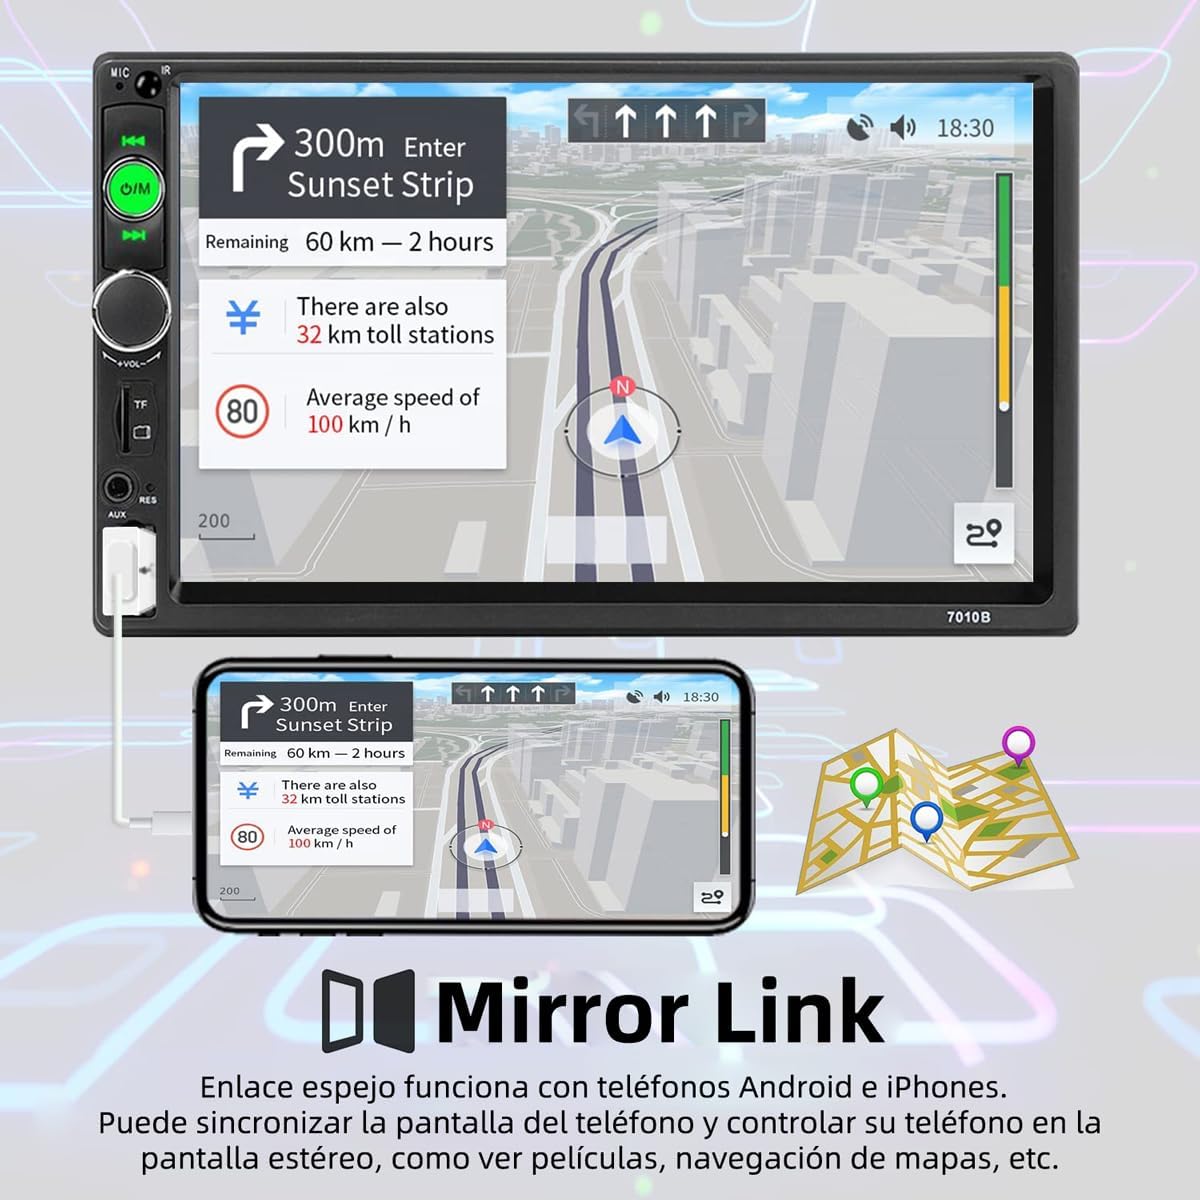
Synchronize your Android smartphone to display multimedia content directly on the car stereo screen. Enjoy online videos, music, and navigation apps conveniently from the stereo display.
Bluetooth Connectivity & Hands-Free Calling

Connect your phone wirelessly via Bluetooth for hands-free calls and audio streaming. Maintain safety on the road while easily accessing your music and contacts.
12-LED Waterproof Rear Camera
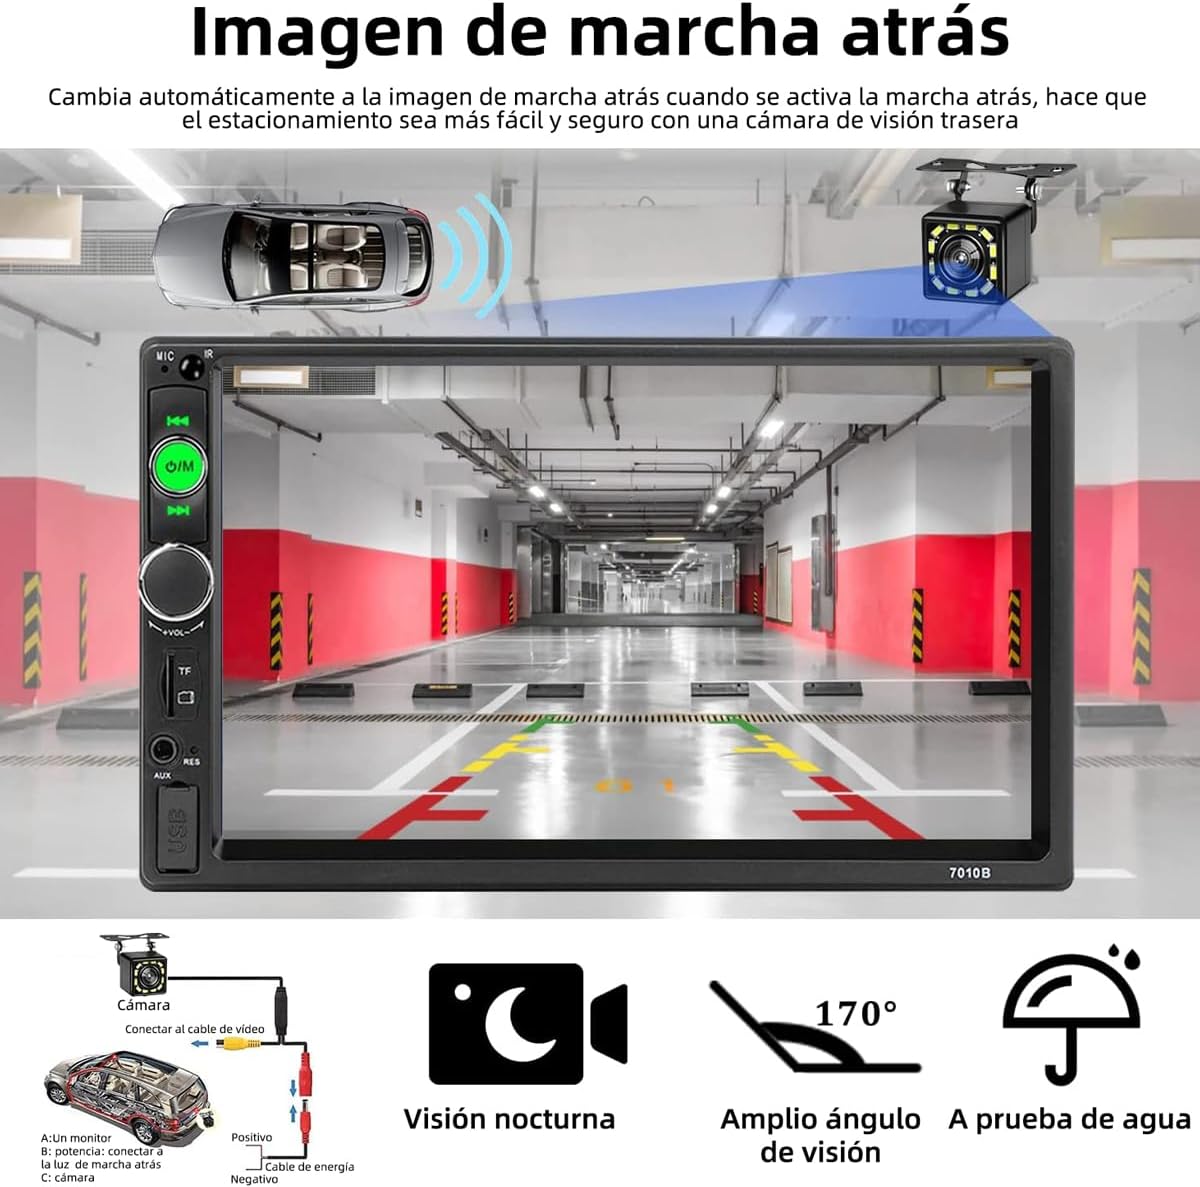
The included 12-LED rear camera provides clear and wide-angle vision (170°) for easy maneuvering and parking, even in low-light conditions. It is IP68 waterproof for durability.
Multimedia Playback & FM Radio

Supports auxiliary audio input, USB input, TF card input, and phone charging. Enjoy your favorite music and videos in various formats (MP3/WMA/WAV/APE/FLAC, RM/RMVB/AVI/MP4/MKV/3GP). The stable FM radio allows you to listen to music and news (87.5-108 MHz).
Kompatibilitet med ratkontrol

Easily adjust settings without distraction while driving. The stereo is compatible with your vehicle's steering wheel controls for convenient operation.
5. Opsætning og installation
5.1 Ledningsdiagram
Refer to the following diagrams for proper wiring connections. It is highly recommended to have a professional perform the installation.
Main Wiring Harness (A):
Grøn: venstre baghøjttaler +
Grøn/Sort: Bageste venstre højttaler -
Hvid: Venstre fronthøjttaler +
Hvid/Sort: Venstre fronthøjttaler -
Grå: Højre fronthøjttaler +
Grey/Black: Front Right Speaker -
Lilla: Højre baghøjttaler +
Lilla/Sort: Bagerste højre højttaler -
Power Wiring Harness (B):
Red: +12V ACC/Ignition Switch
Sort: GND (Jord)
Blue: Power Antenna/Amplifier Turn-on
Orange: Illumination (Headlight Detection)
Yellow: Constant +12V Power Supply
Brown: Brake Detection
Pink: Reverse Line (for rear camera trigger)

Ledningsføring til bakkamera:
1. Connect the car stereo's reverse video input to the camera's video output.
2. Connect the camera's power cable (red) to the vehicle's reverse light positive (+).
3. Connect the camera's ground cable (black) to the vehicle's chassis ground (-).
4. Connect the stereo's reverse trigger wire (pink) to the vehicle's reverse light positive (+).
5.2 Generelle installationstrin
- Afbryd batteriet: Før start skal du frakoble den negative pol på dit køretøjs batteri for at forhindre kortslutninger.
- Remove Old Stereo: Fjern forsigtigt din eksisterende bilstereo fra instrumentbrættet.
- Tilslut ledningsnet: Connect the HYIEAR stereo's wiring harness to your vehicle's wiring harness. Match colors and functions according to the wiring diagram.
- Tilslut antenne: Plug in the radio antenna cable.
- Tilslut bakkamera (valgfrit): If installing the rear camera, route its cable to the back of the stereo and connect it as per the diagram. Connect the camera's power to the reverse light circuit.
- Test forbindelser: Before fully mounting, reconnect the battery and briefly test the stereo's basic functions (power on, radio, sound).
- Monter stereoanlæg: Secure the stereo into the dashboard using the provided mounting brackets.
- Saml dashboardet igen: Geninstaller alle fjernede paneler og komponenter.
6. Betjeningsvejledning
6.1 Grundlæggende betjening
- Tænd/sluk: Tryk på Driftstid knappen på frontpanelet for at tænde eller slukke enheden.
- Lydstyrkekontrol: Drej på BIND knap for at justere lydstyrken.
- Valg af tilstand: Tryk på Driftstid button briefly to cycle through different modes (Radio, USB, TF, AUX, Bluetooth).
- Nulstil: Brug en tynd genstand til at trykke på RES button to reset the unit if it malfunctions.
6.2 Radiodrift

I FM -tilstand:
- Tune: Brug |< og >>| knapper til manuelt at stille ind eller søge efter stationer.
- Automatisk scanning: Trykke AS/PS to automatically scan and save strong stations.
- Forudindstillede stationer: Use the numbered buttons on the touchscreen to select saved stations.
6.3 Bluetooth -parring
Sådan parrer du din smartphone:
- Sørg for, at Bluetooth er aktiveret på din telefon.
- Select Bluetooth mode on the car stereo.
- Søg efter available devices on your phone. The stereo's Bluetooth name is "Car BT".
- Select "Car BT" to pair. Once connected, you can make/receive calls and stream audio.
6.4 Spejllink
Sådan bruger du Mirror Link:
- Connect your Android smartphone to the stereo's USB port using a USB cable.
- Follow the on-screen prompts on the stereo and your phone to enable Mirror Link. This may require enabling USB debugging or specific settings on your phone.
- Once connected, your phone's screen will be mirrored on the stereo display, allowing you to control your phone's apps from the stereo's touchscreen.
6.5 Bakkameravisning
When the vehicle is shifted into reverse gear, the stereo will automatically switch to the rear camera view, hvilket giver et klart billede for sikker parkering og manøvrering.
7. Vedligeholdelse
- Rengøring af skærmen: Use a soft, dry cloth to wipe the touchscreen. For stubborn smudges, dampen the cloth slightly with water or a screen cleaner. Avoid harsh chemicals or abrasive materials.
- Generel rengøring: Hold enheden fri for støv og snavs. Brug en blød børste eller trykluft til at rengøre omkring knapper og porte.
- Temperatur: Avoid prolonged exposure to direct sunlight or extreme temperatures, which can affect the unit's performance and lifespan.
8. Fejlfinding
| Problem | Mulig årsag | Løsning |
|---|---|---|
| Enheden tænder ikke. | Incorrect wiring; Blown fuse; Insufficient power supply. | Check power connections (red, yellow, black wires). Ensure red and yellow are connected to +12V and black to ground. Check vehicle's fuse box and the stereo's inline fuse. |
| Ingen lyd fra højttalere. | Højttalerledninger forkert tilsluttet; Lydstyrke for lav; Mute-funktion aktiv. | Verify speaker wiring (positive/negative). Increase volume. Check if mute is enabled. |
| Problemer med Bluetooth-forbindelse. | Phone not in pairing mode; Stereo not in Bluetooth mode; Interference. | Ensure phone's Bluetooth is on and discoverable. Select Bluetooth mode on stereo. Try re-pairing. Move away from other electronic devices. |
| Mirror-linket virker ikke. | Incorrect USB cable; Phone settings not enabled (e.g., USB debugging); Incompatible phone. | Use a high-quality USB data cable. Check phone's developer options for USB debugging or Mirror Link settings. Ensure your Android phone is compatible. |
| Rear camera image not displaying. | Camera not powered; Video cable loose; Reverse trigger wire not connected. | Check camera power connection to reverse light. Ensure video cable is securely plugged into stereo. Verify pink reverse trigger wire is connected. |
| Screen is dim or hard to see in daylight. | Brightness setting too low; Glare. | Adjust screen brightness in the stereo's settings menu. Position the unit to minimize direct sunlight glare if possible. |
9. Specifikationer
| Feature | Specifikation |
|---|---|
| System | Krympe |
| Chipsæt | C200S |
| Skærmstørrelse | 7 tommer |
| Skærmopløsning | 800 x 480 |
| Mirror Link | Kompatibel med Android |
| Radio Band | FM 87.5-108 MHz, AM 530-1710 KHz |
| Strømudgang | 60 W |
| Strømforsyning | 12V (Not compatible with 24V vehicles) |
| Bluetooth navn | Car BT |
| Arbejdstemperatur | -10 °C til 60 °C |
| Ratkontrol | Understøttet |
| Magt Amplifier Chip | TDA7388 |
| Wi-Fi | Ikke understøttet |
| GPS | Ikke understøttet |
| USB-version | 2.0 |
| Lydformater | MP3/WMA/WAV/APE/FLAC |
| Videoformater | RM/RMVB/AVI/MP4/MKV/3GP |
| Billedformat | JPG |
| Sprog | English, Chinese, Spanish, Portuguese, Russian, Italian, German, French, Turkish, Czech, Polish, Thai |
| Produktdimensioner | 6.5 x 178 x 10 cm; 800 g |
10. Garanti og support
This product is covered by the standard manufacturer's warranty. For specific warranty terms and conditions, please refer to the documentation included with your purchase or contact the seller directly.
If you encounter any issues or have questions regarding the HYIEAR 7-inch Double DIN Car Stereo, please contact HYIEAR customer support or the retailer from whom you purchased the product. Provide your model number (7010B) and a detailed description of the issue for faster assistance.
Ask a question about this manual
Ask about setup, troubleshooting, compatibility, parts, safety, or missing instructions. Manuals+ will review the question and use this page’s manual context to help answer it.