
1. Introduktion
Thank you for choosing the Banda Audioparts BD400.4 Four Channel Car Audio Amplifier. Det her amplifier is designed to deliver high-quality audio performance for your vehicle's sound system. This manual provides essential information for proper installation, operation, and maintenance of your amplifier. Please read it thoroughly before installation and retain it for future reference.
2. Sikkerhedsinstruktioner
For at forhindre skade eller skade på ampLifier, bedes du overholde følgende sikkerhedsforanstaltninger:
- Professionel installation anbefales: Installation af bilstereokomponenter kræver erfaring med elektrisk ledningsføring og bilprocedurer. Hvis du er i tvivl, skal du kontakte en kvalificeret fagmand.
- Afbryd batteriet: Always disconnect the vehicle's negative battery terminal before beginning any installation to prevent electrical shorts.
- Korrekt ledningsføring: Ensure all wiring is correctly connected and insulated to prevent short circuits and damage. Use appropriate gauge wires as specified.
- Monteringssted: Monter amplifier securely in a dry, well-ventilated area, away from heat sources and moisture. Avoid mounting in locations that obstruct vehicle operation or safety devices.
- Sikringsbeskyttelse: Always use the recommended fuse size for the power input. Never replace a fuse with one of a higher ampaldersvurdering.
- Lydstyrkeniveauer: Langvarig eksponering for høj lydstyrke kan forårsage høreskader. Juster lydstyrken til et sikkert og behageligt niveau.
3. Pakkens indhold
Bekræft at alle varer er til stede i pakken:
- Banda Audioparts BD400.4 Four Channel Car Audio Amplivligere
- Instruktionsmanual (dette dokument)
4. Funktioner
The Banda Audioparts BD400.4 ampLifier tilbyder følgende nøglefunktioner:
- Class D Operation: Provides high power output with exceptional efficiency.
- Fire kanaler: Delivers 4 x 100 WRMS at 2 Ohms or 4 x 70 WRMS at 4 Ohms.
- Brokoblet tilstand: Capable of 2 x 200 WRMS when bridged at 2-4 Ohms.
- Aktiv crossover: Features adjustable High Pass Filter (HPF) and Low Pass Filter (LPF) for precise sound tuning.
- Fuld rækkevidde: Suitable for various audio components including midrange, midbass, tweeters, and subwoofers.
- Kompakt design: Space-saving dimensions for versatile installation in cars and motorcycles.
5. Kontrolelementer og forbindelser
Sæt dig ind i amplifier's input, output, and control layout.
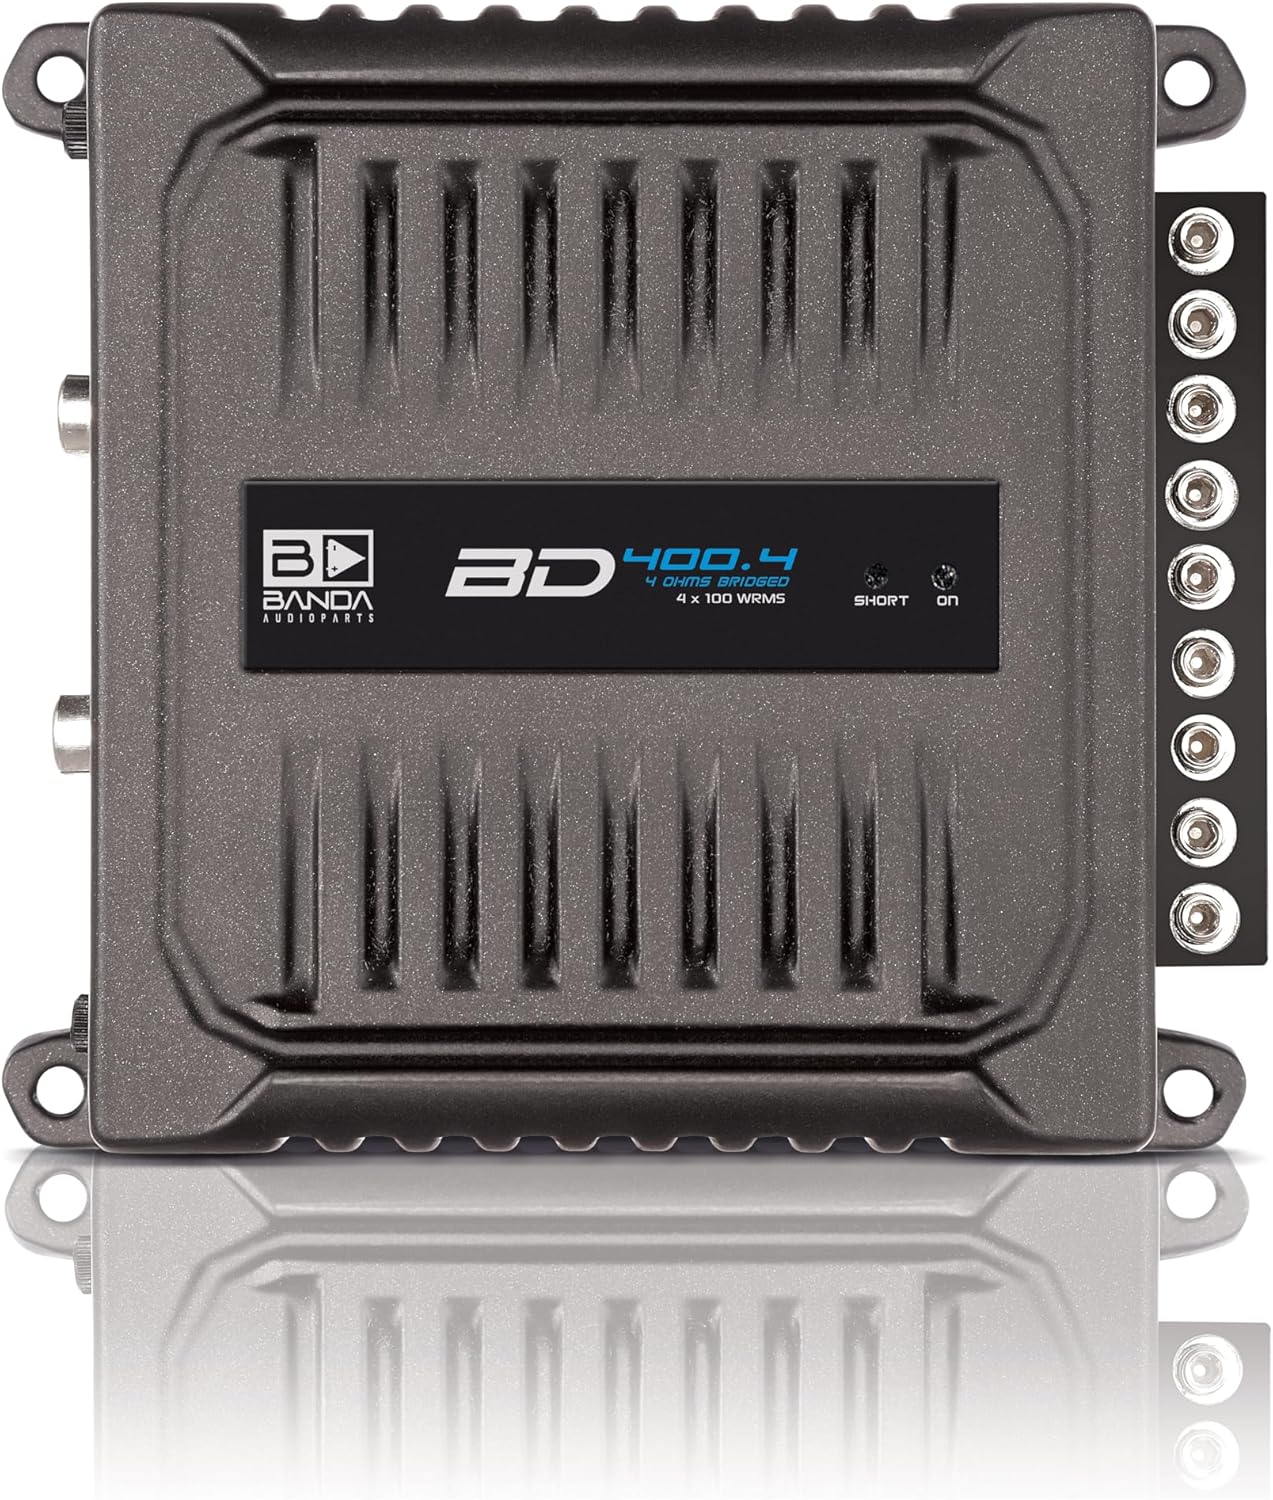
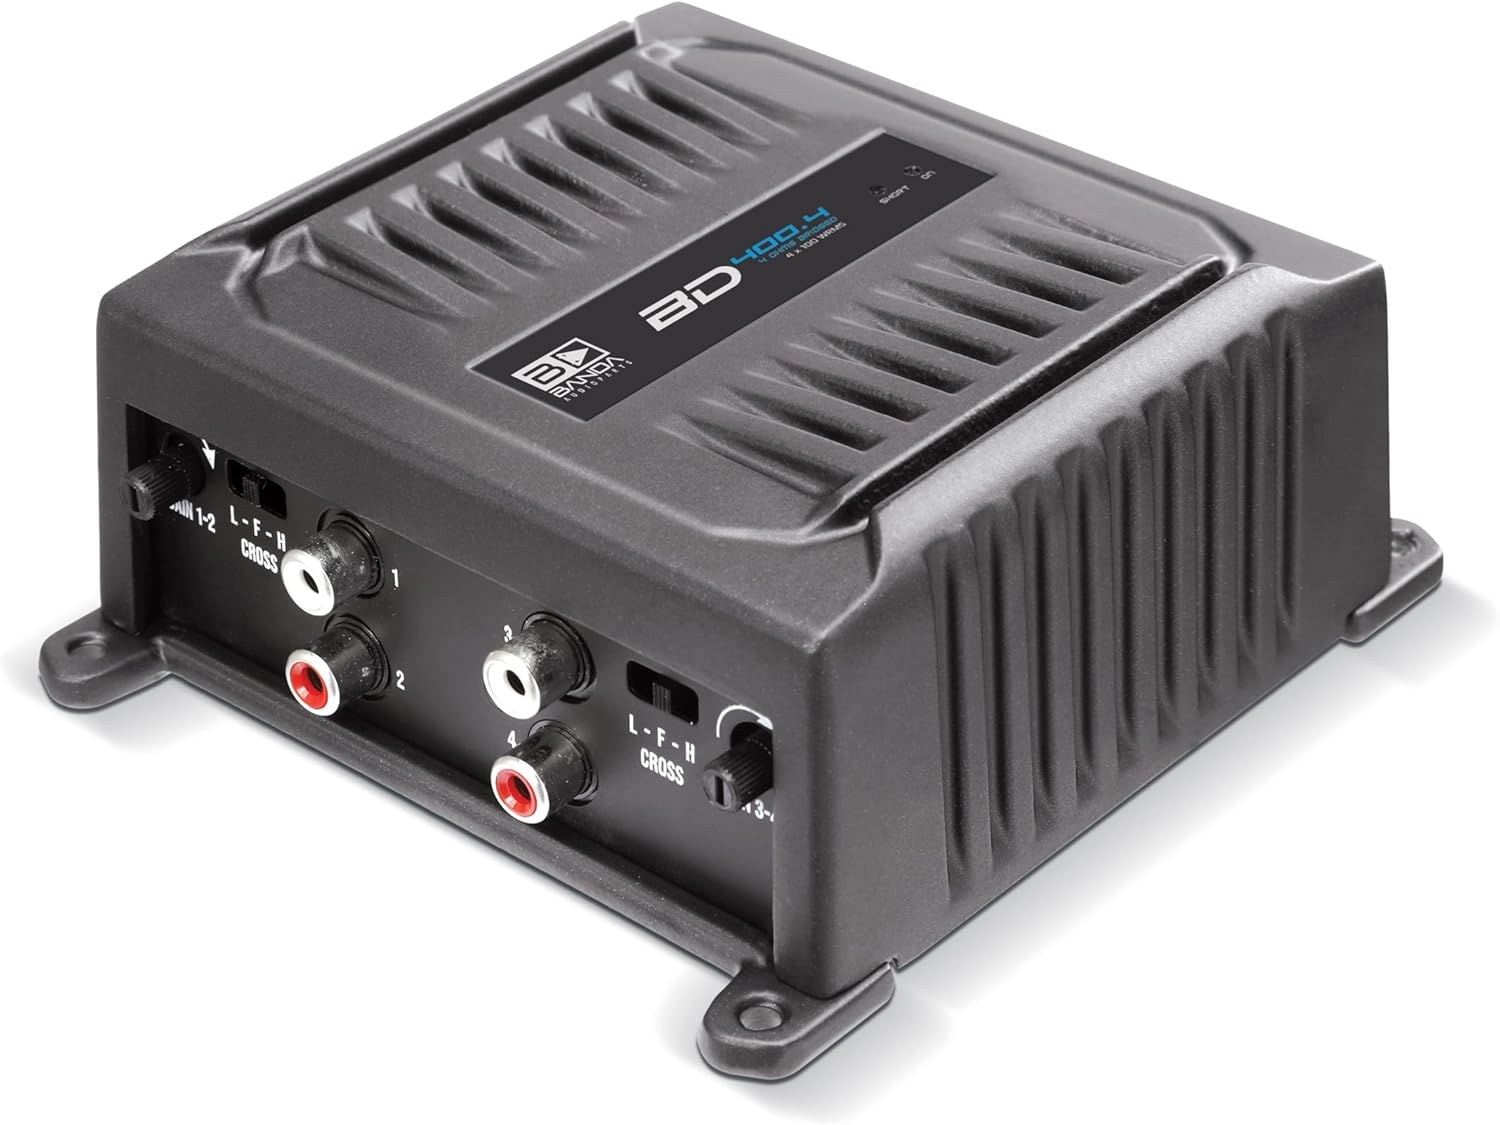
Billede 1: Forside view of the BD400.4 amplifier, highlighting the RCA inputs, gain controls, and crossover switches.
Billede 2: Bagside view of the BD400.4 amplifier, showing the power, remote, ground, and speaker terminals.
5.1 Input Side (Image 1)
- RCA Inputs (1-2, 3-4): Connect to your head unit's RCA pre-outs.
- GAIN 1-2 / GAIN 3-4: Adjusts the input sensitivity for channels 1-2 and 3-4 respectively.
- CROSS 1-2 / CROSS 3-4 (L-F-H Switch): Selects the crossover mode for channels 1-2 and 3-4.
- L (LPF): Low Pass Filter. Allows only low frequencies to pass.
- F (FULL): Full Range. Allows all frequencies to pass.
- H (HPF): High Pass Filter. Allows only high frequencies to pass.
5.2 Output Side (Image 2)
- GND (jord): Tilslut til et solidt jordpunkt på chassis.
- REM (fjernbetjening): Tilslut til fjernbetjeningens tændingsudgang på din hovedenhed.
- 12VDC (Power): Connect to the positive terminal of your vehicle's battery via a fuse.
- BRIDGED Speaker Terminals: Output terminals for connecting speakers. Can be used for standard stereo or bridged mono configurations.
6. Opsætning og installation
Follow these steps for proper installation of your amplivligere.
6.1 Montering af Amplivligere
- Choose a mounting location that is dry, well-ventilated, and secure. Ensure adequate airflow around the ampvarmebeholder til afkøling.
- Marker monteringshullerne ved hjælp af amplifier som skabelon.
- Drill pilot holes if necessary, taking care not to damage any vehicle wiring or components.
- Sikre den ampløfteren ved hjælp af passende skruer.
6.2 Strømledninger
- Power Wire (12VDC): Run a power wire (minimum 9 AWG / 6mm²) directly from the positive terminal of the vehicle's battery to the amplifier's 12VDC terminal. Install an in-line fuse holder within 18 inches (45 cm) of the battery, using a 30A fuse.
- Jordledning (GND): Run a ground wire (minimum 9 AWG / 6mm²) from the amplifier's GND terminal to a clean, unpainted metal point on the vehicle's chassis. Ensure a solid electrical connection. The ground wire should be as short as possible, ideally less than 3 feet (1 meter).
- Fjernbetjeningsledning (REM): Run a remote turn-on wire from your head unit's remote output (typically a blue/white wire) to the ampforsyningens REM-terminal. Denne ledning signalerer amplifier til at tænde og slukke med hovedenheden.
6.3 Lydindgangsforbindelse
- Tilslut RCA-kabler fra din hovedenheds for-amp udgange til amplifier's RCA inputs (1-2 and 3-4).
6.4 Højttalerledninger
The BD400.4 can operate in stereo or bridged mono mode.

Billede 3: Detaljeret view of the speaker terminals, indicating standard and bridged wiring configurations.
- Stereo-tilstand: Connect each speaker to its corresponding positive (+) and negative (-) terminal on the amplifier. Ensure correct polarity. The amplifier supports 4 channels at 2 or 4 Ohms.
- Brokoblet tilstand: To bridge channels (e.g., for a subwoofer), connect the speaker's positive (+) lead to the positive (+) terminal of one channel and the speaker's negative (-) lead to the negative (-) terminal of the adjacent channel, as indicated by the 'BRIDGED' labels on the amplifier (refer to Image 3). The amplifier supports 2 channels when bridged at 2-4 Ohms.
7. Betjeningsvejledning
Efter installationen skal du følge disse trin for at konfigurere og betjene din amplivligere.
7.1 Forstærkningsjustering
- Set the GAIN controls on the amplifier to their minimum (fully counter-clockwise) position.
- Turn on your head unit and set its volume to about 75% of maximum.
- Øg langsomt GAIN-kontrollen på amplifier until you hear distortion, then back it off slightly until the sound is clear.
- Repeat for both GAIN 1-2 and GAIN 3-4 controls if using all four channels.
7.2 Delefiltreindstillinger
Use the CROSS switches (L-F-H) to optimize the frequency response for your speakers.
- HPF (Højpasfilter): Use for full-range speakers, tweeters, or midrange drivers to block low frequencies that can cause distortion or damage. The HPF is adjustable from 20 to 90Hz at 12dB/octave.
- LPF (lavpasfilter): Use for subwoofers to block high frequencies. The LPF is adjustable from 90 to 20kHz at 12dB/octave.
- FULL (Full Range): Use if your speakers require a full frequency signal or if you are using an external crossover.
8. Specifikationer
Technical specifications for the Banda Audioparts BD400.4 amplivligere:
| Parameter | Værdi |
|---|---|
| Total Power 14.4V @ 2 Ohms | 4 x 100 WRMS |
| Total Power 14.4V @ 4 Ohms | 4 x 70 WRMS |
| Total Power 14.4V Bridged @ 2-4 Ohms | 2 x 200 WRMS |
| Effektivitet @ 4 Ohm | 0.84 |
| Effektivitet @ 2 Ohm | 0.77 |
| Input bindtage | 9 – 15V |
| Indgangsimpedans | 22K ohm |
| THD+støj | 0.10 % |
| Indgangsfølsomhed | 140mV - 680V |
| SNR (Signal-to-Noise Ratio) | 85dB |
| Frekvensrespons | 5 til 22KHz (-3dBs) |
| HPF (højpasfilter) | 20 to 90Hz @ 12dB/octave Linkwitz-Riley |
| LPF (lavpasfilter) | 90 til 20kHz @ 12dB/oktav Linkwitz-Riley |
| Anbefalet sikring | 30 A |
| Current at Rest | 1 A |
| Average Current Draw (Sinusoidal) | 30 A |
| Average Current Draw (Music) | 20 A |
| Power Wire Gauge (min. Recommended) | 6 mm² / 9 AWG |
| Vægt | 1.8 lb (0.82 kg) |
| Højde | 1.6 tommer (4.06 cm) |
| Bredde | 4.8 tommer (12.19 cm) |
| Dybde | 8.0 tommer (20.32 cm) |
9. Fejlfinding
Hvis du oplever problemer med din ampLifier, se følgende almindelige problemer og løsninger:
- Ingen strøm / AmpLifier tænder ikke:
- Check the in-line fuse near the battery. Replace if blown.
- Verify 12VDC power connection at the amplifier terminal.
- Ensure the ground connection is secure and free of paint or corrosion.
- Check the remote turn-on wire for 12V when the head unit is on.
- Ingen lyd:
- Bekræft ampApparatet er tændt (indikatorlampe).
- Kontroller RCA-indgangsforbindelserne fra hovedenheden.
- Kontroller højttalerledningernes forbindelser, og sørg for korrekt polaritet.
- Check head unit settings (volume, source selection, fader/balance).
- Ensure GAIN controls are not set to minimum.
- Forvrænget lyd:
- Reducer GAIN-kontrollen på amplivligere.
- Check for proper crossover settings (HPF/LPF).
- Sørg for, at højttalerimpedansen matcher amplifer-kapaciteter.
- Undersøg højttalerledningerne for kortslutninger eller skader.
- Støj (Hvæsen, Hylen, Summen):
- Ensure all ground connections are solid and at the same potential.
- Route RCA cables away from power wires to prevent interference.
- Check for faulty RCA cables.
- Verify the head unit's ground connection.
- AmpOverophedning af kølemiddel:
- Sørg for tilstrækkelig ventilation omkring amplivligere.
- Check speaker impedance; ensure it is not below the amplifiers minimumsvurdering.
- Reducer GAIN-indstillingen.
10. Vedligeholdelse
The Banda Audioparts BD400.4 ampLifier kræver minimal vedligeholdelse.
- Rensning: Brug en blød, tør klud til at tørre af ampydersiden af apparatet. Brug ikke skrappe kemikalier eller slibende rengøringsmidler.
- Forbindelser: Periodically check all power, ground, remote, RCA, and speaker connections to ensure they are secure and free from corrosion.
- Ventilation: Sørg for, at ampAt køleribberne ikke er blokeret af snavs eller andre genstande for at opretholde korrekt varmeafledning.
11. Garanti og support
Banda Audioparts products are designed for reliability and performance. For specific warranty information, please refer to the warranty card included with your product or contact your authorized Banda Audioparts dealer. For technical support or service inquiries, please reach out to your point of purchase or visit the official Banda Audioparts webwebsted.