1. Introduktion
Thank you for choosing the Baseus A2 Pro Handheld Vacuum Cleaner. This compact and powerful cordless vacuum is designed for efficient cleaning in various environments, from your car to your home or office. Its lightweight design, strong suction, and versatile attachments make it an ideal tool for quick clean-ups and reaching tight spaces. Please read this manual thoroughly before use to ensure proper operation and maintenance.
2. Hvad er der i æsken
Your Baseus A2 Pro package includes the following components:
- Baseus A2 Pro Handheld Vacuum Cleaner Unit
- 2-in-1 Brush and Crevice Nozzle
- Blæsermundstykke
- USB-C ladekabel
- Brugermanual

Figure 2.1: Baseus A2 Pro Handheld Vacuum Cleaner with included accessories.
3. Produktet er slutview
Familiarize yourself with the components of your Baseus A2 Pro vacuum cleaner:
- Hovedenhed: Indeholder motor, batteri og kontrolknapper.
- Støvkop: Transparent compartment for collecting debris.
- HEPA-filter: Located inside the dust cup, filters fine particles.
- Power knap: Turns the vacuum on/off.
- Mode knap: Adjusts suction power levels.
- USB-C opladningsport: Til genopladning af det interne batteri.
- 2-i-1 dyse: Features a brush for agitation and a crevice tool for narrow gaps.
- Blæserdyse: Attaches to the exhaust port for blowing dust.

Figure 3.1: Close-up of the versatile 2-in-1 nozzle and the blower nozzle.
4. Opsætning
4.1 Montering
- Ensure the HEPA filter is correctly seated inside the transparent dust cup.
- Align the dust cup with the main unit and twist clockwise until it locks securely into place.
- Attach the desired nozzle (2-in-1 or blower) to the appropriate port. For vacuuming, attach the 2-in-1 nozzle to the suction inlet. For blowing, attach the blower nozzle to the exhaust port at the rear of the unit.
4.2 Opladning
Oplad støvsugeren helt før første brug.
- Tilslut USB-C-opladerkablet til opladningsporten på støvsugeren.
- Plug the other end of the USB-C cable into a compatible 5V/2A USB power adapter (not included) or a car USB port.
- The charging indicator light will illuminate during charging. A full charge typically takes approximately 3-4 hours.
- Når den er fuldt opladet, kan indikatorlampen skifte farve eller slukke, afhængigt af modellen.
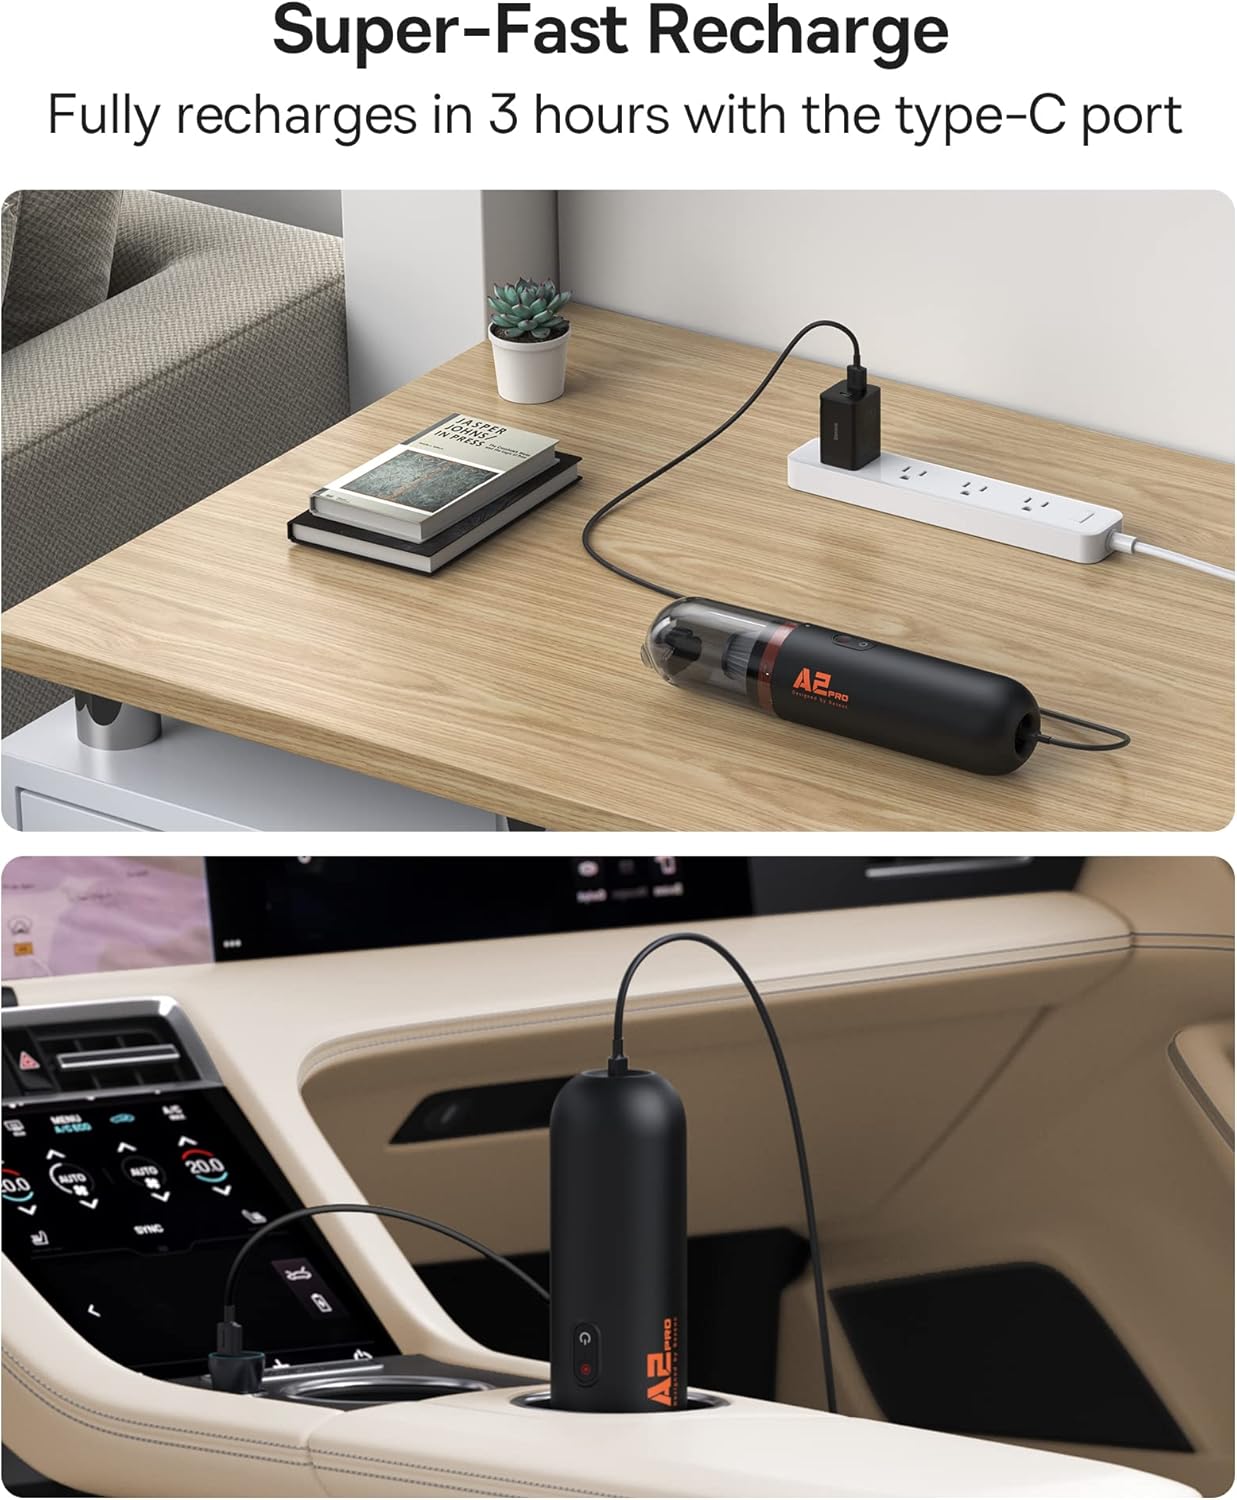
Figure 4.1: Charging the Baseus A2 Pro in different environments.
5. Betjeningsvejledning
5.1 Tænd/sluk
Press and hold the Power Button (usually marked with a power symbol) to turn the vacuum cleaner on or off.
5.2 Justering af sugekraft
The Baseus A2 Pro features two power levels. While the vacuum is on, press the Mode Button (often located near the power button) to switch between low and high suction modes. The indicator lights will show the current power level.
5.3 Støvsugning
- Attach the 2-in-1 nozzle to the suction inlet.
- For general cleaning, use the brush attachment to agitate debris on surfaces like car seats, carpets, or keyboards.
- For tight corners, crevices, or between seats, slide the brush back to expose the crevice tool.
- Move the vacuum slowly over the area to be cleaned, ensuring the nozzle makes good contact with the surface.

Figure 5.1: Vacuuming a couch with the Baseus A2 Pro, highlighting its low noise level.

Figure 5.2: Effective cleaning of car interiors, including hard-to-reach areas.
5.4 Blæsefunktion
The Baseus A2 Pro can also be used as a blower to clear dust from hard-to-reach areas.
- Remove the dust cup and any attached nozzle from the suction inlet.
- Attach the blower nozzle to the exhaust port located at the rear of the main unit.
- Turn on the vacuum cleaner and direct the airflow to blow away dust from keyboards, car vents, or other delicate surfaces.
6. Vedligeholdelse
Regelmæssig vedligeholdelse sikrer optimal ydeevne og forlænger din støvsugers levetid.
6.1 Tømning af støvbeholderen
- Sørg for, at støvsugeren er slukket.
- Twist the dust cup counter-clockwise to detach it from the main unit.
- Tøm forsigtigt det opsamlede affald i en skraldespand.
6.2 Rengøring af HEPA-filteret
The HEPA filter is washable and reusable. Clean it regularly, especially when suction power decreases.
- After emptying the dust cup, remove the HEPA filter.
- Skyl HEPA-filteret under rindende vand, indtil det er rent. Brug ikke rengøringsmidler eller varmt vand.
- Allow the filter to air dry completely for at least 24 hours before reinserting it into the dust cup. Ensure it is completely dry to prevent mold or damage.
- Reassemble the filter into the dust cup and attach the dust cup back to the main unit.
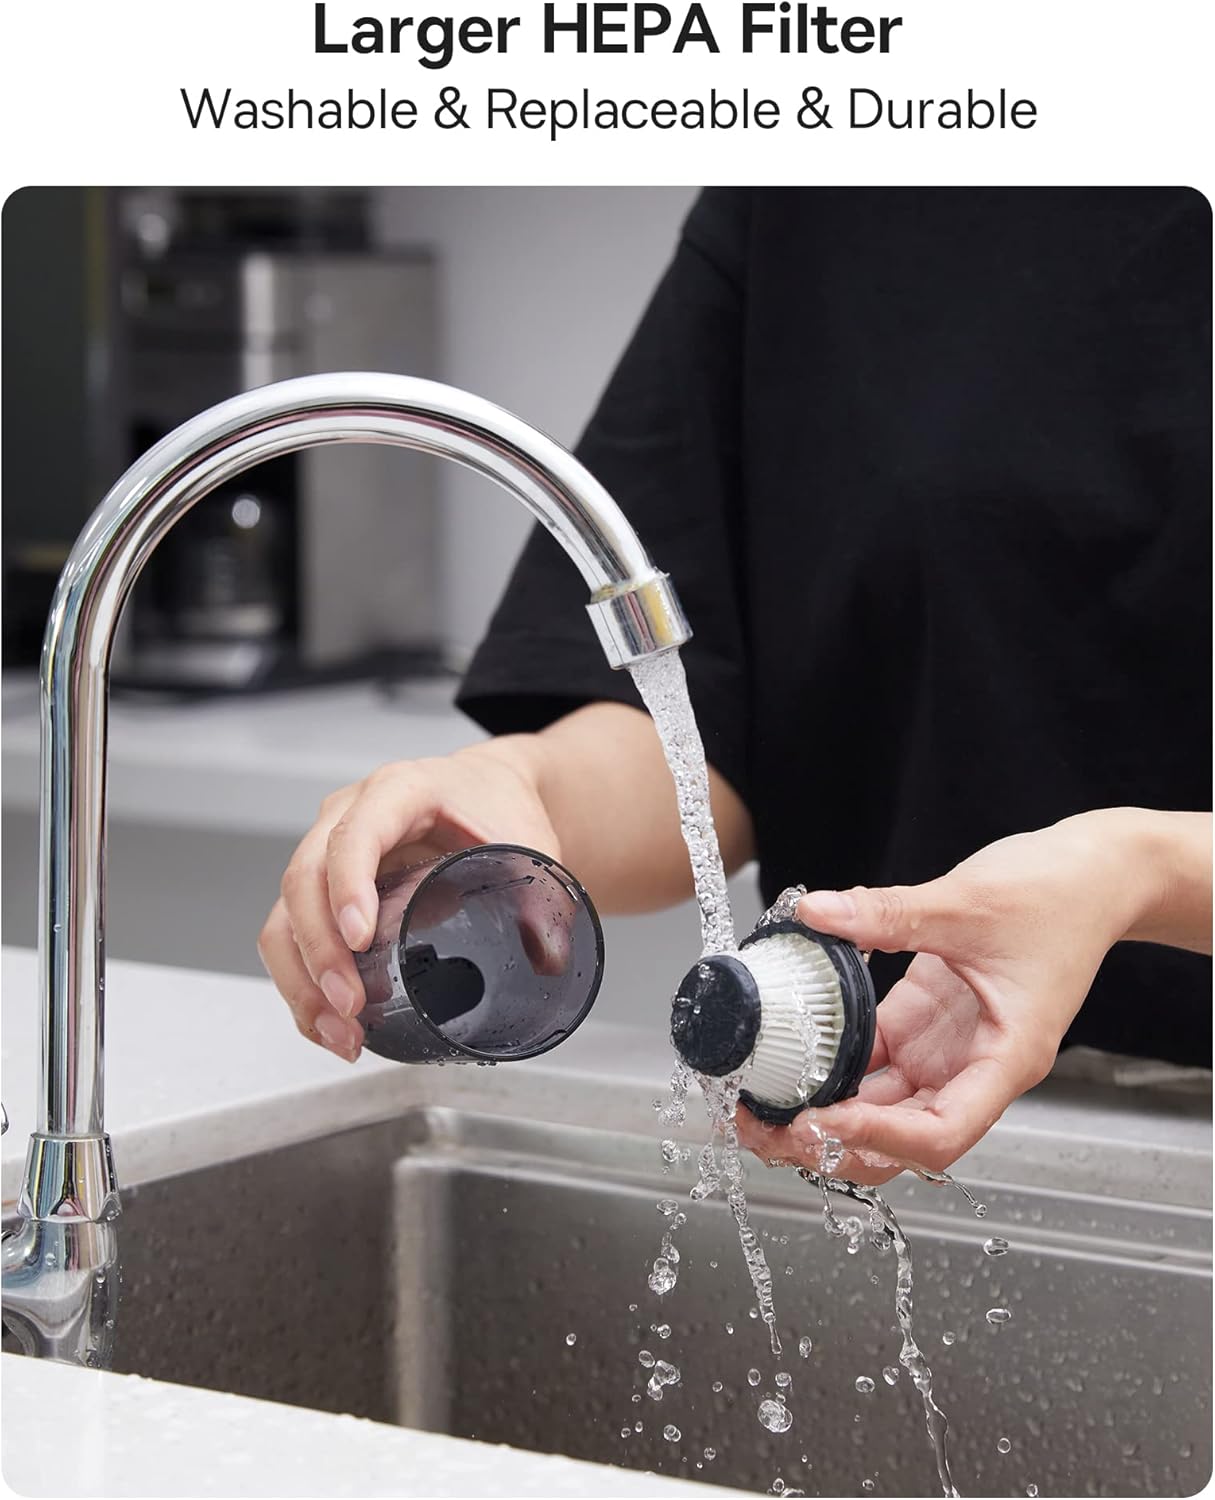
Figure 6.1: Cleaning the washable HEPA filter.
7. Fejlfinding
If you encounter any issues with your Baseus A2 Pro, refer to the following troubleshooting guide:
| Problem | Mulig årsag | Løsning |
|---|---|---|
| Vakuum tænder ikke | Batteriet er fladt; Tænd/sluk-knappen er ikke trykket korrekt ind | Charge the battery fully; Press and hold the power button for 2-3 seconds. |
| Svag sugeevne | Dust cup is full; Filter is clogged; Nozzle is blocked | Empty the dust cup; Clean or replace the HEPA filter; Clear any obstructions from the nozzle. |
| Oplader ikke | Charging cable or adapter is faulty; Charging port is dirty | Try a different USB-C cable and adapter; Clean the charging port gently. |
| Usædvanlig støj under drift | Obstruction in the nozzle or dust cup; Loose components | Check and clear any blockages; Ensure all components are securely assembled. |
8. Specifikationer
| Feature | Detalje |
|---|---|
| Mærke | Baseus |
| Modelnavn | A2 Pro |
| Sugekraft | 80AW |
| Støjniveau | Less than 60dB (as per feature bullets) |
| Batteritype | Lithium-Ion (3*2000mAh) |
| Runtime | Ca. 25-30 minutter |
| Opladningstid | Ca. 3-4 timer |
| Opladningsport | USB-C |
| Filtertype | HEPA-filter (vaskbart) |
| Støvkopkapacitet | 120 milliliter |
| Varens vægt | 1.6 pund |
| Dimensioner (L x B x H) | 2.4 cm L x 2.4 cm B x 10.55 cm H |
9. Garanti og support
Baseus products are manufactured to the highest quality standards. For warranty information, technical support, or any questions regarding your Baseus A2 Pro Handheld Vacuum Cleaner, please refer to the warranty card included in your package or contact Baseus customer support directly. Keep your purchase receipt as proof of purchase for warranty claims.


