
Indledning
Thank you for choosing the VIFLYKOO Weather Station. This device provides real-time indoor and outdoor temperature and humidity monitoring, atmospheric pressure readings, and a 12-hour weather forecast. This manual will guide you through the setup, operation, and maintenance of your weather station to ensure optimal performance.
Pakkens indhold
Kontroller venligst pakkens indhold for at sikre, at alle varer er til stede:
- 1 x VIFLYKOO Weather Station Main Unit
- 3 x trådløse fjernbetjeningssensorer
- 1 x USB-kabel
- 1 x Brugermanual (flersproget)
Produkt overview
Familiarize yourself with the main unit's components and controls:

This image shows the rear panel of the VIFLYKOO Weather Station main unit, highlighting key features and controls.
- Table stand hole
- Batteridæksel
- Max/Min reading button
- Resetting and sensor scanning button
- Data/Time setting button
- Vægkrog
- Snooze/Light display button
- Display in °C or °F button
- Display in 12 or 24 hour format button
- Knap til indstilling af alarm
- DC 5V power input socket
Opsætning
1. Strømforsyning til hovedenheden
The main weather station unit can be powered by either a USB cable or batteries.

This image illustrates the two power modes for the main unit (USB cable or 3 AAA batteries) and the battery compartment for the outdoor transmitter (2 AA batteries).
- USB Strøm: Connect the included USB cable to the DC 5V power input socket (11) on the back of the main unit and plug the other end into a USB power adapter (not included) or a computer USB port.
- Batteristrøm: Open the battery cover (2) and insert 3 AAA batteries (not included) according to the polarity markings. When operating on batteries, the backlight will only illuminate for 8 seconds after pressing the 'Snooze/Light' button.
2. Installing Remote Sensors
Each wireless remote sensor requires 2 AA batteries (not included).
- Åbn batterirummet på bagsiden af hver fjernbetjeningssensor.
- Insert 2 AA batteries, observing the correct polarity.
- Luk batterirummet forsvarligt.
3. Sensorplacering
The remote sensors have a transmission range of up to 100 meters. Choose suitable locations for accurate readings.
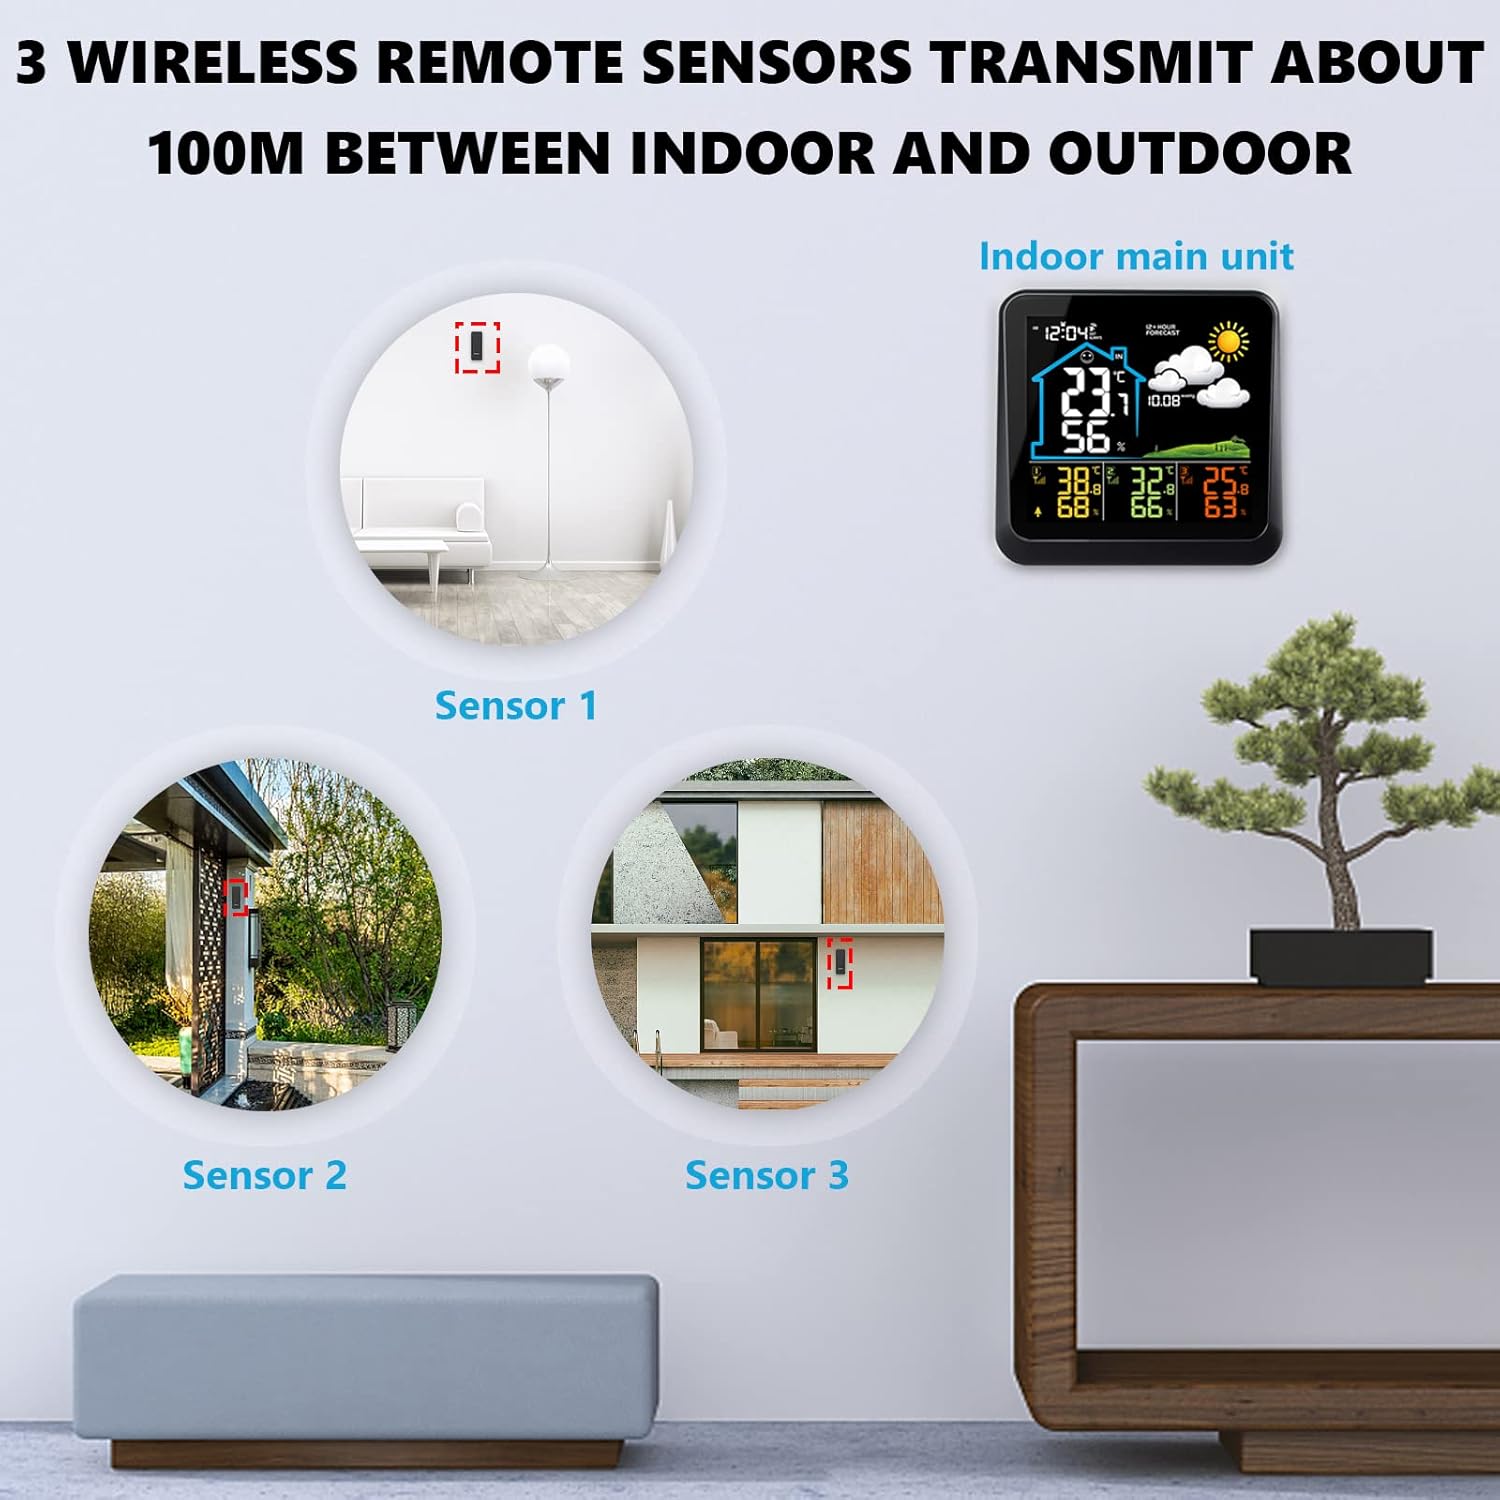
This image demonstrates suitable locations for placing the three wireless remote sensors, such as a baby's room, a wine cellar, or a garden, to monitor temperature and humidity.
- Place sensors in areas where you need to monitor temperature and humidity, such as baby rooms, wine cellars, gardens, or backyards.
- Ensure sensors are protected from direct sunlight and heavy rain for accurate outdoor readings.
- Avoid placing sensors near large metal objects or strong electromagnetic interference sources.
4. Indledende indstillinger (tid, dato, enheder)
After powering on, the main unit will automatically search for the remote sensors. Once connected, you can set the time, date, and preferred units.
- Press the 'Data/Time setting' button (5) to enter time setting mode.
- Use the 'Max/Min reading' (3) and 'Resetting and sensor scanning' (4) buttons to adjust values.
- Press 'Data/Time setting' (5) again to confirm and move to the next setting (e.g., year, month, day, 12/24 hour format).
- To switch between Celsius (°C) and Fahrenheit (°F), press the 'Display in °C or °F' button (8).
- To switch between 12-hour and 24-hour time format, press the 'Display in 12 or 24 hour' button (9).
Betjeningsvejledning
1. Skærmfunktioner
The color LCD screen displays various information at a glance:
- Indendørs/udendørs temperatur og luftfugtighed
- 12-Hour Weather Forecast
- Atmosfærisk tryk (hPa)
- Tid og dato
- Komfortniveauindikator
- Batteriindikator
2. Indstilling af alarm
Sådan indstilles en alarm:
- Press the 'Alarm setting' button (10) to enter alarm setting mode.
- Use the adjustment buttons (3, 4) to set the desired alarm time.
- Press 'Alarm setting' (10) again to confirm.
3. Snooze/Backlight Function
- Batteridrift: Press the 'Snooze/Light display' button (7) to illuminate the screen for 8 seconds.
- USB-betjening: Repeatedly press the 'Snooze/Light display' button (7) to cycle through low brightness, high brightness, or off modes.
- When an alarm sounds, press the 'Snooze/Light display' button (7) to activate the snooze function. The alarm will sound again after a short interval.
4. Max/Min Readings
Press the 'Max/Min reading' button (3) to view the maximum and minimum recorded temperature and humidity values. Press again to cycle through current, maximum, and minimum readings.
5. Vejrudsigt
The station provides a 12-hour weather forecast based on atmospheric pressure trends. The forecast accuracy is approximately 75%.

This image shows the various weather forecast icons used by the station: Sunny, Freeze, Cloudy, Partly Cloudy, and Rainy.
Forecast icons include: Sunny, Sunny to Cloudy, Cloudy, Rainy, Snowy.
Note: If the weather station is moved, it may take 12 to 24 hours for the atmospheric pressure to adjust and recalculate the forecast.
6. Indoor Comfort Indicator
The display includes a comfort indicator based on indoor humidity levels:

This image displays the main unit's screen, indicating comfort levels: optimal (40-70% RH), high (70-100% RH), and low (0-40% RH).
- Optimal: 40-70% Relative Humidity (RH)
- Høj: 70-100% RF
- Lav: 0-40% RF
Opretholdelse
1. Udskiftning af batteri
- When the battery indicator appears on the main unit, replace the 3 AAA batteries.
- For remote sensors, replace the 2 AA batteries when their performance degrades.
- Udskift altid alle batterier på samme tid med nye af samme type.
2. Rensning
Tør hovedenheden og sensorerne af med en blød kludamp klud. Brug ikke slibende rengøringsmidler, og apparaterne må ikke nedsænkes i vand.
Fejlfinding
| Problem | Mulig årsag | Løsning |
|---|---|---|
| Ingen visning på hovedenheden | Ingen strøm eller lave batterier. | Tilslut USB-strøm eller udskift AAA-batterier. |
| Remote sensor not connecting / Incorrect outdoor readings | Sensor batteries low or dead; sensor out of range; interference. | Replace AA batteries in sensor. Move sensor closer to main unit. Avoid obstacles. Press 'Resetting and sensor scanning' button (4) on main unit to re-scan. |
| Display shows 'LL.L' or 'HH.H' | Temperature or humidity is outside the measurable range. | This indicates the reading is below the minimum ('LL.L') or above the maximum ('HH.H') operating range. The device is functioning as expected under extreme conditions. |
| Upræcis vejrudsigt | Station recently moved; forecast is an estimation. | Allow 12-24 hours for the station to recalibrate after moving. Forecasts are based on atmospheric pressure trends and are not 100% accurate. |
Specifikationer

This image provides the physical dimensions of the main weather station unit (14.5cm x 14cm) and the remote sensor (10cm x 3.8cm).
| Feature | Detalje |
|---|---|
| Mærke | VIFLYKOO |
| Modelnummer | 3 sensorer |
| Display Type | Farve LCD |
| Forbindelsesteknologi | Trådløs, USB |
| Strømkilde (hovedenhed) | USB-kabel (medfølger) eller 3 x AAA-batterier (medfølger ikke) |
| Strømkilde (fjernsensorer) | 2 x AA batteries per sensor (not included) |
| Indendørs temperaturområde | 0 ° C til +50 ° C (32 ° F til 122 ° F) |
| Udendørs temperaturområde | -30 °C til +60 °C (-22 °F til 140 °F) |
| Fugtighedsområde | 20% til 90% RH |
| Trådløs transmissionsafstand | Op til 100 meter (udendørs) |
| Særlige funktioner | 12-hour weather forecast, Max/Min records, Alarm, Snooze, Comfort indicator |
| Hovedenhedens dimensioner | Ca. 14.5 cm x 14 cm |
| Dimensioner af fjernsensor | Ca. 10 cm x 3.8 cm |
Garanti og support
Oplysninger om produktgaranti og kundesupport findes typisk i din købsdokumentation eller på producentens officielle website. Please refer to those resources for details on warranty coverage, returns, and technical assistance.