1. Introduktion
Tak for købetasing the Lanix LX240 V7 23.8-inch Full HD Monitor. This manual provides essential information for the safe and efficient use of your new monitor. Please read it thoroughly before installation and keep it for future reference.
2. Sikkerhedsoplysninger
Overhold følgende sikkerhedsforanstaltninger for at forhindre beskadigelse af skærmen og sikre brugerens sikkerhed:
- Udsæt ikke skærmen for regn eller fugt for at undgå brand eller elektrisk stød.
- Åbn ikke skærmen casing. Der er ingen dele indeni, som kan serviceres af brugeren. Overlad al service til kvalificeret personale.
- Placer skærmen på en stabil, plan overflade for at forhindre den i at falde.
- Sørg for tilstrækkelig ventilation omkring skærmen. Bloker ikke ventilationsåbningerne.
- Brug kun den strømadapter, der følger med skærmen.
- Tag stikket ud af stikkontakten, hvis skærmen ikke skal bruges i længere tid.
3. Pakkens indhold
Kontroller, at alle varer er til stede og i god stand ved udpakning:
- Lanix LX240 V7 Monitor
- Strømadapter
- HDMI kabel
- Brugervejledning (dette dokument)

Image: Lanix LX240 V7 Monitor packaging box, showing the monitor model and key features.
4. Opsætning
4.1 Samling af stativet
Følg disse trin for at fastgøre stativet til din skærm:
- Tag forsigtigt skærmen ud af emballagen, og sørg for at den er beskyttet.
- Attach the stand base to the stand neck. Secure with screws if provided.
- Juster den samlede stander med monteringshullet på bagsiden af skærmen.
- Gently push the stand into the slot until it clicks into place or secure with screws.

Billede: Bagside view of the Lanix LX240 V7 monitor, showing the stand attachment point and port area.
4.2 Tilslutning af skærmen
Connect the monitor to your computer using the appropriate cables:
- Strømtilslutning: Tilslut strømadapteren til skærmens strømindgang, og sæt derefter adapteren i en stikkontakt.
- Videoforbindelse:
- HDMI: Tilslut den ene ende af HDMI-kablet til HDMI-porten på din skærm og den anden ende til HDMI-porten på din computer.
- VGA: Connect one end of the VGA cable to the VGA port on your monitor and the other end to the VGA port on your computer.
- Lydforbindelse (hvis relevant): The monitor has integrated speakers. If using HDMI, audio will transmit automatically. For VGA, ensure your computer's audio output is configured correctly.
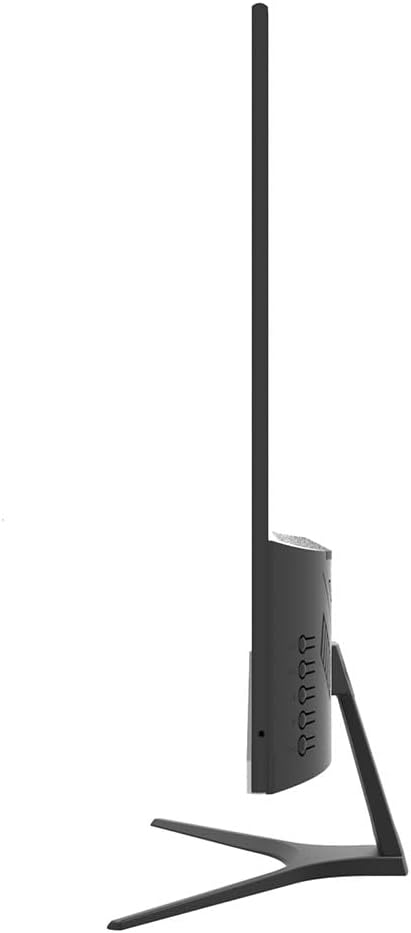
Billede: Side view of the Lanix LX240 V7 monitor, illustrating the location of input ports and control buttons.
5. Betjeningsvejledning
5.1 Tænd/sluk
Tryk på tænd/sluk-knappen på skærmen for at tænde eller slukke den. Strømindikatorlampen lyser, når skærmen er tændt.
5.2 Valg af indgangskilde
If you have multiple devices connected, you may need to manually select the input source:
- Press the "Input" or "Source" button on the monitor (refer to the side view image for button locations).
- Use the navigation buttons to select between HDMI and VGA inputs.
- Press the "Menu" or "OK" button to confirm your selection.
5.3 On-Screen Display (OSD) menu
The OSD menu allows you to adjust various monitor settings:
- Tryk på knappen "Menu" for at åbne OSD-menuen.
- Use the navigation buttons (usually up/down or left/right arrows) to browse through menu options such as Brightness, Contrast, Color Settings, Aspect Ratio, etc.
- Press "Menu" or "OK" again to enter a sub-menu or confirm a setting.
- Press the "Exit" or "Menu" button repeatedly to close the OSD.

Billede: Forside view of the Lanix LX240 V7 monitor, showcasing its display area and slim bezels.
6. Vedligeholdelse
Korrekt vedligeholdelse sikrer din skærms levetid:
- Rengøring af skærmen: Tør forsigtigt skærmen af med en blød, fnugfri klud. Fjern genstridige mærker ved atampRengør kluden let med vand eller en specialiseret skærmrens. Sprøjt aldrig væske direkte på skærmen.
- Rengøring af Casing: Brug en blød, tør klud til at tørre skærmen afasing. Undgå slibende rengøringsmidler eller opløsningsmidler.
- Opbevaring: Hvis skærmen opbevares i en længere periode, skal alle kabler frakobles og opbevares et køligt og tørt sted, helst i originalemballagen.
7. Fejlfinding
Se følgende tabel for almindelige problemer og løsninger på disse:
| Problem | Mulig årsag | Løsning |
|---|---|---|
| Intet billede på skærmen | Skærmen er ikke tændt; Forkert inputkilde; Løst videokabel. | Ensure power cable is connected and monitor is turned on. Select correct input source (HDMI/VGA). Check video cable connections. |
| Billedet er for mørkt/lyst | Lysstyrke-/kontrastindstillingerne er forkerte. | Juster indstillingerne for lysstyrke og kontrast via OSD-menuen. |
| Ingen lyd fra højttalerne | Audio settings incorrect; Volume too low. | Check monitor's volume settings in OSD. Ensure computer's audio output is set to the monitor (for HDMI) or external speakers (for VGA). |
| Flimrende eller ustabilt billede | Loose video cable; Incorrect refresh rate. | Ensure video cable is securely connected. Check your computer's display settings for the correct refresh rate (60Hz). |
8. Specifikationer
| Modelnavn | LX240 V7 |
| Skærmstørrelse | 23.8 inches (23.6 inches actual) |
| Paneltype | LED |
| Opløsning | 1920 x 1080 (Fuld HD) |
| Aspektforhold | 1.78:1 (16:9) |
| Opdateringshastighed | 60 Hz |
| Svartid | 5 millisekunder |
| Lysstyrke | 250 cd/m² |
| Kontrastforhold | 3000:1 |
| Viewi vinkel | 178 grader |
| Forbindelse | 1x HDMI, 1x VGA |
| Indbyggede højtalere | Ja |
| Strømforbrug | 22 watt |
| Dimensioner (H x B x D) | Approx. 21cm x 25cm x 5cm (screen only, based on image) |
| Vægt | 2.71 kilo |
Billede: Forside view of the Lanix LX240 V7 monitor with height, width, and depth measurements indicated.
9. Garanti og support
Garantioplysninger: The Lanix LX240 V7 monitor comes with a 1-year manufacturer's warranty. This warranty covers defects in materials and workmanship under normal use. It does not cover damage caused by misuse, accidents, unauthorized modifications, or external causes.
Kundesupport: For technical assistance, warranty claims, or service inquiries, please contact Lanix customer support. Refer to the official Lanix webwebstedet eller din købsdokumentation for kontaktoplysninger.