
ORIA OUS-HY-WA109B
ORIA Digital Alarm Clock OUS-HY-WA109B User Manual
Model: OUS-HY-WA109B
1. Introduktion
This manual provides detailed instructions for the setup, operation, and maintenance of your ORIA Digital Alarm Clock (Model OUS-HY-WA109B). Please read this manual thoroughly before using the product to ensure proper function and safety.
1.1 Pakkens indhold
- ORIA Digital Alarm Clock (Model OUS-HY-WA109B)
- USB strømkabel
- Brugermanual

Figure 1: Package contents including the ORIA Digital Alarm Clock, USB cable, and user manual.
2. Sikkerhedsoplysninger
- Udsæt ikke enheden for ekstreme temperaturer, direkte sollys eller høj luftfugtighed.
- Hold enheden væk fra vand eller andre væsker.
- Brug kun det medfølgende USB-kabel eller et tilsvarende certificeret kabel til strøm.
- Forsøg ikke selv at adskille eller reparere enheden. Kontakt kundesupport for at få hjælp.
- Bortskaf batterier i henhold til lokale regler.
3. Opsætning
3.1 Strømforsyning til enheden
The ORIA Digital Alarm Clock offers dual power options:
- DC Cable Power (Recommended): Connect the provided USB power cable to the DC 5V port on the back of the clock and plug the other end into a USB power adapter (not included) or a USB port. The display will remain continuously on.
- Battery Power (Backup/Power Saving Mode): Insert 3 AAA batteries (not included) into the battery compartment on the back of the clock. In battery mode, the screen will automatically turn off after 8 seconds to conserve power. Touch the top button to wake up the screen for 8 seconds.
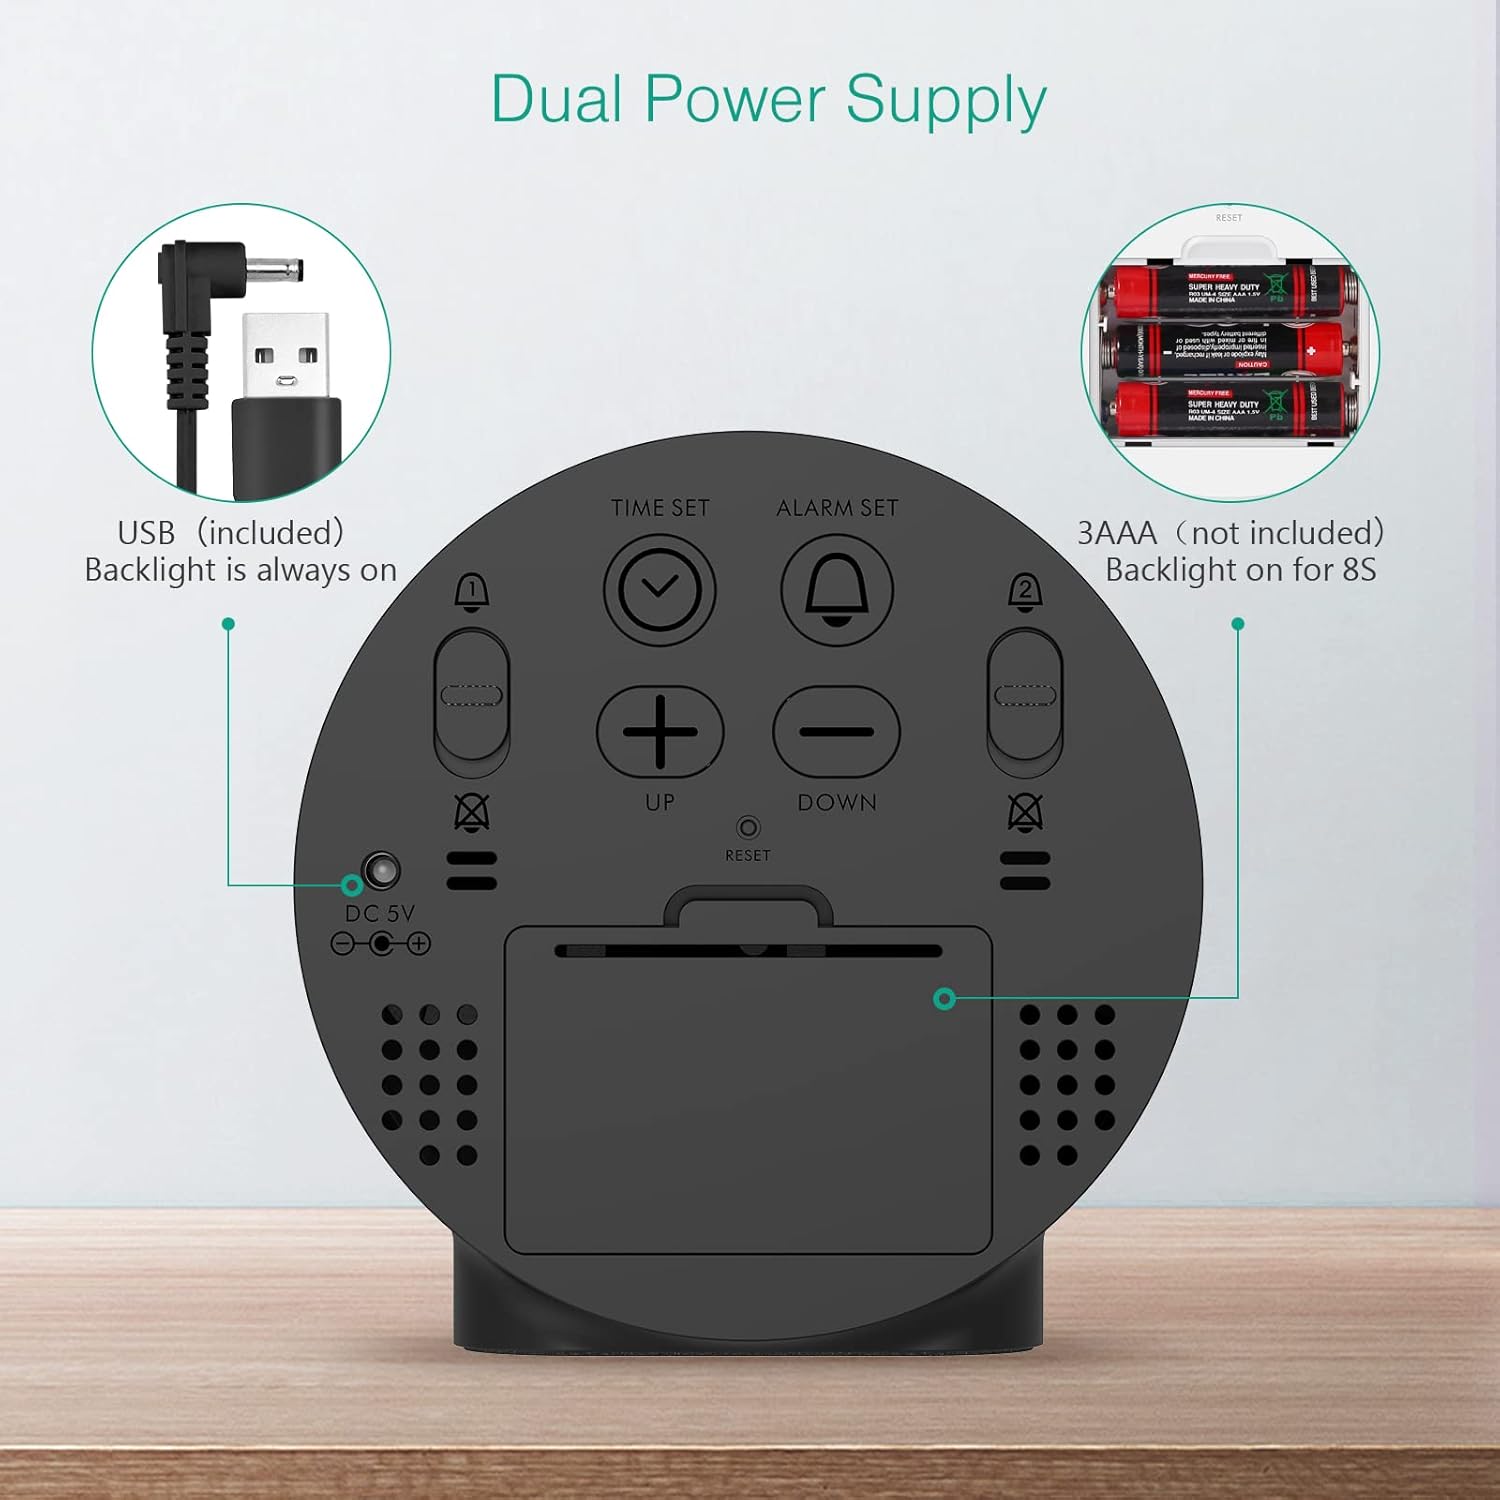
Figure 2: Back panel illustrating the USB power input and battery compartment for dual power supply.
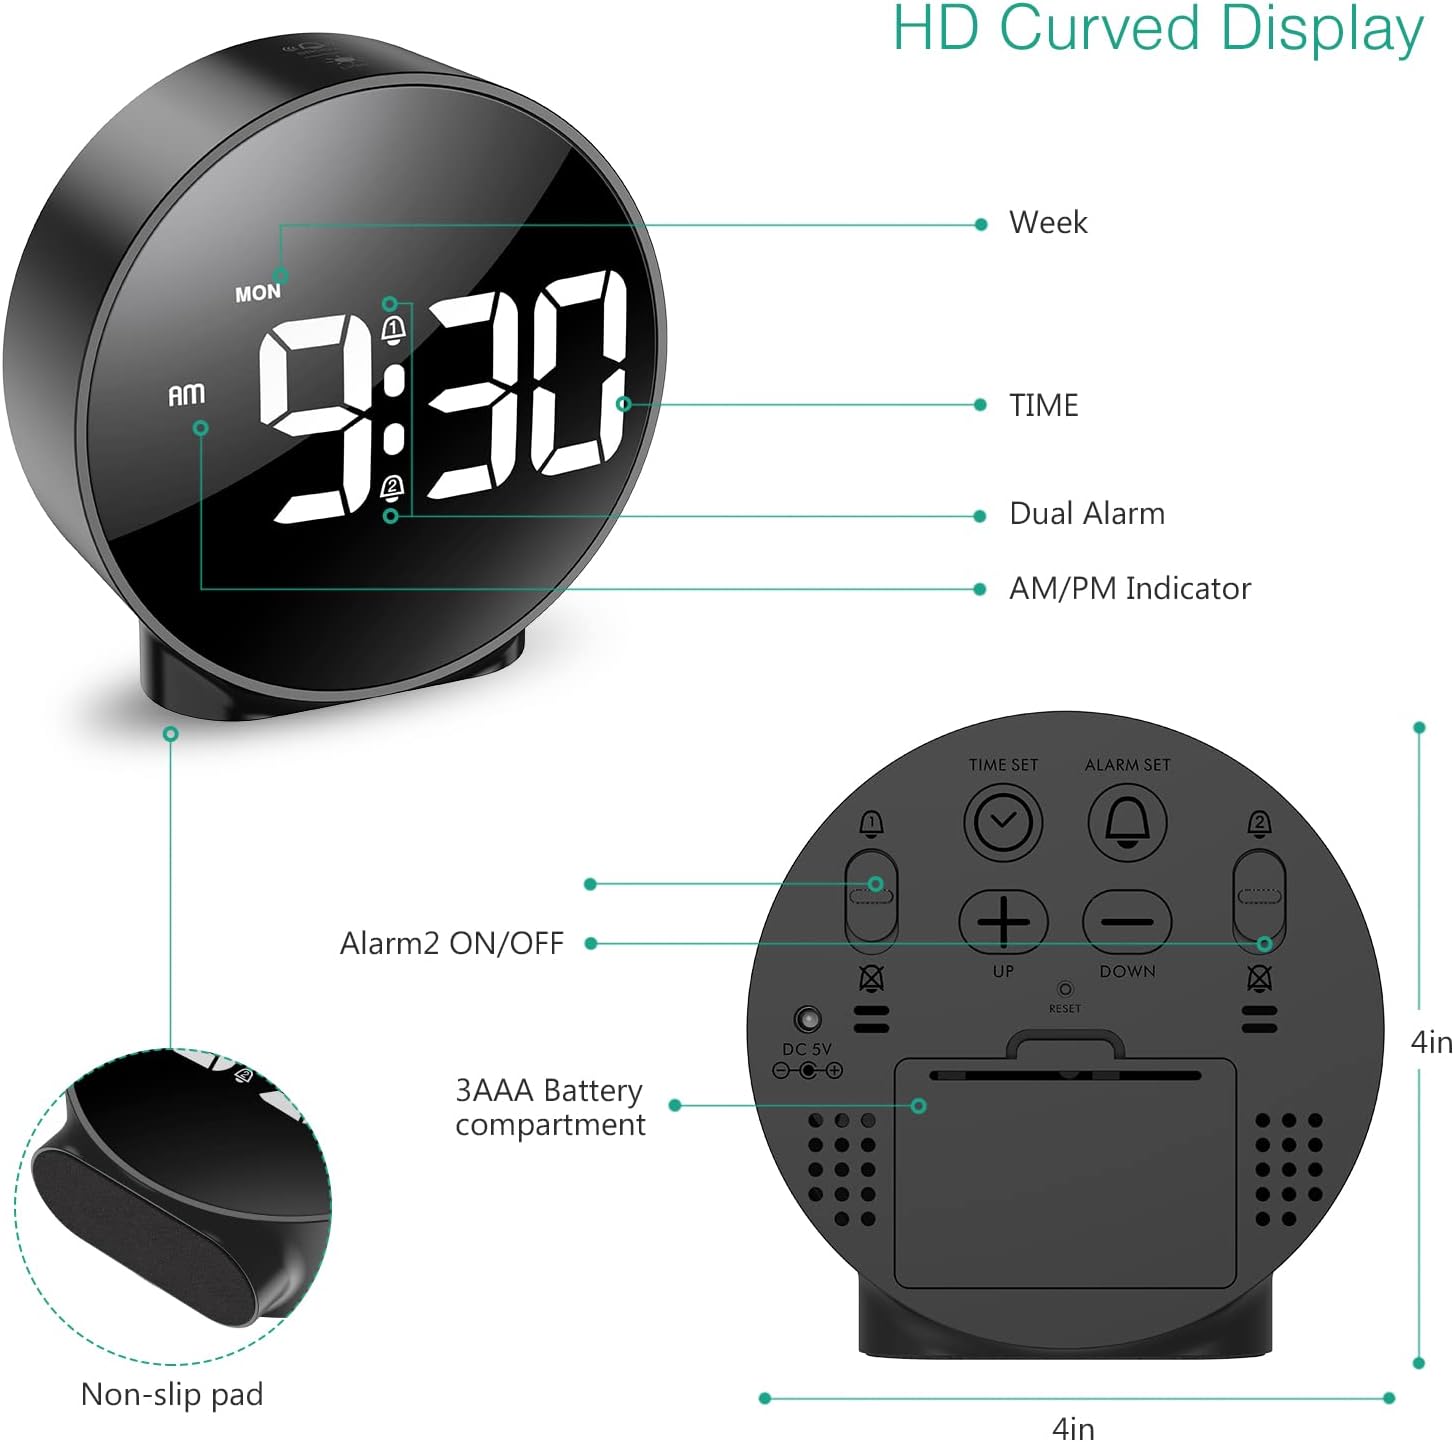
Figur 3: Detaljeret view of the clock's back panel, highlighting the DC 5V input, battery compartment, and control buttons.
4. Betjeningsvejledning
4.1 Setting the Time (12/24Hr Format)
- Tryk og hold på TIDSINDSTILLING button on the back of the clock for 3 seconds to enter time setting mode. The hour digits will start flashing.
- Brug UP or NED knapper for at justere timen.
- Trykke TIDSINDSTILLING igen for at bekræfte timetallet og gå videre til minutindstilling. Minuttiffrene vil blinke.
- Brug UP or NED knapper for at justere minutter.
- Trykke TIDSINDSTILLING again to confirm the minute and exit time setting mode.
- For at skifte mellem 12-timers og 24-timers format skal du trykke på 12/24 timer knap.
4.2 Indstilling af alarmer (dobbeltalarmer)
The clock supports two independent alarms (Alarm 1 and Alarm 2) with 5 alarm modes.
- Tryk og hold på ALARM SÆT knap (for Alarm 1) eller ALARM 2 TIL/FRA button (for Alarm 2) for 3 seconds to enter alarm setting mode. The hour digits will flash.
- Brug UP or NED knapper for at justere alarmtiden.
- Tryk på den respektive ALARM SÆT or ALARM 2 TIL/FRA Tryk på knappen igen for at bekræfte timeindstillingen og gå videre til minutindstillingen. Minuttifrene blinker.
- Brug UP or NED knapper for at justere alarmminut.
- Tryk på den respektive ALARM SÆT or ALARM 2 TIL/FRA button again to confirm the minute and select the alarm mode. The display will show the current mode (e.g., "1-1" for one day).
- Brug UP or NED buttons to cycle through the 5 alarm modes:
- 1-1: Alarm sounds once.
- 1-5: Alarmen lyder mandag til fredag.
- 1-6: Alarmen lyder mandag til lørdag.
- 1-7: Alarm sounds Monday to Sunday.
- 6-7: Alarm sounds Saturday to Sunday.
- Tryk på den respektive ALARM SÆT or ALARM 2 TIL/FRA button one last time to confirm the alarm mode and exit alarm setting.
- To turn an alarm ON or OFF, short press the respective ALARM SÆT or ALARM 2 TIL/FRA knappen. Et alarmikon vises på displayet, når den er aktiveret.
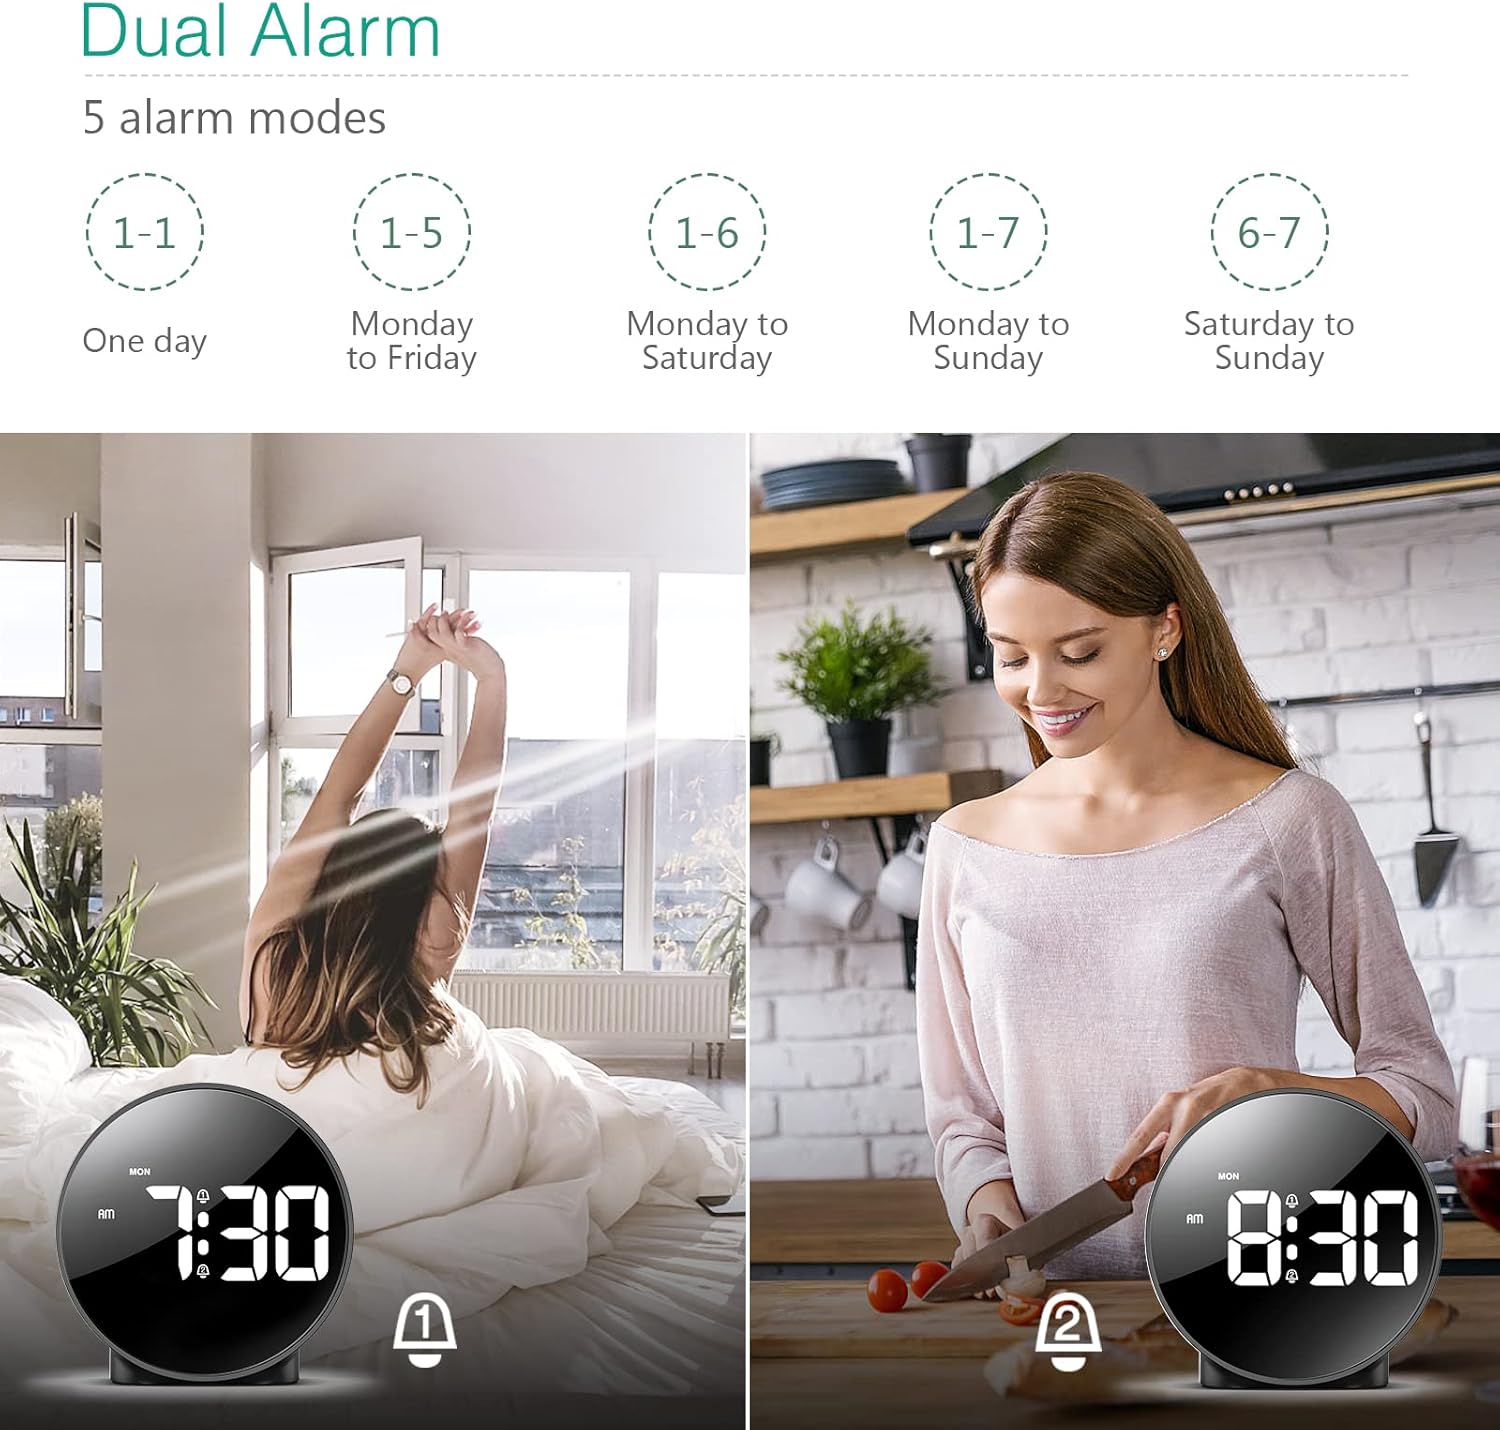
Figure 4: Illustration of the dual alarm functionality with various scheduling modes.
4.3 Snooze -funktion
Når en alarm lyder, skal du trykke på den store SNOOZE / LYS knappen øverst på uret for at aktivere snooze-funktionen. Alarmen sætter på pause i 5 minutter og lyder derefter igen. Du kan gentage denne proces flere gange.

Figure 5: Activating the snooze function by touching the top of the clock.
4.4 Justering af lysstyrke
The clock features 4 levels of adjustable brightness. Short press the SNOOZE / LYS button on the top of the clock to cycle through the brightness levels (100%, 80%, 60%, and 0% (off)).

Figure 6: Visual representation of the four adjustable brightness levels of the clock display.
4.5 Sommertid (DST)
The clock supports Daylight Saving Time adjustment. Refer to the included mini-manual for specific instructions on how to activate or deactivate DST.
5. Funktioner
- HD LED-skærm: Large, high-definition curved display for clear time reading.
- Dual Alarms with 5 Modes: Set two independent alarms with flexible scheduling options (one-day, weekdays, weekends, or every day).
- Justerbar lysstyrke: Four levels of display brightness, including an off mode, to suit various environments and preferences.
- Snooze-funktion: Provides an additional 5 minutes of sleep with a simple touch.
- 12/24 timers format: Easily switch between standard and military time displays.
- Dobbelt strømforsyning: Operates via USB cable for continuous display or AAA batteries for power-saving mode (display turns off after 8 seconds).
- Kompakt design: Suitable for various locations such as bedrooms, living rooms, offices, or for travel.
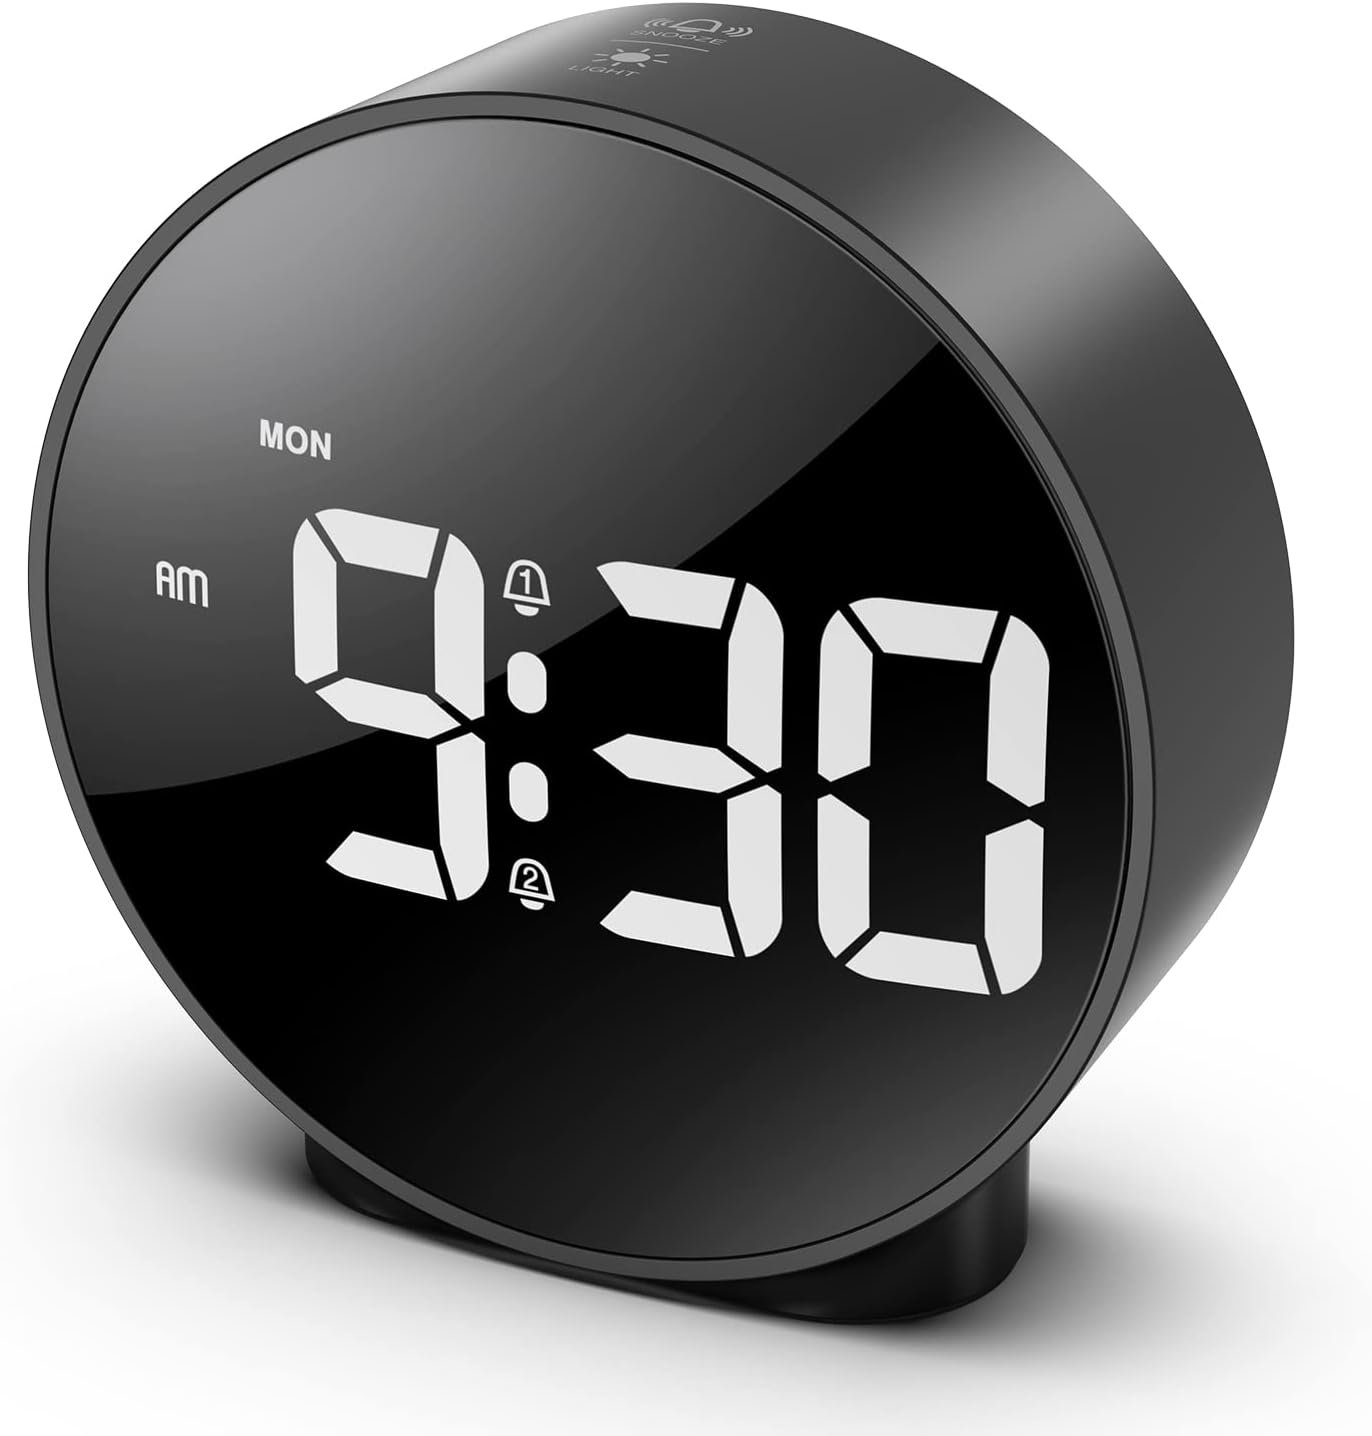
Figure 7: The ORIA Digital Alarm Clock showcasing its clear HD LED display.
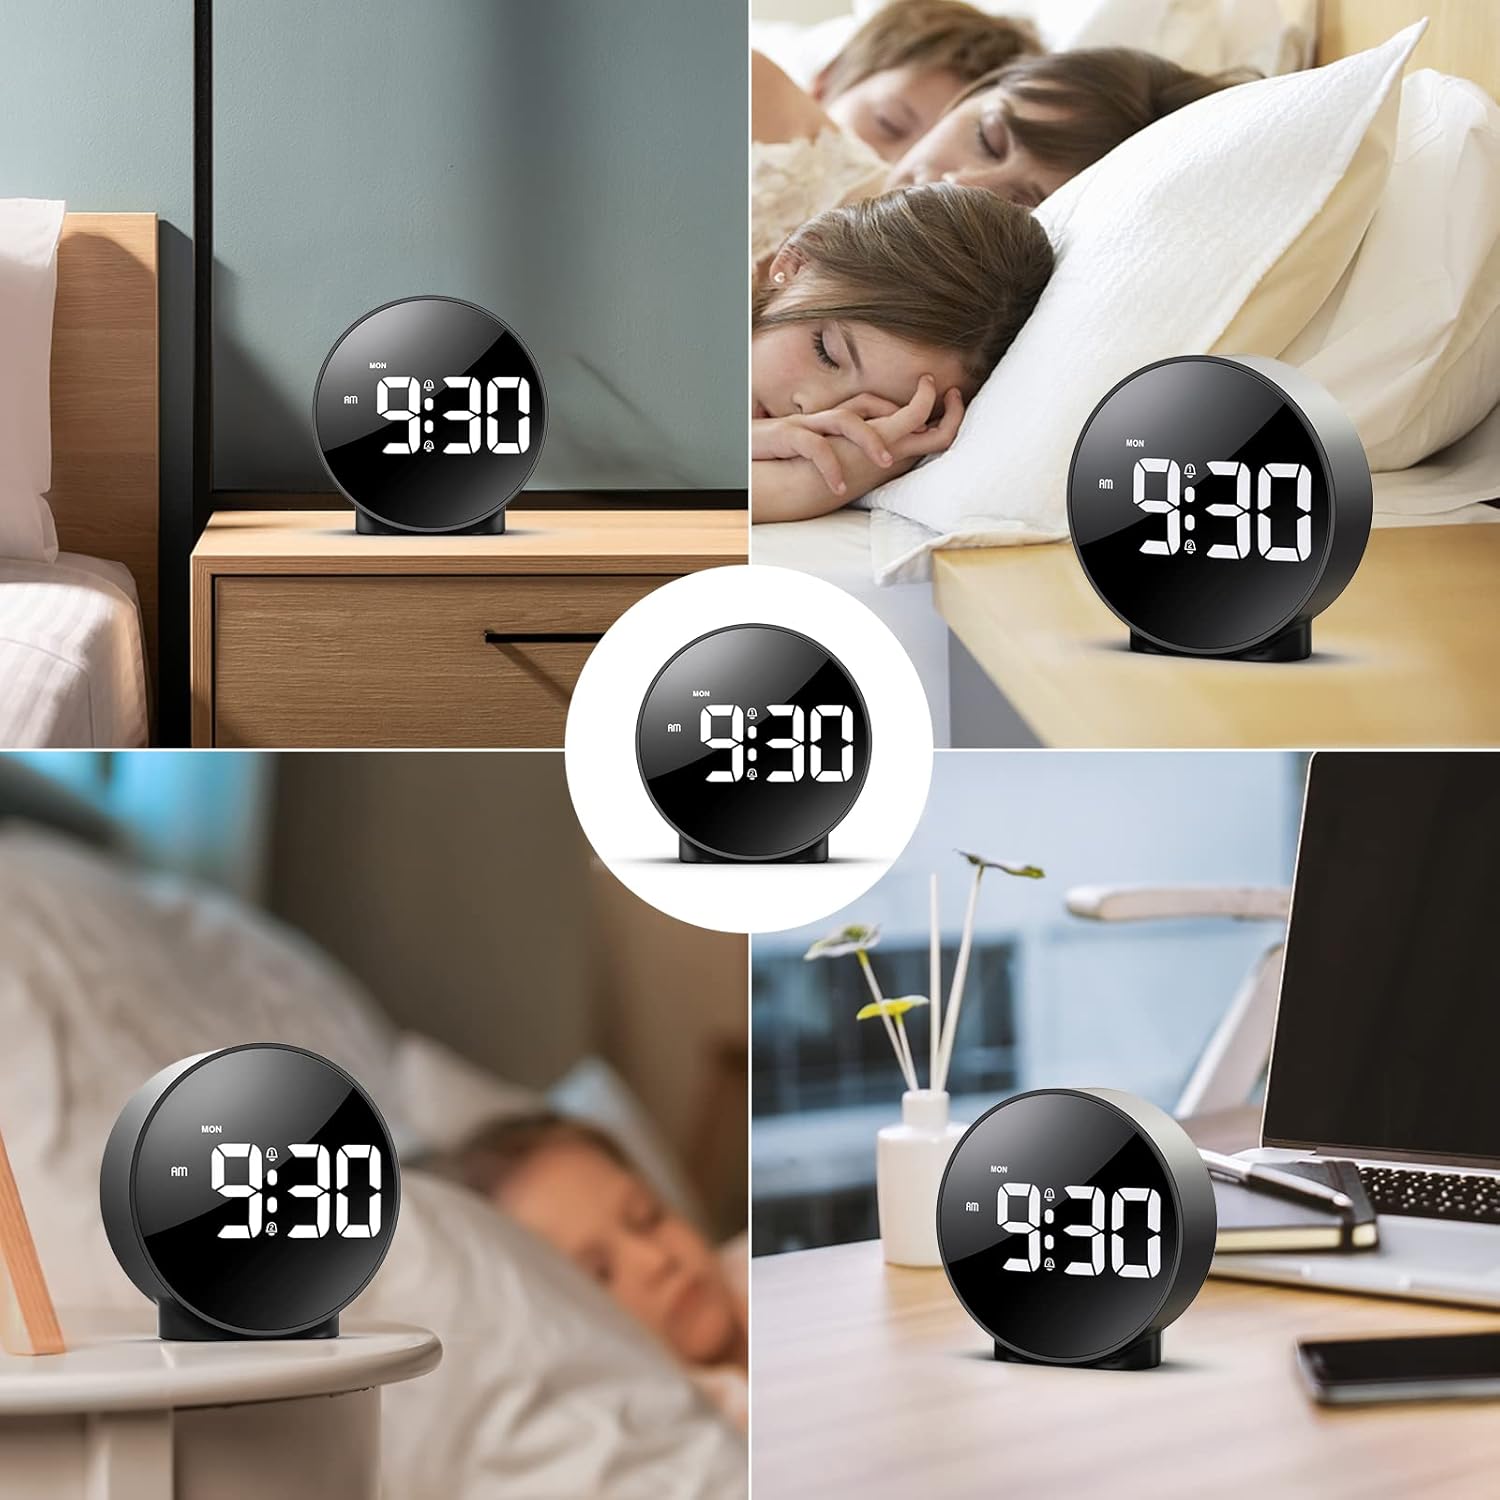
Figure 8: The versatile ORIA Digital Alarm Clock integrated into different environments like a bedroom, office, and living room.
6. Vedligeholdelse
- Rengør uret med en blød, tør klud. Brug ikke slibende rengøringsmidler eller opløsningsmidler.
- Hvis de ikke er i brug i længere tid, skal batterierne fjernes for at forhindre lækage.
7. Fejlfinding
- Display is off in battery mode: This is normal for power saving. Touch the top button to activate the display for 8 seconds. For continuous display, use the USB power cable.
- Knapper reagerer ikke: Try resetting the clock by pressing the small NULSTIL button located on the back panel using a thin object (e.g., a paperclip).
- Alarmen lyder ikke: Ensure the alarm is activated (alarm icon visible on display) and the volume is not set to zero.
- Forkert tidspunkt/dato: Re-enter time setting mode and adjust the time and date as per Section 4.1.
8. Specifikationer
| Mærke | ORIA |
| Modelnummer | OUS-HY-WA109B |
| Farve | Black Case & White Digit |
| Display Type | Digital LED |
| Produktdimensioner | 4.29 cm B x 4.8 cm H |
| Varens vægt | 5.9 ounce (0.17 kilo) |
| Strømkilde | Corded Electric & Battery Powered (3x AAA, not included) |
| Materiale | Plast |
| Særlige funktioner | Alarm, LED Display, Adjustable Brightness, Dual Alarms, Snooze |
9. Garanti og support
- 1-års garanti: Produktet er dækket af en 1-årig begrænset garanti.
- 90-Day Free Replacements: Enjoy free replacements for eligible issues within 90 days of purchase.
- 30 dages gratis returnering: Returnering accepteres inden for 30 dage efter købet.
- 24/7 kundesupport: For any inquiries or assistance, please contact ORIA customer support.
- Livsvarig teknisk support: Benefit from lifetime technical support for your product.
For yderligere hjælp, besøg venligst ORIA Store on Amazon.
Ask a question about this manual
Ask about setup, troubleshooting, compatibility, parts, safety, or missing instructions. Manuals+ will review the question and use this page’s manual context to help answer it.