Andoer 2.7K Digital Camera Compact Video Camcorder
Andoer 2.7K Digital Camera 48MP User Manual
Model: 2.7K Digital Camera Compact Video Camcorder
Indledning
This manual provides essential instructions for the safe and effective operation of your Andoer 2.7K Digital Camera. Please read this manual thoroughly before using the camera and retain it for future reference.
The Andoer 2.7K Digital Camera is a compact device designed for capturing high-resolution photos and videos. It features a 48MP image sensor, 2.7K video recording capabilities, a 2.88-inch IPS screen, 16X digital zoom, and various functions such as anti-shake, face detection, and a built-in LED fill light.
Pakkens indhold
Bekræft, at alle nedenstående varer er inkluderet i din pakke:
- 1 x Andoer 2.7K Digital Camera
- 2 x Lithium Batteries (3.7V 700mAh)
- 1 x USB-ladekabel
- 1 x håndledsrem
- 1 x bæretaske
- 1 x Brugermanual (engelsk)

Figur 1: Indhold af kamerapakken.
Kameraet er slutview

Figur 2: Foran og bagpå view of the camera with included batteries.
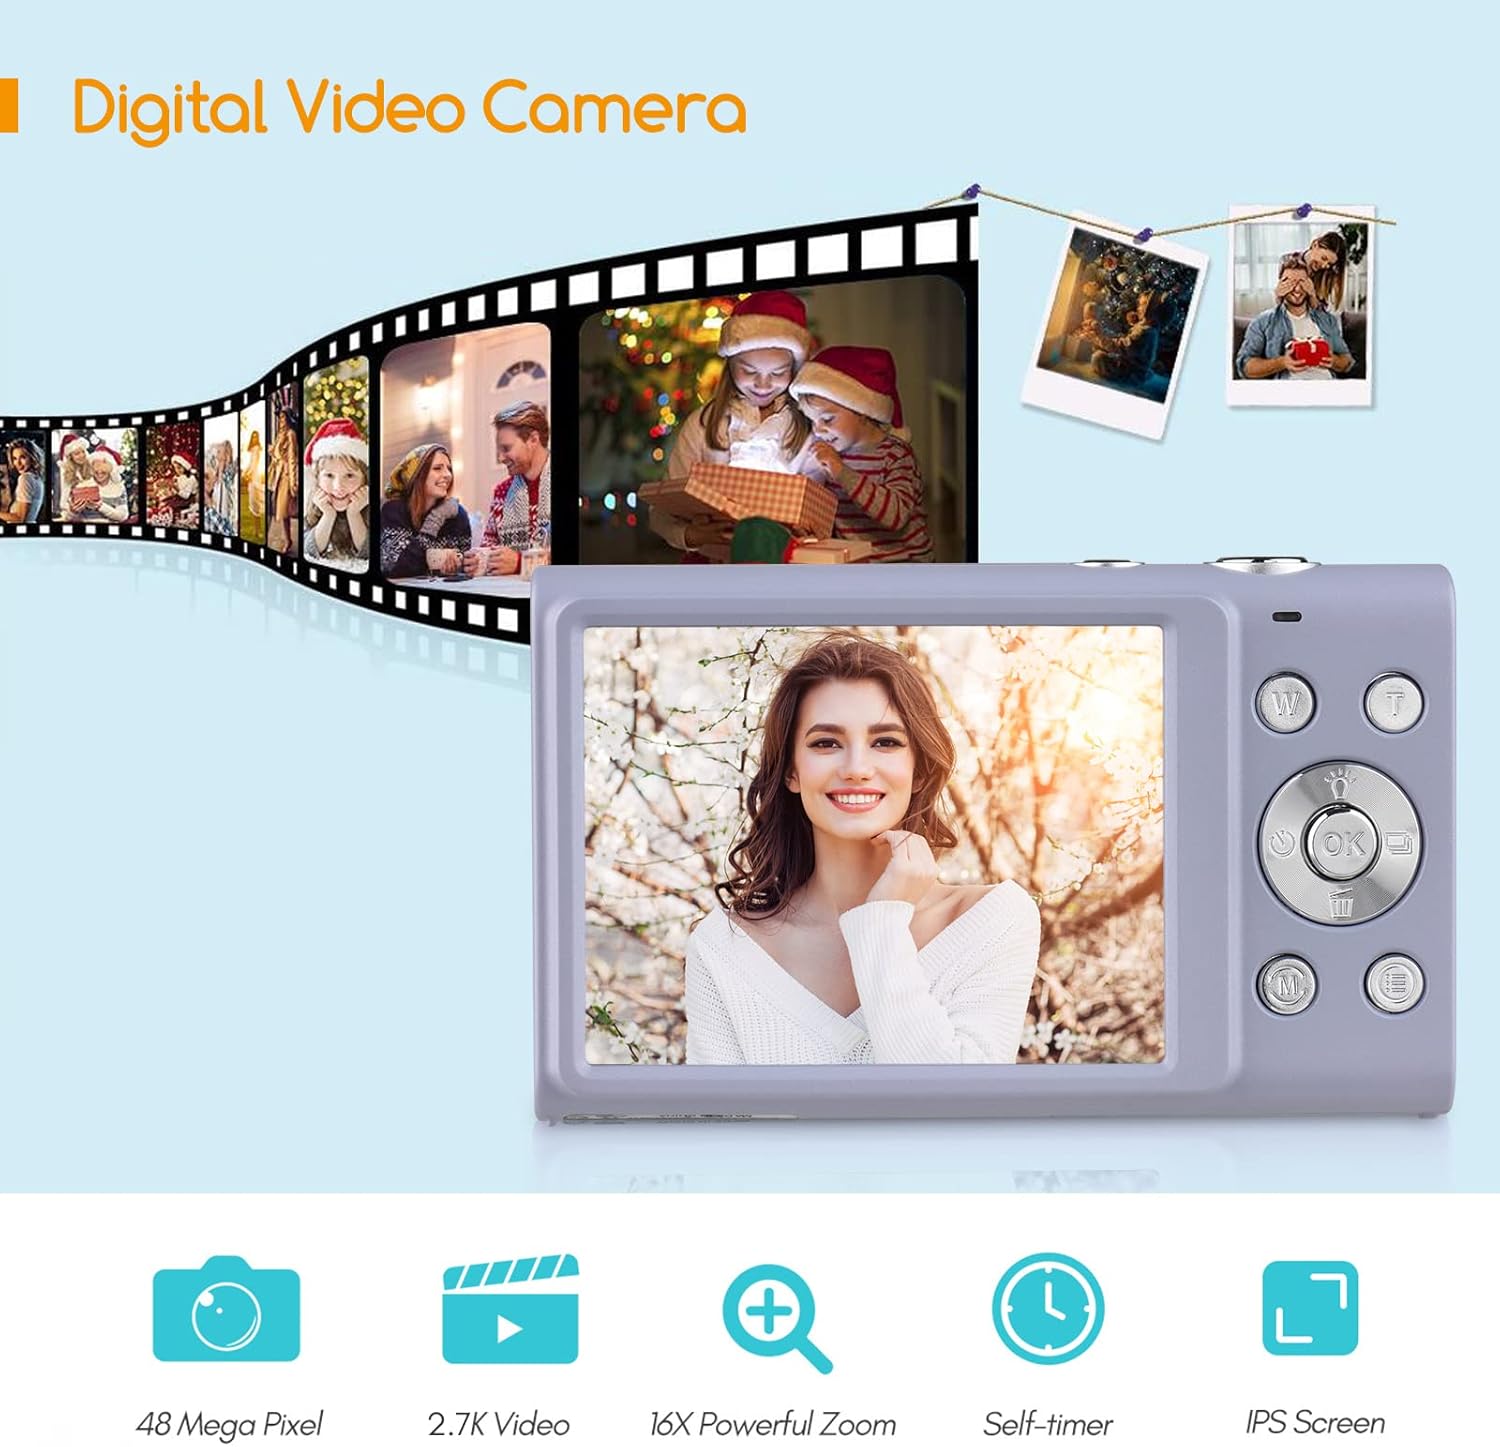
Figure 3: Camera features highlighted.
Opsætning
1. Batteriinstallation
- Åbn batteridækslet, der er placeret i bunden af kameraet.
- Insert a fully charged lithium battery (3.7V 700mAh) into the compartment, ensuring correct polarity.
- Luk batterirummets dæksel forsvarligt.
2. Opladning af batteriet
- Connect the camera to a power source (e.g., computer USB port or USB wall adapter) using the provided USB charge cable.
- Opladningsindikatorlampen lyser. Den slukker eller skifter farve, når opladningen er færdig.
- En fuld opladning tager typisk cirka 2-3 timer.
3. Installation af hukommelseskort
The camera requires an external Class-10 memory card (up to 128GB, not included) for storing photos and videos.
- Find hukommelseskortåbningen på siden af kameraet.
- Insert the memory card with the metal contacts facing the front of the camera until it clicks into place.
- For at fjerne det skal du forsigtigt trykke på kortet, indtil det springer ud.
4. Fastgørelse af håndledsremmen
Thread the wrist strap through the strap eyelet on the side of the camera to prevent accidental drops.
5. Stativ montering
The camera features a universal 1/4" screw hole on the bottom, allowing it to be mounted on a tripod for stable shots.

Figure 4: Universal 1/4" screw hole for tripod attachment.
Betjeningsvejledning
1. Tænd/sluk
- Press and hold the Power button (usually marked with a circle and a line) to turn the camera on or off.
- The camera has an auto power-off feature (1min/3min/5min) to conserve battery life. This can be adjusted in the settings.
2. Tage billeder
- Tænd kameraet. Skærmen viser live-optagelsen. view.
- Komponer dit billede med den 2.88-tommer IPS-skærm.
- Press the Shutter button (typically on top of the camera) halfway down to focus. The camera features auto-focus.
- Press the Shutter button fully down to capture the photo.
Photo Modes and Features:
- Opløsning: Supports up to 48MP. Adjust in settings.
- Digital zoom: Use the W/T (Wide/Telephoto) buttons to zoom in or out (up to 16X digital zoom).
- Anti-shake: Digital image stabilization helps reduce blur from camera movement.
- Ansigtsgenkendelse og smiloptagelse: The camera can detect faces and automatically capture a photo when a smile is detected.
- Selvudløser: Options for Off, 2 sec, 5 sec, 10 sec delays.
- Kontinuerlig optagelse: Tag en hurtig rækkefølge af billeder.
- Built-in LED Fill Light: Activate for additional illumination in low-light conditions.

Figure 5: Demonstrations of Self-Timer, Continuous Shooting, LED Fill Light, and Face Detection.

Figur 6: Eksample of 16X Digital Zoom in use.

Figure 7: Face Detection and Smile Capture in action.
3. Optagelse af videoer
- Switch the camera to video mode (if applicable, usually via a mode button or menu option).
- Press the Record button (often marked with a red dot) to start recording.
- Tryk på optageknappen igen for at stoppe optagelsen.
Videofunktioner:
- Opløsning: Supports 2.7K (2688x1520), 1080P (1920x1080), 720P (1280x720), VGA (640x480).
- Digital zoom: Available during video recording.

Figure 8: Camera's 2.7K video and 48MP photo capabilities.
4. Afspilning
- Press the Playback button (often marked with a triangle icon) to enter playback mode.
- Use the navigation buttons to browse through your photos and videos.
- Press the Playback button again or the Shutter button to exit playback mode.
5. Tilslutning til en computer
- Sluk kameraet.
- Tilslut kameraet til din computer ved hjælp af det medfølgende USB-kabel.
- Kameraet vises som et flytbart diskdrev på din computer.
- You can then transfer photos and videos to your computer.
- Supported Operating Systems: Windows XP/ Vista/ 7/ 8/ 10, Mac 10.2 and above.
Opretholdelse
- Rensning: Use a soft, dry cloth to clean the camera body. For the lens and screen, use a specialized lens cleaning cloth and solution. Avoid harsh chemicals.
- Batteripleje: Store batteries in a cool, dry place. Do not expose them to extreme temperatures. If not using the camera for an extended period, remove the battery.
- Opbevaring: When not in use, store the camera in its carry bag in a dry, dust-free environment.
- Vandtæthed: Dette kamera er ikke water resistant. Avoid exposure to water or high humidity.
Fejlfinding
| Problem | Mulig årsag | Løsning |
|---|---|---|
| Kameraet tænder ikke. | Batteriet er afladet eller isat forkert. | Oplad batteriet, eller sæt det korrekt i igen. Sørg for, at batterirummet er lukket. |
| Kan ikke tage billeder/videoer. | Hukommelseskortet er fuldt, ikke isat eller beskadiget. | Indsæt et hukommelseskort, slet unødvendigt files, eller formater kortet (dette vil slette alle data). |
| Billeder er slørede. | Camera shake, dirty lens, or out of focus. | Hold the camera steady, clean the lens, ensure auto-focus is engaged (half-press shutter). Use anti-shake feature. |
| Blitzen virker ikke. | Blitzen er deaktiveret, eller batteriet er lavt. | Kontrollér blitzindstillingerne. Sørg for, at batteriet er tilstrækkeligt opladet. |
| Kameraet fryser. | Softwarefejl. | Remove and re-insert the battery to reset the camera. |
Specifikationer
| Feature | Detalje |
|---|---|
| Billedsensor | CMOS sensor |
| Billedopløsning | 48 MP, 44 MP, 36 MP, 24 MP, 20 MP, 16 MP, 12 MP, 10 MP |
| Video opløsning | 2.7K (2688x1520), 1080P (1920x1080), 720P (1280x720), VGA (640x480) |
| Vise | 2.88 tommer IPS skærm |
| Digital Zoom | 16X |
| Blænde | F/3.2 |
| Brændvidde | f=7.36 mm |
| File Format | JPG / AVI |
| Eksponering | EV-3 to EV+3 |
| Selvudløser | Fra / 2 sek / 5 sek / 10 sek |
| Automatisk sluk | 1 min / 3 min / 5 min |
| Særlige funktioner | Anti-Shake, Face Detect, Smile Capture, Built-in LED Fill Light, Continuous Photography |
| Opbevaring | Supports Class-10 external memory card up to 128GB (not included) |
| Strømforsyning | 1 x Lithium battery (3.7V 700mAh) |
| Varestørrelse | 9.4 * 5.6 * 1.9 cm / 3.7 * 2.2 * 0.7 tommer |
| Varens vægt | 115g / 4.1oz (with battery) |
| Operativsystemkrav | Windows XP/ Vista/ 7/ 8/ 10, Mac 10.2 |
Garanti og support
For warranty information, please refer to the documentation provided at the time of purchase or contact your retailer. Andoer products typically come with a standard manufacturer's warranty covering defects in materials and workmanship.
If you encounter any issues not covered in the troubleshooting section, or require further assistance, please contact Andoer customer support through their official webwebstedet eller de kontaktoplysninger, der følger med dit produkt.
Ask a question about this manual
Ask about setup, troubleshooting, compatibility, parts, safety, or missing instructions. Manuals+ will review the question and use this page’s manual context to help answer it.