
Indledning
Thank you for choosing the artika Imperium Flush Mount Ceiling Light Fixture. This manual provides essential information for the safe installation, operation, and maintenance of your new lighting fixture. Please read these instructions thoroughly before beginning installation and retain them for future reference.
Sikkerhedsoplysninger
- ADVARSEL: Risk of electric shock. Turn off power at the main circuit breaker or fuse box before installation or any maintenance.
- Alle elektriske forbindelser skal være i overensstemmelse med lokale og nationale standarder i elektriske forskrifter (NEC). Hvis du ikke er bekendt med korrekt elektrisk ledningsføring, skal du kontakte en kvalificeret elektriker.
- Installer ikke denne armatur i våde eller dråber.amp locations. This fixture is designed for indoor use only.
- Sørg for, at monteringsfladen kan bære armaturets vægt.
- Brug kun den specificerede pæretype og wattage to avoid overheating or damage.
- Do not touch the bulbs immediately after they have been on, as they will be hot.
Hvad er der i æsken
Your artika Imperium light fixture package includes the following components:
- Imperium Flush Mount Ceiling Light Fixture
- Monteringshardware (skruer, trådmøtrikker, monteringsbeslag)
Note: Bulbs are not included. This fixture requires 6 E12 base incandescent bulbs, maximum 40 watts each.
Specifikationer
| Mærke | artika |
| Modelnummer | IMPERIUM |
| Farve | Sort og guld |
| Materiale | Metal, glas |
| Dimensioner (L x B x H) | 10.51" x 10.51" x 12.56" (26.7 cm x 26.7 cm x 31.9 cm) |
| Varens vægt | 5.15 pund |
| Pære base | E12 |
| Antal lyskilder | 6 |
| Max Wattage (pr. pære) | 40 watts (Incandescent) |
| I alt Wattage | 240 watt |
| Dæmpbar | Ja (med kompatibel lysdæmper) |
| Installationstype | Flush Mount |
| Indendørs/Udendørs brug | Indendørs |
Opsætning og installation
Follow these steps carefully to install your artika Imperium light fixture.
1. Forberedelse
- VIGTIG: Before starting installation, turn off the electricity at the main fuse box or circuit breaker.
- Saml de nødvendige værktøjer: skruetrækker, afisoleringstang, elektrikertape, stige.
- Unpack all components and inspect for any damage. Keep all packaging until you are sure all parts are present and undamaged.
2. Montering af monteringsbeslag
- Attach the mounting bracket to the electrical junction box in the ceiling using the provided screws. Ensure it is securely fastened.
3. Ledningsforbindelser
- Connect the fixture's ground wire (usually bare copper or green) to the house supply ground wire using a wire nut.
- Connect the fixture's neutral wire (usually white) to the house supply neutral wire (white) using a wire nut.
- Connect the fixture's live wire (usually black) to the house supply live wire (black) using a wire nut.
- Stik forsigtigt alle ledninger ind i samledåsen.
4. Attaching the Fixture
- Align the fixture base with the mounting bracket.
- Secure the fixture to the mounting bracket using the decorative nuts or screws provided. Ensure the fixture is flush against the ceiling and stable.
5. Montering af pære
- Carefully screw 6 E12 base incandescent bulbs (max 40W each) into the sockets. Do not overtighten.
6. Strømgenoprettelse
- Genopret strømmen til hovedafbryderen eller sikringsskabet.
- Test lysarmaturet for at sikre korrekt drift.

The artika Imperium flush mount ceiling light fixture installed in a modern bedroom, showcasing dens elegante design.

Diagram showing the dimensions of the artika Imperium light fixture: 10.51 inches (26.7 cm) wide, 10.51 inches (26.7 cm) deep, and 12.56 inches (31.9 cm) high.
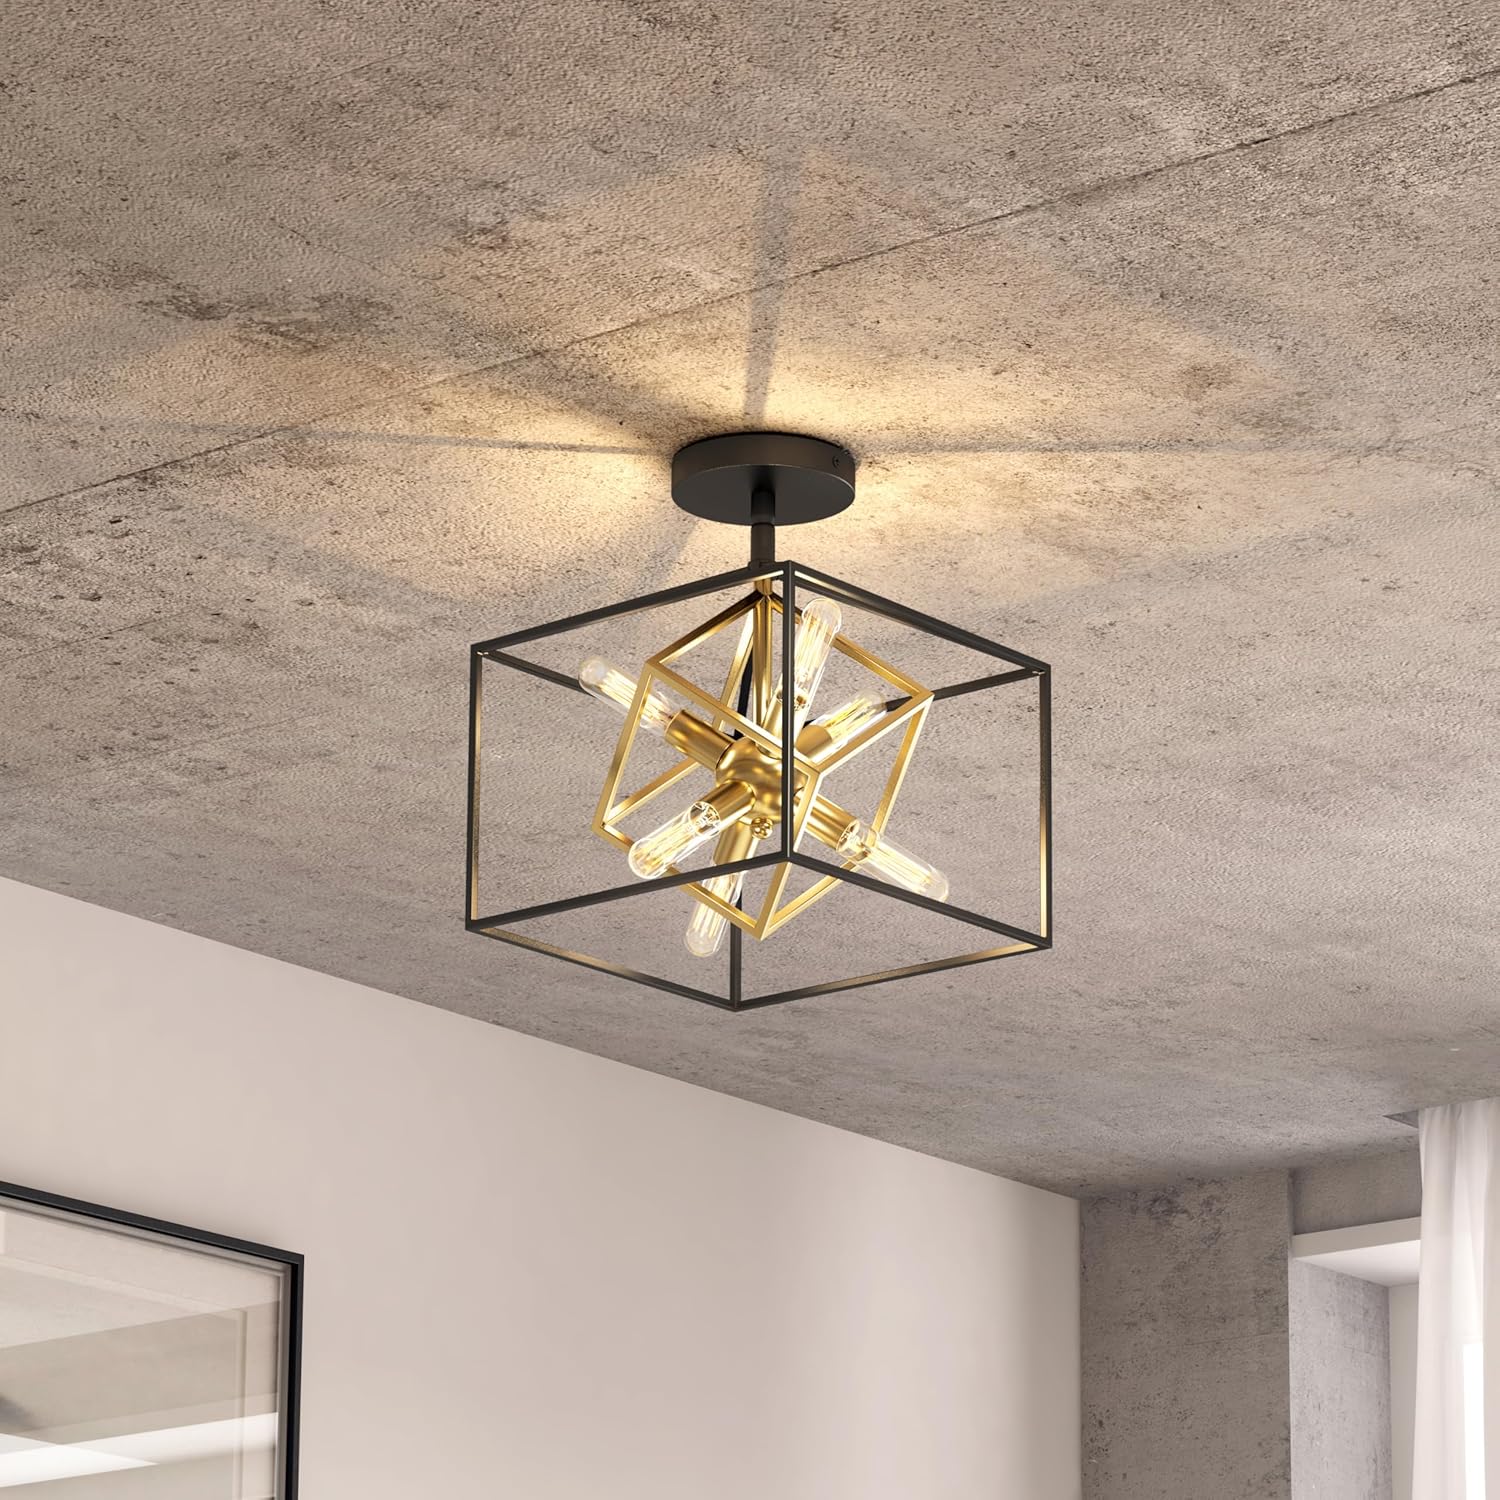
Nærbillede view of the artika Imperium light fixture from below, highlighting the gold internal cube structure and the six E12 bulb sockets.

The artika Imperium flush mount ceiling light fixture illuminating a hallway, demonstrating its light distribution.
Official product video demonstrating the design and features of the artika Imperium Flush Mount Ceiling Light.
Betjeningsvejledning
The artika Imperium light fixture operates via a standard wall switch. If connected to a compatible dimmer switch, the light output can be adjusted to create various ambiances.
- Tænd/sluk: Use your existing wall switch to turn the fixture on or off.
- Dæmpning: If a dimmer switch is installed, rotate or slide the dimmer control to adjust the brightness level. Ensure your E12 bulbs are dimmable compatible for optimal performance.
Opretholdelse
Rensning
- Sluk altid for strømmen før rengøring.
- Tør armaturet af med en blød, tør klud.
- Brug ikke slibende rengøringsmidler, opløsningsmidler eller polermidler, da de kan beskadige finishen.
Udskiftning af pære
- Ensure the power is turned off and the bulbs have cooled completely before attempting to replace them.
- Unscrew the old bulb counter-clockwise.
- Screw in a new E12 base incandescent bulb (max 40W) clockwise until snug. Do not overtighten.
Fejlfinding
Hvis du oplever problemer med din lampe, kan du se følgende almindelige problemer og løsninger:
| Problem | Mulig årsag | Løsning |
|---|---|---|
| Lyset tændes ikke. | Ingen strømforsyning. Løse ledninger. Defekt pære. | Tjek afbryderen. Sørg for, at alle ledningsforbindelser er sikre (sluk først). Udskift pære. |
| Lyse flimrer. | Løs pære. Inkompatibel lysdæmper. Løse ledninger. | Spænd pæren. Ensure dimmer is compatible with incandescent bulbs. Kontroller ledningsforbindelserne (sluk først for strømmen). |
| Dimming does not work. | Ikke-dæmpbare pærer. Inkompatibel lysdæmper. | Use dimmable E12 bulbs. Ensure dimmer switch is compatible with incandescent bulbs. |
Garanti og support
The artika Imperium Flush Mount Ceiling Light Fixture comes with a 5 års begrænset garanti fra købsdatoen. Denne garanti dækker fejl i materialer og udførelse ved normal brug.
For warranty claims, technical support, or any questions regarding your product, please contact Artika for Living Inc. customer service. Keep your proof of purchase for warranty validation.
Fabrikant: Artika for living inc