
AMZASA AS9009-5
AMZASA AS9009-5 5-Light Rectangular Kitchen Island Chandelier User Manual
Model: AS9009-5 | Brand: AMZASA
Indledning
This manual provides detailed instructions for the safe installation, operation, and maintenance of your AMZASA AS9009-5 5-Light Rectangular Kitchen Island Chandelier. Please read this manual thoroughly before installation and retain it for future reference.
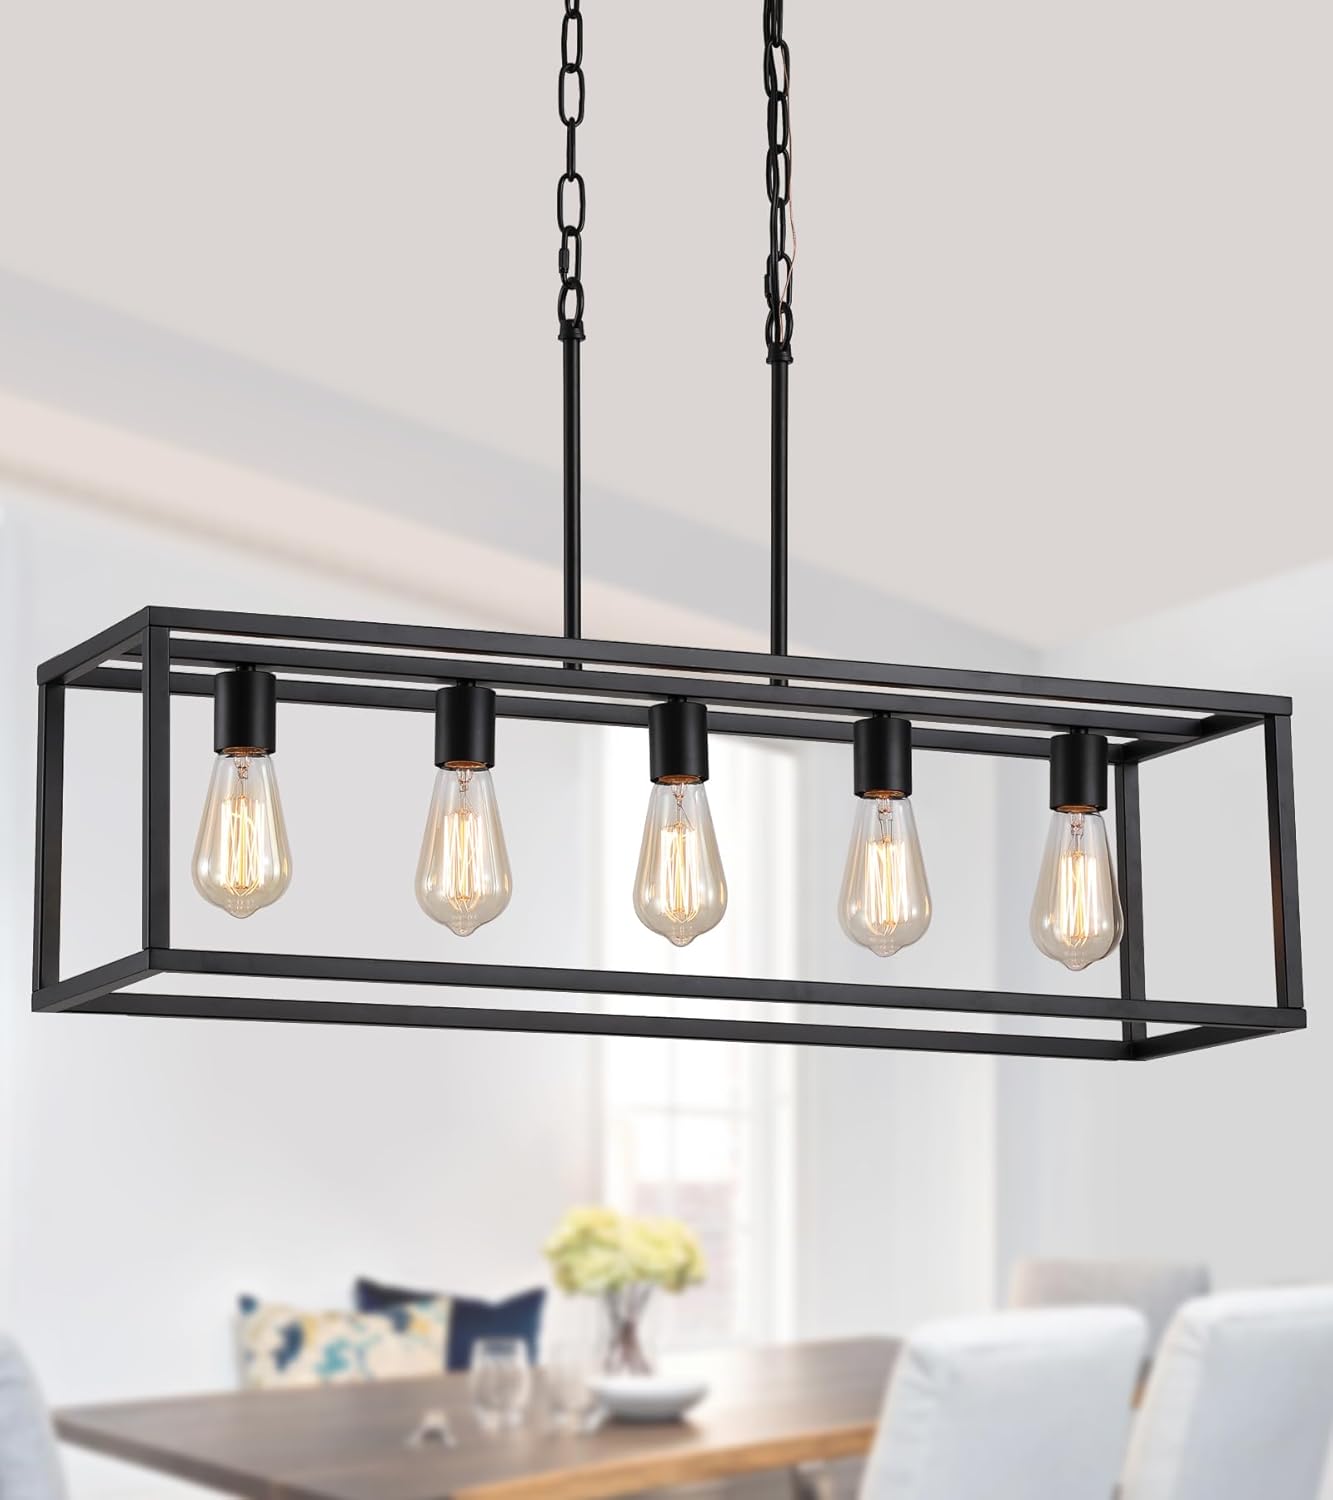
Image: The AMZASA AS9009-5 5-Light Rectangular Kitchen Island Chandelier, featuring a black metal frame and five exposed bulb sockets.
Vigtige sikkerhedsinstruktioner
ADVARSEL: Risiko for elektrisk stød. Afbryd strømmen ved sikringsboksen eller afbryderen før installation eller service.
- Læs alle instruktioner omhyggeligt, før installationen påbegyndes.
- Kontakt en kvalificeret elektriker, hvis du ikke er bekendt med elektriske ledninger.
- Sørg for, at monteringsfladen kan bære armaturets vægt.
- Brug kun den specificerede pæretype og wattage (E26 base, max 60W per bulb, bulbs not included).
- Tilslut ikke denne armatur til et ujordet elektrisk system.
- Forsøg ikke at ændre armaturet på nogen måde.
- Keep flammable materials away from light bulbs.
- Denne lampe er kun beregnet til indendørs brug.
Hvad er der i æsken
Kontroller, at alle komponenter er til stede, før installationen påbegyndes:
- Light Fixture (Rectangular Frame with 5 Sockets)
- Montering overdækning
- Chain (47.24 inches)
- Rods (8.7 inches, quantity as needed for hanging)
- Installationshardware (skruer, trådmøtrikker osv.)
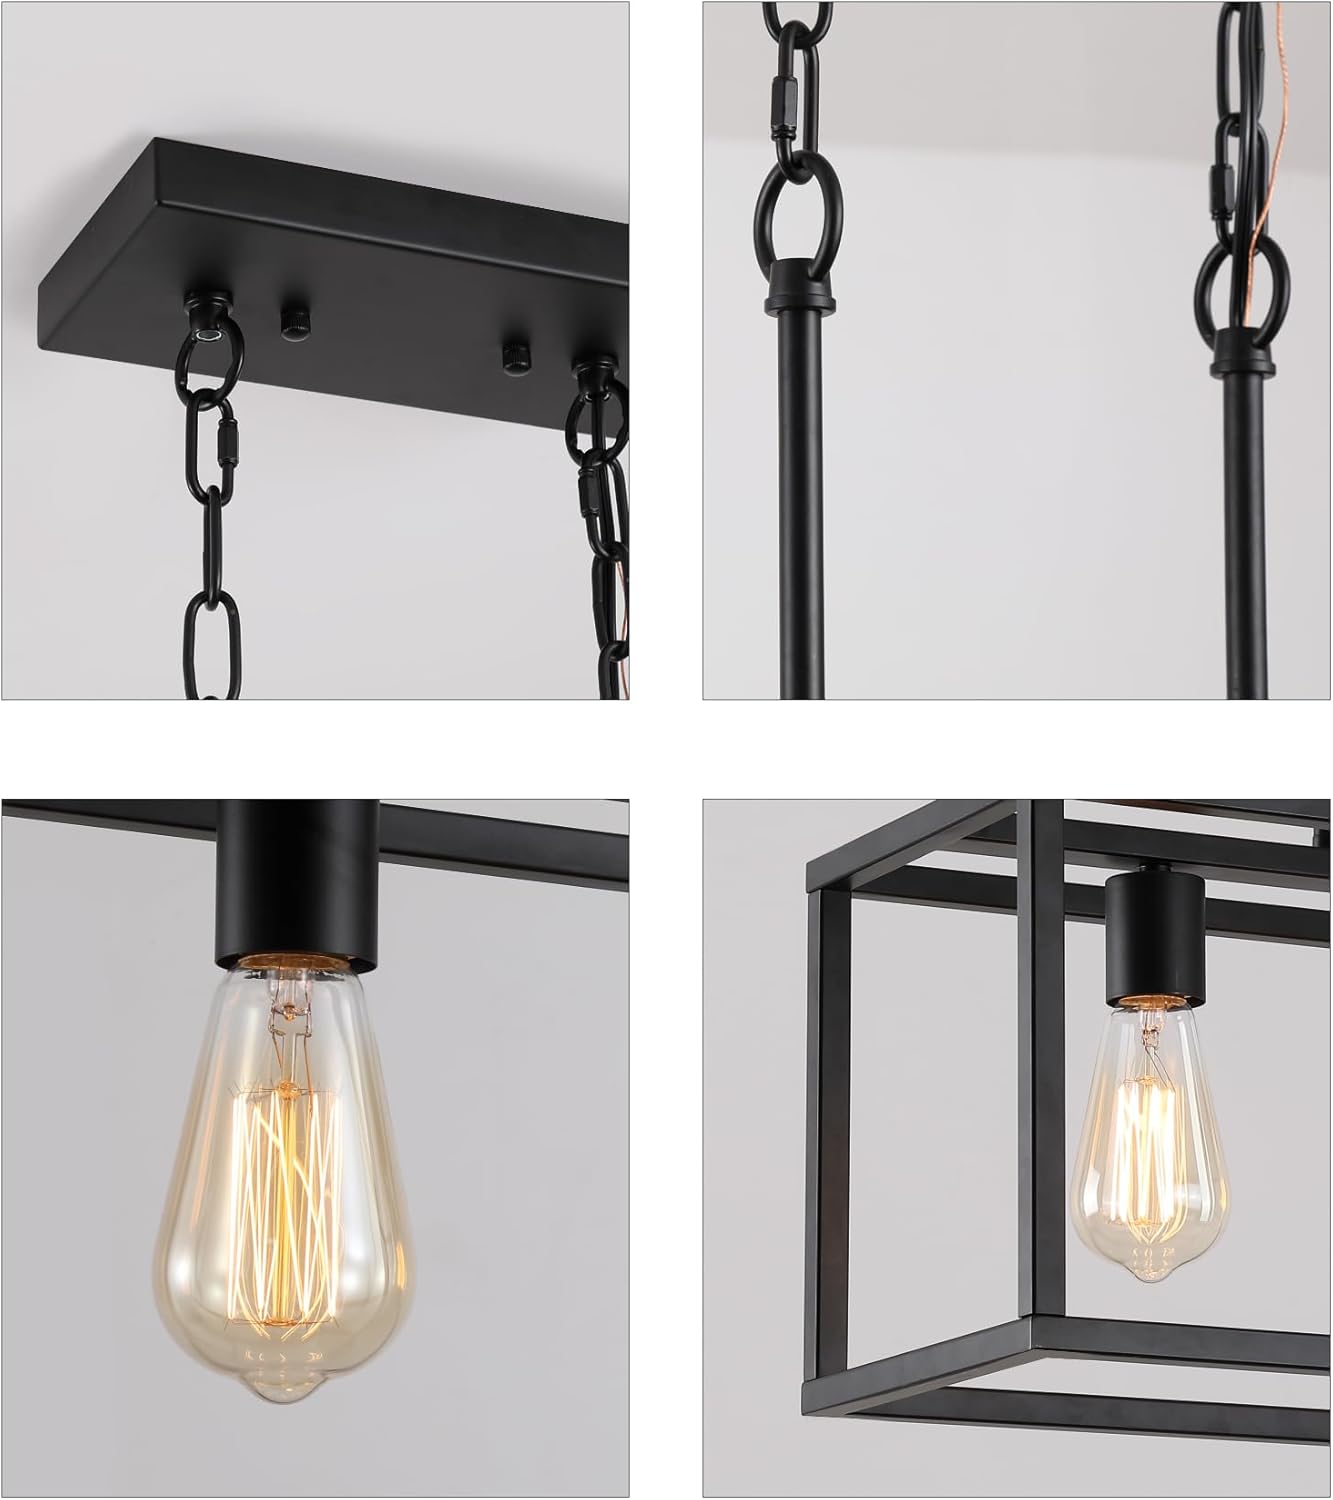
Billede: Detaljeret view of the chandelier's components, including the ceiling canopy, hanging chain, bulb socket, and the corner joint of the metal frame.
Installationsvejledning
- Sluk for strømmen: Før du starter, skal du sørge for, at strømforsyningen til installationsområdet er helt afbrudt ved afbryderen eller sikringsskabet.
- Prepare the Fixture Frame: The fixture frame may come in a loose pack. Secure the four rods (if provided separately) to form the rectangular frame.
- Bestem hængende højde: Adjust the length of the chain and rods to achieve your desired hanging height. The maximum height is 66.7 inches (including 8.7-inch rods and 47.24-inch chains).
- Monter baldakinen: Attach the mounting bracket to the junction box in the ceiling. Then, connect the rods and chains to the canopy.
- Ledningsforbindelser:
- Connect the fixture's ground wire (usually bare copper or green) to the house ground wire.
- Connect the fixture's hot wire (usually black) to the house hot wire (black).
- Connect the fixture's neutral wire (usually white) to the house neutral wire (white).
- Fastgør alle forbindelser med ledningsmøtrikker og elektrisk tape.
- Sikre armaturet: Carefully lift the fixture and attach the canopy to the mounting bracket, securing it with the provided screws.
- Installer pærer: Screw five E26 base bulbs (max 60W each, not included) into the sockets.
- Gendan strøm: Når installationen er færdig, og alle forbindelser er sikre, skal strømmen genoprettes ved afbryderen.

Image: Diagram illustrating the dimensions of the AMZASA AS9009-5 chandelier, including length (32.7"), width (8.7"), frame height (9.85"), and maximum hanging height (66.7").
Betjeningsvejledning
The AMZASA AS9009-5 chandelier operates via a standard wall switch. Ensure appropriate E26 base bulbs are installed before operation.
- Krav til pære: This fixture requires five E26 base bulbs, with a maximum wattage of 60 watts per bulb. Bulbs are not included.
- Tænd/sluk: Brug din eksisterende vægkontakt til at tænde eller slukke lysekronen.
- Dæmpningsevne: If you wish to use dimmable bulbs, ensure they are compatible with your dimmer switch.

Image: Comparison showing the AMZASA AS9009-5 chandelier with lights on and lights off, demonstrating its appearance in both states.
Pleje og vedligeholdelse
Regelmæssig vedligeholdelse vil bidrage til at bevare din lysekrones udseende og funktionalitet.
- Rensning: Always disconnect power before cleaning. Wipe the fixture with a soft, dry cloth. Do not use abrasive cleaners, polishes, or solvents, as these may damage the finish.
- Udskiftning af pære: Ensure the fixture is off and bulbs have cooled before replacing them. Screw in new E26 base bulbs carefully.
- Inspektion: Kontrollér regelmæssigt alle forbindelser og monteringsudstyr for at sikre, at de forbliver fastgjorte.
Fejlfinding
| Problem | Mulig årsag | Løsning |
|---|---|---|
| Lyset tændes ikke. |
|
|
| Flimrende lys. |
|
|
Produktspecifikationer
| Mærke | AMZASA |
| Modelnavn | AS9009-5 |
| ASIN | B0B2LMVDRG |
| Stil | Modern Industrial Farmhouse Rectangular Linear Chandelier |
| Materiale | Jern |
| Farve | Sort |
| Produktmål (L x B x H) | 32.7" x 8.7" x 66.7" (Max Height) |
| Rammehøjde | 9.85" |
| Antal lys | 5 |
| Pære base | E26 |
| Max Wattage pr. pære | 60 watt |
| Voltage | 110 volt |
| Strømkilde | AC |
| Installationstype | Loftmontering |
| Indendørs/Udendørs brug | Indendørs |
| Varens vægt | 9.2 pund |
| Certificering | UL-listet |
Garanti og support
AMZASA provides a 3-year product maintenance period for this fixture. If you encounter any issues or have questions regarding your AMZASA AS9009-5 chandelier, please contact our customer support.
Our online service is available 24 hours to assist you.
For support, besøg venligst AMZASA Store on Amazon eller se din købsdokumentation for direkte kontaktoplysninger.
Ask a question about this manual
Ask about setup, troubleshooting, compatibility, parts, safety, or missing instructions. Manuals+ will review the question and use this page’s manual context to help answer it.