NinjaABXY B09XM557BR
User Manual: Xbox Controller Charger with Rechargeable Batteries
Model: B09XM557BR | Brand: NinjaABXY
1. Introduktion
This manual provides essential information for the safe and efficient use of your Xbox Controller Charger with Rechargeable Batteries. This product is designed to provide a reliable and convenient power solution for your Xbox controllers, ensuring extended gaming sessions without interruption.
The charger and battery kit are compatible with a wide range of Xbox controllers, including Xbox One, Xbox One S, Xbox One X, Xbox One Elite, Xbox Series S, and Xbox Series X. It features multiple charging input options and intelligent protection mechanisms to safeguard your devices.

Figure 1: The Xbox Controller Charger with three 2550mAh rechargeable batteries and a USB cable. The charging station has two slots for batteries and LED indicators.

Figure 2: This image illustrates the broad compatibility of the rechargeable battery packs with various Xbox controller models, including Xbox One, Xbox One S, Xbox Series X|S, and Xbox One Elite.
2. Hvad er inkluderet
Kontroller venligst pakkens indhold for at sikre, at alle varer er til stede:
- 3 x 2550 mAh Rechargeable Battery Packs for Xbox Controller
- 1 x Dual Charging Base
- 1 x Type-C ladekabel
- 1 x Brugermanual (dette dokument)
3. Specifikationer
| Feature | Detalje |
|---|---|
| Batterikapacitet | 2550 mAh per battery |
| Genopladningscyklusser | Over 2000 gange |
| Opladningstid | Cirka 2.5 timer for fuld opladning |
| Spilletid pr. opladning | Op til 25 timer |
| Input bindtage | 5 volt |
| Strømudgang | 18 watt |
| Opladningsporte | USB, Micro USB, Type-C |
| Kompatibilitet | Xbox One, Xbox One S, Xbox One X, Xbox One Elite, Xbox Series S, Xbox Series X controllers |
| Dimensioner (pakke) | 14.71 x 12.19 x 3.4 cm |
| Vægt (pakke) | 290 gram |

Figure 3: This graphic highlights the large capacity of the 2550mAh batteries, indicating a 2.5-hour charge time for approximately 25 hours of use.
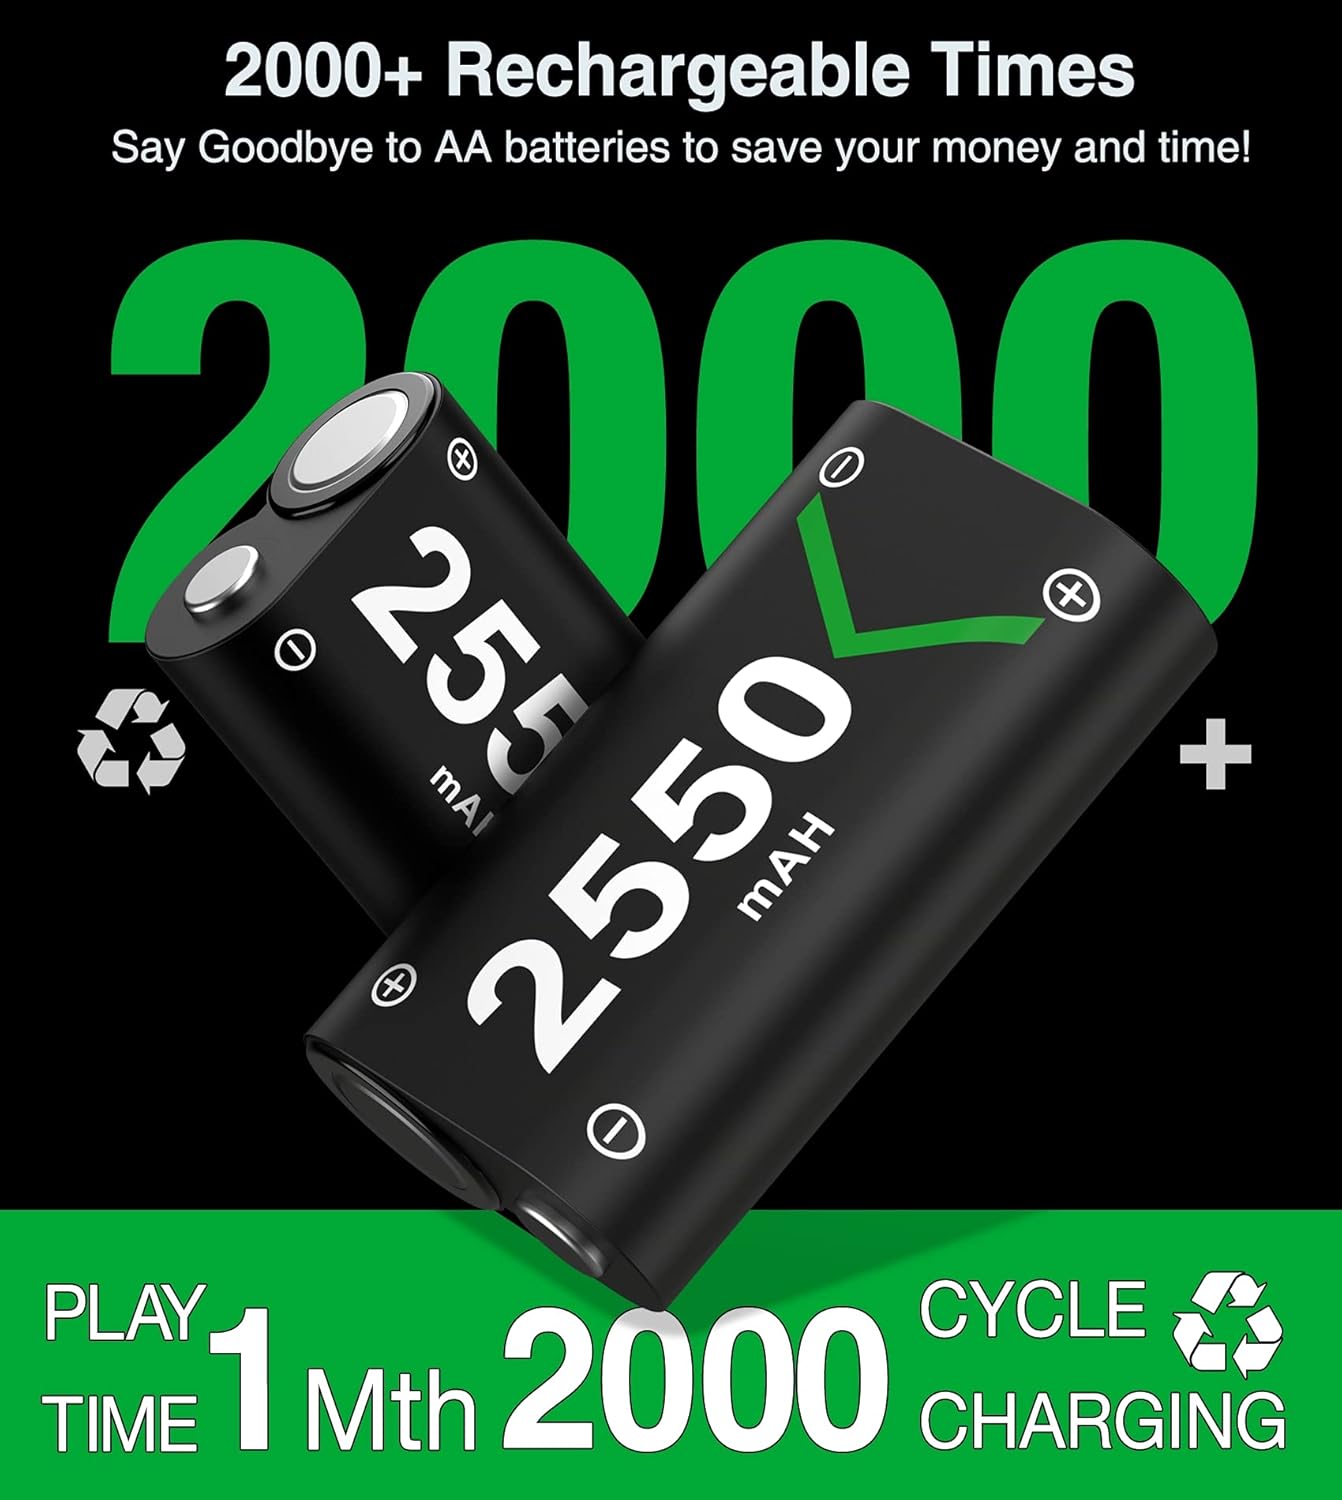
Figure 4: This image emphasizes the durability of the batteries, stating they can be recharged over 2000 times, offering long-term value.
4. Opsætningsvejledning
Follow these steps to set up your Xbox Controller Charger and batteries:
- Pak indholdet ud: Carefully remove all items from the packaging and ensure nothing is missing.
- Tilslut ladestationen:
Connect the provided Type-C charging cable to the charging station. The station offers multiple input options for convenience:
- Standard USB port (Type-A)
- Micro USB port
- Type-C port
Plug the other end of the cable into a compatible USB power source (e.g., Xbox console, USB wall adapter, PC USB port).

Figure 5: The charging station provides three optional charging input methods: standard USB, Type-C, and Micro USB, offering flexibility for power connection.
- Sæt batterier i controllere: Open the battery compartment of your Xbox controller. Insert one of the 2550 mAh rechargeable battery packs, ensuring correct polarity. Close the battery compartment cover.
- Place Batteries in Charging Station: If the batteries are not in a controller or need charging, place them into the designated charging slots on the dual charging base. Ensure they are seated correctly.
5. Betjeningsvejledning
5.1 Opladningsproces
The charging station features clear LED indicators to show the charging status of each battery:
- Rødt lys: Angiver, at batteriet oplades i øjeblikket.
- Grønt lys: Indikerer, at batteriet er fuldt opladet.
- Gray Light: Indicates auto shutoff or no battery detected.
A full charge typically takes about 2.5 hours. Once fully charged, the LED will turn green, and the smart charging protection will prevent overcharging.

Figure 6: The charging station's LED indicators clearly show the charging status: red for charging, green for fully charged, and gray for auto shutoff.
5.2 Batteriforbrug
Each fully charged 2550 mAh battery pack provides up to 25 hours of continuous playtime, depending on controller usage and game intensity. With three battery packs included, you can always have a charged spare ready for uninterrupted gaming.
6. Vedligeholdelse
6.1 Rengøring
- Always disconnect the charging station from the power source before cleaning.
- Use a soft, dry cloth to wipe the charging station and battery packs.
- Do not use liquid cleaners, aerosols, or abrasive materials, as these may damage the product.
6.2 Opbevaring
- Opbevar opladeren og batterierne et køligt og tørt sted, væk fra direkte sollys og ekstreme temperaturer.
- Avoid storing batteries in a completely discharged state for extended periods, as this can reduce their lifespan. Charge them periodically if not in use.
6.3 Pleje af batterier
- Batteripakkerne må ikke skilles ad, punkteres eller ændres.
- Avoid exposing batteries to water or fire.
- Bortskaf gamle eller beskadigede batterier i henhold til lokale regler.
7. Fejlfinding
If you encounter any issues with your charger or batteries, please refer to the following common problems and solutions:
| Problem | Mulig årsag/løsning |
|---|---|
| Battery not charging (LED is off or gray) |
|
| Battery LED remains red after extended charging |
|
| Short battery life after full charge |
|
| Controller not recognizing battery |
|

Figure 7: The internal circuitry of the charging station includes multiple safety protections such as over-heated, over-voltage, og kortslutningsbeskyttelse for at sikre sikker opladning.
8. Garantioplysninger
This product is covered by a standard manufacturer's warranty. Please refer to the packaging or the manufacturer's official webwebstedet for specifikke garantivilkår og -betingelser, herunder detaljer om varighed og dækning. Gem dit købsbevis til garantikrav.
9. Kundesupport
For technical assistance, troubleshooting beyond this manual, or warranty inquiries, please contact the manufacturer, NinjaABXY, through their official customer support channels. You may also contact the retailer from whom you purchased the product for assistance.
Please have your product model number (B09XM557BR) and purchase date ready when contacting support.
Ask a question about this manual
Ask about setup, troubleshooting, compatibility, parts, safety, or missing instructions. Manuals+ will review the question and use this page’s manual context to help answer it.