
Vigtige sikkerhedsoplysninger
Please read these instructions carefully before installation. If you do not understand these instructions or have doubts about the safety of the installation, please contact a qualified installer. The manufacturer is not liable for damage or injury caused by incorrect assembly or use.
- Vægt kapacitet: Do not exceed the maximum weight capacity specified for your model. Overloading can result in serious injury or property damage.
- Vægstruktur: The wall mount must be securely attached to a suitable wall structure. Do not install on drywall alone. Ensure the mounting surface can safely support the combined weight of the mount and the television.
- VESA-kompatibilitet: Verify your TV's VESA mounting pattern (hole spacing) is compatible with this mount.
- Børn: Hold børn væk fra installationsområdet. Små dele kan være en kvælningsfare.
- Værktøjer: Brug passende værktøjer til installation.
Produktkompatibilitet
This instruction manual covers two models of PERLESMITH Full Motion TV Wall Mounts, PSMFK7 and PSMFK1. Please identify your model and confirm your television's specifications before proceeding with installation.
Model PSMFK7
- Skærmstørrelseskompatibilitet: De fleste 26-55 tommer tv'er.
- Vægt kapacitet: Op til 31.7 kg.
- VESA-mønstre: 100x100mm to 400x400mm.

Figure 1: PSMFK7 Model Compatibility Overview. This image illustrates the supported screen sizes (26-55 inches), maximum weight capacity (70 lbs), and VESA mounting patterns (100x100mm to 400x400mm) for the PSMFK7 TV wall mount.
Model PSMFK1
- Skærmstørrelseskompatibilitet: De fleste 26-60 tommer tv'er.
- Vægt kapacitet: Op til 35 kg.
- VESA-mønstre: Up to 400x400mm (16x16 inches).

Figure 2: PSMFK1 Model Compatibility and Wall Types. This image details the wide compatibility of the PSMFK1 model, supporting TVs up to 60 inches and various VESA patterns. It also indicates suitability for single wood stud, brick, and concrete walls.
Confirm Before Purchase
Før købasing or installing, ensure your TV meets the following criteria:
- TV vægt: Your TV's weight is within the mount's capacity (70 lbs for PSMFK7, 77 lbs for PSMFK1).
- TV størrelse: Your TV's screen size is within the recommended range (26-55" for PSMFK7, 26-60" for PSMFK1).
- VESA mønster: Your TV's VESA mounting holes match one of the supported patterns.
- Vægtype: Your wall is suitable for installation (single wood stud, concrete, or brick).
- Cable Blockage: Ensure the mounting holes on your TV do not block any cables or inputs.

Figure 3: Pre-Purchase Confirmation Checklist. This image provides a visual summary of essential checks to perform before installing the TV mount, including TV weight, size, VESA, wall type, and potential cable interference.
Hvad er inkluderet
Carefully unpack the box and ensure all parts are present and undamaged. If any parts are missing or damaged, do not attempt to install. Contact customer service for assistance.
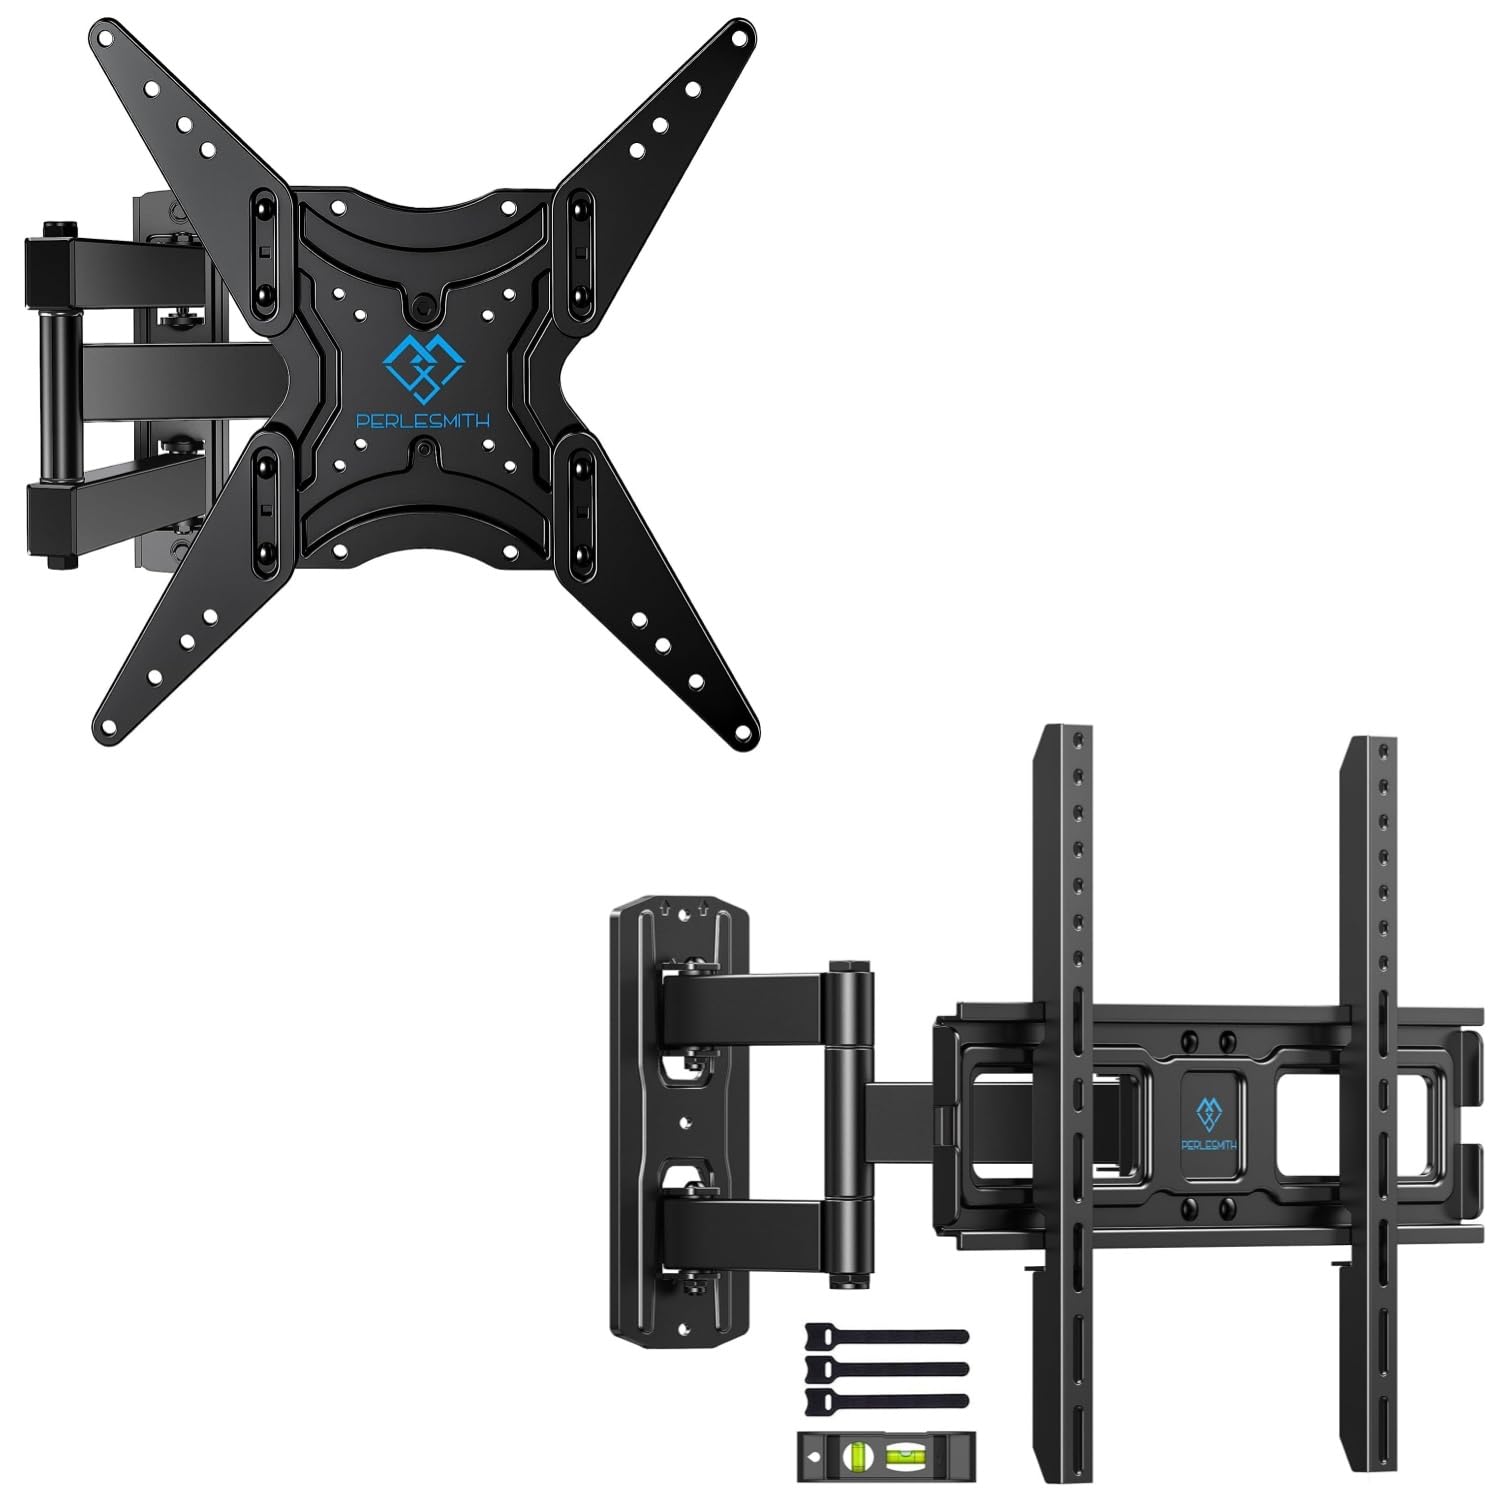
Figure 4: Package Contents. This image displays the main components of the PERLESMITH full motion TV wall mount kit, including the mount assembly, a bubble level for installation, and cable ties for cable management.
Typisk pakkeindhold:
- Fuld bevægelsesfri TV-vægbeslag
- TV-beslag (x2)
- Monteringssæt (forskellige skruer, skiver, afstandsstykker, ankre)
- Boble niveau
- Kabelbinder (x3)
- Instruktionsmanual
Opsætning og installation
Proper installation is crucial for the safety and stability of your TV. Follow these steps carefully.
Før du begynder
- Gather all necessary tools (e.g., drill, stud finder, level, screwdriver, tape measure).
- Ensure you have a clear, safe workspace.
- Confirm your TV and wall meet the compatibility requirements.
Wall Type Considerations
Denne beslag er designet til montering på:
- Single Wood Stud: Locate the center of the wood stud using a stud finder.
- Solid Concrete Wall: Requires a masonry drill bit and concrete anchors.
- Murstensvæg: Requires a masonry drill bit and brick anchors.
ADVARSEL: Do not install this TV mount on drywall alone. Drywall cannot support the weight of the mount and TV.
Generelle installationstrin
- Fastgør TV-beslag til TV'et: Secure the vertical TV brackets to the back of your television using the appropriate screws, washers, and spacers from the hardware kit. Ensure the brackets are centered and level.
- Bestem vægpladens position: Hold the wall plate against the wall at your desired viewing height. Use the included bubble level to ensure it is perfectly horizontal. Mark the drilling locations.
- Bor pilothuller: Drill pilot holes at the marked locations. For wood studs, drill directly. For concrete or brick, use a masonry bit and insert concrete/brick anchors.
- Sikker vægplade: Fastgør vægpladen til væggen med hængselboltene og skiverne. Spænd den godt fast, men overspænd den ikke.
- Hæng TV på vægpladen: Carefully lift the TV (with brackets attached) and hook the brackets onto the wall plate. Ensure the TV is securely seated.
- Sikker montering af TV: Use the safety screws or locking mechanisms on the TV brackets to secure the TV to the wall mount, preventing accidental dislodgement.

Figure 5: Centering Your TV. This image demonstrates a TV mounted centrally on a wall, providing a visual guide for optimal placement above a feature like a fireplace.

Figure 6: Corner Mounting Example. This image illustrates how the full motion design allows for effective TV placement in a room corner, maximizing viewing vinkler.
Betjeningsjusteringer
Fuld bevægelsesdesignet giver mulighed for fleksibel viewing angles. Adjustments can be made after installation.
- Vip: The TV can be tilted +5° upwards to -15° downwards to reduce glare or optimize viewing from different heights. Loosen the tilt knobs on the TV brackets, adjust to the desired angle, and re-tighten.
- Drejelig: The articulating arm allows the TV to swivel up to +/-90° (180° total range) left or right, depending on TV size and wall distance. Gently push or pull the TV to the desired angle.
- Udvidelse/tilbagetrækning: The mount can extend the TV up to 19.17 inches (48.7 cm) from the wall for optimal viewing or retract it back to 3.2 inches (8.1 cm) for a low-profile se.
- Nivellering: After installation, the TV can be leveled +/-3° to correct any minor misalignments. Loosen the leveling screws, adjust, and re-tighten.

Figure 7: Full Motion Adjustments. This image visually explains the tilt, extension, swivel, and leveling features of the TV mount, demonstrating the range of motion available for optimal viewing.
Opretholdelse
Regelmæssig vedligeholdelse sikrer levetiden og sikker drift af dit TV-vægbeslag.
- Rensning: Tør holderen af med en blød, tør klud for at fjerne støv. Undgå slibende rengøringsmidler eller opløsningsmidler.
- Tjek forbindelser: Kontrollér regelmæssigt alle skruer og forbindelser for at sikre, at de forbliver stramme og sikre. Spænd efter om nødvendigt.
- Undersøg for skader: Regularly inspect the mount for any signs of wear, corrosion, or damage. If any issues are found, discontinue use and contact customer support.
Fejlfinding
Hvis du støder på problemer under eller efter installationen, kan du se følgende almindelige problemer og løsninger.
| Problem | Mulig årsag | Løsning |
|---|---|---|
| TV'et er ikke i vater efter installation. | Mindre forskydning under installationen. | Use the +/-3° leveling adjustment feature. Loosen leveling screws, adjust, and re-tighten. |
| Mount feels loose or unstable. | Screws not fully tightened; incorrect wall anchors used; wall structure insufficient. | Ensure all mounting screws are securely tightened. Verify correct anchors for your wall type. If the wall is insufficient, consult a professional. |
| Vanskeligheder med at justere hældning eller drejning. | Justeringsknapper/bolte er for stramme. | Loosen the relevant adjustment knobs or bolts slightly, make the adjustment, then re-tighten to hold the position. |
| TV'et passer ikke til beslaget. | Incorrect TV size, weight, or VESA pattern for the mount model. | Verify your TV's specifications against the mount's compatibility (refer to Product Compatibility section). |
Produktspecifikationer
| Feature | PSMFK7 Model | PSMFK1 Model |
|---|---|---|
| Monteringstype | Vægmontering | |
| Bevægelsestype | Artikulerende, drejelig, vippebar | |
| Kompatible skærmstørrelser | 26 - 55 tommer | 26 - 60 tommer |
| Maksimal vægtkapacitet | 70 lbs (31.7 kg) | 77 lbs (35 kg) |
| VESA-kompatibilitet | 100x100mm til 400x400mm | Op til 400x400 mm |
| Tilt vinkel | +5° / -15° | |
| Drejevinkel | +/-90° (up to 180° total, depending on TV size) | |
| Justering af nivellering | +/-3° | |
| Forlængelse fra væg | 3.2 tommer (tilbagetrukket) til 19.17 tommer (udstrakt) | |
| Materiale | Legeret stål | |
| Kompatible vægtyper | Single Wood Stud, Solid Concrete, Brick Wall | |
Garanti og support
For warranty information or technical support, please refer to the product packaging or contact PERLESMITH customer service directly. Keep your purchase receipt for warranty claims.
If you have any questions or require assistance with installation or operation, please do not hesitate to reach out to our support team.


