
1. Introduktion
The EVTSCAN Peakmeter PM8213C is a portable digital multimeter designed for various electrical measurements. This instrument offers stable performance, high precision, and low power consumption, making it a reliable tool for both professional and DIY users. Its compact appearance and comprehensive features ensure accurate readings for voltage, current, resistance, continuity, non-contact voltage (NCV), frequency, and duty cycle.
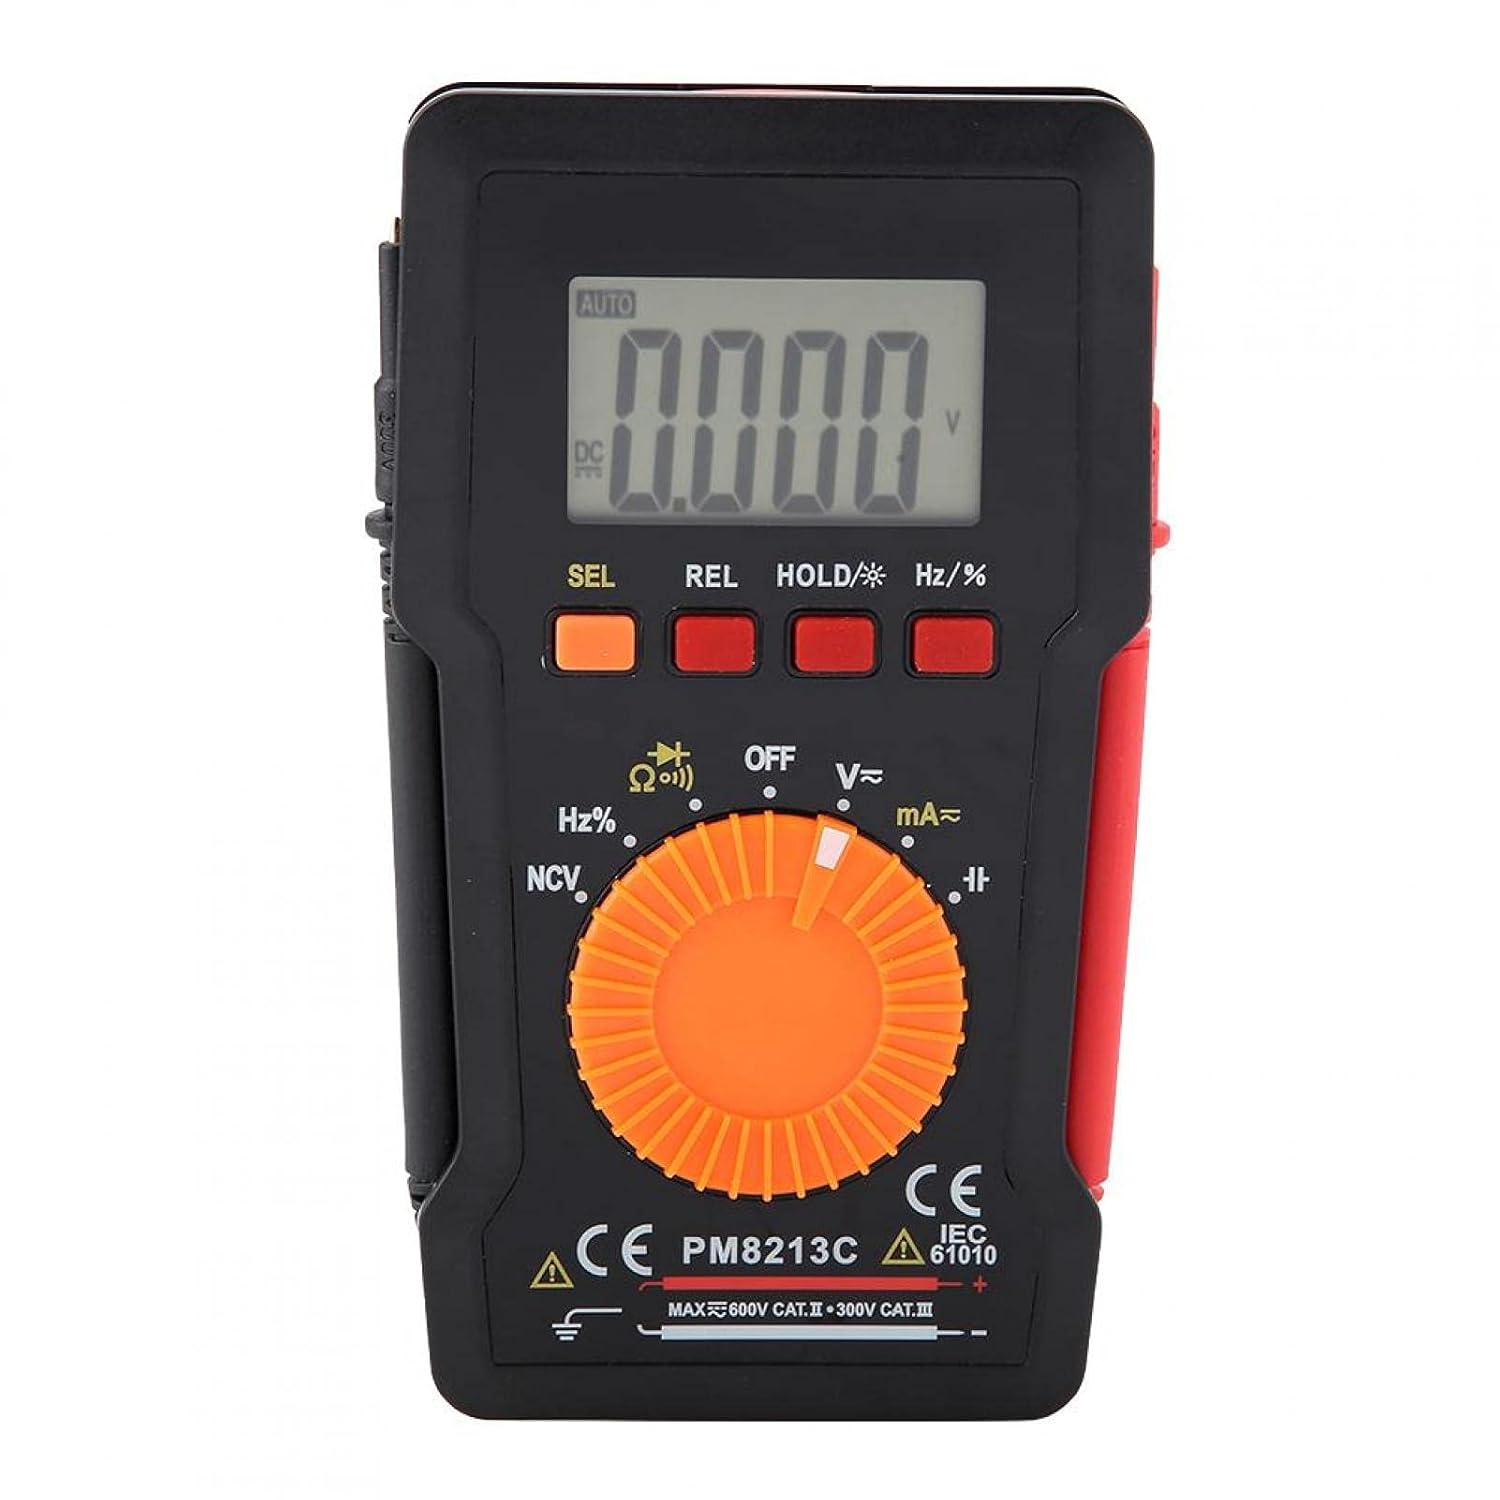
Figur 1: Forside view of the EVTSCAN Peakmeter PM8213C Digital Multimeter.
2. Sikkerhedsoplysninger
To ensure safe operation and service of the meter, please read this manual carefully before use. Failure to observe safety warnings can result in serious injury or death. Always adhere to local and national safety codes.
- Overskrid ikke de maksimale inputgrænser for nogen funktion.
- Vær forsigtig, når du arbejder med voltagover 30V AC RMS, 42V peak eller 60V DC. Disse voluminertages udgør en stødfare.
- Before measuring current, ensure the meter's test leads are connected to the correct input jacks and the function switch is set to the appropriate current range.
- Frakobl altid testledningerne fra kredsløbet, før funktionskontaktens position ændres.
- Udskift batteriet med det samme, når indikatoren for lavt batteri vises, for at sikre nøjagtige aflæsninger.
- Brug ikke måleren, hvis den ser beskadiget ud, eller hvis beskyttelsespladerneasing er fjernet.
- Hold hænder og fingre bag probebarriererne under målingerne.
3. Produktet er slutview
3.1. komponenter
The PM8213C multimeter consists of the following main components:
- LCD-skærm: Viser måleaflæsninger, enheder og funktionsindikatorer.
- Funktionsknapper: SEL (Select), REL (Relative), HOLD (Data Hold), Hz/% (Frequency/Duty Cycle).
- Drejekontakt: Used to select the desired measurement function (e.g., V~, V-, Ω, Continuity, NCV, Hz%, mA~, A~).
- Indgangsstik: Terminals for connecting test leads (COM, VΩHz, mA, A).
- Prøveemner: Red and black leads for connecting to the circuit under test.
- Beskyttelsesetui: Provides protection for the meter.

Figure 2: Key features of the PM8213C Multimeter, including LCD screen and compact design.
3.2. Vis symboler
Familiarize yourself with the symbols that may appear on the LCD display:
- BIL: Auto-ranging mode is active.
- DC/AC: Direct Current / Alternating Current.
- V: Volt (bindtagog).
- Ω: Ohms (Resistance).
- hz: Hertz (Frequency).
- %: Driftscyklus.
- NCV: Non-Contact Voltage afsløring.
- HOLDE: Data Hold function is active.
- REL: Relativ måletilstand.
- Batterisymbol: Indikerer lav batteristrøm.
- OOL: Over-range indication.
4. Opsætning
4.1. Batteriinstallation
The PM8213C requires one CR2032 (3V) button cell battery for operation. The battery is typically not included in the package.
- Sørg for, at multimeteret er slukket.
- Find batterirummet på bagsiden af måleren.
- Use a suitable tool (e.g., a small screwdriver) to open the battery compartment cover.
- Insert the CR2032 battery, observing the correct polarity (+ and - markings).
- Sæt batterirummets dæksel på igen og fastgør det.
4.2. Tilslutning af testledning
Connect the test leads to the appropriate input jacks before taking any measurements.
- Tilslut sort testledning til KOM (fælles) indgangsstik.
- For de fleste målinger (volumentage, resistance, frequency, duty cycle, continuity), connect the rød testledning til VΩHz indgangsstik.
- For current measurements (mA), connect the rød testledning til mA indgangsstik.
- For higher current measurements (A), connect the rød testledning til A input jack (if available and distinct from mA). Note: The PM8213C typically uses a single current input for mA/A, check the dial for specific ranges.
5. Betjeningsvejledning
5.1. Tænd/sluk
To turn the multimeter ON, rotate the function switch from the OFF position to any desired measurement function. To turn the multimeter OFF, rotate the function switch to the OFF position. The meter features an automatic power-off function after approximately 30 minutes of inactivity to conserve battery life.
5.2. Funktionsvalg
Use the rotary switch to select the primary measurement function. For functions with multiple modes (e.g., AC/DC voltage, continuity/diode), press the SEL button to toggle between modes.
5.3. Måling af DC-volumentage (V-)
- Tilslut den røde testledning til VΩHz-stikket og den sorte testledning til COM-stikket.
- Set the rotary switch to the V- position.
- Tilslut testledningerne parallelt med DC-volumentage source or component you wish to measure.
- Læs bindtage -værdi på LCD -displayet.
5.4. Måling af AC Voltage (V~)
- Tilslut den røde testledning til VΩHz-stikket og den sorte testledning til COM-stikket.
- Set the rotary switch to the V~ position.
- Tilslut testledningerne parallelt med AC-volumentage-kilde eller komponent.
- Læs bindtage -værdi på LCD -displayet.
5.5. Måling af modstand (Ω)
- Sørg for, at kredsløbet er spændingsløst, før du måler modstanden.
- Tilslut den røde testledning til VΩHz-stikket og den sorte testledning til COM-stikket.
- Indstil drejekontakten til Ω-positionen.
- Tilslut testledningerne på tværs af den komponent, hvis modstand du vil måle.
- Aflæs modstandsværdien på LCD-displayet.
5.6. Kontinuitetstest (Ω))))
- Sørg for, at kredsløbet er spændingsløst.
- Tilslut den røde testledning til VΩHz-stikket og den sorte testledning til COM-stikket.
- Set the rotary switch to the Continuity position (often shared with Resistance or Diode). Press SEL if needed to select continuity.
- Tilslut testledningerne på tværs af komponenten eller ledningen.
- Hvis der er kontinuitet (lav modstand), vil måleren udsende et hørbart bip.
5.7. Non-Contact Voltage (NCV) Detektion
- Indstil drejekontakten til NCV-positionen.
- Move the top edge of the multimeter close to the conductor suspected of having AC voltage.
- Måleren vil indikere tilstedeværelsen af AC-volumentage through an audible beep and/or visual indicator (e.g., LED).
5.8. Measuring Frequency (Hz) and Duty Cycle (%)
- Tilslut den røde testledning til VΩHz-stikket og den sorte testledning til COM-stikket.
- Set the rotary switch to the Hz/% position.
- Tilslut testledningerne parallelt med signalkilden.
- Tryk på Hz /% button to toggle between frequency and duty cycle measurements.
- Aflæs værdien på LCD-displayet.
5.9. Measuring Current (mA~, A~)
- ADVARSEL: Never connect the meter in parallel to a voltage source when measuring current. This will blow the fuse and can damage the meter.
- Sørg for, at kredsløbet er spændingsløst.
- Tilslut den sorte testledning til COM-stikket.
- For milliampere (mA) measurements, connect the red test lead to the mA jack. For ampere (A) measurements, connect the red test lead to the A jack (if separate).
- Set the rotary switch to the appropriate mA~ or A~ position.
- Open the circuit where you want to measure current and connect the meter in series with the load.
- Genstart kredsløbet, og aflæs strømværdien på LCD-displayet.
6. Vedligeholdelse
6.1. Rensning
Tør målerens hus af med enamp en klud og et mildt rengøringsmiddel. Brug ikke slibemidler eller opløsningsmidler. Hold indgangsterminalerne fri for snavs og fugt.
6.2. Udskiftning af batteri
When the low battery indicator appears on the display, replace the CR2032 battery promptly to ensure accurate measurements.
- Turn the multimeter OFF and disconnect all test leads.
- Åbn batterirummets dæksel på bagsiden af måleren.
- Fjern det gamle CR2032-batteri.
- Insert a new CR2032 (3V) button cell battery, ensuring correct polarity.
- Luk dækslet til batterirummet forsvarligt.
6.3. Udskiftning af sikring
If the current measurement function stops working, the fuse may need replacement. The fuse specification is F 400mA/250V.
- Turn the multimeter OFF and disconnect all test leads.
- Open the meter's casing (refer to the battery replacement section for access, or consult the full service manual if necessary).
- Locate the blown fuse.
- Carefully remove the old fuse and replace it with a new fuse of the exact same type and rating (F 400mA/250V).
- Reassemble the meter's casing sikkert.
7. Fejlfinding
If the meter does not function correctly, check the following points before seeking service:
- Ingen visning eller svag visning: Kontroller batteriinstallationen og udskift om nødvendigt.
- Forkerte aflæsninger: Ensure test leads are correctly connected to the appropriate input jacks and the rotary switch is set to the correct function and range. Check battery level.
- Strømmåling virker ikke: Check and replace the fuse if blown. Ensure test leads are connected in series with the circuit.
- "OOL" displayed: The measured value exceeds the selected range. Switch to a higher range or ensure the input is within the meter's capabilities.
8. Specifikationer
| Højde | Mindre end 2000 m |
| Driftstemperatur | 0 ~ 40 °C |
| Driftsfugtighed | <80% RH (not considered at <10 °C) |
| Opbevaringstemperatur | -10 ~ 60 °C |
| Opbevaring Fugtighed | <70% RH (remove batteries) |
| Temperaturkoefficient | 0.1 precision/°C |
| Max Tilladt Voltage (Indgang til jord) | 600V DC eller AC rms |
| Sikringsbeskyttelse | F 400mA/250V |
| Sampling Rate | Cirka 3 gange/sekund |
| Automatisk sluk | Cirka 30 minutter |
| Vise | Maximum 3999 counts |
| Over-range-visning | "OOL" |
| Strømforsyning | CR2032 (3V) button cell battery |
| Vægt | Approximately 120 - 142 g |
| Dimensioner (L x B x H) | 127 x 70 x 12.5 mm (ca. 12.8 x 7.5 x 1.3 cm) |
8.1. DC Voltage (PM8213C)
| Rækkevidde | Opløsning | Nøjagtighed |
|---|---|---|
| 4 V | 0.001 V | ±(0.1 % + 3 cifre) |
| 40 V | 0.01 V | ±(0.1 % + 3 cifre) |
| 400 V | 0.1 V | ±(0.1 % + 3 cifre) |
| 600 V | 1 V | ±(0.1 % + 3 cifre) |
8.2. Pakkens indhold
- 1 x Digital Multimeter (PM8213C)
- 2 x testledninger
- 1 x beskyttelsesetui
9. Garanti og support
For garantioplysninger eller teknisk support, kontakt venligst sælgeren eller producenten direkte. Gem din købskvittering som købsbevis.