1. Introduktion
This manual provides essential information for the safe and efficient operation, maintenance, and troubleshooting of your Juki HZL-8370AT Home Electronic Sewing Machine. Please read this manual thoroughly before using the machine and keep it for future reference.
2. Sikkerhedsinstruktioner
- Always unplug the machine from the electrical outlet immediately after using, before cleaning, or when making any user servicing adjustments.
- Do not operate the machine with a damaged cord or plug. If the machine is not working properly, has been dropped, damaged, or dropped into water, return it to the nearest authorized service dealer for examination, repair, electrical or mechanical adjustment.
- Hold fingrene væk fra alle bevægelige dele. Der kræves særlig forsigtighed omkring symaskinens nål.
- Brug altid den rigtige stingplade. Den forkerte plade kan få nålen til at knække.
- Træk eller skub ikke i stoffet under syning. Dette kan afbøje nålen og få den til at knække.
- Brug kun tilbehør, der er anbefalet af producenten, som beskrevet i denne manual.
- Dette apparat er ikke beregnet til brug af personer (inklusive børn) med nedsatte fysiske, sensoriske eller mentale evner, eller mangel på erfaring og viden, medmindre de har fået opsyn eller instruktion i brugen af apparatet af en person, der er ansvarlig for deres sikkerhed.
3. Produktet er slutview
The Juki HZL-8370AT is a versatile home electronic sewing machine designed for various sewing projects. It features 19 stitch types and a robust one-piece metal frame for stability.
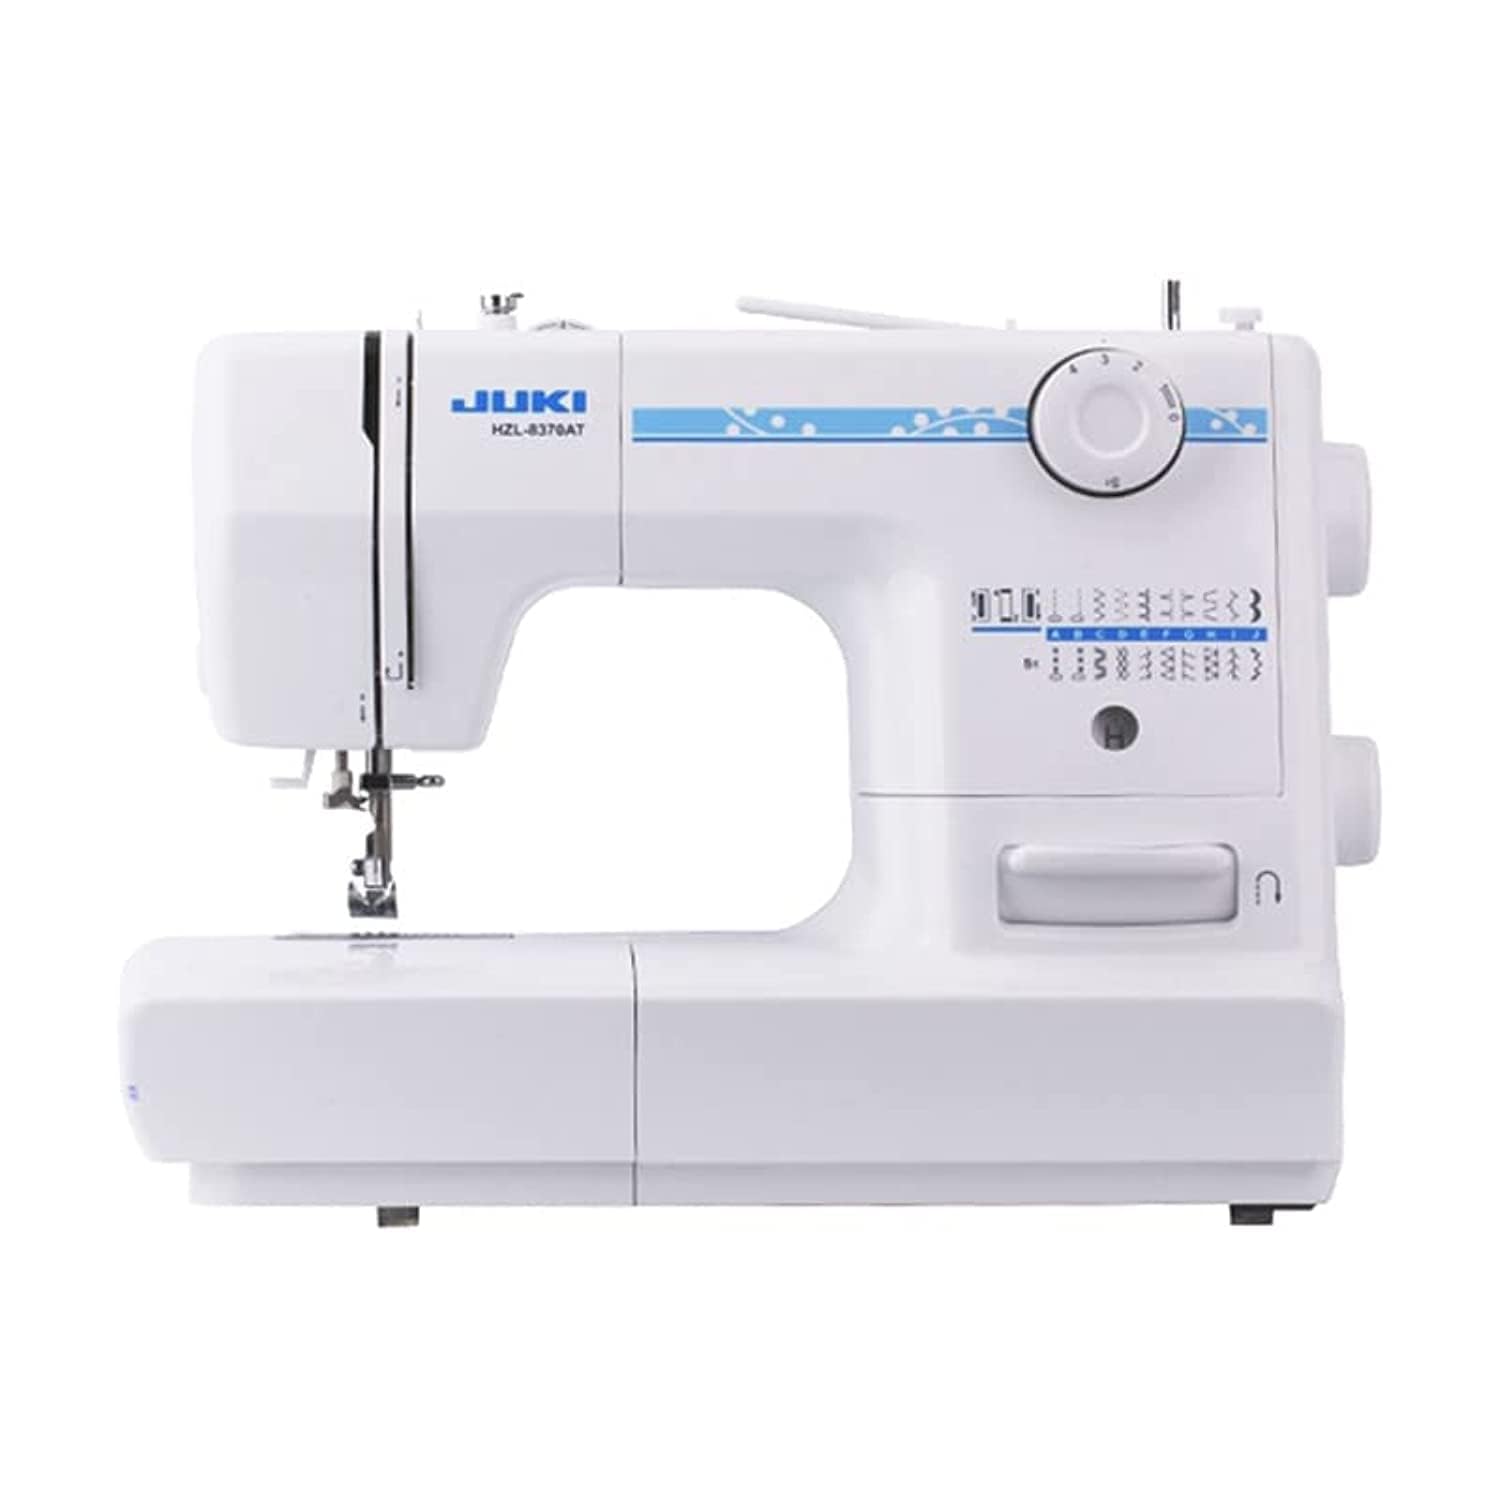
Figur 1: Forside view of the Juki HZL-8370AT Home Electronic Sewing Machine. This image shows the main body of the machine, including the needle area, stitch selection dial, and various controls.
Nøglekomponenter:
- Sømvalgsknap: Bruges til at vælge mellem de 19 tilgængelige stingmønstre.
- Trådspændingsknap: Justerer overtrådens spænding.
- Needle Bar and Presser Foot: Holds the needle and applies pressure to the fabric.
- Spoleopvikler: Til at spole tråd på spolen.
- Håndhjul: Hæver og sænker nålen manuelt.
- Foot Pedal Connector: For connecting the foot pedal to control sewing speed.
4. Opsætning
4.1 Udpakning og placering
- Tag forsigtigt maskinen ud af emballagen.
- Place the machine on a stable, flat surface. Ensure there is adequate space around the machine for comfortable operation.
- Connect the foot pedal and power cord to the machine and then to a suitable electrical outlet.
4.2 Montering af nålen
- Drej håndhjulet mod dig for at hæve nålen til sin højeste position.
- Løsn nålen clamp skrue.
- Sæt en ny nål i med den flade side mod maskinens bagside, og skub den så langt op som muligt.
- Spænd nålen clamp skrue sikkert.
4.3 Spolning af spolen
- Læg en trådrulle på trådrulleholderen.
- Før tråden gennem spolespændingsskiven.
- Placer en tom spole på spolevinderens spindel.
- Vikl tråden rundt om spolen et par gange, og skub derefter spolevindingsspindlen til højre.
- Tryk forsigtigt på fodpedalen for at starte spolningen. Stop, når spolen er fuld.
- Klip tråden over, og før spolevindingsspindlen tilbage til venstre.
4.4 Trådning af maskinen
- Hæv trykfoden og nålen til deres højeste positioner.
- Placer trådspolen på spoleholderen.
- Følg den nummererede trådningssti, der er angivet på maskinen, og sørg for, at tråden passerer gennem alle føringsskinner og trådgiveren.
- Tråd nålen forfra og bagpå.
- Sæt den opviklede spole i spolehuset under stingpladen, og sørg for, at tråden fremføres korrekt.
- Hold the upper thread, turn the handwheel to lower and raise the needle, catching the bobbin thread. Pull both threads under the presser foot and towards the back.
5. Betjeningsvejledning
5.1 Valg af en søm
Turn the Stitch Selection Dial to choose one of the 19 available stitch patterns. Refer to the stitch chart on the machine for visual guidance.

Figure 2: Close-up of the stitch selection dial and various stitch patterns available on the Juki HZL-8370AT. This shows the range of stitches from basic to decorative.
5.2 Justering af stinglængde og -bredde
- The maximum stitch length is 5 mm. Adjust the stitch length dial according to your fabric and desired stitch appearance.
- The maximum stitch width is 7 mm. Adjust the stitch width dial for zigzag or decorative stitches.
5.3 Begynd at sy
- Læg stoffet under trykfoden.
- Sænk trykfodshåndtaget.
- Gently press the foot pedal to start sewing. The sewing speed is up to 800 stitches per minute.
- Før stoffet forsigtigt, træk eller skub ikke.
5.4 Baglæns syning
To reinforce a seam, press and hold the reverse lever/button while sewing. Release it to continue sewing forward.
6. Vedligeholdelse
6.1 Rengøring af maskinen
- Tag altid stikket ud af maskinen før rengøring.
- Fjern stingpladen og spolehuset.
- Brug en lille børste til at fjerne fnug og støv fra transportøren og spoleområdet.
- Tør maskinens yderside af med en blød, tør klud. Brug ikke skrappe kemikalier.
6.2 Skift af nåle
Change the needle regularly, especially if it becomes bent, dull, or if you notice skipped stitches. Refer to section 4.2 for needle installation instructions.
7. Fejlfinding
Almindelige problemer og løsninger:
- Oversprungne sømme: Ensure the needle is inserted correctly and is not bent or dull. Use the correct needle type for your fabric.
- Trådbrud: Check if the machine is threaded correctly, the thread tension is appropriate, and the needle is not damaged. Ensure the thread is not tangled.
- Maskinblokering: Remove any tangled threads from the bobbin area. Ensure the bobbin is wound and inserted correctly.
- Ujævne sting: Adjust the thread tension. Ensure the fabric is fed evenly without pulling.
Hvis problemerne fortsætter efter at have forsøgt disse løsninger, bedes du kontakte kundesupport.
8. Specifikationer
| Feature | Specifikation |
|---|---|
| Model | HZL-8370AT |
| Type | Home Electronic Sewing Machine |
| Antal sting | 19 |
| Maksimal stinglængde | 5 mm |
| Maksimal stingbredde | 7 mm |
| Syhastighed | 800 sting i minuttet |
| Magt | 70 watt |
| Rammemateriale | Metal (one-piece) |
| Farve | Hvid |
| Varens vægt | 6.93 kilo |
| Forsendelsesdimensioner | 42.5 x 35 x 22.5 cm |
| Anbefalede anvendelser | Home sewing, clothing repair, craft projects, textile manufacturing |
| GTIN (UPC) | 06936986883709 |
9. Garanti og support
For warranty information and customer support, please refer to the documentation included with your purchase or visit the official Juki webwebsted. Gem din købsbevis til garantikrav.