1. Introduktion
This manual provides detailed instructions for the safe and effective use of your Pinty 1x30 4 MOA Red/Green Dot Sight. Designed for sporting activities, this sight offers quick target acquisition with its dual-color reticle and robust construction. Please read this manual thoroughly before installation and operation to ensure optimal performance and longevity of your device.
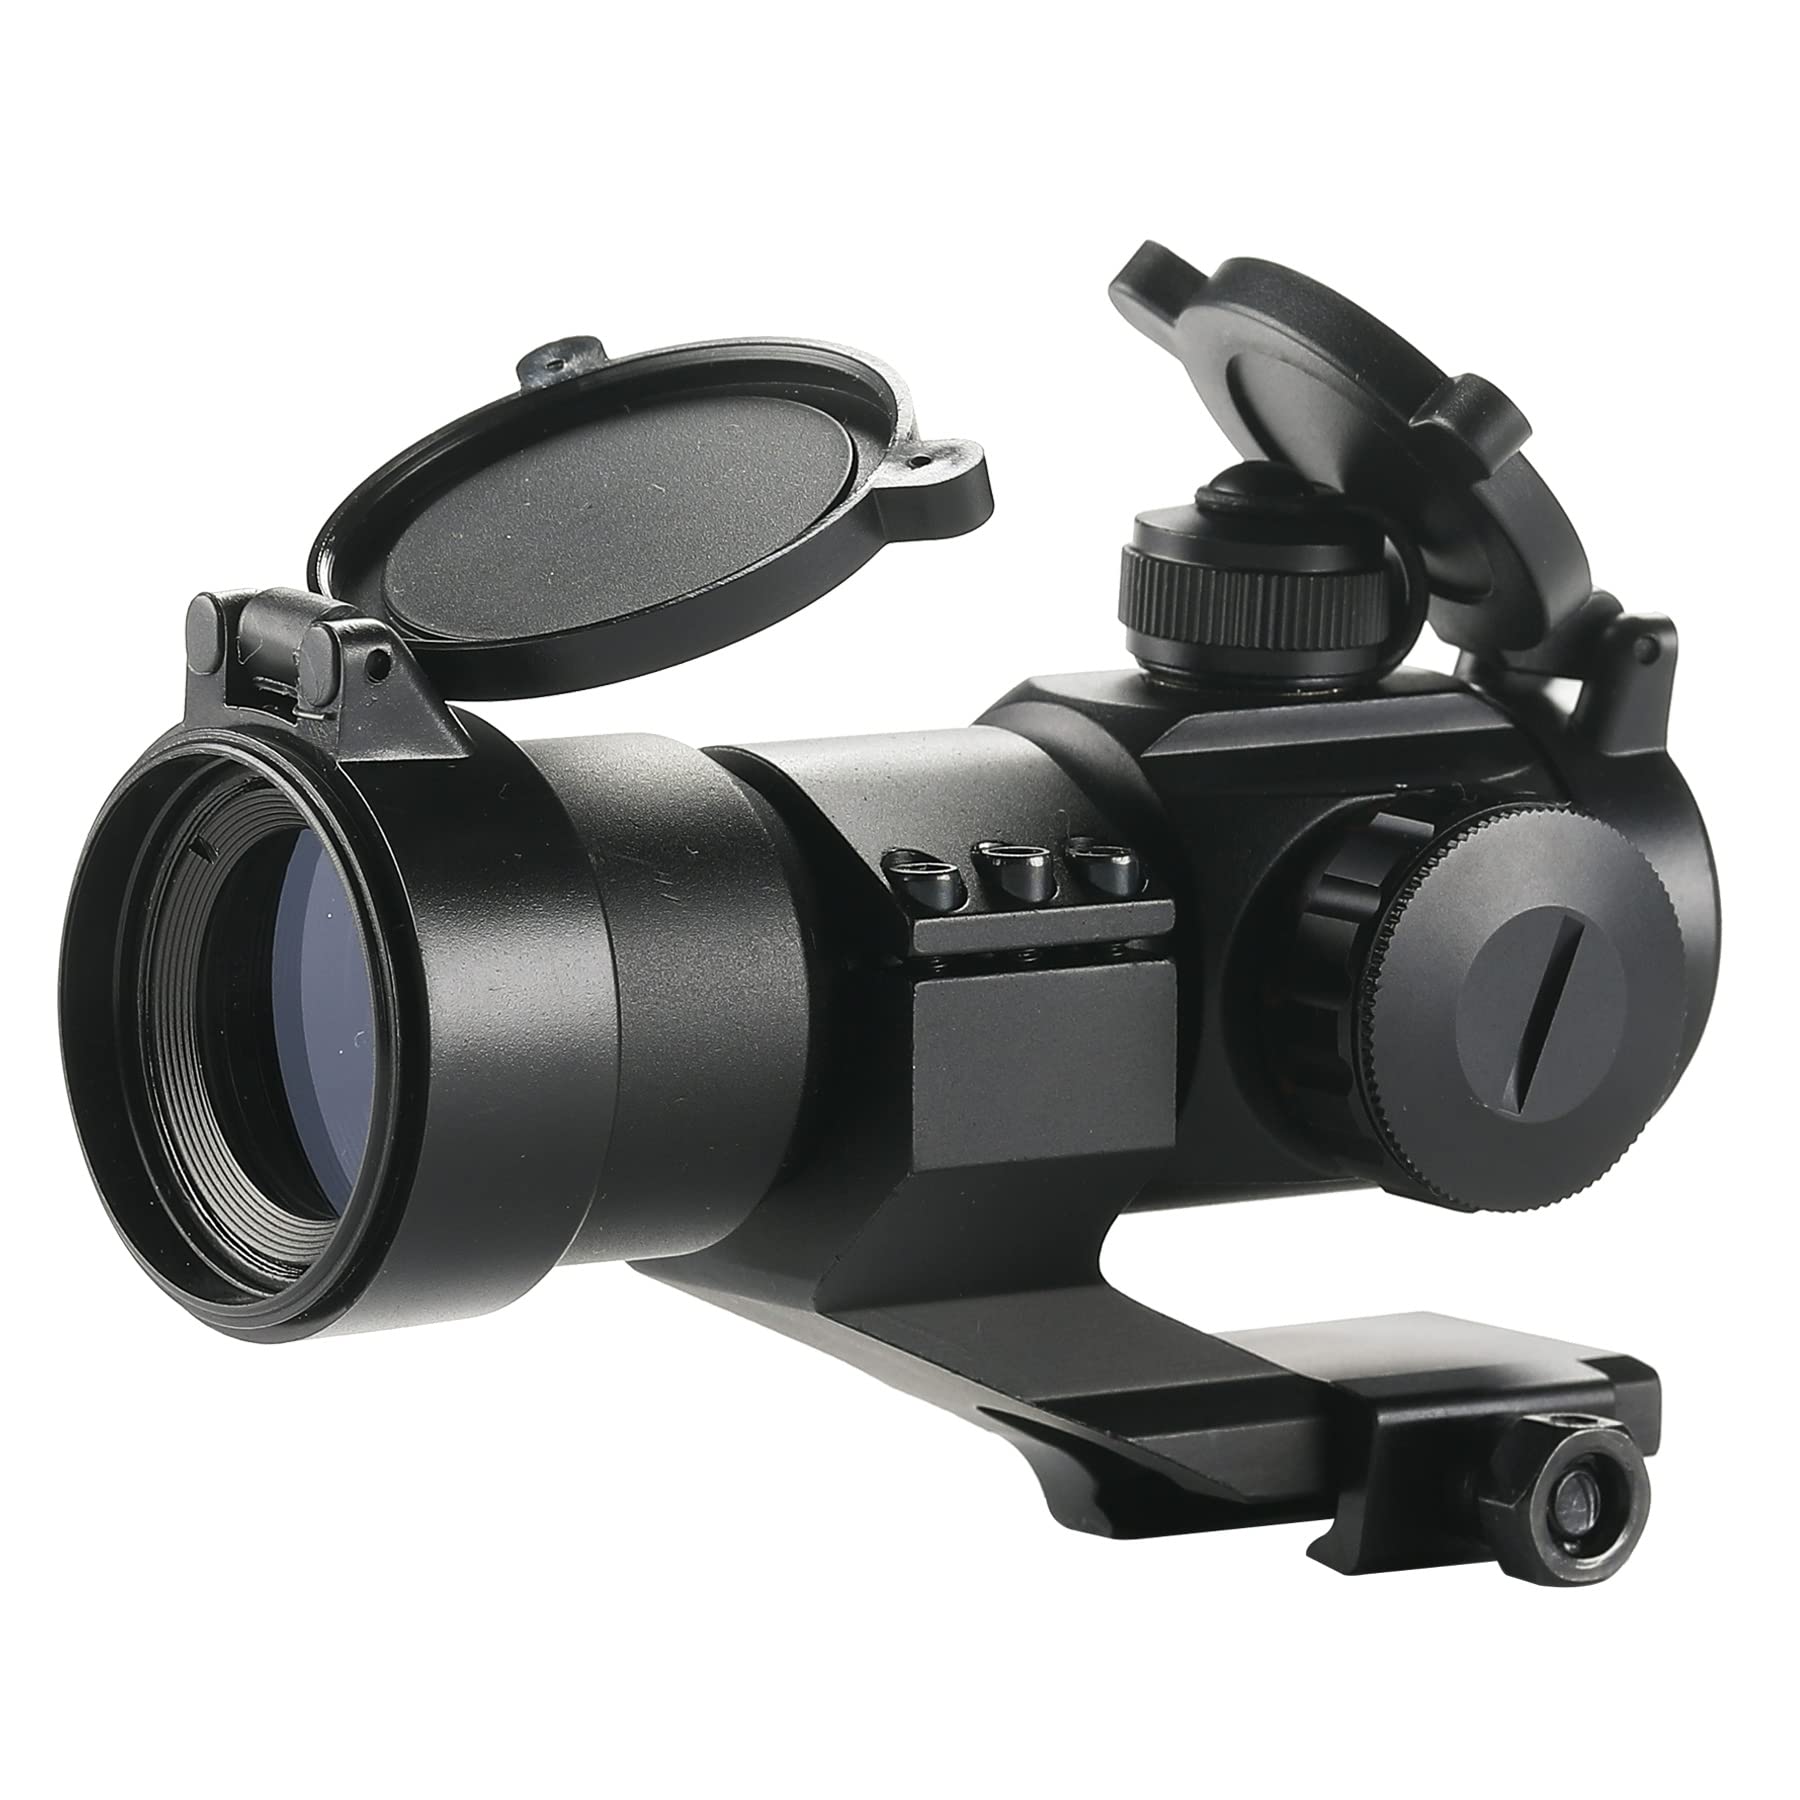
Image: The Pinty 1x30 4 MOA Red/Green Dot Sight, a compact and durable optical device.
2. Sikkerhedsoplysninger
- Always handle the sight and any associated equipment responsibly.
- Never look directly at the sun or any intense light source through the sight, as this can cause permanent eye damage.
- Ensure the sight is securely mounted before use to prevent injury or damage.
- Opbevar batterier utilgængeligt for børn. Søg omgående læge ved indtagelse.
- Do not attempt to disassemble or modify the sight, as this may void the warranty and cause damage.
3. Pakkens indhold
Bekræft at alle varer er til stede i din pakke:
- 1x Pinty 1x30 Red/Green Dot Sight
- 1x unbrakonøgle
- 1x rengøringsklud
- 1x CR2032 batteri
- 1x brugermanual

Image: Contents of the Pinty Red/Green Dot Sight package.
4. Opsætning og installation
4.1 Batteriinstallation
- Locate the battery compartment cap, usually on the side of the illumination dial.
- Skru hætten af mod uret.
- Insert one CR2032 battery with the positive (+) side facing outwards.
- Screw the cap back on clockwise until secure, ensuring a tight seal.
4.2 Mounting the Sight
The Pinty Red/Green Dot Sight is designed for standard 20mm Picatinny and Weaver rails.
- Loosen the mounting screw(s) on the sight's base.
- Align the sight's base with the rail on your device.
- Slide the sight onto the rail until it is in the desired position.
- Tighten the mounting screw(s) firmly using the provided hex wrench to secure the sight. Ensure it is stable and does not wobble.

Image: The Red/Green Dot Sight securely mounted on a Picatinny rail.

Image: Key components of the Pinty Red/Green Dot Sight, showing mounting points and adjustment dials.
5. Betjeningsvejledning
5.1 Power On/Off and Reticle Selection
The sight features a rotary dial on the side for power control and reticle selection.
- Rotate the dial to select between red or green reticle illumination.
- Each color typically has multiple brightness settings (e.g., 3 levels for red, 3 for green). Rotate the dial further to increase or decrease brightness.
- To turn off the sight, rotate the dial to the "OFF" position.
Henstilling: Use the red reticle for low-light conditions or night use, and the green reticle for bright daylight conditions for better visibility.
5.2 Justering af vind- og højdeforskydning
The sight allows for precise adjustments to ensure accuracy. Adjustments are typically 4 MOA per click.
- Højdejustering: Located on the top of the sight. Remove the protective cap, then use a flathead screwdriver or coin to turn the adjustment screw. Turning clockwise typically moves the point of impact down, and counter-clockwise moves it up.
- Windage Justering: Located on the side of the sight. Remove the protective cap, then use a flathead screwdriver or coin to turn the adjustment screw. Turning clockwise typically moves the point of impact right, and counter-clockwise moves it left.
Perform adjustments incrementally and test after each adjustment until the desired accuracy is achieved.
6. Vedligeholdelse
6.1 Rengøring
- Brug den medfølgende rengøringsklud til forsigtigt at tørre linserne af. Undgå at bruge slibende materialer eller stærke kemikalier.
- Til genstridigt snavs kan en lille mængde linserengøringsmiddel beregnet til optik påføres kluden, ikke direkte på linsen.
- Keep the sight body clean by wiping it with a soft, damp klæde.

Image: Illustration of the 5-layer multi-coating on the lenses, designed for optimal light transmission and clear vision.
6.2 Opbevaring
- Always use the spring-loaded flip lens covers when the sight is not in use to protect the lenses from dust and debris.
- Store the sight in a cool, dry place, away from direct sunlight and extreme temperatures.
- If storing for extended periods, it is recommended to remove the battery to prevent leakage.
7. Fejlfinding
- Reticle not appearing or dim:
- Check if the sight is turned on.
- Ensure the battery is correctly installed with the positive (+) side facing out.
- Replace the CR2032 battery if it is low or depleted.
- Clean battery contacts if corroded.
- Inaccurate aiming:
- Verify the sight is securely mounted to the rail and not loose.
- Perform windage and elevation adjustments as described in Section 5.2.
- Fogging on lenses:
- Allow the sight to acclimate to the ambient temperature.
- Ensure lens caps are properly sealed when not in use.
8. Specifikationer
| Model | FAC-RGS-0000-00 |
| Objektiv blænde | 30 mm |
| Forstørrelse | 1x |
| Felt af View | 50 grader |
| Øjnehjælp | Ubegrænset |
| Sigtemiddel Type | 4 MOA Dot (Red/Green) |
| Slutte | Mat sort |
| Strømkilde | 1 x CR2032 batteri (medfølger) |
| Dimensioner (L x B x H) | 130 x 65 x 70 mm (5.12" x 2.56" x 2.75") |
| Vægt | 278 g |
| Skinnekompatibilitet | Standard 20mm Picatinny/Weaver Rails |
| Materiale | Aluminium, metal |
| Holdbarhedsfunktioner | Weather-resistant, Shock-resistant, Corrosion-resistant, Waterproof, Fogproof |

Image: Durability features of the Pinty Red/Green Dot Sight, including resistance to temperature, corrosion, shock, water, and fog.
9. Garanti og support
Pinty products are designed for reliability and performance. For warranty information or technical support, please refer to the official Pinty webwebstedet eller kontakt din forhandler. Gem din købskvittering som købsbevis.