
1. Introduktion
This manual provides essential information for the safe and efficient operation, maintenance, and troubleshooting of your Profile GE Automatic Espresso Machine + Milk Frother. Please read these instructions thoroughly before first use and retain for future reference.

Image 1.1: The Profile GE Automatic Espresso Machine with a prepared espresso and a latte.
2. Sikkerhedsoplysninger
Følg altid grundlæggende sikkerhedsforanstaltninger ved brug af elektriske apparater for at reducere risikoen for brand, elektrisk stød og personskade.
- Ensure the appliance is connected to a grounded outlet.
- Nedsænk ikke maskinen, ledningen eller stikket i vand eller andre væsker.
- Tag stikket ud af stikkontakten, når den ikke er i brug, og før rengøring.
- Brug ikke noget apparat med en beskadiget ledning eller stik.
- Hold hænder og ledninger væk fra varme overflader.
- Brug kun tilbehør anbefalet af producenten.
3. Produktet er slutview
Profile GE Automatic Espresso Machine is designed for convenience and quality, featuring an integrated grinder, milk frother, and smart connectivity.
3.1 Komponenter
- Kontrolpanel: Touch-sensitive buttons for various drink selections and functions.
- Bønnetragt: Stores whole coffee beans for grinding.
- Vandreservoir: Aftagelig tank til vandforsyning.
- Kaffetud: Dispenserer brygget kaffe.
- Dampstang: Til opskumning af mælk.
- Drypbakke: Opsamler overskydende væsker.
- Græsbeholder: Samler brugt kaffegrums op.

Image 3.1: The top control panel with buttons for Espresso, Americano, My Brew, Steam, and Hot Water.

Image 3.2: The integrated bean hopper with whole coffee beans and grind size adjustment knob.

Image 3.3: The removable water reservoir being lifted from the machine.
4. Opsætning
4.1 Udpakning og første placering
- Fjern forsigtigt alle emballagematerialer.
- Placer maskinen på en stabil, plan overflade væk fra varmekilder og direkte sollys.
- Sørg for tilstrækkelig plads omkring maskinen til ventilation og adgang til komponenter.
4.2 Indledende rengøring
Before first use, clean all removable parts with warm water and mild detergent. Rinse thoroughly and dry. Wipe the exterior of the machine with a damp klæde.
4.3 Fyldning af vandbeholderen
- Remove the water reservoir from the machine (refer to Image 3.3).
- Fill with fresh, cold drinking water up to the MAX line.
- Replace the reservoir securely into the machine.
4.4 Tilsætning af kaffebønner
- Open the lid of the bean hopper (refer to Image 3.2).
- Hæld hele kaffebønner i beholderen. Overfyld ikke.
- Luk låget forsvarligt.
4.5 Tænding og første skylning
- Sæt netledningen i en jordet stikkontakt.
- Press the power button on the control panel. The machine will perform an initial rinse cycle.
- Place a container under the coffee spout to collect the rinse water.
4.6 SmartHQ App Connection
For enhanced customization and software updates, connect your espresso machine to the SmartHQ app.
- Download the SmartHQ app from your device's app store.
- Follow the in-app instructions to pair your espresso machine.
- Customize drink preferences, volume, and strength through the app.

Image 4.1: Using the SmartHQ app to control and customize the espresso machine.
5. Betjeningsvejledning
5.1 Brygning af kaffe
The machine offers Espresso, Americano, Lungo, and Hot Water options. The 'My Cup' setting is pre-set to Ristretto and can be adjusted via the SmartHQ app.
- Ensure the water reservoir is filled and the bean hopper contains coffee beans.
- Stil en kop under kaffetuden.
- Select your desired drink (Espresso, Americano, Lungo, My Cup) from the control panel.
- Maskinen vil automatisk male bønnerne, brygge og dispensere din kaffe.

Image 5.1: The espresso machine dispensing a fresh shot of espresso.
5.2 Justering af kværnstørrelse
The integrated conical burr grinder allows for 5 levels of grind size adjustment, from coarsest to finest, to optimize flavor extraction.
- Locate the grind size adjustment knob inside the bean hopper (refer to Image 3.2).
- Turn the knob to select your desired grind setting. Finer grinds are suitable for espresso, while coarser grinds are better for longer coffee types.
5.3 Using the Steam Frother
The steam frother creates various milk textures for cappuccinos, lattes, and more.
- Fill the included stainless steel frothing pitcher with cold milk.
- Placer dampdysen i mælken.
- Tryk på 'Damp'-knappen på kontrolpanelet.
- Move the pitcher to achieve desired foam texture.
- Once finished, press the 'Steam' button again to stop.
- Immediately clean the steam wand after each use to prevent milk residue buildup.
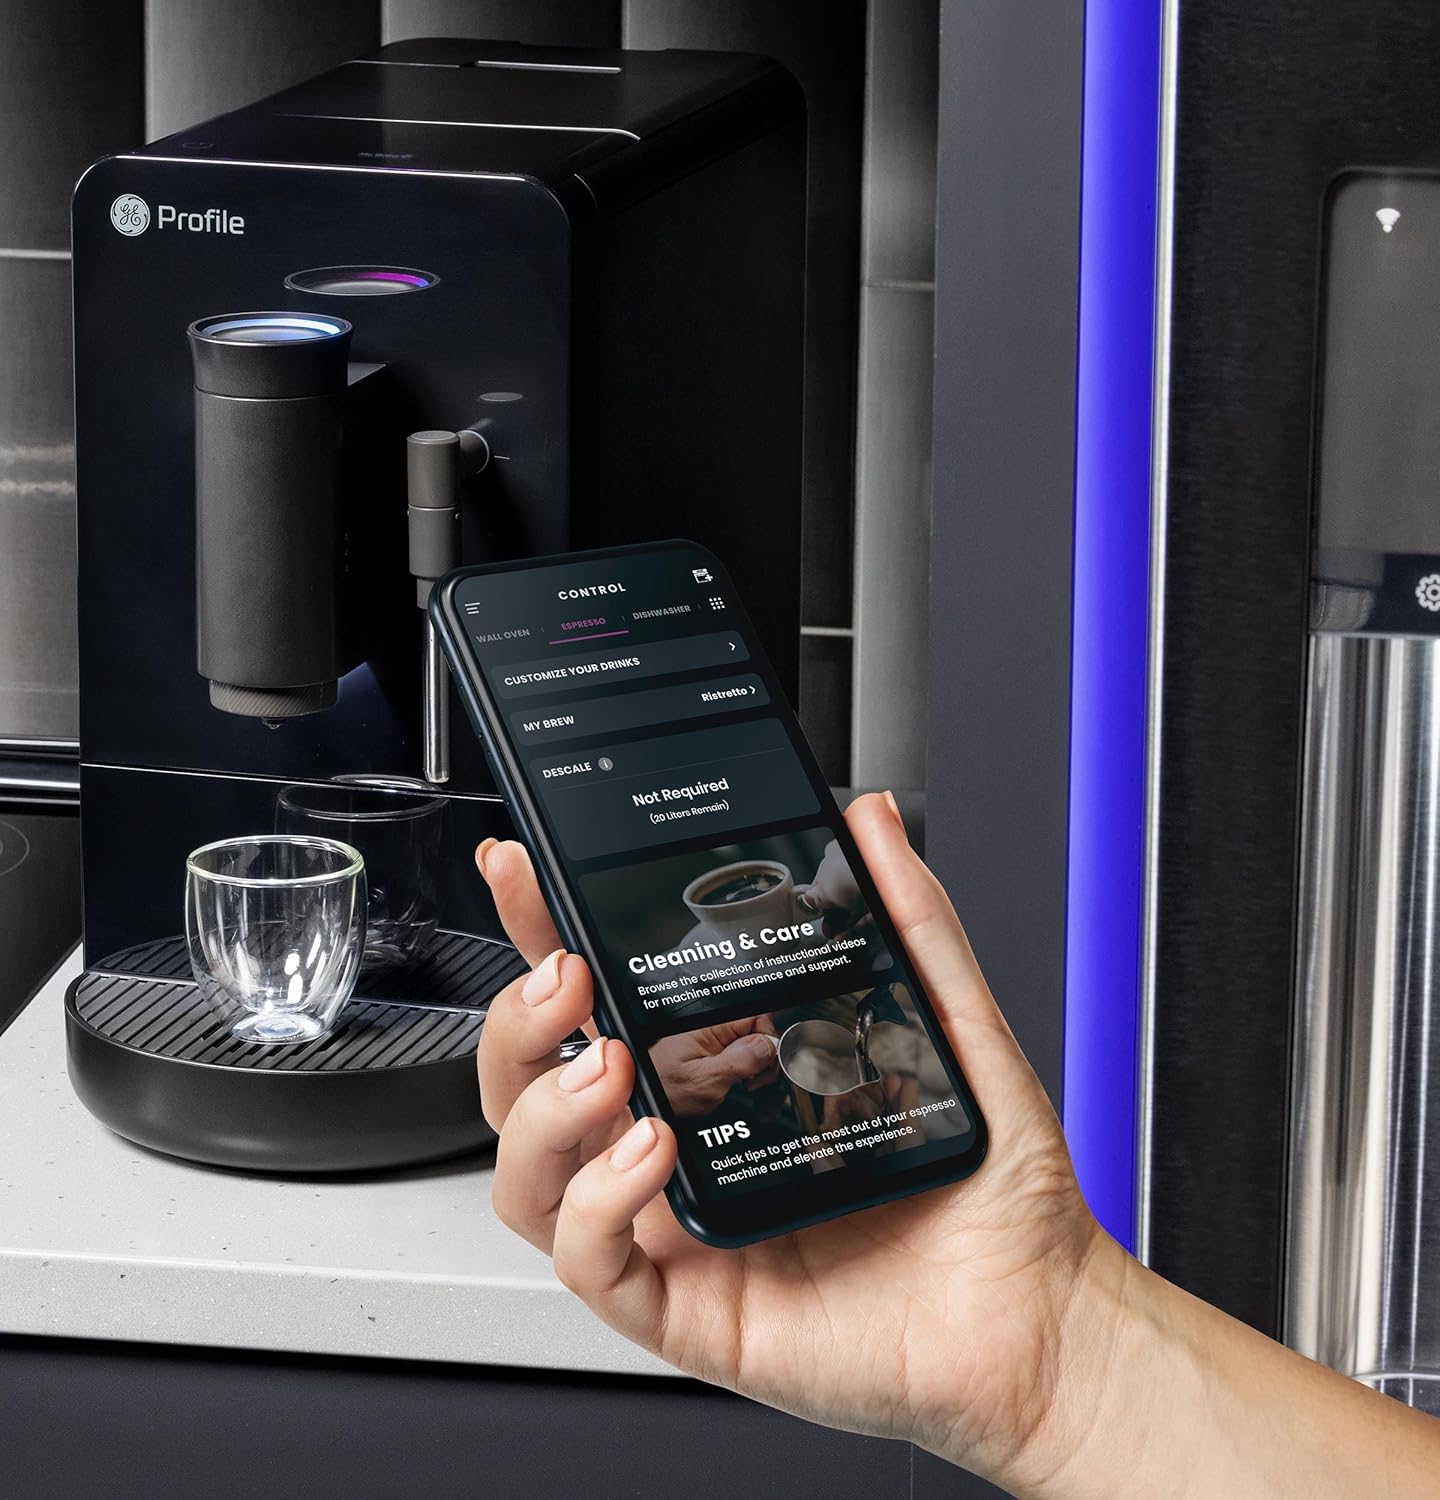
Image 5.2: A hand using the steam wand to froth milk in a stainless steel pitcher.
6. Vedligeholdelse
Regelmæssig rengøring og vedligeholdelse sikrer optimal ydeevne og levetid for din espressomaskine.
6.1 Daglig rengøring
- Dampstang: Tør dampdysen af med en sprayflaske efter hver brug.amp cloth. Purge steam briefly to clear any milk residue from the nozzle.
- Drypbakke og kaffegrumsbeholder: Tøm og skyl dagligt. Maskinen vil indikere, hvornår grumsbeholderen skal tømmes.
- Vandreservoir: Skyl dagligt og fyld op med frisk vand.
6.2 Ugentlig rengøring
- Bryggeenhed: The brew unit is typically removable for rinsing under running water. Refer to the included cleaning kit instructions for detailed steps.
- Bønnetragt: Periodically clean out any oil residue or old beans.
6.3 Afkalkning
The machine will prompt you when descaling is required. Use a descaling solution specifically designed for espresso machines and follow the instructions provided with the descaling agent or in the SmartHQ app.
7. Fejlfinding
Dette afsnit omhandler almindelige problemer, du kan støde på med din espressomaskine.
| Problem | Mulig årsag | Løsning |
|---|---|---|
| No coffee dispensed / "Add Beans" message | Bean hopper empty or beans not feeding correctly. | Refill bean hopper. Gently stir beans to ensure they feed into the grinder. |
| Kaffen er for svag eller vandig | Grind size too coarse, insufficient coffee dose, or descaling needed. | Adjust grind size to a finer setting. Check SmartHQ app for strength settings. Perform descaling if prompted. |
| Mælken skummer ikke ordentligt | Steam wand clogged, milk type unsuitable, or insufficient steam pressure. | Clean steam wand thoroughly. Use fresh, cold milk. Ensure machine is heated to steam temperature. |
| Maskinen tænder ikke | Ikke tilsluttet, strømmen er slukkettage, eller afbryderen er udløst. | Check power connection. Verify power outlet functionality. Reset circuit breaker if necessary. |
| SmartHQ app connectivity issues | Incorrect Wi-Fi password, network interference, or app bug. | Verify Wi-Fi credentials. Ensure machine is within Wi-Fi range. Restart app and machine. Check for app updates. |
8. Specifikationer
- Mærke: Profile
- Modelnavn: GE Profile Automatic Espresso Machine + Frother
- Varemodelnummer: P7CEBBS6RBB
- Farve: Sort
- Produktdimensioner: 7" D x 16" B x 12.5" H
- Varens vægt: 16 pund
- Voltage: 120V
- Driftstilstand: Fuldautomatisk
- Særlige funktioner: Built-In Bean Hopper, Built-In Conical Burr Grinder & Adjustable Grind Size, Programmable My Brew Setting, Steam Frother & Frothing Pitcher, WiFi Connected
- Inkluderede komponenter: Rengøringssæt, Kaffebønnebeholder, Espressomaskine, Dampstang, Mælkekande, Vandtank
- Kaffeindgangstype: Hele bønner
- Human Interface Input: Touchskærm

Billede 8.1: Produktmål for espressomaskinen.
9. Garanti og support
This product is covered by a manufacturer's warranty. For specific warranty details, registration, or technical support, please refer to the warranty card included with your product or visit the official GE Profile website. You may also contact customer service through the SmartHQ app for assistance.