1. Introduktion
The Snapmaker 2.0 Modular A250T is a versatile 3-in-1 machine designed for creators, hobbyists, and engineers. It seamlessly integrates three powerful functions: 3D printing, laser engraving and cutting, and CNC carving. This manual provides essential information for setting up, operating, maintaining, and troubleshooting your device.

Figure 1: The Snapmaker 2.0 Modular A250T, showcasing its 3D printing capability with a detailed golden cat sculpture.
Video 1: En overview of the Snapmaker 3-in-1 3D Printer, demonstrating its core functionalities including 3D printing, laser engraving, and CNC carving.
2. Produktfunktioner
The A250T model is built with precision and durability in mind, featuring an array of advanced components and user-friendly designs.
2.1 All-Metal Design
The Snapmaker 2.0 boasts an all-metal construction, ensuring stability, durability, and high precision for all operations. This robust build quality contributes to consistent and reliable performance.
Video 2: A behind-the-scenes look at the manufacturing process of the Snapmaker 2.0, highlighting its all-metal design and precision engineering.
2.2 Modulært design
The modularity of the Snapmaker 2.0 allows for quick and easy interchangeability of toolheads, enabling seamless transitions between 3D printing, laser engraving, and CNC carving functions. This design also supports future upgrades and add-ons.

Figure 2: The modular design of the Snapmaker 2.0, illustrating how different components like toolheads and the controller integrate for various functions.
2.3 Powerful Controller
The upgraded controller provides universal ports, multiport adapters, and a CAN Hub for additional CAN-bus ports, expanding creative possibilities and simplifying workflow management.
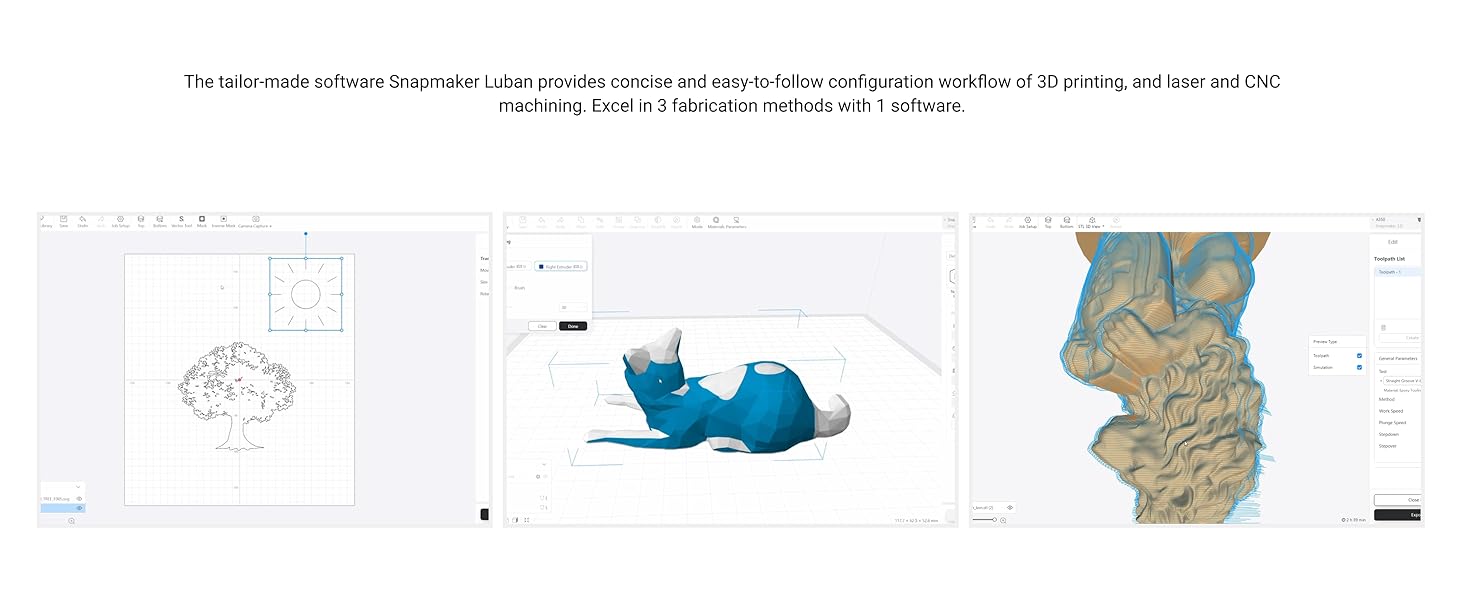
Figure 3: The powerful controller of the Snapmaker 2.0, showing its various connection points for different modules and accessories.
2.4 5-inch Touchscreen
A smartphone-like 5-inch touchscreen simplifies the workflow, allowing users to manage most-used tasks directly from the interface.

Figure 4: The intuitive 5-inch touchscreen interface of the Snapmaker 2.0, providing direct control over machine functions.
2.5 Wi-Fi Connectivity & Power Loss Recovery
The machine supports Wi-Fi connectivity for convenient file uploads and firmware updates. It also features power loss recovery, automatically detecting power outages and resuming operations from where they left off.

Figure 5: Demonstrations of Wi-Fi connectivity for seamless file transfer and the power loss recovery feature, ensuring project continuity.
3. Opsætning
For detailed assembly instructions, please refer to the official User Guide PDF available at Brugervejledning (PDF).
3.1 Module Installation and Quick Switching
The Snapmaker 2.0's modular design allows for rapid switching between the 3D printing, laser engraving, and CNC carving modules. This process typically takes less than one minute.
Video 3: Demonstrates the quick and easy process of switching between the 3D printing, laser, and CNC modules on the Snapmaker 2.0 AT Models.
4. Betjening
The Snapmaker 2.0 is controlled via its intuitive touchscreen and the dedicated Snapmaker Luban software. This software provides a concise and easy-to-follow workflow for all three fabrication methods.
Video 4: Showcases various creative applications and projects made possible with the Snapmaker, inspiring users to 'Make Something Wonderful'.
4.1 3D-udskrivning
The 3D printing module offers high print quality with features like filament runout recovery, auto-leveling, and a flexible print sheet for easy model removal. It supports a variety of materials.

Figure 6: Key features of the 3D printing function, including high print quality and user-friendly functionalities.
Kompatible materialer: PLA, PETG, Wood PLA, TPU, ABS.
4.2 Lasergravering og -skæring
The laser module features a precise 0.2mm x 0.3mm laser spot, a built-in camera for easy positioning, and an aluminum grid table. High power upgrade options are available for enhanced capabilities.

Figure 7: Features of the laser engraving function, including precision and integrated camera for accurate placement.
Kompatible materialer: Plywood, Leather, Corrugated Fiberboard, Marble, Cardboard, Paper.
4.3 CNC udskæring
The CNC carving module is equipped with an ER11 Collet, custom MDF platform and clamp sets, and dust resistance features. It supports 4-axis CNC machining for complex projects.

Figure 8: Features of the CNC carving function, emphasizing its robust tools and dust management.
Kompatible materialer: PCB, Carbon Fiber Sheet, Epoxy Tooling Material, Bamboo, Acrylic, Walnut.
5. Vedligeholdelse
Regular maintenance ensures the longevity and optimal performance of your Snapmaker 2.0. Keep the machine clean, especially the linear modules, to prevent dust accumulation which can affect precision. The CNC module features dust resistance, but regular cleaning is still recommended.
6. Fejlfinding
If you encounter issues with your Snapmaker 2.0, consider the following common troubleshooting steps:
- Softwareproblemer: Ensure your Snapmaker Luban software is up-to-date. If experiencing issues with USB drive recognition or print failures, try restarting the software and the machine.
- Linear Motor Recognition: If linear motors are not recognized after a reboot or during operation, check all cable connections to the controller and the modules. Ensure the firmware is updated. If the issue persists, consult the official Snapmaker support resources.
- Problemer med udskriftskvalitet: For 3D printing, ensure proper bed leveling and filament loading. For laser and CNC, verify material settings and tool calibration.
For more in-depth troubleshooting, refer to the comprehensive Brugervejledning (PDF) or contact Snapmaker customer support.
