
Indledning
This manual provides comprehensive instructions for the installation, operation, and maintenance of your Banda Audioparts 4-Channel Vehicle Audio Bass Amplifier, Model 2000.41OHMGREEN. This Class D amplifier is designed to deliver high-powered audio performance for your vehicle's sound system. Please read this manual thoroughly before installation and use to ensure proper function and safety.
Sikkerhedsoplysninger
- Professionel installation anbefales: På grund af kompleksiteten af køretøjers elektriske systemer anbefales professionel installation på det kraftigste.
- Elektrisk fare: Always disconnect the vehicle's battery before making any electrical connections to prevent electric shock or damage to the amplifter og køretøj.
- Korrekt ledningsføring: Ensure all wiring is correctly sized and fused according to specifications to prevent overheating and fire hazards.
- Varmeafledning: Monter amplifier in a location that allows for adequate airflow to prevent overheating. Avoid mounting in enclosed spaces without ventilation.
- Vand og fugt: Udsæt ikke ampfor vand eller for høj fugtighed.
- Sikker montering: Monter sikkert ampen løfteanordning for at forhindre, at den bliver til et projektil i tilfælde af et pludseligt opbremsnings- eller uheld.
Produkt overview
The Banda Audioparts 2000.41OHMGREEN is a 4-channel Class D amplifier designed for robust audio performance. It features a compact design and advanced circuitry for efficient power delivery.
Nøglefunktioner:
- Klasse D amplifier technology for high efficiency.
- 4-channel output, bridgeable for higher power.
- Integrated Subsonic Filter and Low Pass Filter for precise sound tuning.
- LED indicators for power, clipping, low voltage, and fuse status.
- RCA connectors for distortion-free signal transfer.
LED-indikatorer:
- Blå LED: Angiver ampLifieren er tændt og fungerer.
- Rød LED: Illuminates to indicate output distortion (clipping). Reduce input gain if this LED is active.
- Gul LED: Indikerer lav volumentage battery. Check vehicle's charging system.
- Constant (Red/Yellow): If either Red or Yellow LED stays constant, it may indicate an output short circuit or a blown/missing fuse.
Amplivligere Views:
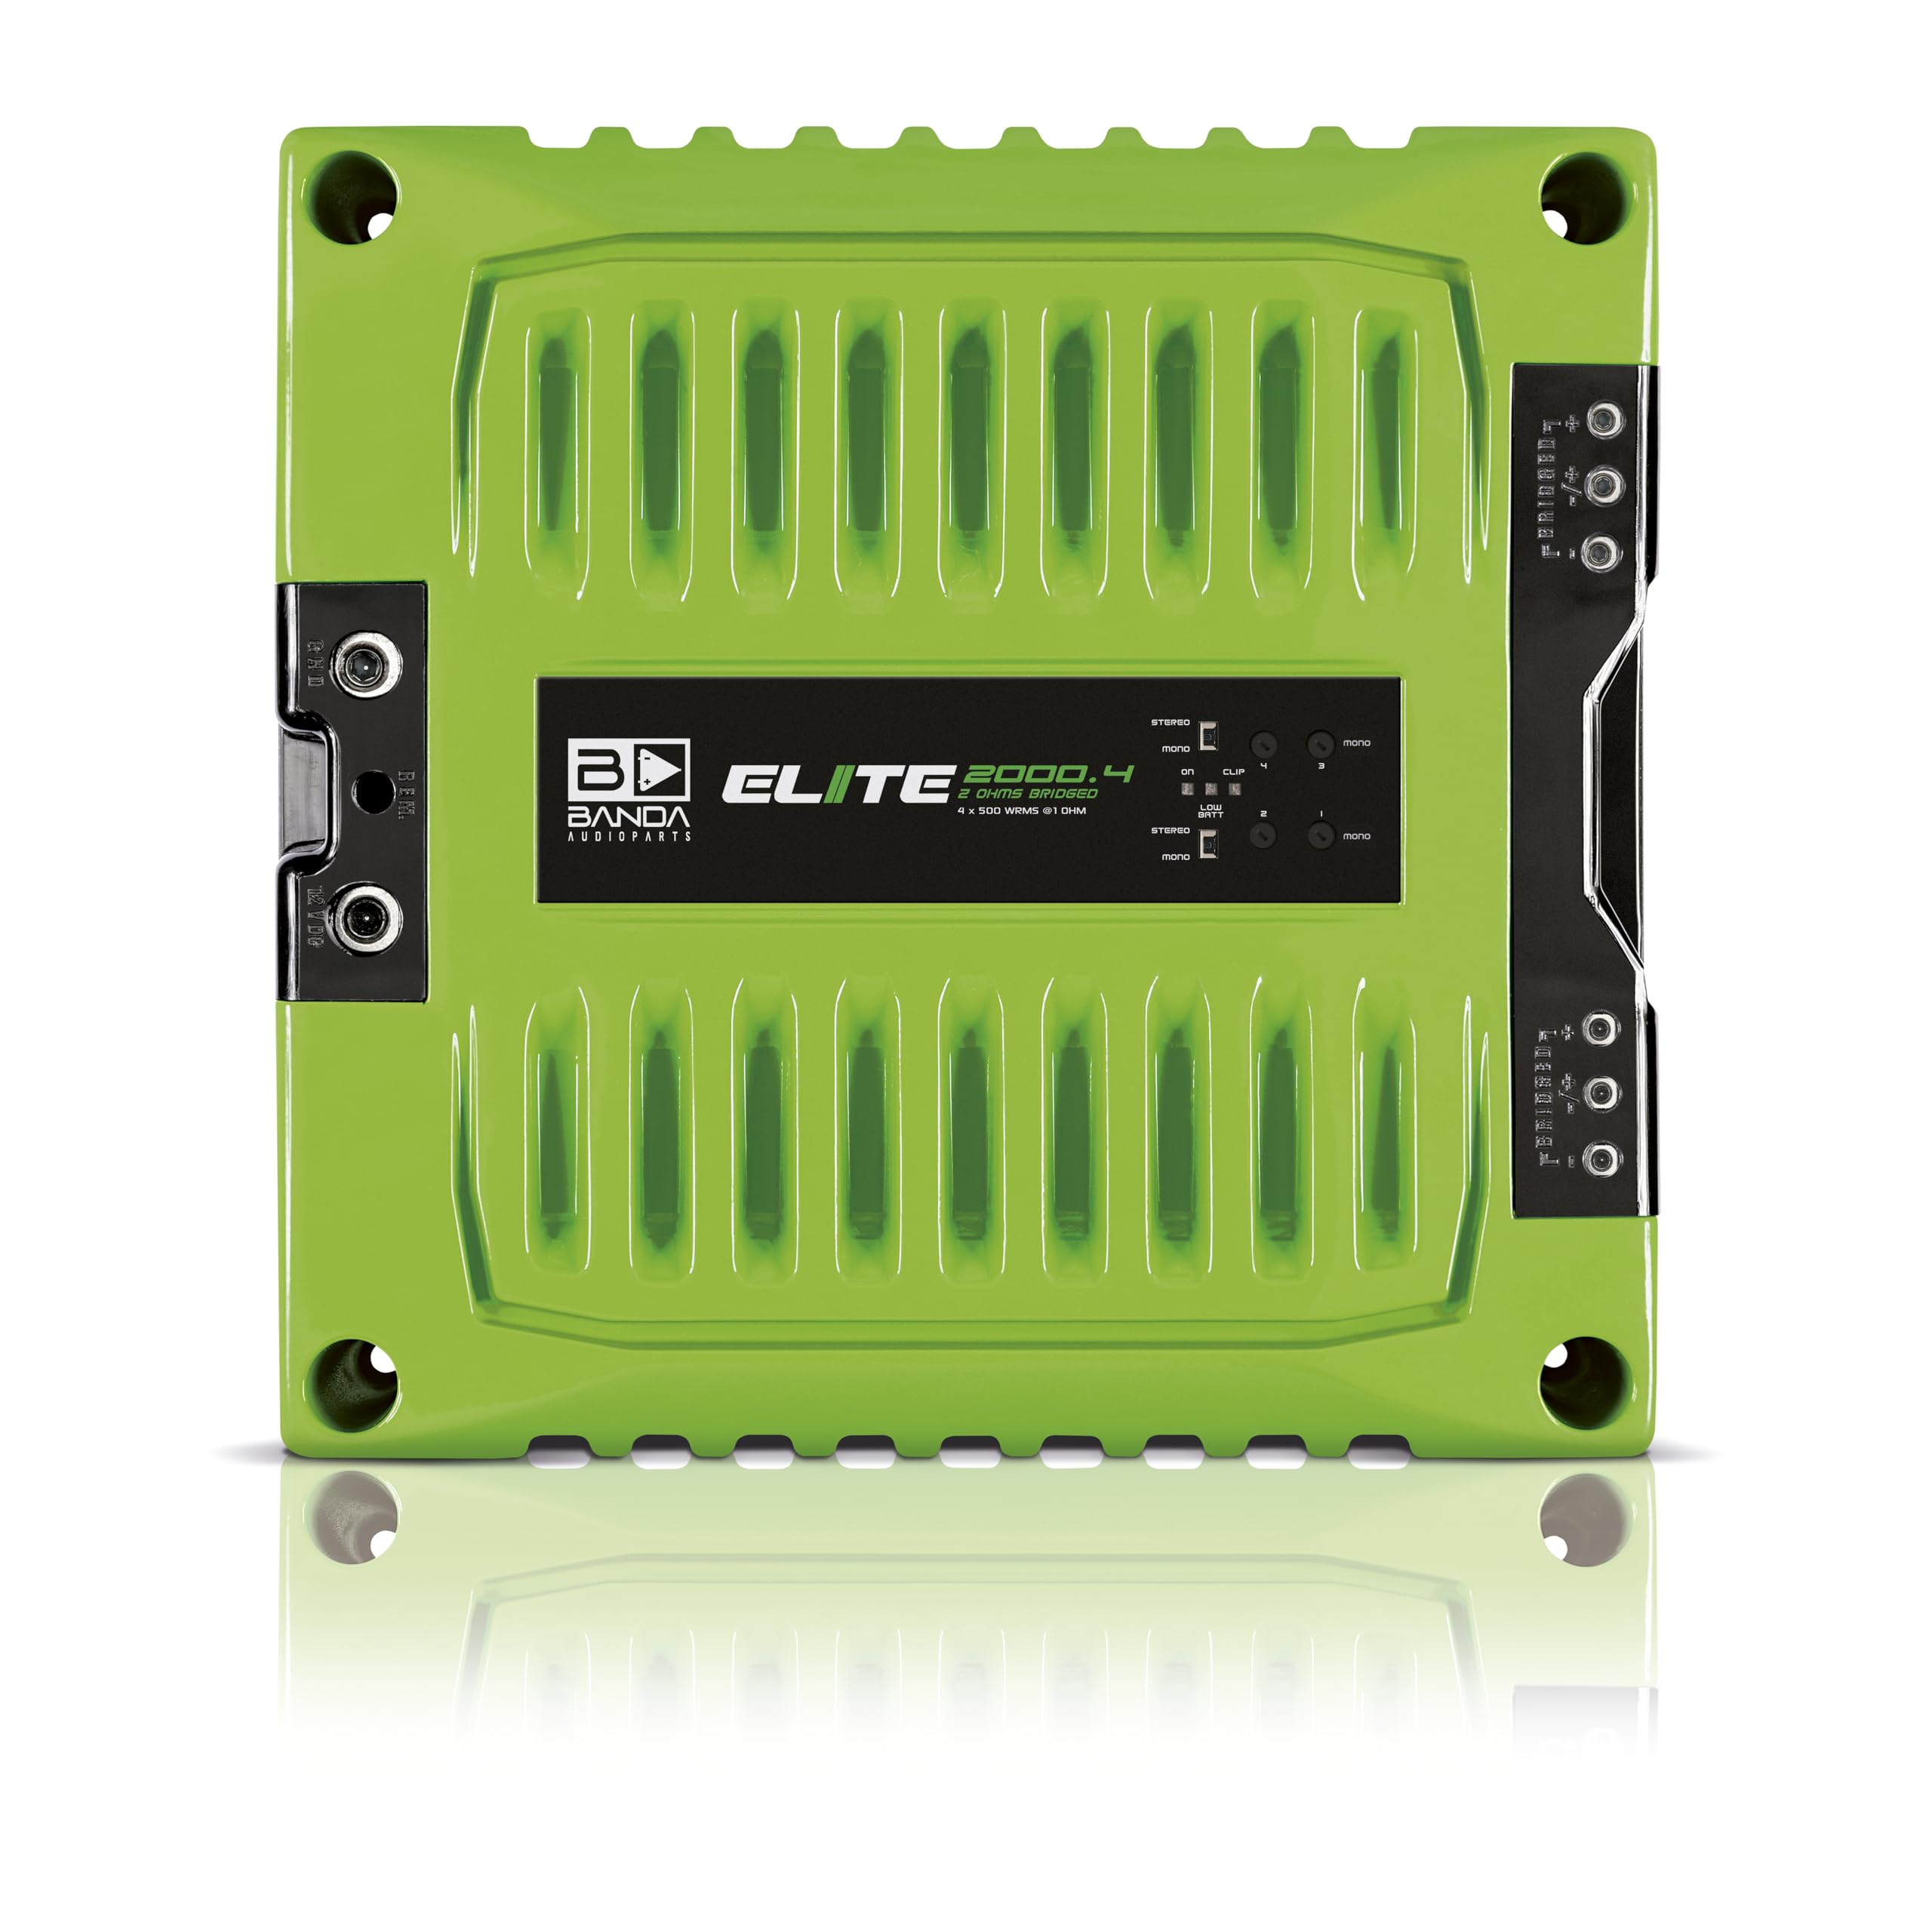
Front view of the Banda Audioparts 4-Channel Ampløfter, showcasing the top panel and branding.

Bag view af amplifier, displaying the RCA inputs, gain controls, and filter switches.

Side view af amplifier, highlighting the power, ground, and remote terminals.
Specifikationer
| Parameter | Værdi |
|---|---|
| Total Power 14.4V @ 1 Ohm | 4 x 600 WRMS |
| Total Power 14.4V @ 2 Ohms | 4 x 400 WRMS |
| Total Power 14.4V Bridged @ 2 Ohms | 2 x 1250 WRMS |
| Total Power 12.6V @ 1 Ohm | 4 x 500 WRMS |
| Total Power 12.6V @ 2 Ohms | 4 x 300 WRMS |
| Total Power 12.6V Bridged @ 2 Ohms | 2 x 1000 WRMS |
| Effektivitet @ 2 Ohm | 81 % |
| Effektivitet @ 1 Ohm | 76 % |
| Input bindtage | 9-15V |
| Indgangsimpedans | 100K ohm |
| THD+støj | 0.10 % |
| Indgangsfølsomhed | 220mV - 4V |
| Signal til støj-forhold (SNR) | 80dB |
| Frekvensrespons | 5Hz to 22kHz (-3dBs) |
| Højpasfilter (HPF) | 20 to 90Hz @ 12dB/octave Linkwitz-Riley |
| Lavpasfilter (LPF) | 90 til 20kHz @ 12dB/oktav Linkwitz-Riley |
| Anbefalet sikring | 100 A |
| Current at Rest | 1A |
| Average Current Draw (Sinusoidal) | 210 A |
| Average Current Draw (Music) | 100 A |
| Power Wire Gauge (min. Recommended) | 21 mm² / 4 AWG |
| Speaker Wire Gauge (min. Recommended) | 2 x 2.5mm² / 2 x 13 AWG |
| Produktmål (H x B x D) | 2.2 x 8.4 x 9.7 tommer (ca. 56 x 213 x 246 mm) |
| Varens vægt | 3.3 lbs (ca. 1.5 kg) |
| Modelnummer | 2000.41OHMGREEN |
Opsætning og installation
Careful installation is crucial for optimal performance and safety. Ensure the vehicle's battery is disconnected before beginning.
Monteringssted:
Choose a dry, well-ventilated location away from direct sunlight and heat sources. Ensure sufficient space around the amplifier for air circulation to prevent overheating. Secure the amplifier firmly to a solid surface using appropriate hardware.
Ledningsforbindelser:
- Effekt (B+): Connect a 4 AWG (21mm²) power cable directly from the positive terminal of the vehicle's battery to the amplifier's B+ terminal. Install a 100A fuse within 18 inches (45 cm) of the battery.
- Jord (GND): Connect a 4 AWG (21mm²) ground cable from the ampForbind GND-terminalen på forsyningen til en ren, umalet metaloverflade på køretøjets chassis. Sørg for en solid forbindelse med lav modstand.
- Fjernbetjening (REM): Tilslut en fjernbetjeningsledning fra din hovedenheds fjernbetjeningsudgang til ampforsyningens REM-terminal. Denne ledning tænder amptænd og sluk for støjrelæet med din hovedenhed.
- RCA-indgang: Tilslut RCA-kabler fra din hovedenheds for-amp udgange til ampliferens RCA-indgangsstik.
- Højttaler output: Tilslut dine højttalere til amplifier's speaker terminals using 13 AWG (2.5mm²) speaker wire. Ensure correct polarity (+ to + and - to -) for each speaker. For bridged operation, refer to the diagram on the amplifier or consult a professional.
Detaljeret view af amplifier's rear panel, illustrating RCA input and speaker output terminals.
Betjeningsvejledning
Når den er installeret, skal du følge disse trin for at konfigurere og betjene din amplivligere:
- Indledende opstart: Reconnect the vehicle's battery. Turn on your head unit. The blue LED on the ampLysdioden skal lyse, hvilket indikerer, at den er tændt.
- Forstærkningsjustering: Set the head unit volume to about 75% of its maximum. Slowly increase the amplifier's gain control (Input Sensitivity) until you hear distortion or the red clipping LED illuminates. Then, reduce the gain slightly until the distortion disappears or the red LED turns off. This ensures maximum clean output.
- Filterindstillinger:
- HPF (Højpasfilter): Use this to block low frequencies from reaching your speakers, typically for full-range or mid-range speakers. Adjust the frequency knob between 20Hz and 90Hz.
- LPF (lavpasfilter): Use this to allow only low frequencies to pass, typically for subwoofers. Adjust the frequency knob between 90Hz and 20kHz.
- Lydtest: Play various types of music to fine-tune the gain and filter settings for optimal sound quality.
Opretholdelse
Your Banda Audioparts amplifier is designed for reliable operation with minimal maintenance. Follow these guidelines to ensure its longevity:
- Rensning: Tør regelmæssigt af ampRengør ydersiden af apparatet med en blød, tør klud. Brug ikke skrappe kemikalier eller slibende rengøringsmidler.
- Tilslutningstjek: Kontrollér årligt alle strøm-, jord-, fjernbetjenings- og højttalerforbindelser for at sikre, at de er fastgjorte og fri for korrosion. Løse forbindelser kan forårsage problemer med ydeevnen eller skader.
- Ventilation: Sørg for, at amplifier's cooling fins and fan (if present) are free from dust and obstructions to maintain proper heat dissipation.
Fejlfinding
Hvis du oplever problemer med din ampLifier, se følgende almindelige problemer og løsninger:
| Problem | Mulig årsag | Løsning |
|---|---|---|
| Ingen strøm (blå LED slukket) | Sprunget sikring, løs strøm-/stel-/fjernbetjeningsledning, intet fjernbetjeningssignal. | Check the in-line fuse near the battery. Verify all power, ground, and remote connections are secure. Ensure head unit is on and sending a remote signal. |
| Ingen lydudgang | Løse RCA-kabler, forkerte forstærkningsindstillinger, højttalerledninger frakoblet, amplifier i beskyttelsestilstand. | Check RCA connections at both amplifier and head unit. Adjust gain. Verify speaker wire connections and polarity. If amplifier is hot, allow it to cool. |
| Distorted Sound (Red LED On) | Gain set too high, poor quality input signal, speaker impedance mismatch. | Reducer amplifier's gain (Input Sensitivity). Check head unit output for distortion. Verify speaker impedance matches amplifiers muligheder. |
| AmpOverophedning af væske | Utilstrækkelig ventilation, for lav impedans, langvarig høj effekt. | Sørg for tilstrækkelig luftgennemstrømning omkring amplifier. Check speaker impedance. Reduce volume or gain. |
| Yellow LED On (Low Voltage) | Køretøjsbatteri voltage too low, insufficient power wire gauge. | Check vehicle's battery and charging system. Ensure power wire gauge meets recommendations. |
Garanti & Support
Banda Audioparts products are manufactured to high-quality standards. For specific warranty information and technical support, please refer to the warranty card included with your product or visit the official Banda Audioparts website. Do not attempt to repair the amplifier yourself, as this may void your warranty and cause further damage.