
1. Introduktion
Thank you for choosing the KRUPS Essential EA8105 Automatic Espresso Machine. This appliance is designed to deliver a perfectly balanced coffee experience, from bean to cup. Equipped with advanced KRUPS Thermoblock technology, it ensures optimal temperature control for exceptional coffee flavor. This manual provides essential information for the safe and efficient use, setup, operation, and maintenance of your machine.
2. Sikkerhedsinstruktioner
- Læs alle instruktioner omhyggeligt, før du bruger apparatet.
- Nedsænk ikke apparatet, netledningen eller stikket i vand eller anden væske.
- Sørg for, at voltagDen angivne lydstyrke på apparatet svarer til din elnetspænding.tage.
- Opbevar apparatet utilgængeligt for børn.
- Tag stikket ud af stikkontakten, når det ikke er i brug, og før rengøring.
- Betjen ikke noget apparat med en beskadiget ledning eller stik, eller efter at apparatet ikke fungerer korrekt eller er blevet beskadiget på nogen måde.
- Use only original KRUPS accessories and spare parts.
- Dette apparat er kun til husholdningsbrug.
3. Produktkomponenter

Figur 3.1: Front view of the KRUPS Essential EA8105 Automatic Espresso Machine, showing the bean hopper, control panel, coffee spouts, and steam nozzle.
- Bønnetragt: Til hele kaffebønner.
- Kontrolpanel: Buttons and dial for various functions (on/off, coffee volume, steam).
- Vandtank: Aftagelig tank til vand.
- Kaffeudløbere: Dispenserer brygget kaffe.
- Dampmundstykke: Til opskumning af mælk.
- Drypbakke: Opsamler overskydende væske.
- Beholder til kaffegrums: Samler brugt kaffegrums op.
- Aqua Filter Claris Cartridge: Water filter for improved water quality.

Figur 3.2: Nærbillede view of the coffee spouts and steam nozzle, highlighting the dispensing area.
4. Opsætning
4.1 Udpakning
- Tag forsigtigt maskinen og alt tilbehør ud af emballagen.
- Fjern alle beskyttelsesfilm og emballagematerialer.
- Place the machine on a stable, flat, heat-resistant surface, away from water splashes.
4.2 Water Tank and Aqua Filter Claris
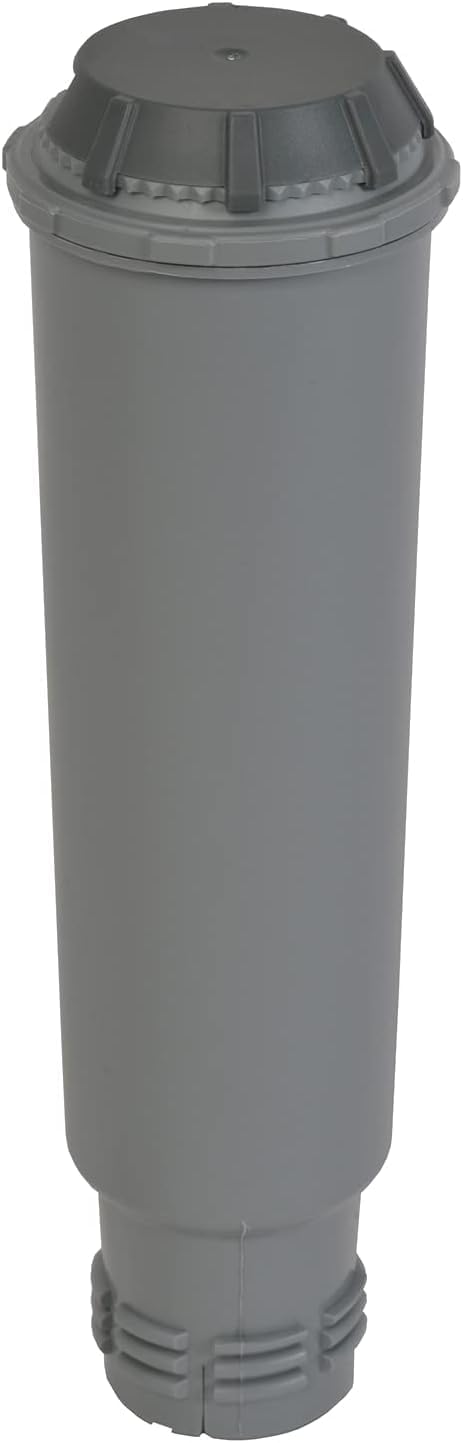
Figur 4.1: The Aqua Filter Claris water filter cartridge, designed to reduce chlorine and limescale.
- Fjern vandtanken fra bagsiden af maskinen.
- If using the Aqua Filter Claris cartridge (included), prepare it according to its separate instructions (usually involves rinsing).
- Insert the prepared filter into the water tank.
- Fyld vandtanken med frisk, koldt vand op til MAX-niveauet.
- Sæt vandtanken tilbage i maskinen, og sørg for, at den sidder sikkert på plads.
4.3 Bønnebeholder
- Åbn låget på bønnebeholderen, der er placeret oven på maskinen.
- Fill the hopper with whole coffee beans. Do not use ground coffee, instant coffee, or caramelized beans, as this can damage the grinder.
- Luk låget forsvarligt.
4.4 Første brug / Klargøring
- Sæt maskinen i en jordforbundet stikkontakt.
- Tænd for maskinen ved hjælp af afbryderknappen.
- The machine will perform an initial rinse cycle. Follow any on-screen prompts or indicator lights.
- Placer en beholder under kaffeudløbene for at opsamle vandet.
- Once the rinse cycle is complete, the machine is ready for use.
5. Betjeningsvejledning
5.1 Tilberedning af espresso/kaffe
- Sørg for, at vandtanken er fyldt, og at bønnebeholderen indeholder kaffebønner.
- Placer en eller to kopper under kaffeudløbene.
- Use the central dial to select your desired coffee volume (e.g., 20ml to 220ml).
- Press the coffee button (single or double cup, depending on model) to start brewing.
- The machine will grind the beans, tamp, and extract the coffee. Brewing will stop automatically.
5.2 Adjusting Coffee Strength
The coffee strength can typically be adjusted by changing the grinding fineness (if available on your model) or by selecting a smaller coffee volume for a more concentrated shot.
5.3 Steam Nozzle / Milk Frothing
- Fyld en kande med kold mælk (med eller uden mælk).
- Placer dampdysen i mælken, lige under overfladen.
- Activate the steam function (refer to your machine's specific button/dial for steam).
- Bevæg kanden op og ned for at lave skum.
- Once desired texture is achieved, turn off the steam function.
- Vigtig: Immediately clean the steam nozzle after each use to prevent milk residue buildup.
6. Vedligeholdelse
6.1 Daglig rengøring
- Tøm og skyl drypbakken og beholderen til kaffegrums.
- Tør maskinens ydre af med adamp klæde.
- Clean the steam nozzle thoroughly after each use.
6.2 Afkalkning
The machine features an automatic cleaning and descaling program. The 'CALC' indicator light will illuminate when descaling is required. Follow the instructions provided by the machine's display or indicator lights for the descaling process. Use only KRUPS descaling solution.
6.3 Aqua Filter Claris Replacement
The Aqua Filter Claris cartridge should be replaced approximately every 2-3 months, or as indicated by the machine. Regular filter replacement helps maintain water quality and reduces limescale buildup.
7. Fejlfinding
- Ingen kaffe udleveret: Check water tank level, ensure beans are in the hopper, check for blockages in coffee spouts.
- Svag kaffe: Adjust coffee volume to a smaller setting, check bean freshness, ensure grinder is not clogged.
- Maskinen tænder ikke: Check power connection, ensure plug is fully inserted into the outlet.
- Lækker: Ensure water tank is correctly seated, check drip tray for overflow.
- Fejlmeddelelser: Refer to the machine's display or indicator lights for specific error codes and consult the full manual or KRUPS support.
8. Specifikationer
| Mærke | KRUPS |
| Modelnummer | EA8105 |
| Farve | Hvid |
| Kaffemaskine type | Espressomaskine (bønne-til-kop) |
| Speciel funktion | Water Filter (Aqua Filter Claris) |
| Materiale | Kobber (interne komponenter) |
| Driftstilstand | Fuldautomatisk |
| Kaffe Type | Hele bønner |
| Inkluderede komponenter | Filterpatron |
| Tåler opvaskemaskine | Ingen |
9. Garanti og support
For warranty information, please refer to the warranty card included with your product or visit the official KRUPS website. For technical support, spare parts, or service, please contact KRUPS customer service in your region. Keep your proof of purchase for warranty claims.