GoolRC S80
GoolRC S80 RC Drone User Manual
Model: S80
1. Sikkerhedsforanstaltninger
Before operating the GoolRC S80 RC Drone, please read and understand all safety instructions. Failure to follow these instructions may result in injury or damage to the product.
- Brug altid dronen i åbne områder, væk fra mennesker, dyr, bygninger og strømledninger.
- Flyv ikke dronen i stærk vind eller ugunstige vejrforhold.
- Sørg for, at dronens batteri er fuldt opladet, og at fjernbetjeningens batterier er friske, inden hver flyvning.
- Hold fingre og løstsiddende tøj væk fra roterende propeller.
- Dette produkt er ikke legetøj. Voksenopsyn anbefales til brugere under 14 år.
- Forsøg ikke at modificere eller adskille dronen eller dens komponenter.
- Følg alle lokale regler og love vedrørende droneoperation.
2. Pakkens indhold
Bekræft at alle varer er til stede i pakken:
- 1 x GoolRC S80 RC Drone
- 1 x fjernbetjening
- 2 x Drone Batteries (3.7V 2000mAh)
- 1 x USB ladekabel
- 2 x reservepropeller
- 4 x Protection Rings
- 1 x skruetrækker
- 1 x brugermanual
- 1 x Opbevaringspose

Image: All components included in the GoolRC S80 drone package.
3. Produktet er slutview
The GoolRC S80 is a foldable RC drone equipped with dual cameras for aerial photography and FPV flight. It features a compact design for portability and various intelligent flight modes.

Image: The GoolRC S80 drone in its unfolded state, alongside its remote controller.
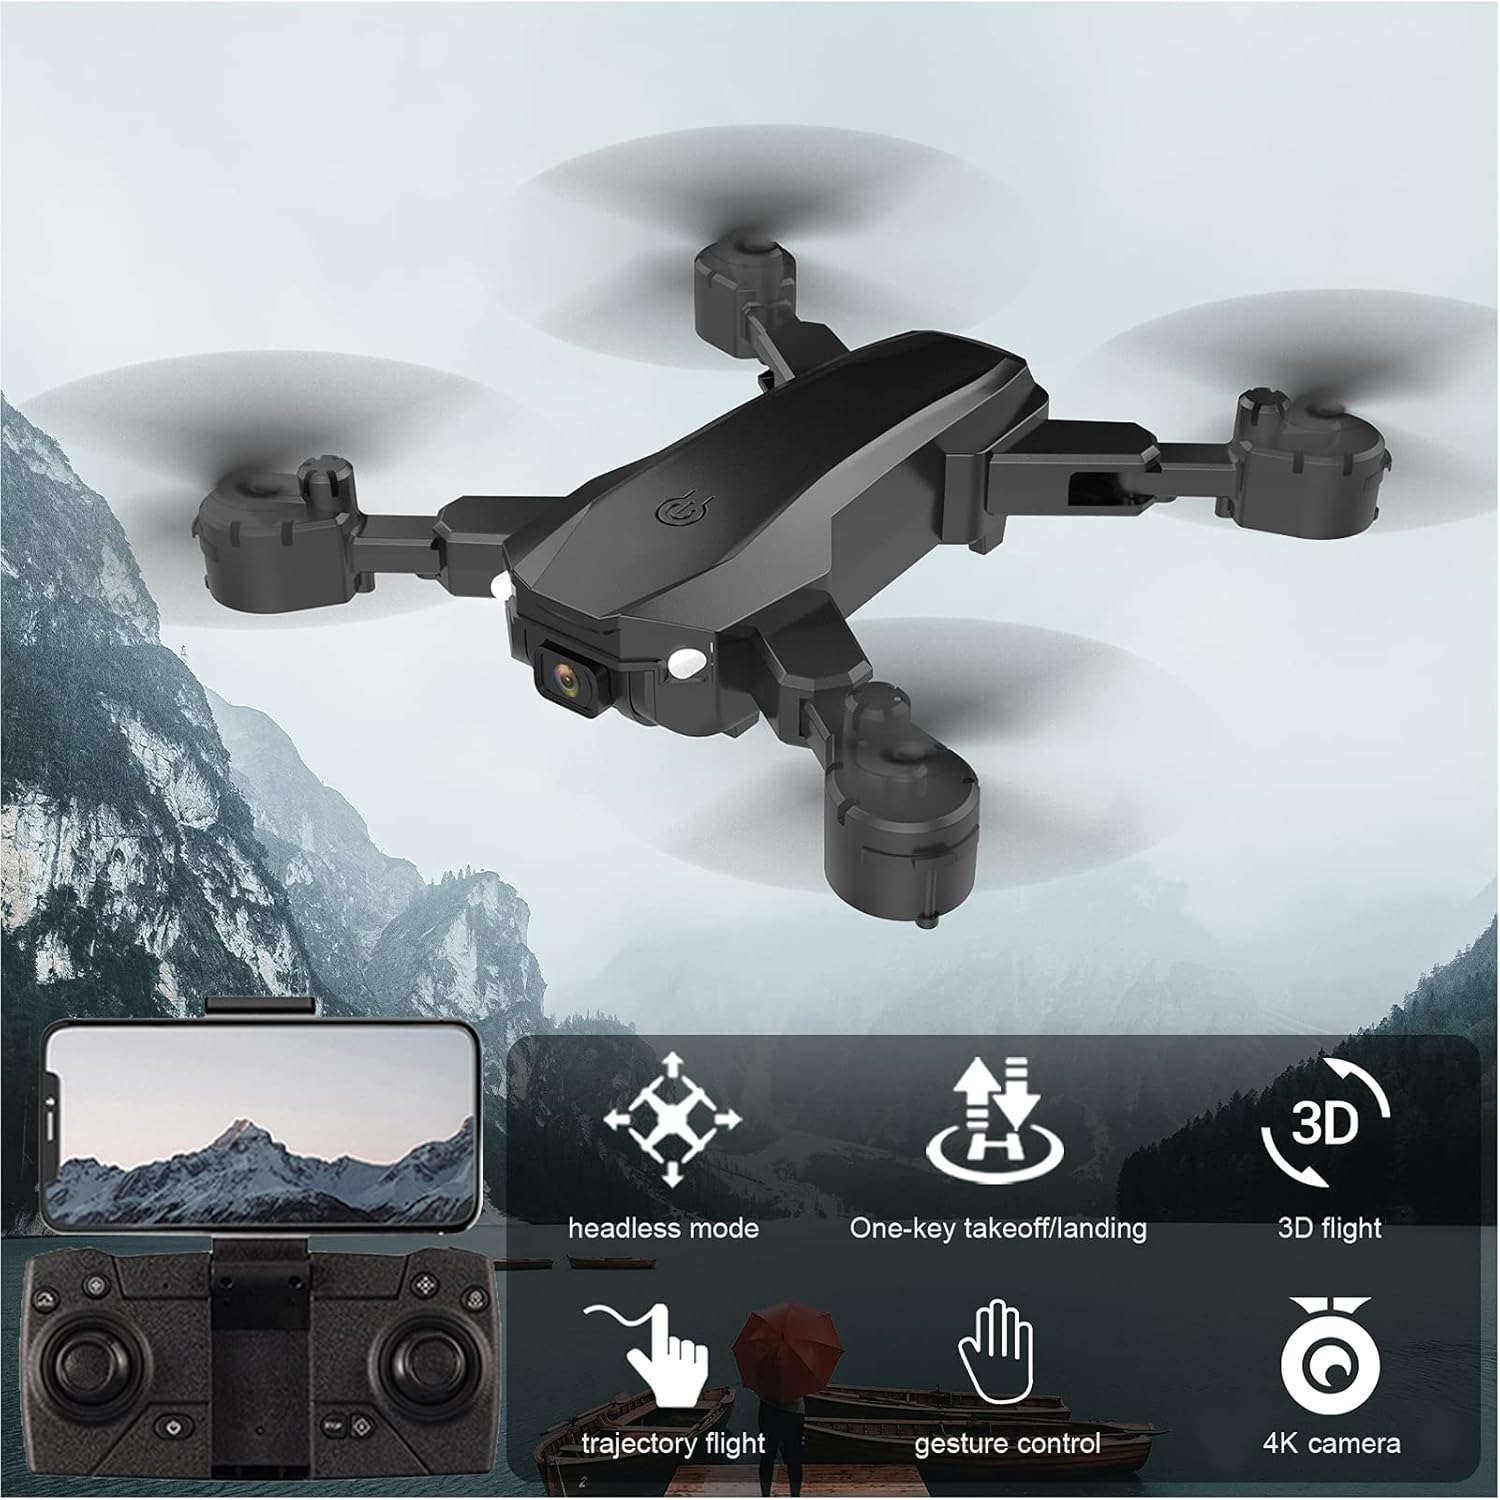
Image: Visual representation of the GoolRC S80 drone highlighting its key features.
4. Batteriinstallation og opladning
4.1 Drone batteri
- Sørg for, at dronen er slukket.
- Find batterirummet på undersiden af dronen.
- Insert the 3.7V 2000mAh drone battery into the compartment, ensuring it clicks into place securely.
- To charge, connect the drone battery to the USB charging cable. Connect the USB cable to a 5V/1A USB power adapter (not included).
- The charging indicator light will show the charging status. Charging time is approximately 60 minutes.
- Lad ikke batterier oplades uden opsyn.
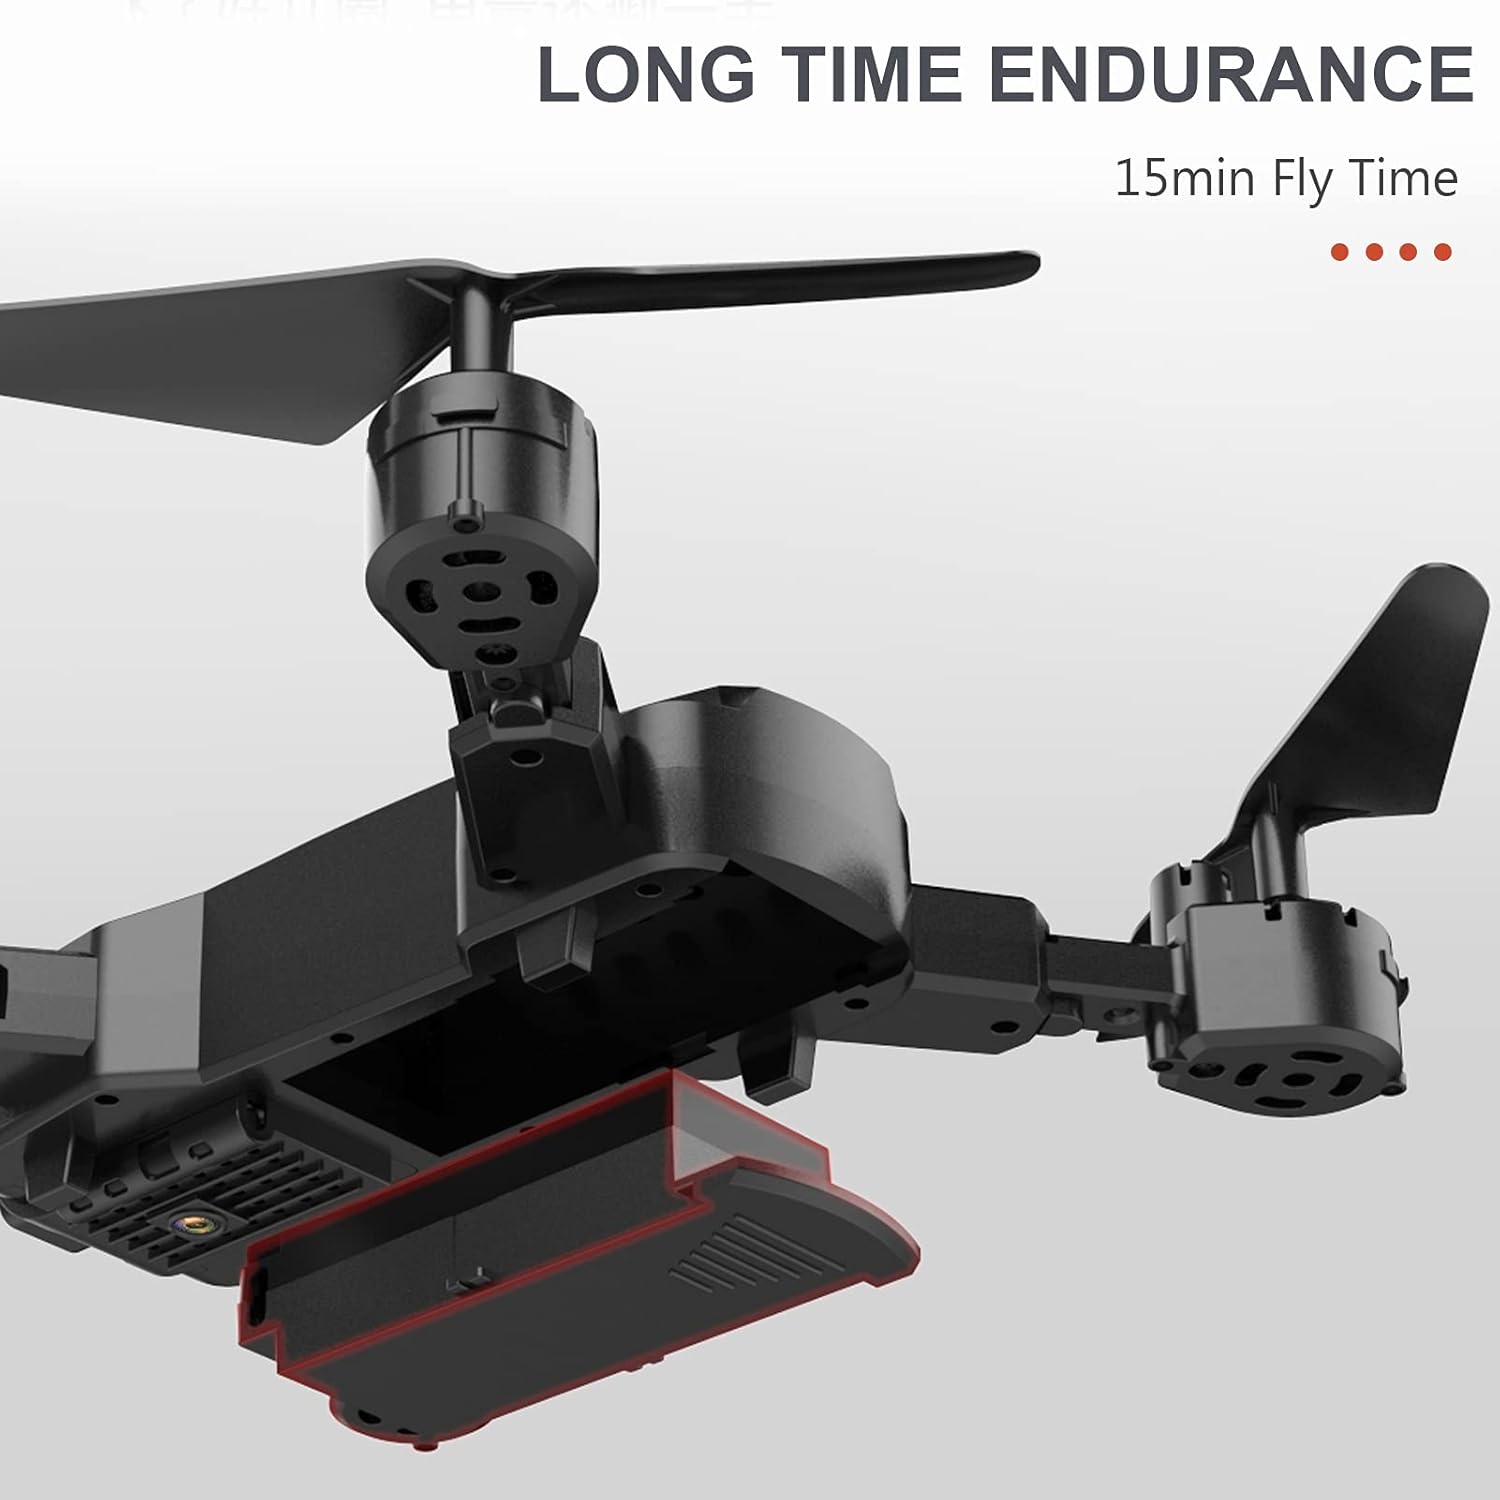
Image: The drone's battery compartment and the battery being inserted.
4.2 Remote Controller Batteries
- Åbn batteridækslet på bagsiden af fjernbetjeningen.
- Sæt 3 x AA-batterier (medfølger ikke) i batterirummet, og sørg for at vende dem korrekt (+/-).
- Luk batteridækslet forsvarligt.
5. Remote Controller Setup and Pairing
- Placer dronen på en flad, plan overflade.
- Tænd dronen. Indikatorlamperne vil blinke.
- Tænd for fjernbetjeningen.
- Push the left joystick (throttle) all the way up, then all the way down. The drone lights will stop flashing and remain solid, indicating successful pairing.
6. Drone Calibration
Before the first flight and after any crash, it is recommended to calibrate the drone's gyroscope for stable flight.
- After successful pairing, place the drone on a flat, level surface.
- Push both joysticks on the remote controller to the bottom-right corner simultaneously for a few seconds.
- The drone's indicator lights will flash rapidly and then become solid, indicating successful calibration.
7. Grundlæggende flyveoperationer
7.1 One-Key Takeoff / Landing
- After pairing and calibration, press the One-Key Takeoff button (usually indicated by an upward arrow icon) on the remote controller. The drone will automatically ascend and hover at a certain altitude.
- To land, press the One-Key Landing button (usually indicated by a downward arrow icon). The drone will slowly descend and land automatically.
7.2 Højdehold
The drone features an auto-hover function that maintains a steady altitude, making it easier to control and capture stable photos/videos.

Image: The drone maintaining a fixed height using its intelligent air pressure system.
7.3 Hovedløs tilstand
I hovedløs tilstand er dronens orientering i forhold til piloten, uanset dronens faktiske fremadrettede retning. Dette forenkler kontrollen for begyndere.
- Tryk på knappen Headless Mode på fjernbetjeningen for at aktivere/deaktivere.
- When activated, the drone will respond to joystick movements based on your perspective.
8. Avancerede flyfunktioner
8.1 Baneflyvning
Using the companion app on your smartphone, you can draw a flight path on the screen, and the drone will automatically follow the designated route.
- Download and install the GoolRC S80 app on your smartphone.
- Tilslut din smartphone til dronens Wi-Fi-netværk.
- In the app, select the Trajectory Flight mode and draw your desired path.
8.2 3D-vendinger
Perform exciting 360-degree flips with a single button press.
- Fly the drone to a sufficient height (at least 3 meters).
- Press the 3D Flip button (refer to remote controller diagram in the full manual).
- Immediately push the right joystick in the desired direction (forward, backward, left, or right) to execute the flip.

Image: The drone executing a 3D flip maneuver.
8.3 Bevægelseskontrol
The drone can recognize specific hand gestures to take photos or record videos.
- Ensure the drone's camera is facing you.
- Perform the designated gesture (e.g., 'V' sign for photo, open palm for video) within the camera's view.
- The drone will automatically capture the photo or start/stop video recording.
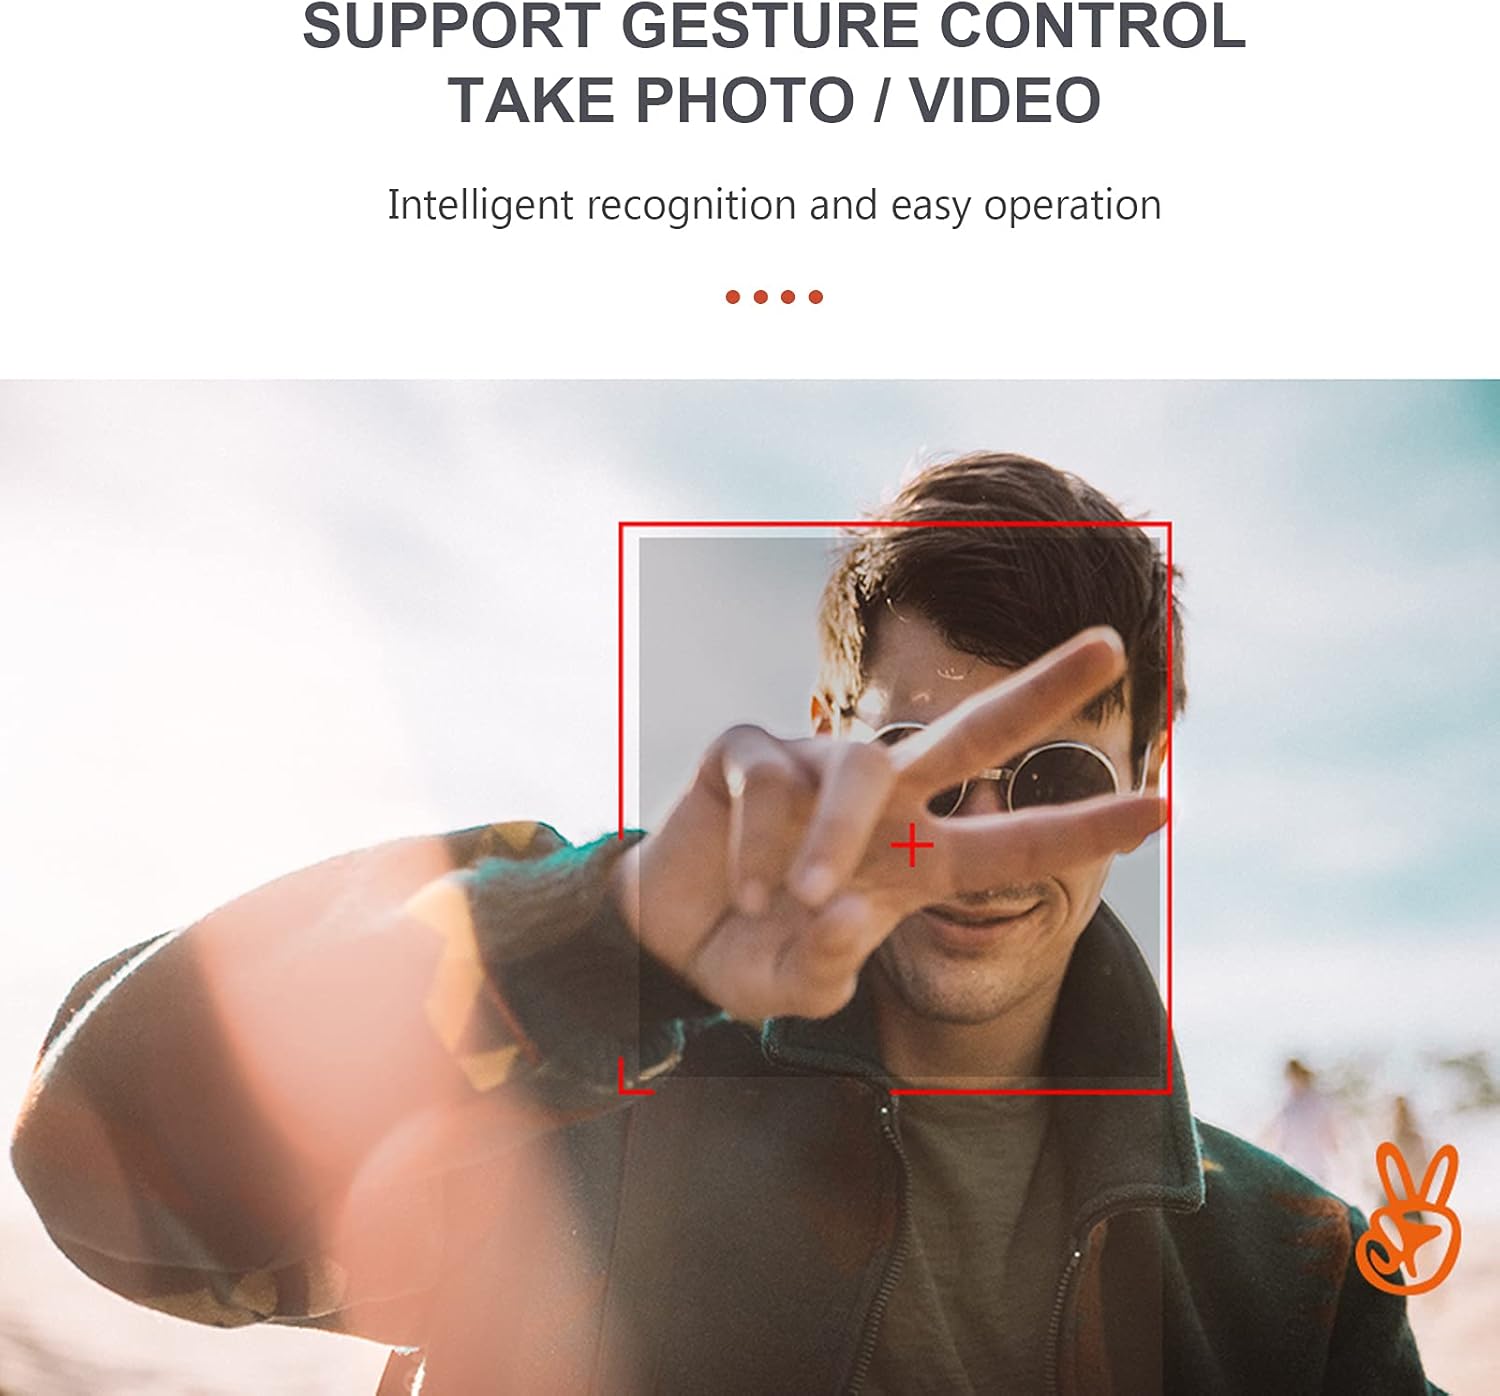
Image: A user performing a gesture to control the drone's camera.
8.4 Hastighedsjustering
The drone offers multiple speed settings to suit different flying environments and skill levels.
- Press the speed adjustment button on the remote controller to cycle through low, medium, and high speeds.
- Higher speeds are recommended for outdoor flight in calm conditions.
9. Kamerabetjening
The GoolRC S80 drone is equipped with a 4K front camera and a bottom camera for versatile aerial photography and videography.
- Tager billeder: While flying, press the Photo button on the remote controller or use the gesture control feature.
- Optagelse af videoer: Press the Video button on the remote controller to start recording. Press again to stop. Alternatively, use gesture control.
- FPV (førstepersons) View): Connect your smartphone to the drone's Wi-Fi network and open the companion app to view live video feed from the drone's camera.
- Captured media is typically saved to your smartphone via the app or to an onboard storage (if applicable, refer to app instructions).

Image: Details on the resolution capabilities of the drone's front and bottom cameras.
10. Vedligeholdelse
- Udskiftning af propel: If propellers are damaged, use the included screwdriver to replace them with spare propellers. Ensure correct orientation (A and B propellers).
- Rensning: Brug en blød, tør klud til at rengøre dronens hus og kameralinsen. Brug ikke skrappe kemikalier.
- Opbevaring: Store the drone and remote controller in a cool, dry place, away from direct sunlight. Remove batteries from the remote controller if storing for extended periods.
- Protection Rings: Install the protection rings before flight to prevent damage to propellers and for safer indoor flying.
11. Fejlfinding
| Problem | Mulig årsag | Løsning |
|---|---|---|
| Drone does not respond to remote controller. | Not paired; Low remote controller battery; Drone battery low. | Re-pair the drone and remote; Replace remote batteries; Charge drone battery. |
| Drone flies unstably or drifts. | Gyroscope not calibrated; Damaged propeller; Uneven surface during takeoff. | Calibrate the gyroscope; Replace damaged propellers; Take off from a flat surface. |
| Camera not taking photos/videos or FPV not working. | App not connected to drone Wi-Fi; Insufficient light for gesture control; App error. | Ensure Wi-Fi connection; Check lighting for gestures; Restart app and drone. |
| Kort flyvetid. | Battery not fully charged; Old battery; Aggressive flying. | Fully charge battery; Consider replacing old batteries; Fly more conservatively. |
12. Specifikationer
| Feature | Detalje |
|---|---|
| Model | S80 |
| Materiale | ABS |
| Motortype | Børstet motor |
| Frekvens | 2.4 GHz |
| Opladningstid | Ca. 60 minutter |
| Flyvetid | Ca. 15 minutter |
| Fjernbetjening afstand | Ca.. 100 meter |
| Fotoopløsning på frontkamera | 4096*3072 (4K) |
| Frontkameraets videoopløsning | 1280*720 |
| Opløsning på bundkamera | 640*480 |
| Billedtransmissionsafstand | Ca.. 40 meter |
| Drone-batteri | 3.7V 2000mAh (medfølger) |
| Fjernbetjenings batteri | 3* AA battery (Not Included) |
| Dronestørrelse (udfoldet) | 17 x 17.4 cm |
| Drone Size (Folded) | 11.3 x 13.8 x 3.1 cm |

Image: Detailed dimensions of the GoolRC S80 drone.
13. Garanti og support
If you encounter any problems with your GoolRC S80 RC Drone, please contact our store in time. We are committed to providing a satisfactory solution to any issues you may experience.
For further assistance, please refer to the contact information provided with your purchase or visit the official GoolRC webwebsted.