
GOOLOO GT3000
GOOLOO GT3000 Jump Starter Instruction Manual
Model: GT3000
1. Introduktion
The GOOLOO GT3000 is a powerful and versatile portable jump starter designed to safely start dead 12-volt car batteries. It also functions as a power bank for charging electronic devices and features an integrated LED light. This manual provides detailed instructions for the safe and effective use of your GT3000.
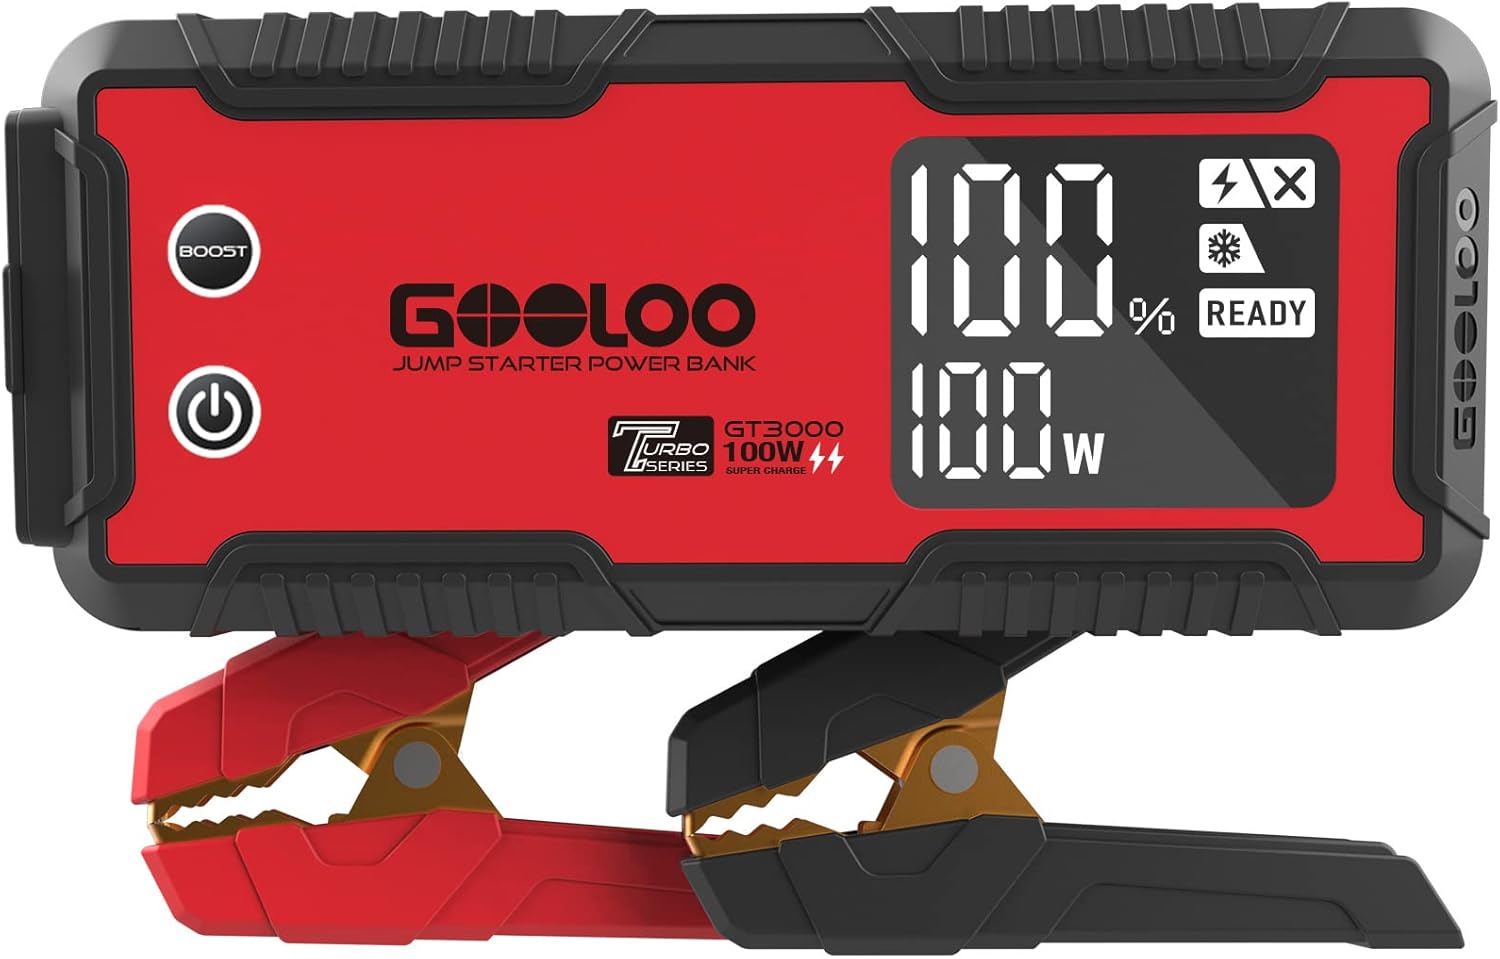
Figure 1.1: The GOOLOO GT3000 Jump Starter with its smart clamps.
2. Sikkerhedsforanstaltninger
Always observe the following safety precautions when using the GOOLOO GT3000 to prevent electric shock, explosion, fire, or injury.
- Læs alle instruktioner før brug.
- Do not use the jump starter if the cables or clamps er beskadiget.
- Ensure proper polarity connection (positive to positive, negative to negative) to avoid damage to the vehicle or jump starter.
- Start ikke med et frossent batteri.
- Tillad ikke den røde og sorte clamps at røre hinanden.
- Opbevares utilgængeligt for børn.
- Anvendes i et godt ventileret område.
- Frakobl jumpstarteren fra bilens batteri inden for 30 sekunder efter, at bilen er startet.
- Opbevar enheden på et køligt, tørt sted væk fra direkte sollys.

Figure 2.1: The GT3000 incorporates 10 smart safety protections for secure operation.
3. Produktet er slutview
Familiarize yourself with the components and ports of your GOOLOO GT3000.

Figure 3.1: GT3000 Port and Button Layout.
- Afbryderen: Tænder/slukker enheden.
- 12V Jump Starter Port: Connects to the smart battery clamps.
- 15V/10A DC Port: For powering 12V/15V DC devices like tire inflators.
- 5V/2.4A Output Port (USB-A): Standard USB-udgang til opladning af enheder.
- 5V/9V/12V Quick Charge Output Port (USB-A): Fast charging for compatible devices.
- IN/OUT PD100W Type-C Port: Bi-directional port for charging the GT3000 or fast charging laptops/devices.
- BOOST knap: Used for jump starting severely discharged batteries.
- 3.2-tommer LED-skærm: Displays battery status, current mode, and readiness.

Figure 3.2: Intuitive LED Screen displaying operational status.
4. Tekniske specifikationer
| Feature | Specifikation |
|---|---|
| Model | GT3000 |
| Maksimal startkraft | 3000 Amps |
| Motorkompatibilitet | Op til 10.0 l benzin / 8.0 l diesel |
| Charging Speed (Type-C) | 100W Bi-directional Fast Charging |
| Fuld opladningstid | 57 minutes (with supplied car charger) |
| Quick Start Charge Time | 3 minutes for a boost |
| USB-udgang 1 | 5V/2.4A |
| USB-udgang 2 (hurtig opladning) | 5V/9V/12V |
| DC-udgang | 15V/10A |
| LED lys | 400 Lumen (SOS, Spotlight, Strobe modes) |
| Vandmodstandsvurdering | IP65 |
| Flammehæmmende vurdering | 94V0 |
| Mål (D x B x H) | 9.06 cm x 3.94 cm x 2.12 cm |
| Vægt | 4.18 pund |
5. Charging the GT3000
Before first use, fully charge the GT3000. It can be charged using the supplied car charger or a compatible fast charge wall charger via the Type-C port.
- Connect the charging cable to the IN/OUT PD100W Type-C port on the GT3000.
- Connect the other end of the cable to a power source (e.g., car charger, wall adapter).
- The LED screen will indicate the charging status and battery percentage.
- Charging from 0% to 100% takes approximately 57 minutes with the supplied car charger.

Figure 5.1: Charging the GT3000 using the car charger.
6. Betjeningsvejledning
6.1. Start af et køretøj med startkabler
Ensure the GT3000 is sufficiently charged before attempting to jump start a vehicle.
- Tilslut Clamps: Indsæt det smarte batteri clamps into the 12V Jump Starter Port on the GT3000.
- Fastgør til batteri: Tilslut den røde (positive, +) polamp til den positive pol på køretøjets batteri. Tilslut den sorte (negative, -) polamp til den negative pol på køretøjets batteri.
- Tjek indikator: The GT3000's LED screen will display "READY" when the connection is correct and safe to proceed. If an error is displayed, refer to the troubleshooting section.
- Start køretøj: Once "READY" is displayed, start your vehicle's engine.
- Afbryde: After the vehicle starts, immediately disconnect the clampfra bilens batteri, og afbryd derefter clamps from the GT3000.
Note: If the battery is severely discharged, the "READY" indicator may not appear. In this case, press the "BOOST" button on the GT3000. Wait for the screen to show "READY" and then attempt to start the vehicle within 30 seconds. Use the BOOST function only when necessary and with caution.

Figure 6.1: GT3000 connected for jump starting a vehicle.

Figure 6.2: Simplified steps for jump starting.
6.2. Brug som powerbank
The GT3000 can charge various electronic devices via its USB-A and Type-C ports.
- USB-A porte: Connect your device's USB charging cable to either the 5V/2.4A or the 5V/9V/12V Quick Charge USB-A output port.
- Type-C port: For fast charging compatible laptops (e.g., MacBook) and other devices, connect a Type-C to Type-C cable to the IN/OUT PD100W port.
- 15V/10A DC Port: This port can power 12V or 15V DC devices such as tire inflators or car vacuums.

Figure 6.3: GT3000 charging a laptop and smartphone.
6.3. Brug af LED-lyset
The built-in 400 lumen LED light has three modes: Spotlight, Strobe, and SOS.
- Sådan tænder/slukker du: Press and hold the LED light button.
- Sådan skifter du mellem tilstande: Briefly press the LED light button while it is on to switch between Spotlight, Strobe, and SOS modes.

Figure 6.4: GT3000 LED light functions.
7. Vedligeholdelse og opbevaring
Proper maintenance ensures the longevity and performance of your GT3000.
- Almindelig opladning: The GT3000 features a 24-month standby time, meaning it retains its charge for an extended period. However, it is recommended to check the battery level periodically and recharge it if it drops below 80% to maintain optimal battery health.
- Rensning: Tør enheden af med en tør, blød klud. Brug ikke skrappe kemikalier eller slibende materialer.
- Opbevaring: Store the GT3000 in a cool, dry place between 0°C and 45°C (32°F and 113°F). Avoid direct sunlight, high temperatures, and high humidity.
- Beskyttelse: The unit is IP65 water-resistant and 94V0 flame retardant, offering protection against dust and splashes. However, do not submerge it in water.

Figure 7.1: The GT3000 boasts an impressive 24-month standby time.

Figure 7.2: The GT3000's IP65 water and dust resistance.
8. Fejlfinding
If you encounter issues with your GT3000, refer to the following common problems and solutions:
| Problem | Mulig årsag | Løsning |
|---|---|---|
| Enheden tænder ikke. | Batteriet er helt afladet. | Oplad enheden helt. |
| "READY" not displayed when connected to car battery. | Forkert klamp connection; Battery is severely discharged; Battery voltage for lavt. | Sørg for, at clamps are connected correctly (red to positive, black to negative). If battery is very low, use the BOOST function. |
| Køretøjet starter ikke efter forsøg på at hoppe. | Vehicle battery is completely dead; Vehicle has other mechanical issues. | Ensure the GT3000 is fully charged. Try the BOOST function. If still unsuccessful, the vehicle may require professional service. |
| Unit beeps or shows error code. | Overload, short circuit, reverse polarity, or other safety protection activated. | Afbryd clamps, check connections, and allow unit to cool if overheated. Refer to the manual for specific error codes if available. |
| Charging of external devices is slow or not working. | Cable issue; Device not compatible with fast charging; GT3000 battery low. | Ensure charging cable is functional. Check device compatibility with fast charging ports. Recharge the GT3000. |
9. Garanti og kundesupport
GOOLOO stands by the quality of its products and offers comprehensive support for the GT3000.
- Garanti: The GOOLOO GT3000 comes with an 18-month warranty from the date of purchase.
- Returgaranti: A 30-day unconditional return guarantee is provided.
- Kundesupport: GOOLOO offers 24/7 customer support. For technical assistance or warranty claims, please contact GOOLOO customer service.
- Teknisk support: Lifetime customer and technical support are available for the product.
For further assistance, please visit the official GOOLOO webwebstedet eller kontakt deres kundeserviceteam direkte.
Ask a question about this manual
Ask about setup, troubleshooting, compatibility, parts, safety, or missing instructions. Manuals+ will review the question and use this page’s manual context to help answer it.